Windows Task Scheduling
The Onsite Backup Manager must be registered as a scheduled task within the Windows Task Manager. Open the Windows Task Manager/Scheduler (usually located in the Start Menu item –Accessories – System Tools). The following screen will be shown:

Add a new task by clicking on the “Create Task” under the Actions tab on the right-hand side. This will start the creation of a new windows task and show the following screen:
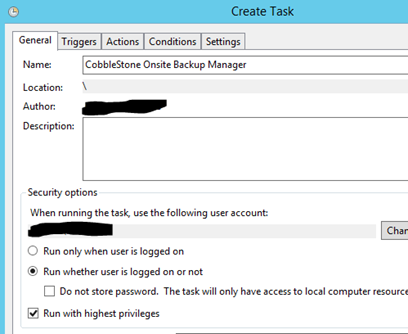
On this screen ensure you have the following:
- Name: provide a pertinent display name for this task.
- Description: provide any optional description for this task.
- User/Group: provide the User/Group that will be used to execute this task.
- The user must be a local administrator to the server.
- Recommended to use a user whose password will not change (IE: a service account).
- Ensure that “Run whether user is logged on or not” is selected.
- Ensure that “Run with highest privileges” is selected.
Next click on the “Triggers” tab and click “New” to setup the schedule for this task.
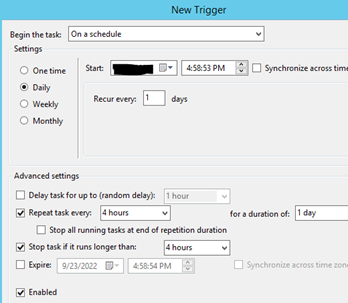
The following components need to be configured:
- Set “Begin the task” to “On a Schedule”.
- Set to “Daily” with recurring every “1” day.
- Select “Repeat task every” and set to “4 hours” for a duration of “1 day”
- Select “Stop task if it runs longer than” and set to “4 hours”.
When finished, ensure that “Enabled” is selected, and then click on the “OK” button.
Next, click on the “Actions” tab to specify the location where the Onsite Backup Manager application was deployed and click “New” to specify the action.
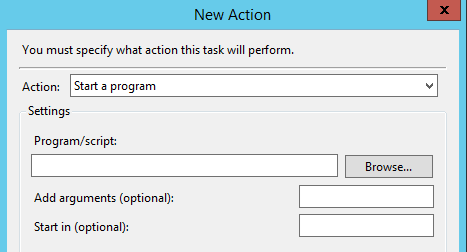
Click the “Browse” button to select the location of the application. (This location will be the folder/directory where you placed/configured the application).
Once you have navigated to the proper folder/directory, ensure you click on the “OnsiteBackupManager.exe” and then click on the “OK” button.
Finally, click on the “Settings” tab to open the following screen:
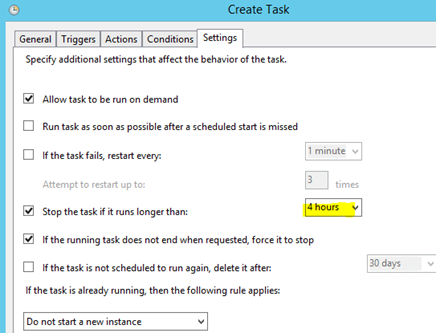
Ensure that the “Stop the task if runs longer than” is selected and set to “4 hours” or the interval specified when setting up the schedule. Once this is done, double-check that all information on the tabs covered is accurate and click on the “OK” button.
- A prompt will appear requesting the password of the user account selected for this task.
- The password MUST be provided for the task to be created successfully.
The Windows Scheduled Task will now be successfully setup to run along the defined interval.