COBBLESTONE SOFTWARE
Contract Insight — User Guide
Temporary System Lockout
Security & Access: Locking the System for Maintenance
Note: Each procedure in this guide begins at the Contract Insight homepage, so any section can be followed on its own. A lockout affects everyone using the system, so read Section 7 before starting one.
1. Overview
A temporary system lockout keeps everyone except administrators out of Contract Insight for a set period. It exists so that maintenance — an upgrade, a data import, a configuration change that should not be made while records are being edited — can be carried out on a quiet system.
While a lockout is on, only system administrators can sign in. Everyone else is signed out straight away and cannot get back in until the lockout ends. It ends automatically at the time set for it, and an administrator can end it early at any point.
A lockout is described by three things: a reason kept for the record, a message shown to anyone who tries to sign in, and the time it ends. Every lockout that is started, and every lockout that is cancelled, is recorded in a history on the same screen, along with who did it and what people were told.
Because a lockout removes access for the whole organization, the screen sits in the Administration area and is normally reserved for Application Administrators or users specifically granted the appropriate permission. The feature also has to be allowed by an application setting before it can be used.
2. Allowing Temporary Lockouts
Before a lockout can be started, the Allow Temporary System Lockouts setting must be on. It is described as “Allow system admins to temporarily lock the system so that users are unable to log in until a system admin unlocks it.”
Steps:
- From the Contract Insight homepage, click Administration at the bottom of the left navigation menu. On the Administration page, under Configuration & Fields, select Application Settings.
- Search for lockout, or open the Security category.
- Set Allow Temporary System Lockouts to On.
- Click Save changes, or Discard to abandon the change. A change takes effect as soon as it is saved.
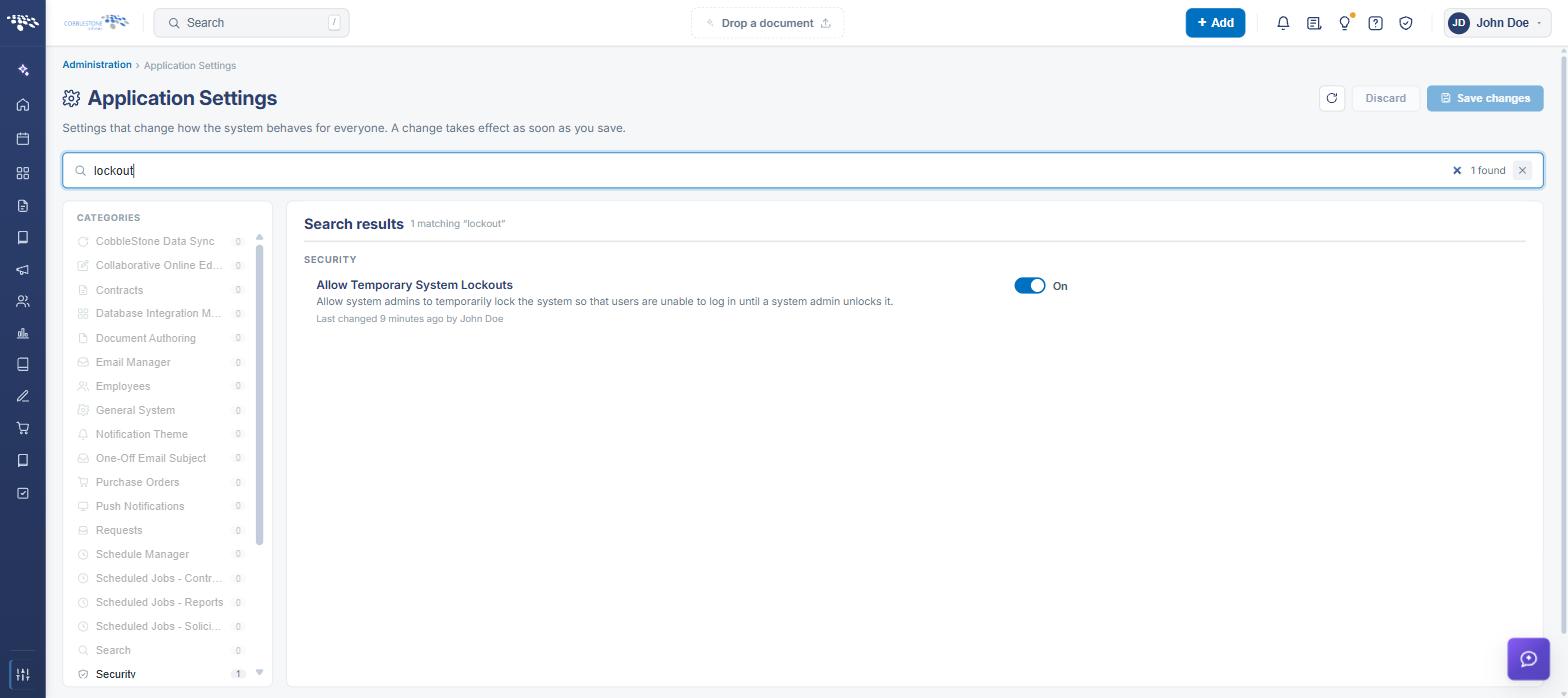
Note: The setting records when it was last changed and by whom, shown beneath its description.
3. Accessing the Temporary System Lockout Screen
The Temporary System Lockout screen is where a lockout is started, ended and reviewed. To open it:
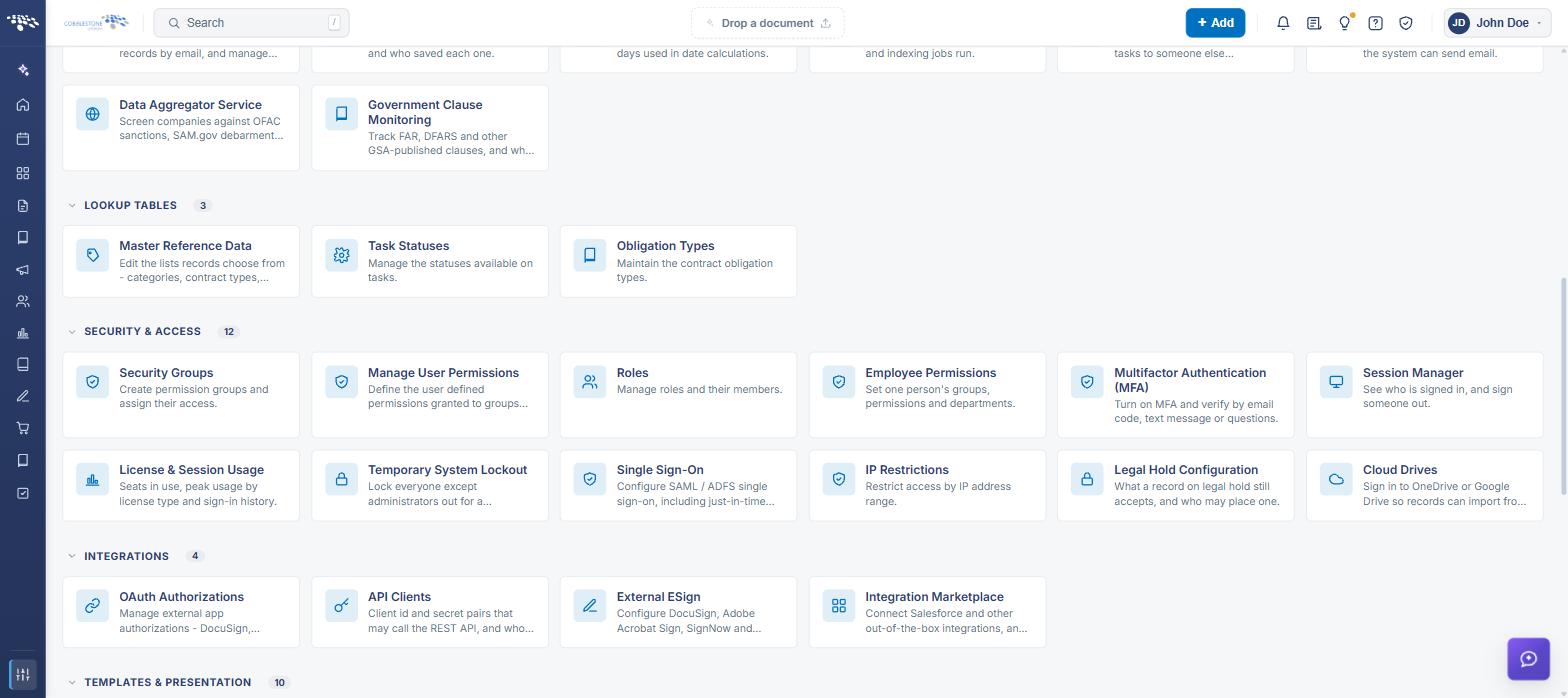
From the Contract Insight homepage, click Administration at the bottom of the left navigation menu. On the Administration page, under Security & Access, select Temporary System Lockout.
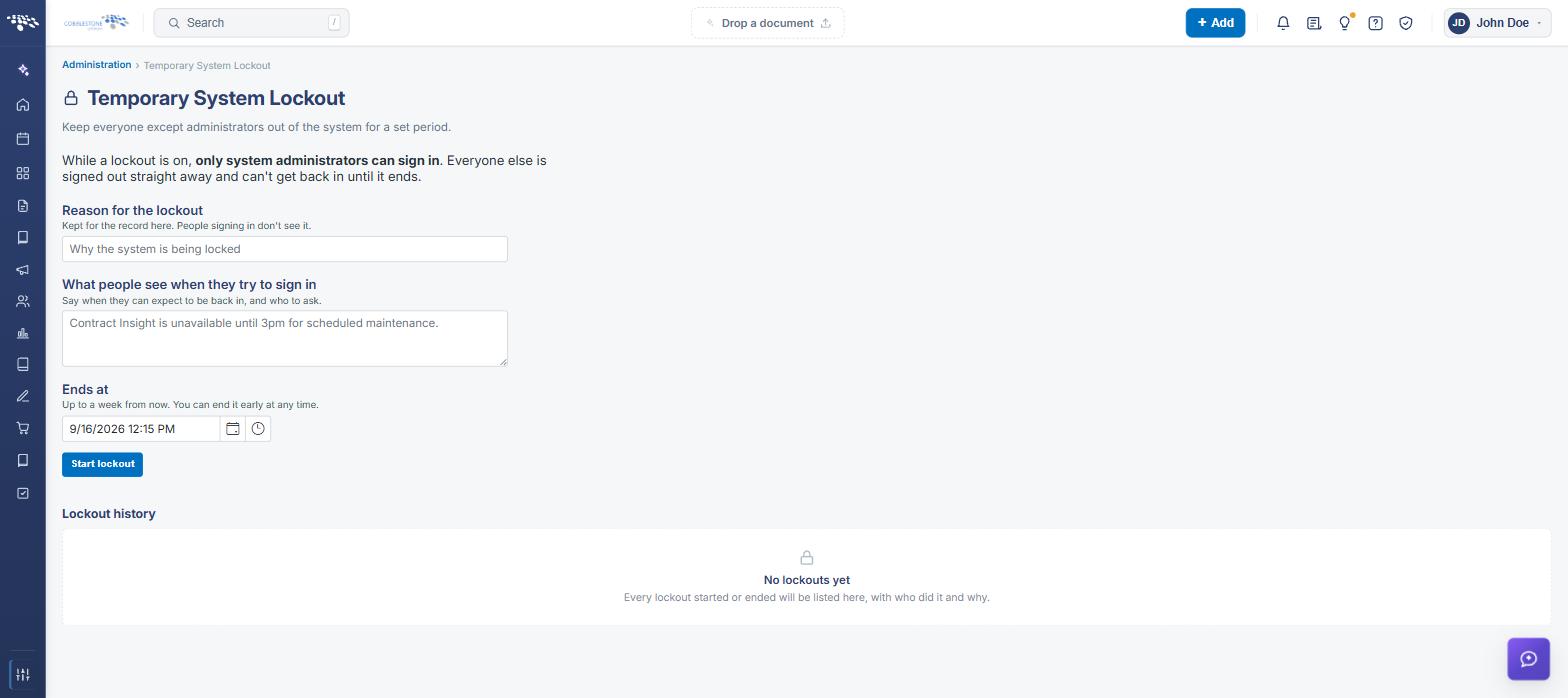
The screen includes the following elements:
- A Temporary System Lockout heading with the subtitle “Keep everyone except administrators out of the system for a set period.”
- A statement of what a lockout does: while one is on, only system administrators can sign in, and everyone else is signed out straight away and can’t get back in until it ends
- A Reason for the lockout field, kept for the record and not shown to people signing in
- A What people see when they try to sign in field, for the message shown on the sign-in screen
- An Ends at date and time picker, with a note that it may be up to a week from now and can be ended early
- A Start lockout button
- A Lockout history grid with a Search box and column filters
4. Starting a Lockout
Steps:
- From the Contract Insight homepage, click Administration at the bottom of the left navigation menu. On the Administration page, under Security & Access, select Temporary System Lockout.
- In Reason for the lockout, record why the system is being locked. This is kept for the record on this screen; people signing in do not see it.
- In What people see when they try to sign in, write the message shown to anyone attempting to sign in. Say when they can expect to be back in, and who to ask — for example, “Contract Insight is unavailable until 3pm for scheduled maintenance.”
- Set Ends at to the date and time the lockout should finish, using the calendar and clock controls. It may be set up to a week from now.
- Click Start lockout.
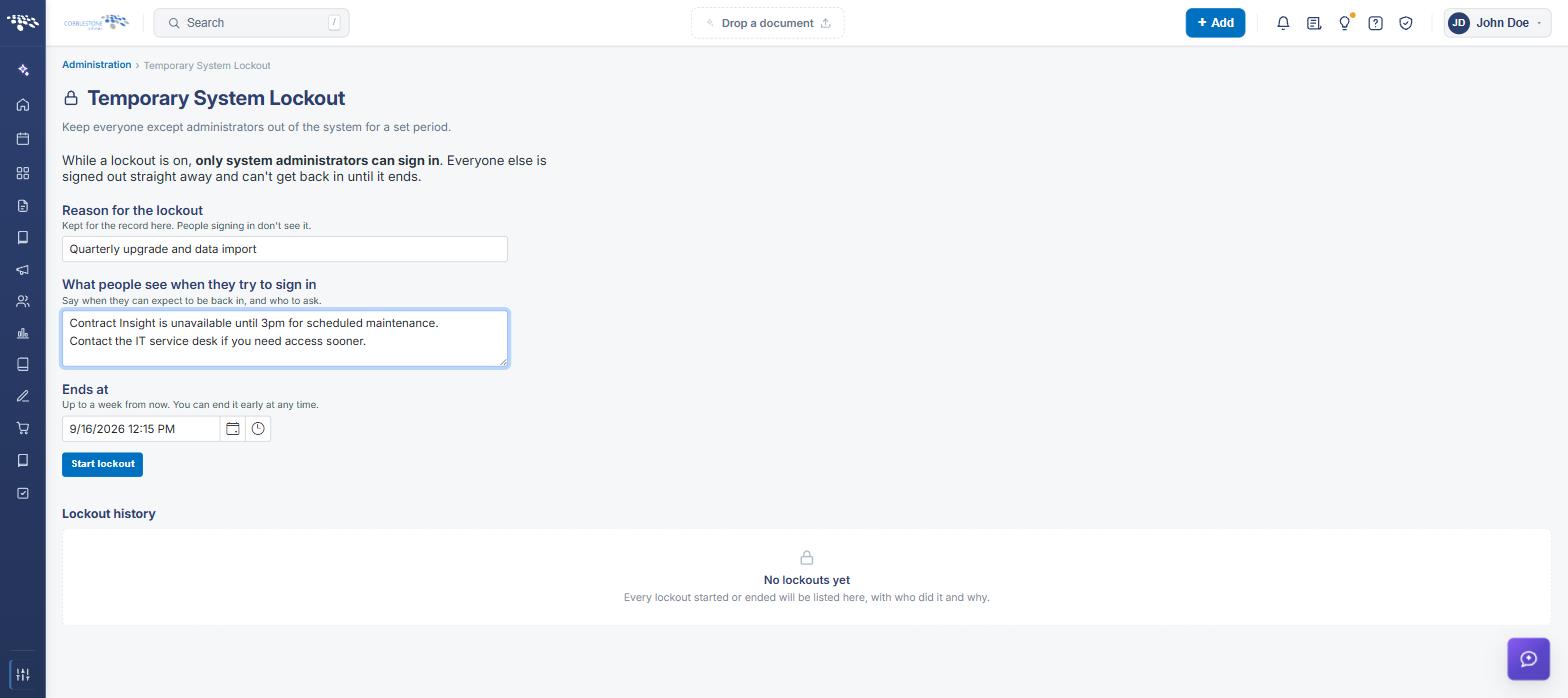
Note: The lockout takes effect immediately. Everyone who is not a system administrator is signed out at once, so anything they had part-finished and unsaved is lost. Tell people before starting a lockout, and give them time to save their work.
5. Ending a Lockout
A lockout ends by itself at the time set in Ends at. It can also be ended early at any point: return to the Temporary System Lockout screen while the lockout is running and cancel it, and people can sign in again straight away.
Both outcomes are written to the lockout history — a cancelled lockout is recorded as “System admin canceled the current system lockout. Users can now log in again.”
Note: Administrators keep their access throughout, so the lockout can always be ended from inside the application. There is no need to wait for the end time if maintenance finishes early.
6. Reviewing the Lockout History
The Lockout history grid at the foot of the screen lists every lockout that has been started or cancelled, newest first. Its columns are:
- What happened — the action recorded, such as “System admin started system lockout. Will last until <date and time> or until canceled.”
- By — the administrator who started or cancelled it
- Reason — the internal reason recorded at the time
- What people were told — the message shown on the sign-in screen during that lockout
- When — the date and time of the action
A Search box above the grid filters it by keyword, and each column carries its own filter icon.
Note: The history is the record of who locked the system, when, and what users were told, so it is worth writing the reason and the message carefully even for a short lockout.
7. Before Locking the System
A lockout is disruptive by design. A short checklist avoids the common problems:
- Tell people first — announce the window before starting the lockout, since work in progress is not saved when they are signed out
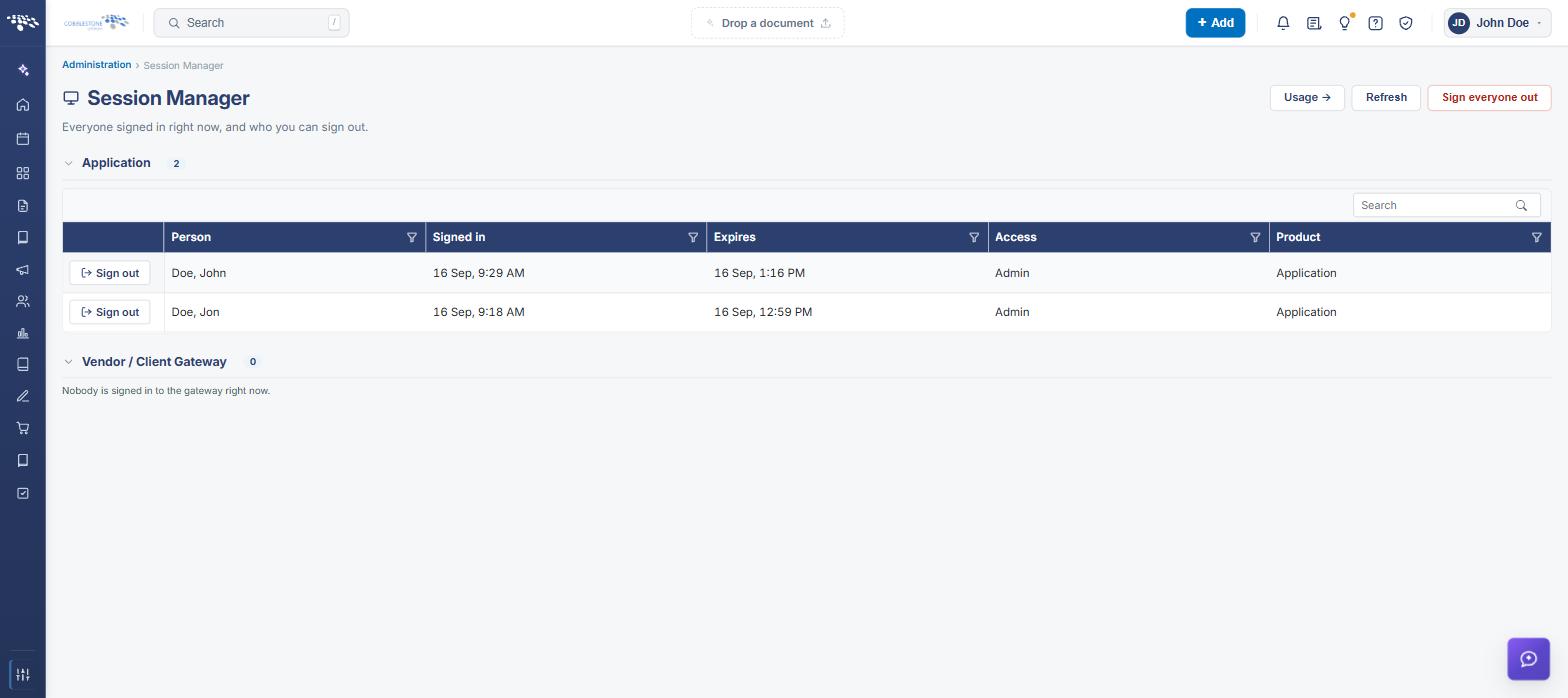
- Check who is signed in — Session Manager, under Security & Access, shows everyone signed in right now, so a lockout can be timed for a quiet moment
- Write a message that answers the obvious question — when the system will be back, and who to contact in the meantime
- Set the end time generously — the lockout can always be ended early, but extending one means people are turned away in the meantime
- Confirm afterwards — once the lockout ends, check the history and let people know the system is available again
8. Quick Reference Summary
Task | How to Complete It |
Allow the feature | Application Settings → Security → Allow Temporary System Lockouts → On, then Save changes. |
Open the screen | Homepage → Administration → Security & Access → Temporary System Lockout. |
Record the reason | Reason for the lockout — kept for the record; people signing in do not see it. |
Write the notice | What people see when they try to sign in — when they will be back in, and who to ask. |
Set the end time | Ends at — up to a week from now, using the calendar and clock controls. |
Start it | Click Start lockout. Non-administrators are signed out immediately. |
End it early | Return to the screen while the lockout runs and cancel it; people can sign in again at once. |
Who keeps access | Only system administrators can sign in while a lockout is on. |
Review what happened | Lockout history — What happened, By, Reason, What people were told, When. |
Check before locking | Session Manager shows who is signed in right now. |