COBBLESTONE SOFTWARE
Contract Insight — User Guide
Language Resources
Configuration & Fields: Translations
Note: Each procedure in this guide begins at the Contract Insight homepage, so any section can be followed on its own. Wording entered here is what anyone using that language sees in place of the English, so changes reach those users as soon as they are saved.
1. Overview
Language resources allow a System Administrator to provide the wording Contract Insight uses in each of the languages the organization offers. An administrator chooses a language, then sets the wording for field labels and menu items; anyone using that language sees what has been entered instead of the English.
Translations are maintained on the Translations screen, which organizes the work in two ways:
- By language — every language the system offers is listed, and each carries its own independent set of translations
- By area — Field labels covers the labels on record fields, taken one table at a time; Top menu covers the wording of the navigation menu items
A translation is never required. Where no wording has been entered for an item, the English source text continues to be used, so a language can be introduced and translated progressively rather than all at once.
Because the Translations screen is maintained from the Administration area, only Application Administrators — or other users specifically granted the appropriate permission — can add languages or edit translated text.
2. Accessing Language Resources
The Translations screen is the central management screen for all language resources. To open it:
From the Contract Insight homepage, click Administration at the bottom of the left navigation menu. On the Administration page, under Configuration & Fields, select Translations.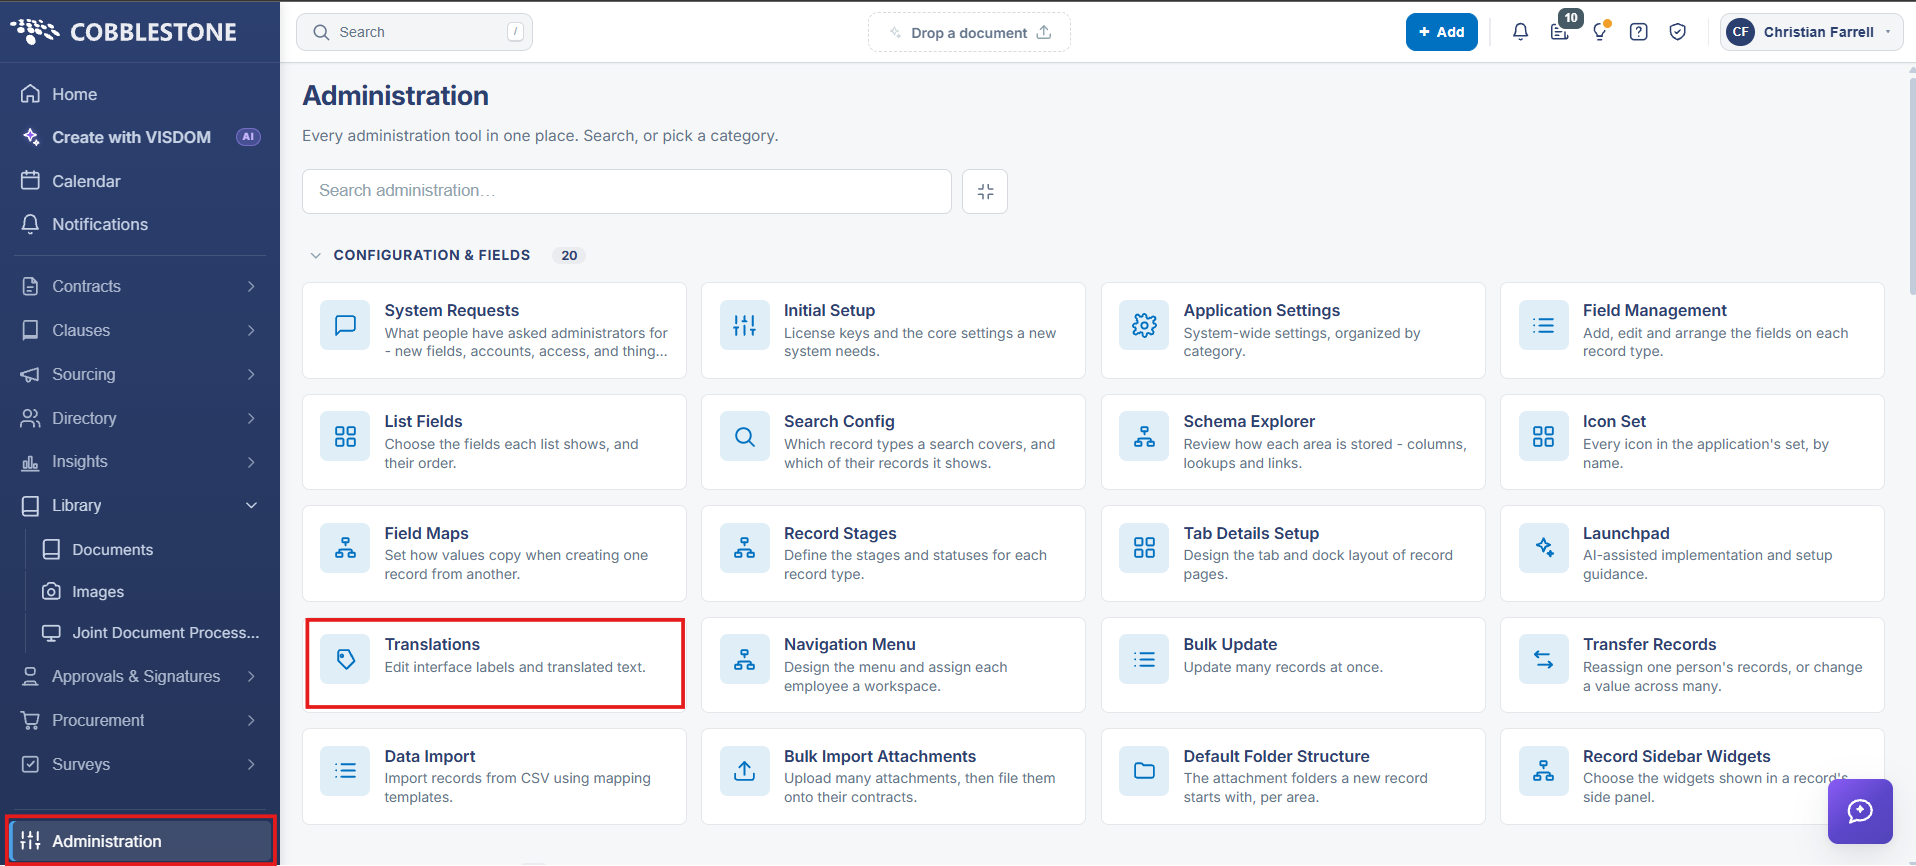
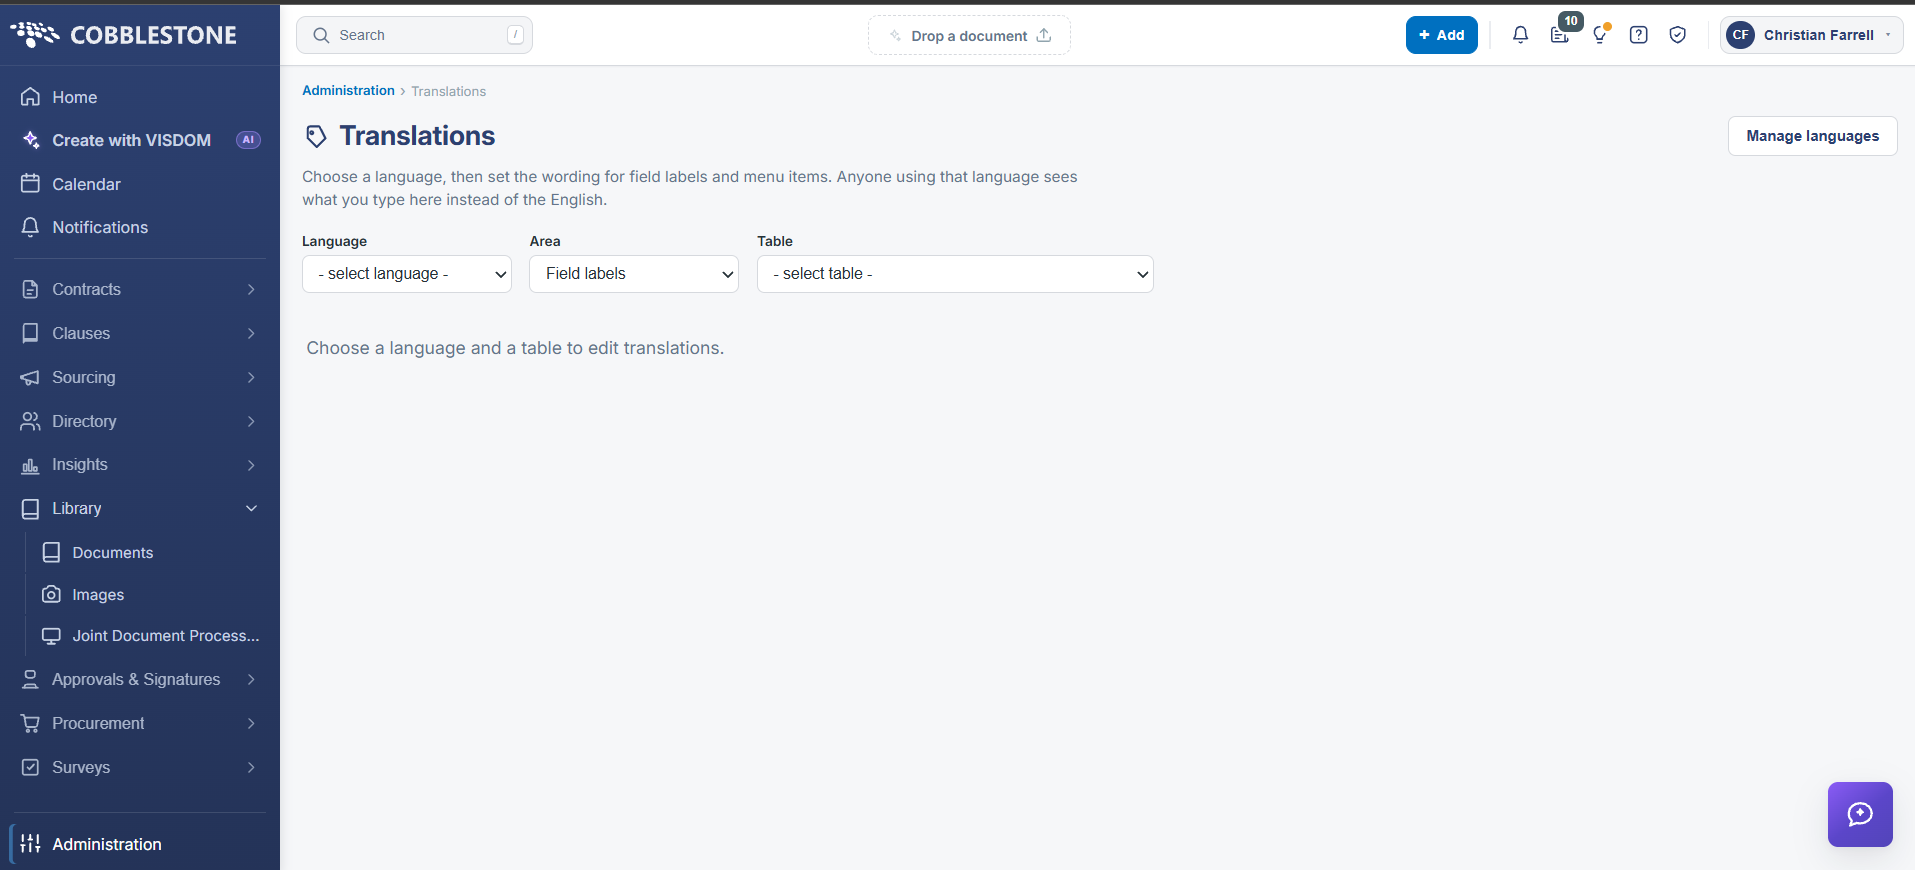
The Translations screen includes the following elements:
- A breadcrumb trail of Administration › Translations
- A Translations heading with the subtitle “Choose a language, then set the wording for field labels and menu items. Anyone using that language sees what you type here instead of the English.”
- A Manage languages button in the upper right
- A Language pick-list, opening on “— select language —”, listing every language on the system and marking any that are not currently offered as “— not in use”
- An Area pick-list offering Field labels and Top menu
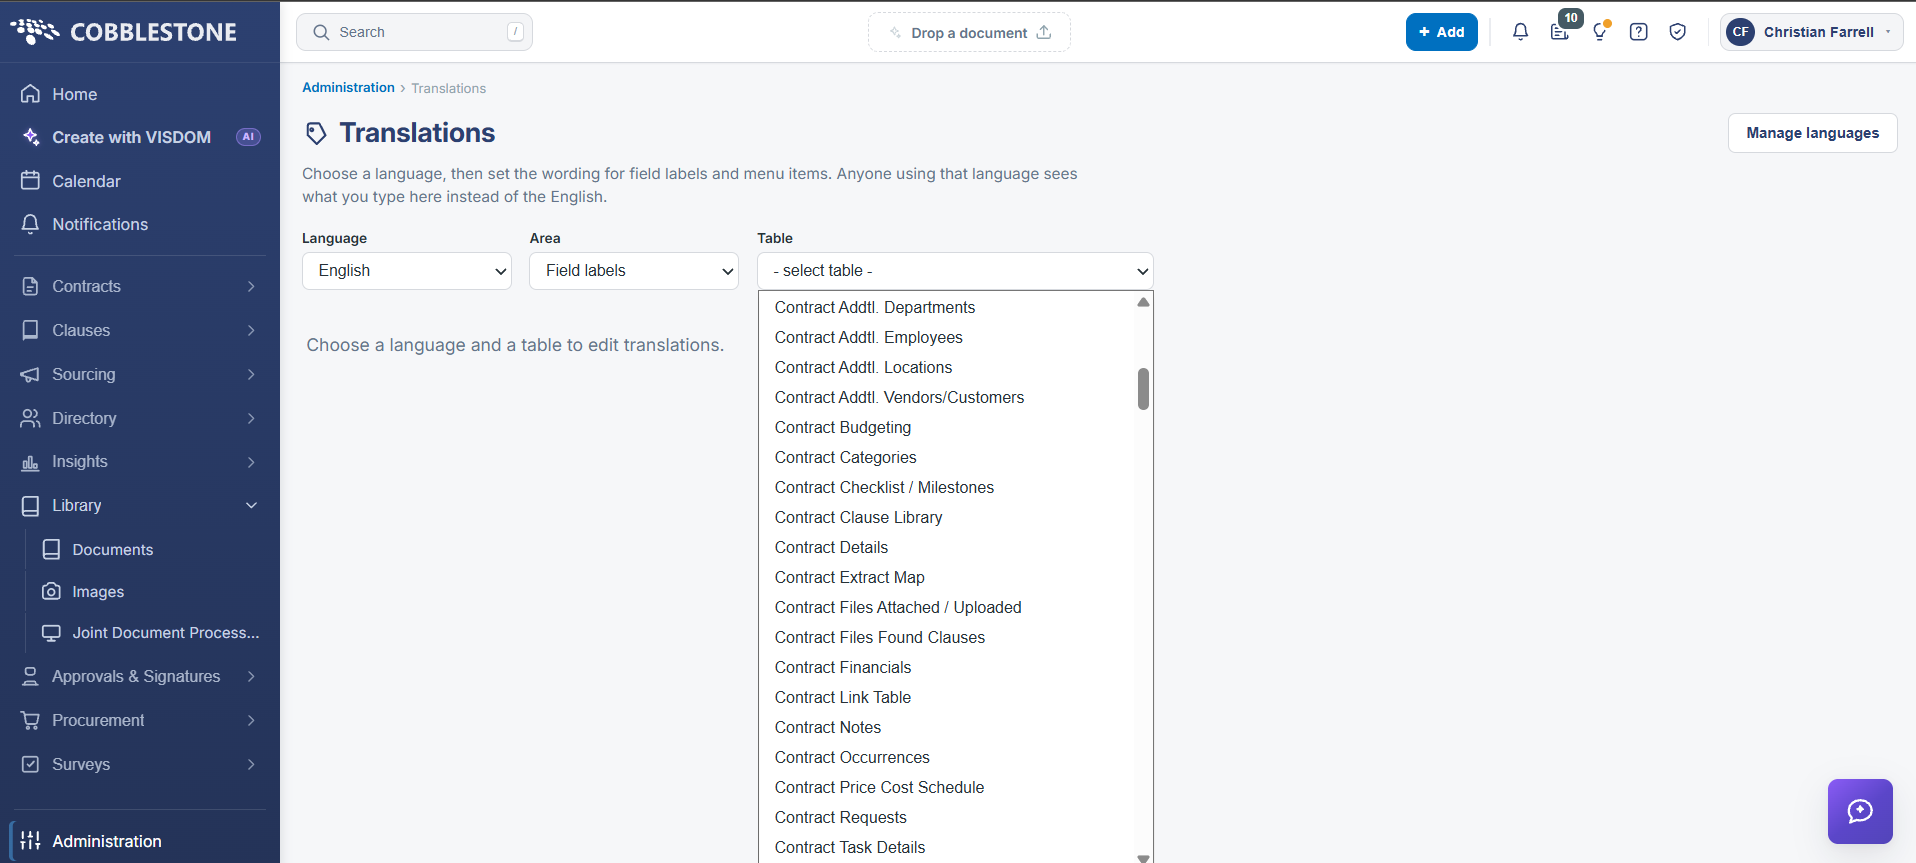
- A Table pick-list, opening on “— select table —”, shown when the Area is Field labels
- A Filter box, shown once a selection has been made, that narrows the rows below
- A count of the items in the current view together with the number of unsaved changes, for example “792 items · 0 unsaved”
- A Save changes button, which becomes available once an edit has been made
- The translation grid itself
Note: Until a language and a table are chosen, the screen reads “Choose a language and a table to edit translations.” and no grid is shown.
3. Managing Languages
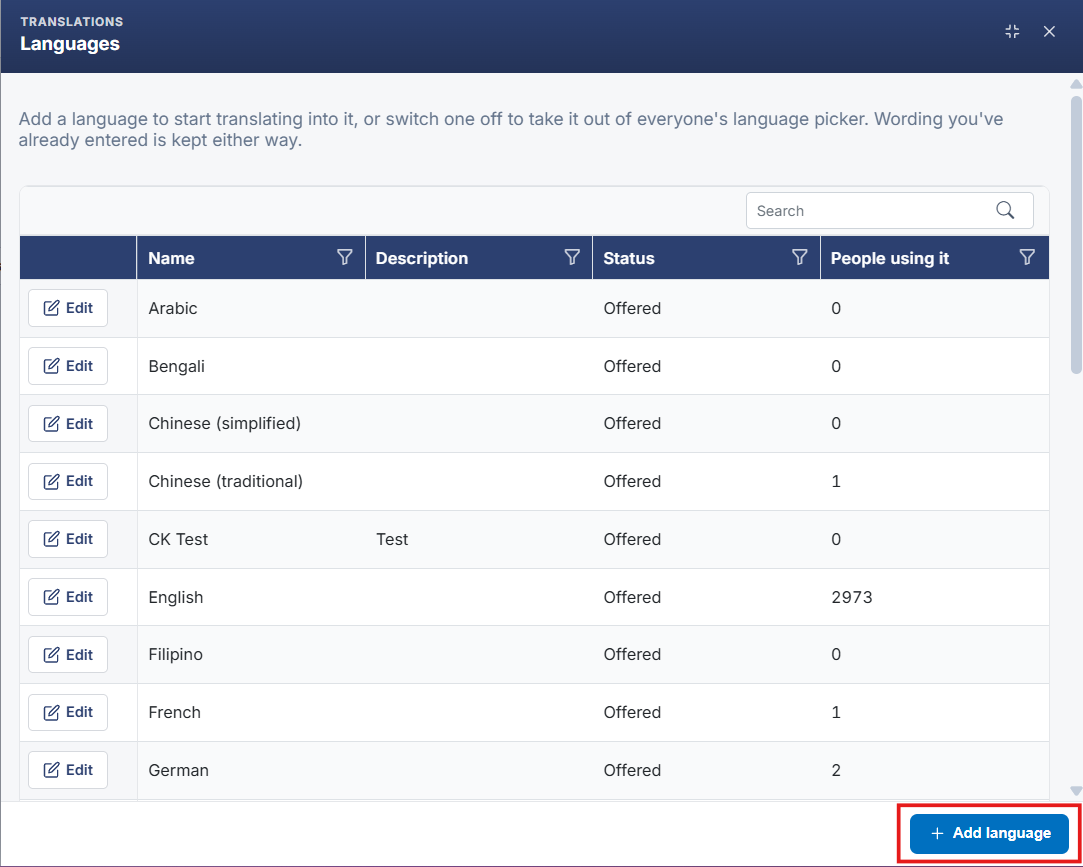
Click Manage languages in the upper right of the Translations screen. The Languages panel opens, headed TRANSLATIONS / Languages, explaining that adding a language starts translating into it, that switching one off takes it out of everyone’s language picker, and that wording already entered is kept either way.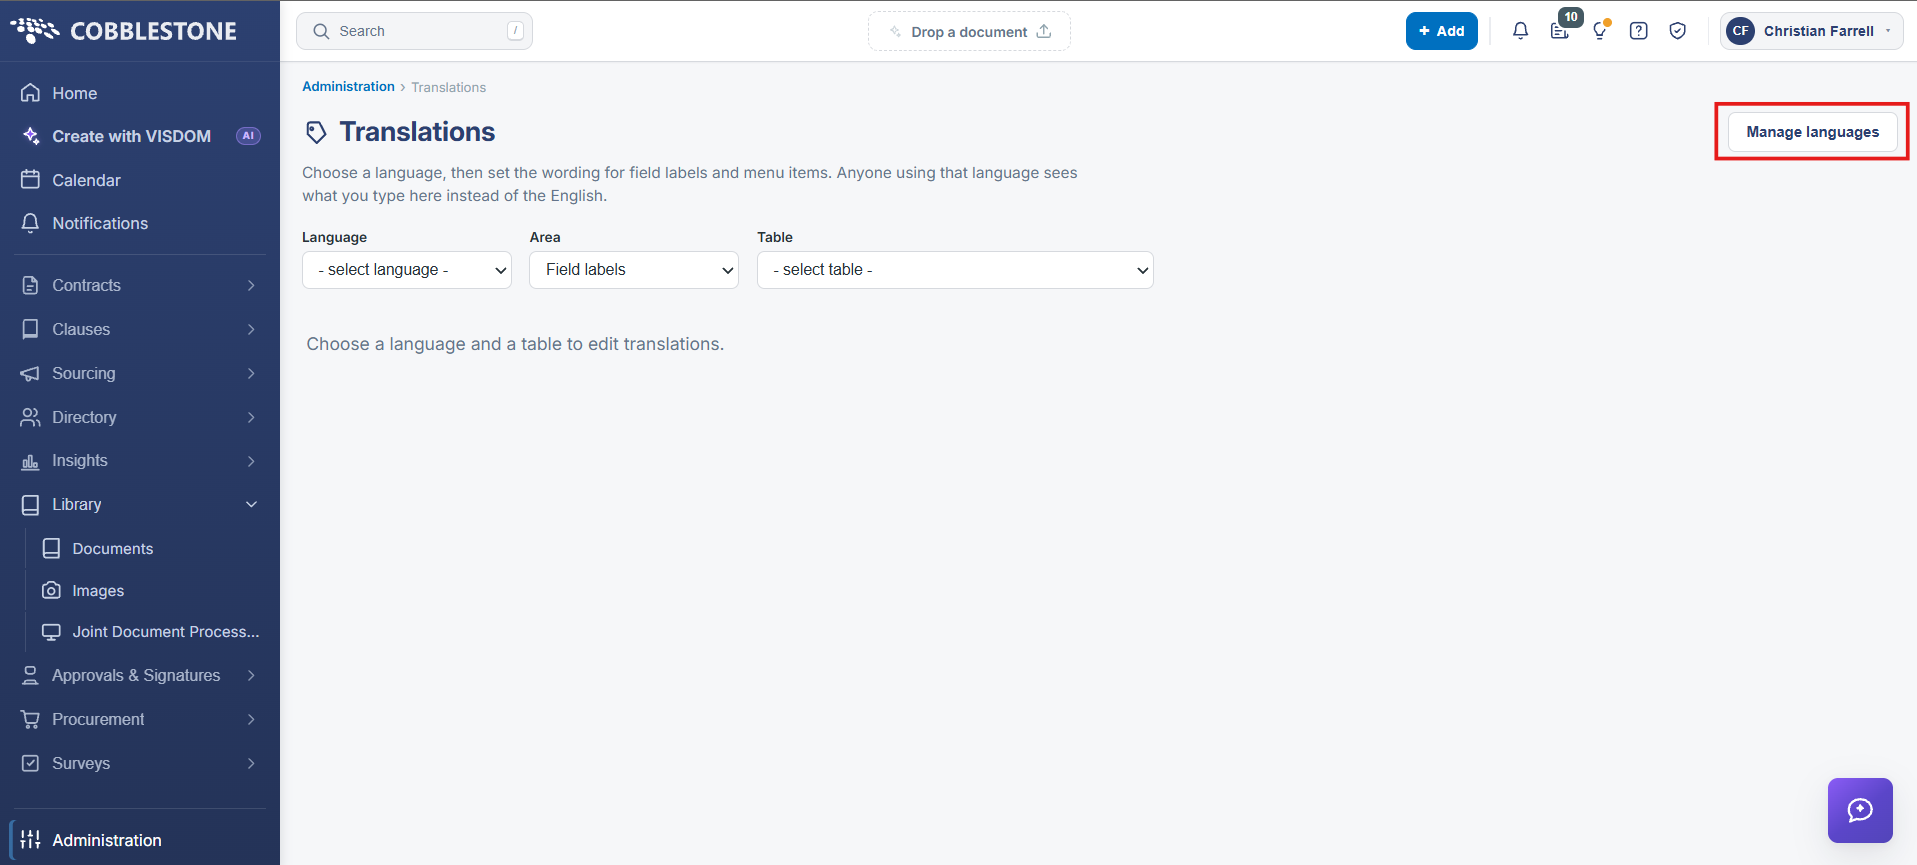
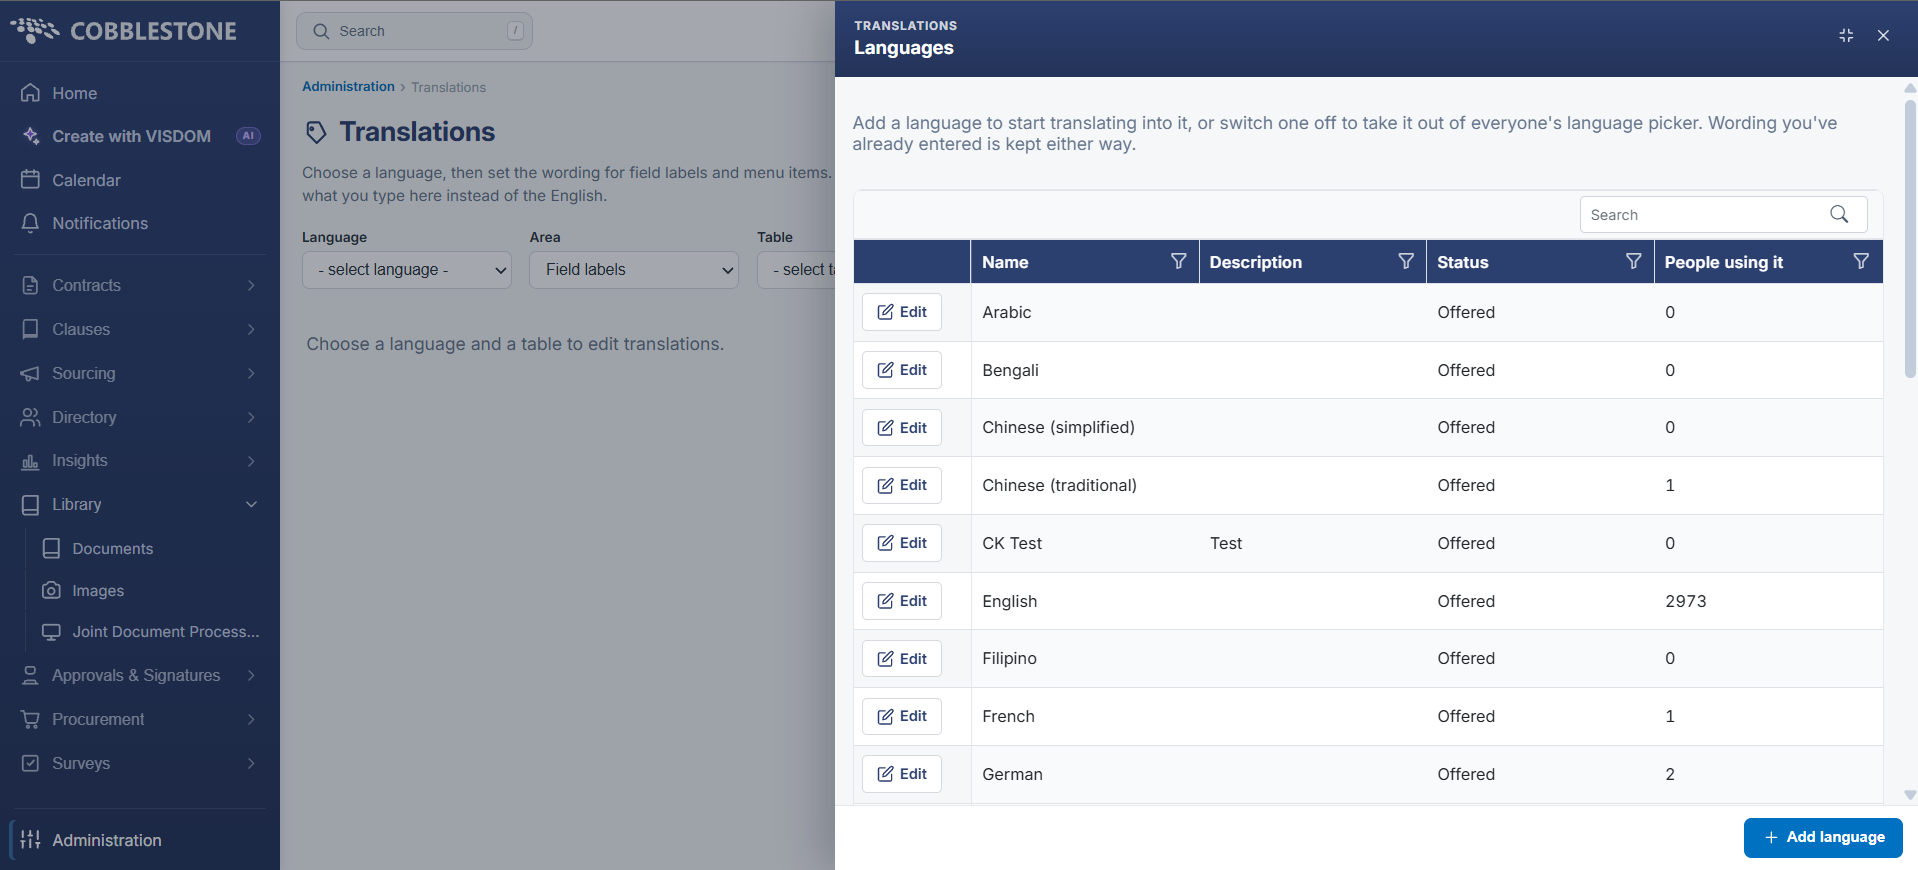
The panel lists every language on the system in a sortable, filterable grid:
- Edit — a per-row button that opens the language for editing
- Name — the name of the language as it appears in the language picker
- Description — free text describing the entry, for whoever maintains the list
- Status — whether the language is Offered to users
- People using it — the number of employees currently set to that language
A Search box sits above the grid, and each column header carries its own filter icon.
3.1 Adding a Language
Steps:
- From the Contract Insight homepage, click Administration at the bottom of the left navigation menu. On the Administration page, under Configuration & Fields, select Translations.
- Click Manage languages in the upper right.
- Click + Add language in the lower right of the panel.
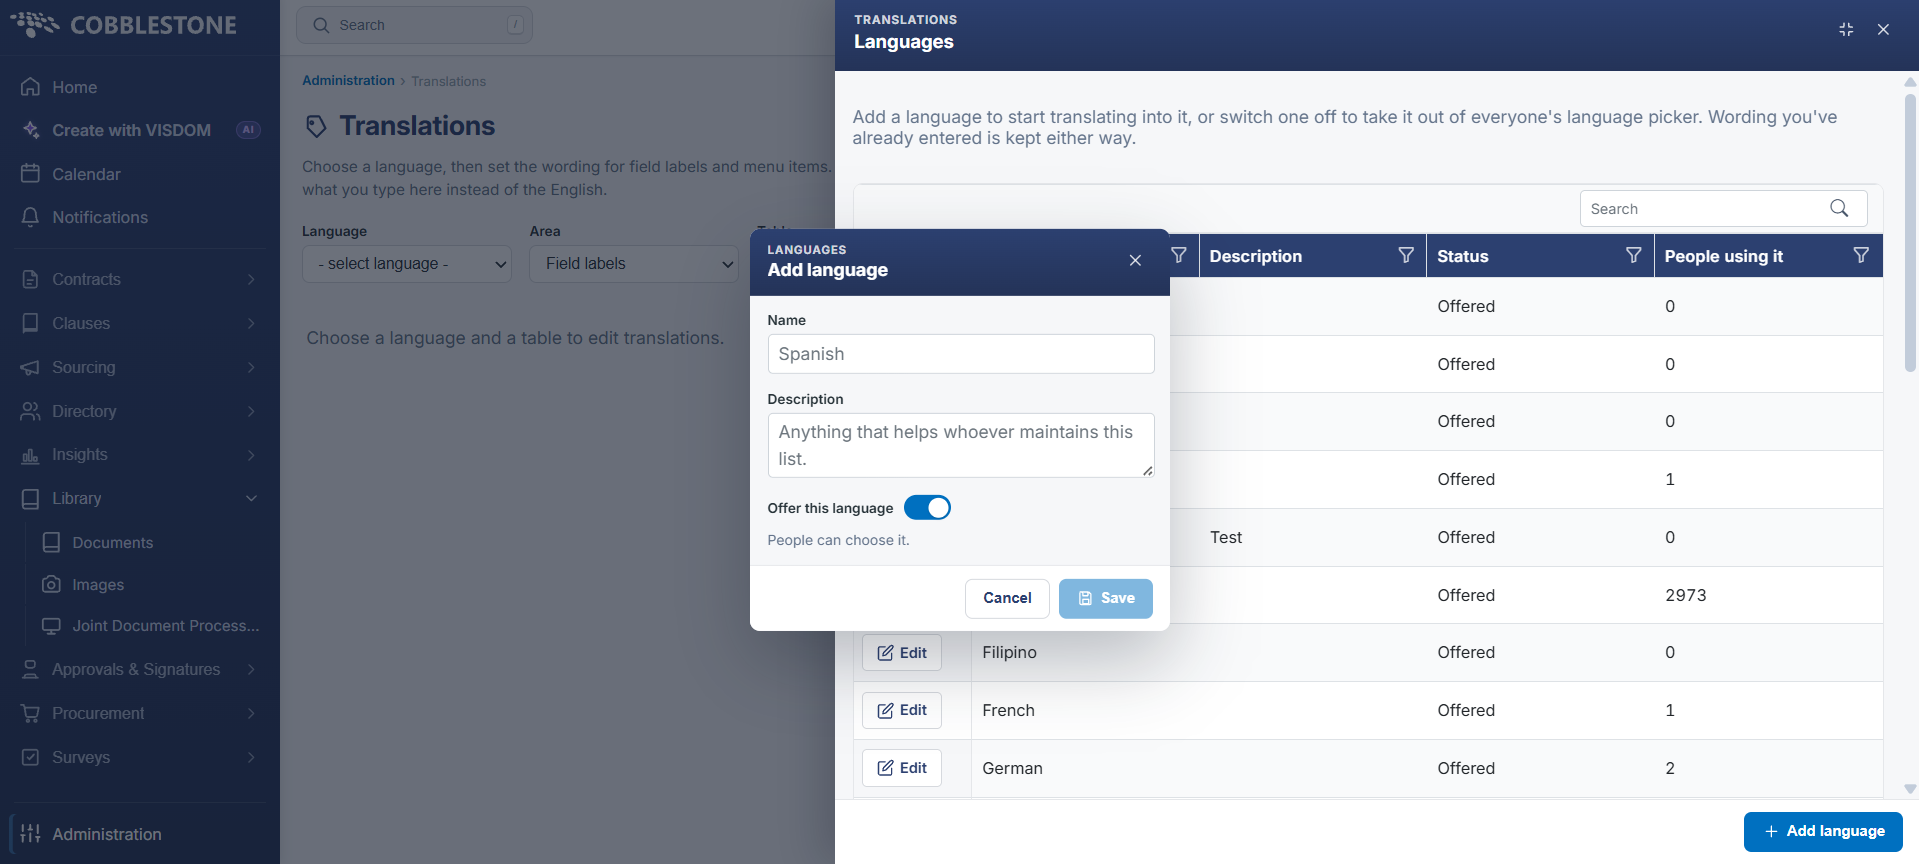
- Enter the Name of the language as it should appear to users, and optionally a Description — anything that helps whoever maintains the list.
- Leave Offer this language switched on so that people can choose it, or switch it off to add the language without yet making it available.
- Click Save. The language is added to the grid and becomes selectable in the Language pick-list on the Translations screen.
3.2 Editing or Withdrawing a Language
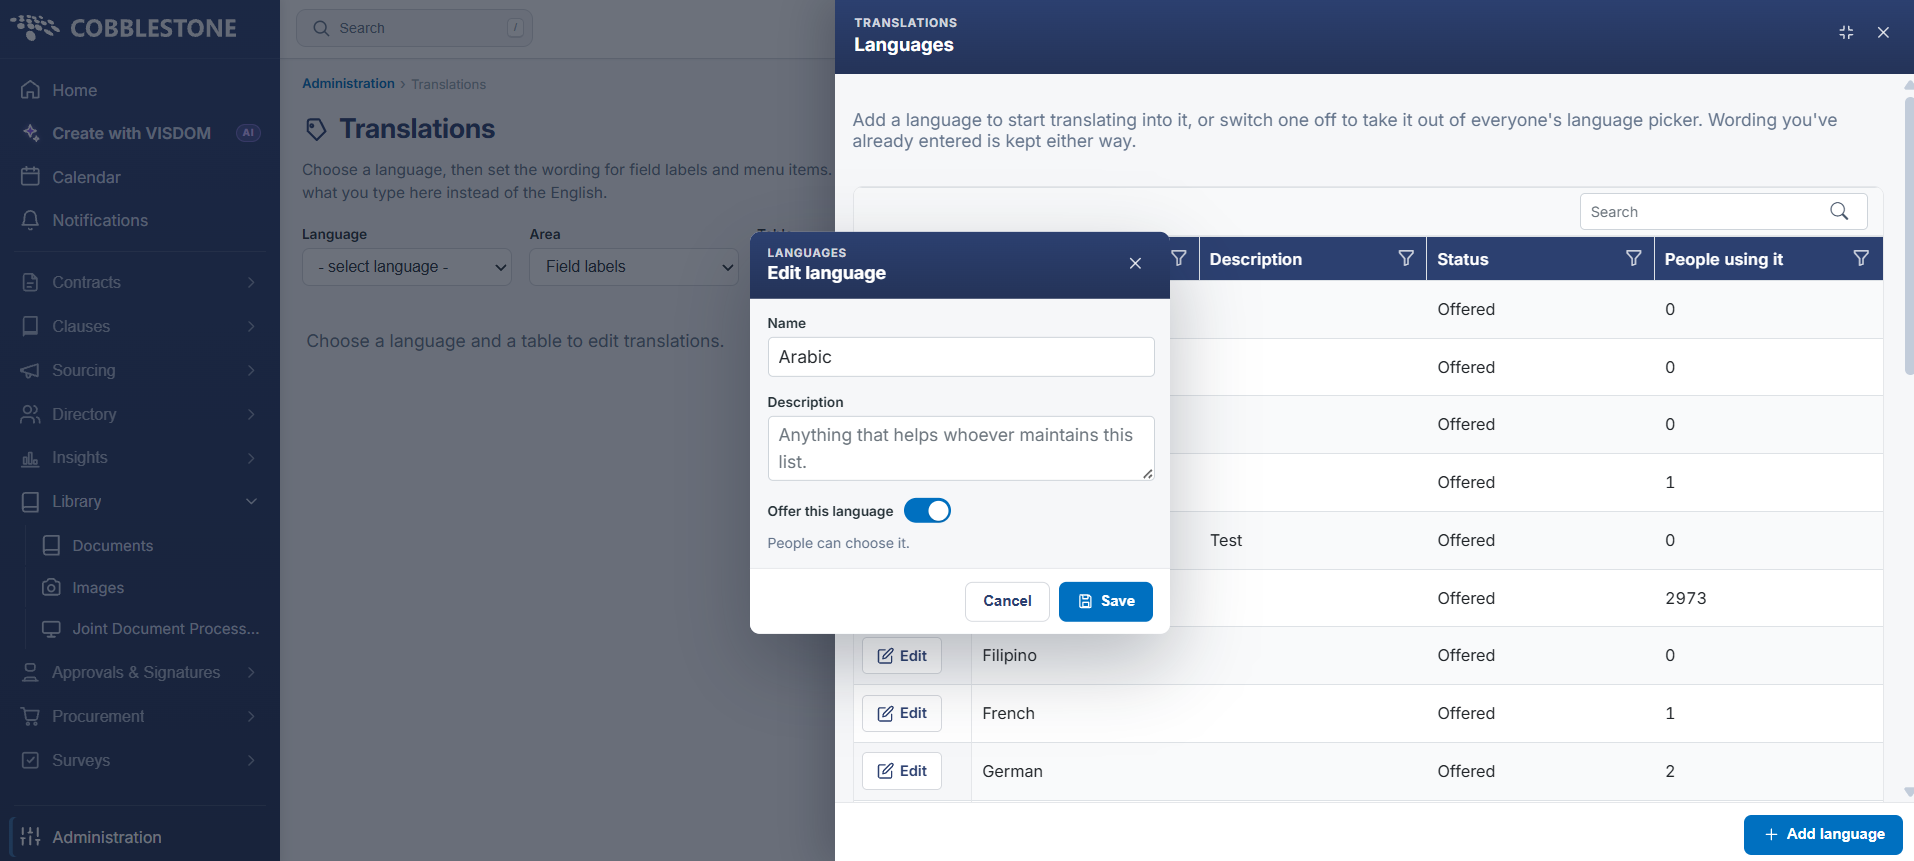
Click Edit on the language’s row to reopen the same fields. Changing Offer this language to off withdraws it from everyone’s language picker; the translations already entered against it are kept, so the language can be offered again later without the work being repeated. Click Save to commit the change, or Cancel to close without saving.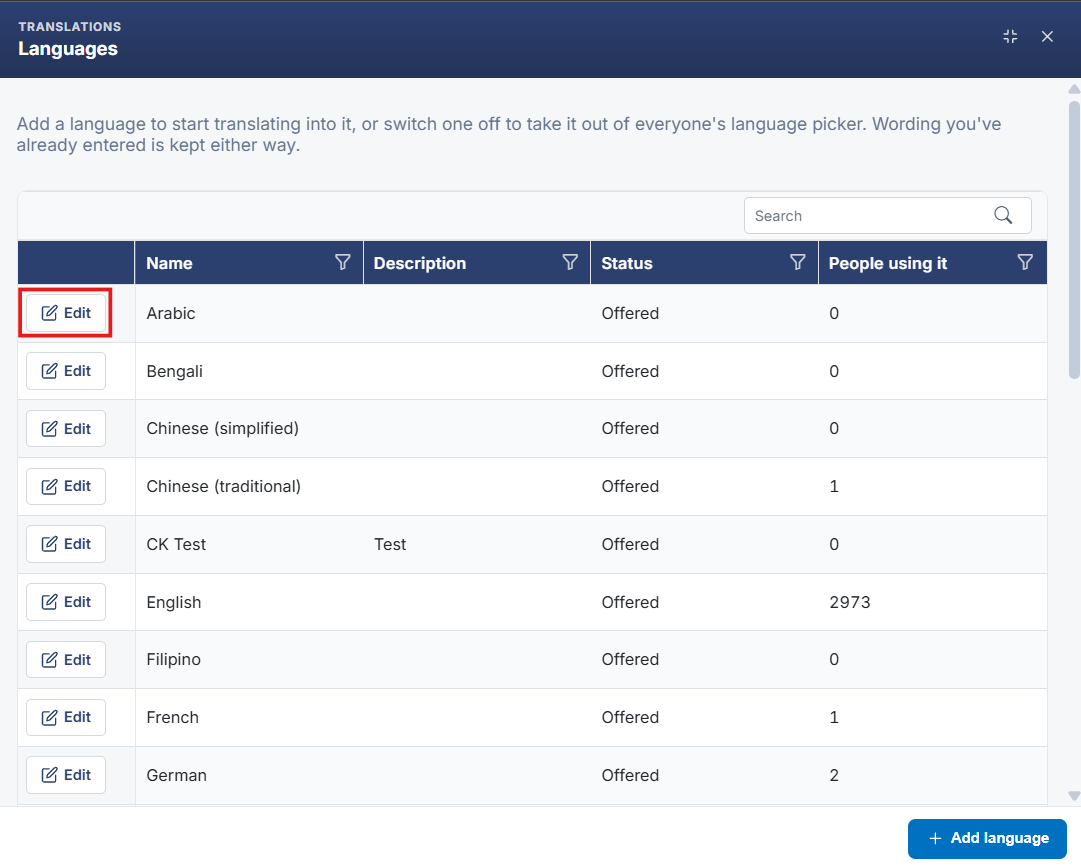
Note: Check the People using it column before withdrawing a language. Employees currently set to it will fall back to the English wording.
4. Translating Field Labels
Function: Sets the wording used for the field labels on a record type in the chosen language.
Steps:
- From the Contract Insight homepage, click Administration at the bottom of the left navigation menu. On the Administration page, under Configuration & Fields, select Translations.
- Select the language from the Language pick-list.
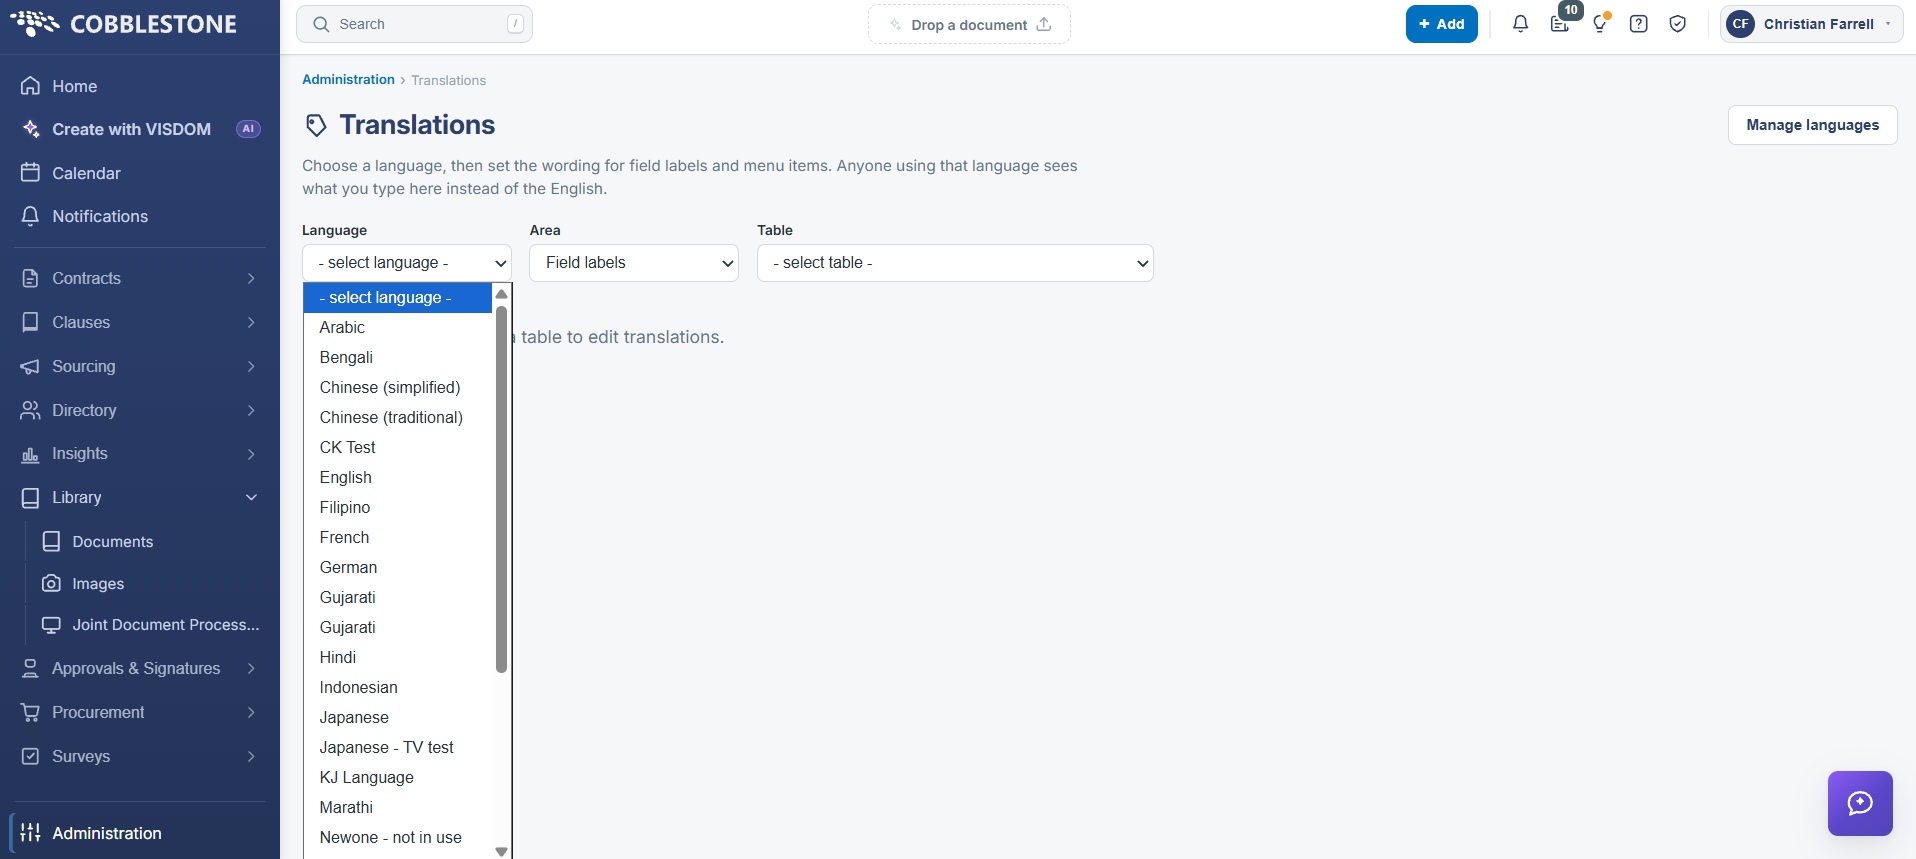
- Leave Area set to Field labels.
- Select the record type or subtable from the Table pick-list — for example Contract Details, Employee Details, or Vendors/Customers. The grid loads and the item count appears above it.
- Use the Filter box to find a particular label if the table has many fields.
- Type the wording required into the TRANSLATION column for each label, and, where the field carries mouse-over help, into the TOOLTIP column beside it. The unsaved count above the grid increases as edits are made.
- Click Save changes above the grid to commit the wording.
Note: A row with no translation shows the English source text greyed out in the TRANSLATION box as a placeholder, so untranslated items are easy to pick out at a glance. Those items continue to display in English until wording is entered.
5. Translating Top Menu Items
Function: Sets the wording used for the navigation menu items in the chosen language.
Steps:
- From the Contract Insight homepage, click Administration at the bottom of the left navigation menu. On the Administration page, under Configuration & Fields, select Translations.
- Select the language from the Language pick-list.
- Set Area to Top menu. The Table pick-list is removed, since menu items are not held against a table.
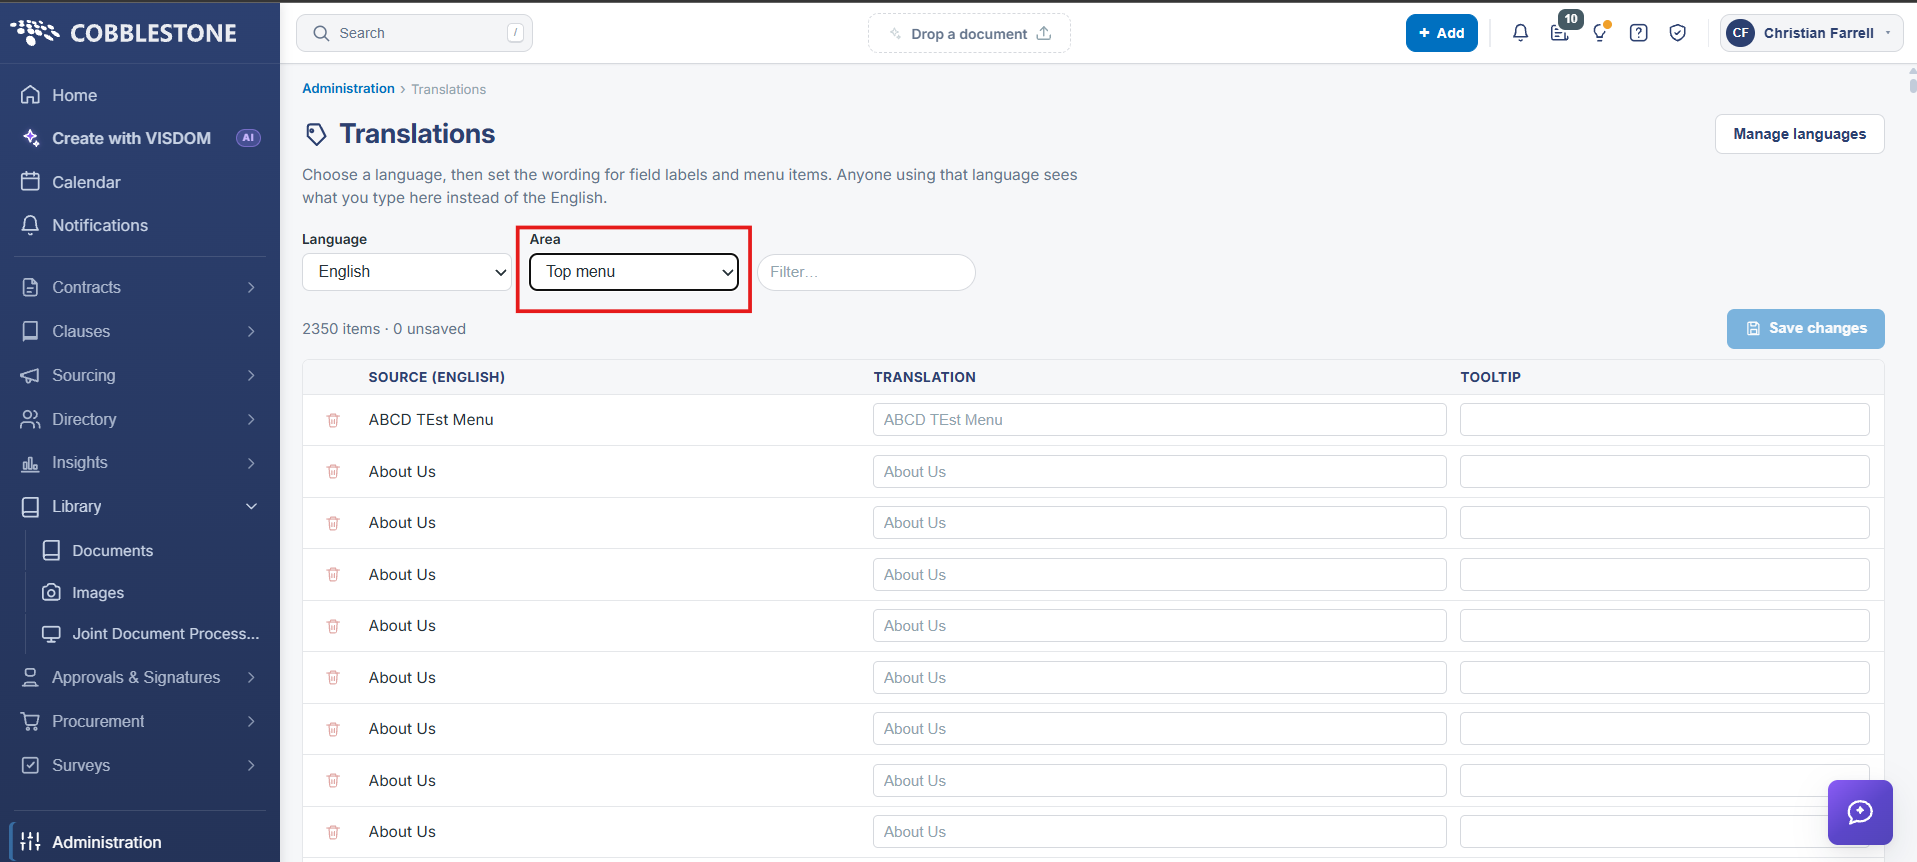
- Use the Filter box to find the menu item required, since the list covers every menu item on the system.
- Enter the wording in the TRANSLATION column, and any mouse-over text in the TOOLTIP column.
- Click Save changes to commit the wording.
Note: The same English menu label can appear on more than one row, because each menu item is translated in its own right. Use the Filter box and translate every row that matches, so that the wording is consistent wherever the item appears.
6. Removing a Translation
Function: Returns a single item to the English source text.
Steps:
- From the Contract Insight homepage, click Administration at the bottom of the left navigation menu. On the Administration page, under Configuration & Fields, select Translations.
- Select the Language, Area, and, for field labels, the Table holding the item.
- Locate the row, using the Filter box if required.
- Click the trash icon at the left of the row, labelled Remove this translation. The wording is cleared and the item reverts to the English source text.
- Click Save changes to commit the removal.
Note: The trash icon is inactive on any row that has not been translated, where it reads “There’s nothing to remove — this item hasn’t been translated yet.”
7. The Translation Grid
Whichever area is selected, the grid presents the same three columns alongside the per-row remove control:
- SOURCE (ENGLISH) — the English text as delivered, shown for reference and not editable
- TRANSLATION — the wording shown to anyone using the selected language. Left blank, the English source text is used
- TOOLTIP — the mouse-over text shown for the item in that language
Above the grid, the item count and the unsaved count track progress through a table, and Save changes commits every edit made in the current view at once.
8. Quick Reference Summary
Task | How to Complete It |
Open the screen | Homepage → Administration → Configuration & Fields → Translations. |
Add a language | Manage languages → + Add language, enter a Name, leave Offer this language on, then Save. |
Withdraw a language | Manage languages → Edit on its row, switch Offer this language off, then Save. Translations are kept. |
Translate field labels | Choose the Language, set Area to Field labels, choose the Table, enter the wording, then Save changes. |
Translate menu items | Choose the Language, set Area to Top menu, enter the wording, then Save changes. |
Find an item | Filter box beside the pick-lists. |
Remove a translation | Trash icon on the row — Remove this translation — then Save changes. |
Grid columns | SOURCE (ENGLISH), TRANSLATION, and TOOLTIP, plus the per-row remove control. |
Untranslated items | Show the English source greyed out in the TRANSLATION box, and continue to display in English. |