COBBLESTONE SOFTWARE
Contract Insight — User Guide
Image Library
Library: Images
Note: Each procedure in this guide begins at the Contract Insight homepage, so any section can be followed on its own. The images stored here are shared assets drawn on by application screens, notification emails, and merge templates, so an image should not be removed without first checking where it is used.
1. Overview
The Image Library is the central store for the image assets Contract Insight uses. Images uploaded here are available to the parts of the application that display them — the header logo, the login page, notification email headers, document watermarks, merge templates, employee profile pictures, and the prompts on ad-hoc reports.
The Image Library is the Images tab of the Library screen, which is described as “Shared documents, and the image assets screens and templates use.” The other tab, Documents, holds the shared document library. Each tab carries a live count of the records it contains.
Every image is filed against an Area, which records where in the application the image is intended to be used. The Area both organizes the library and determines which images are offered when a screen elsewhere in the application asks for one.
2. Accessing the Image Library
The Images tab is the central management screen for all image assets. To open it:
From the Contract Insight homepage, click Library in the left navigation menu, then select Images. The Library screen opens on the Images tab.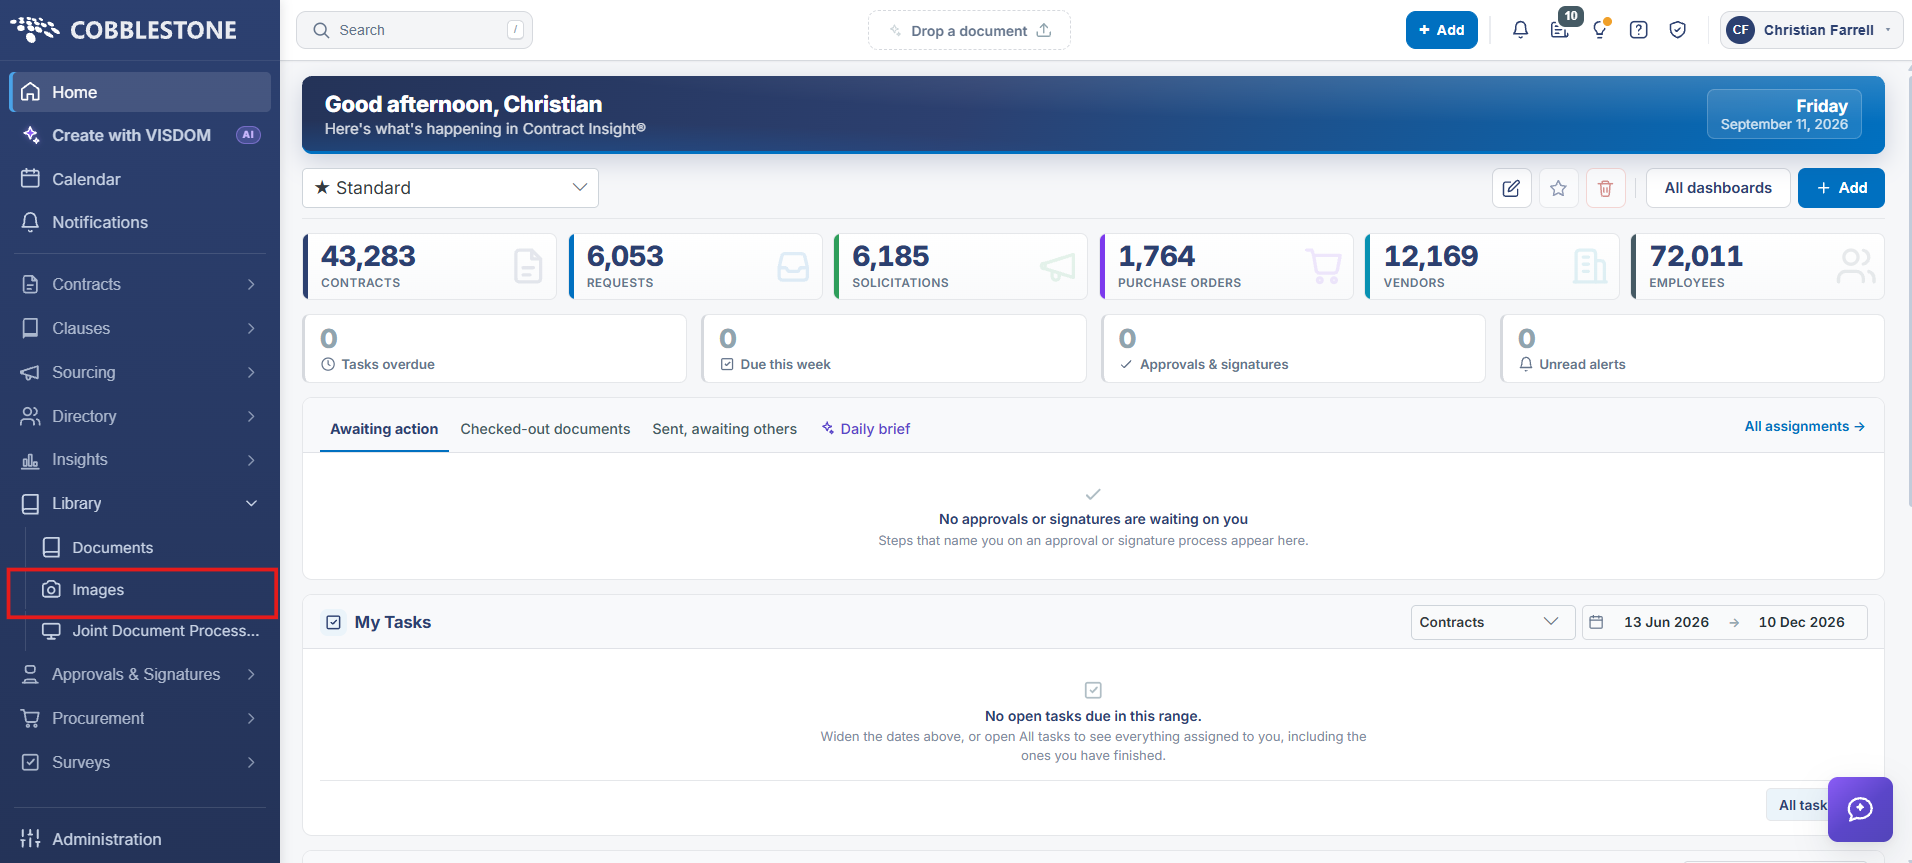
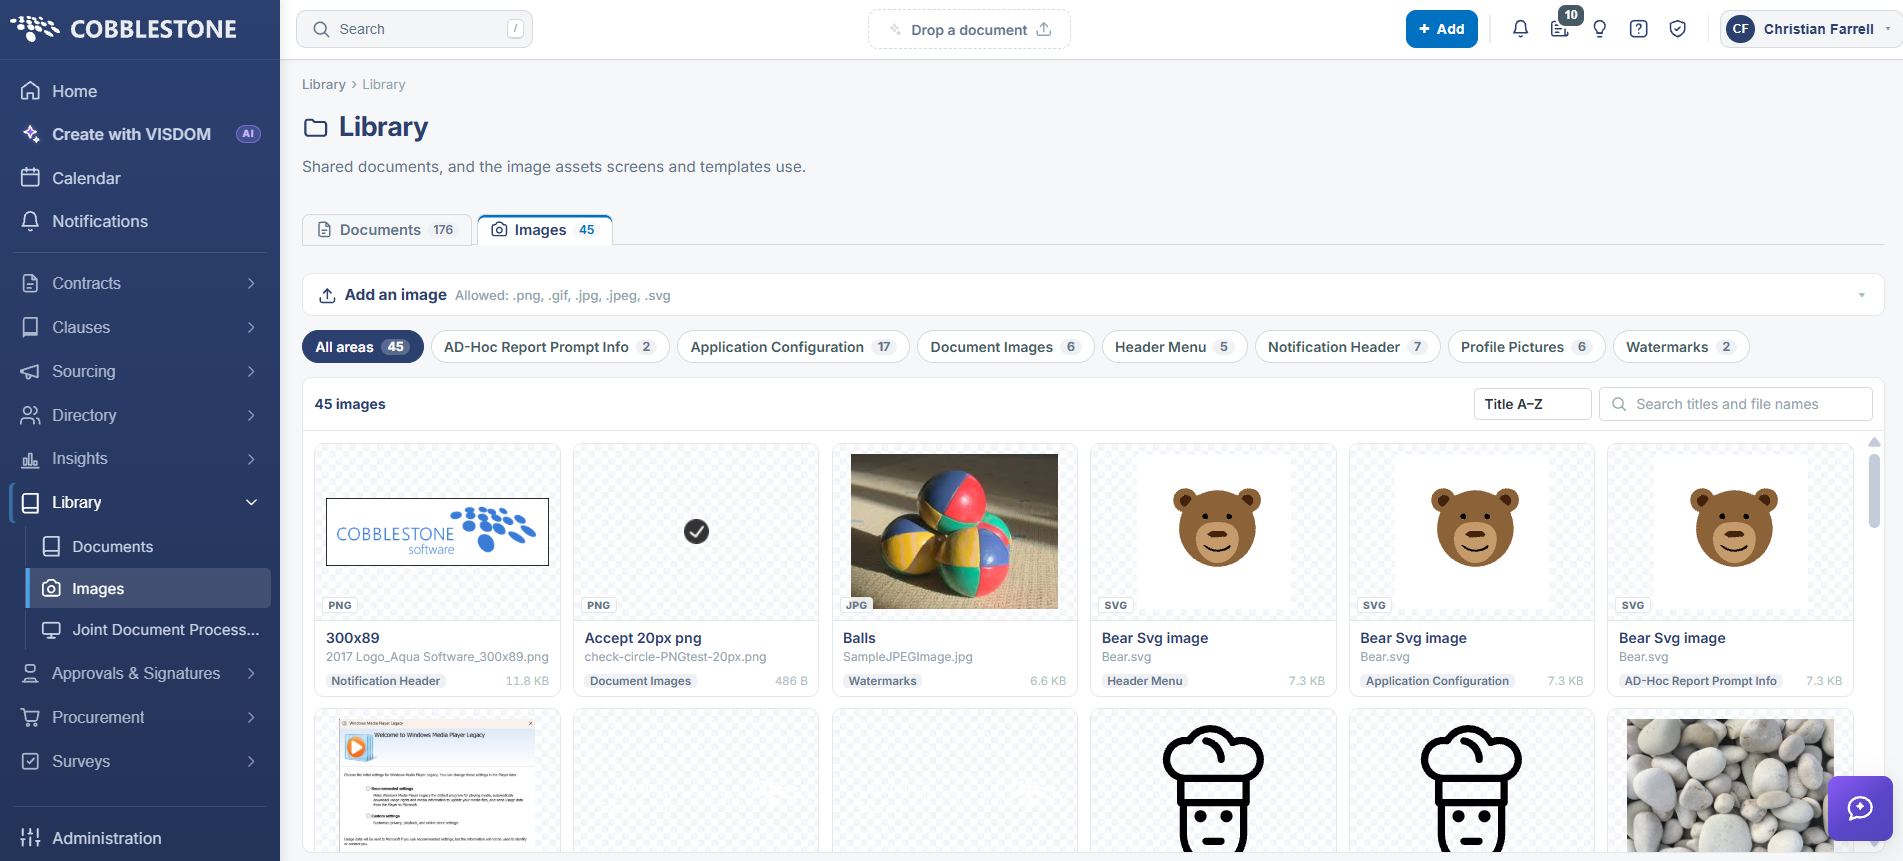
The Image Library screen includes the following elements:
- A breadcrumb trail of Library › Library
- A Library heading with the subtitle “Shared documents, and the image assets screens and templates use.”
- A Documents tab and an Images tab, each with a count of the records it holds
- An Add an image bar, noting the permitted file types, that expands to reveal the upload fields
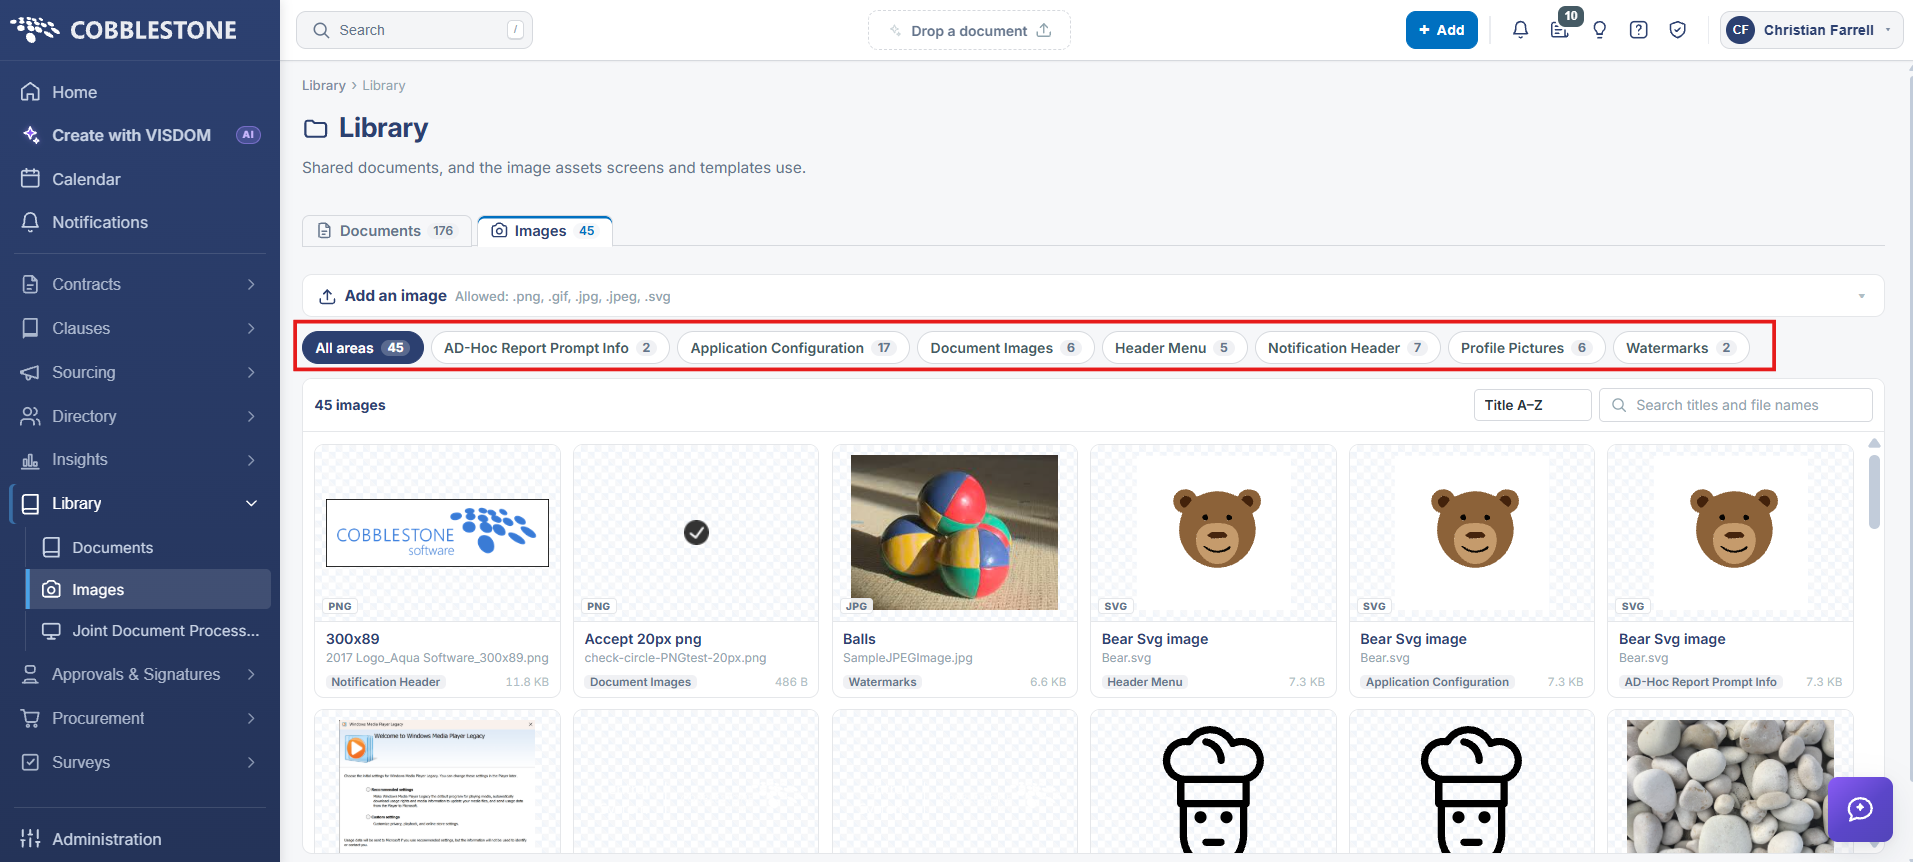
- A row of area filter chips — All areas, plus one chip for each area that currently holds images, each with its own count
- A count of the images in the current view, for example “44 images”
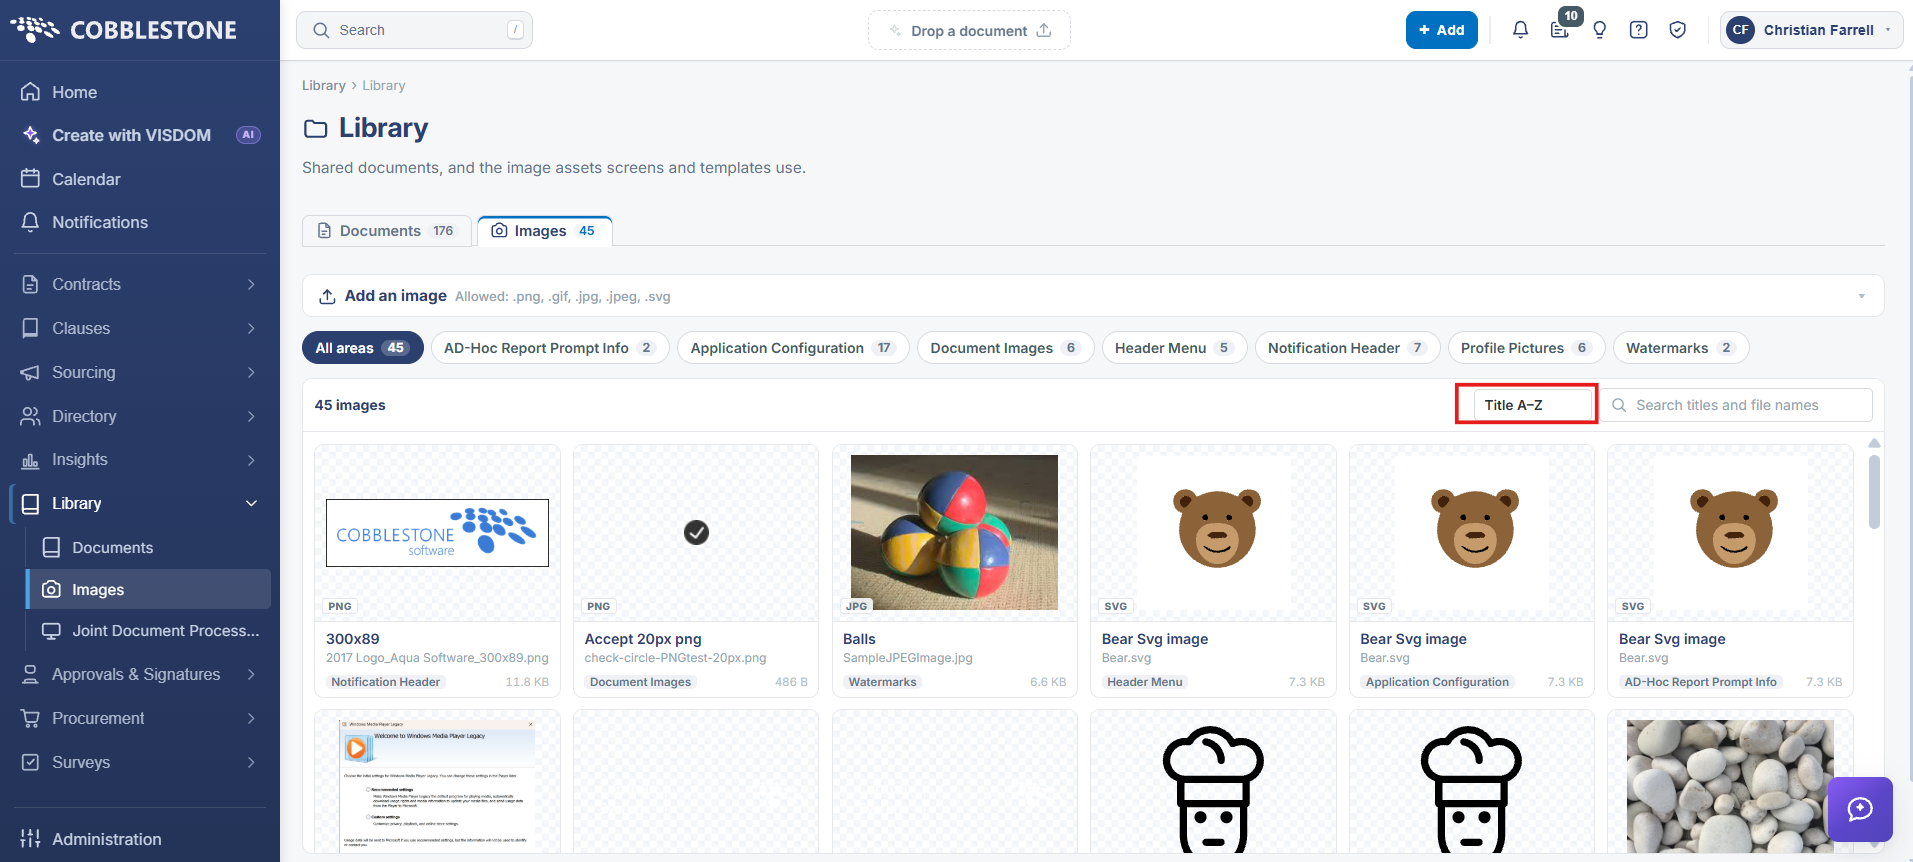
- A sort control offering Title A–Z, Newest first, and Largest first
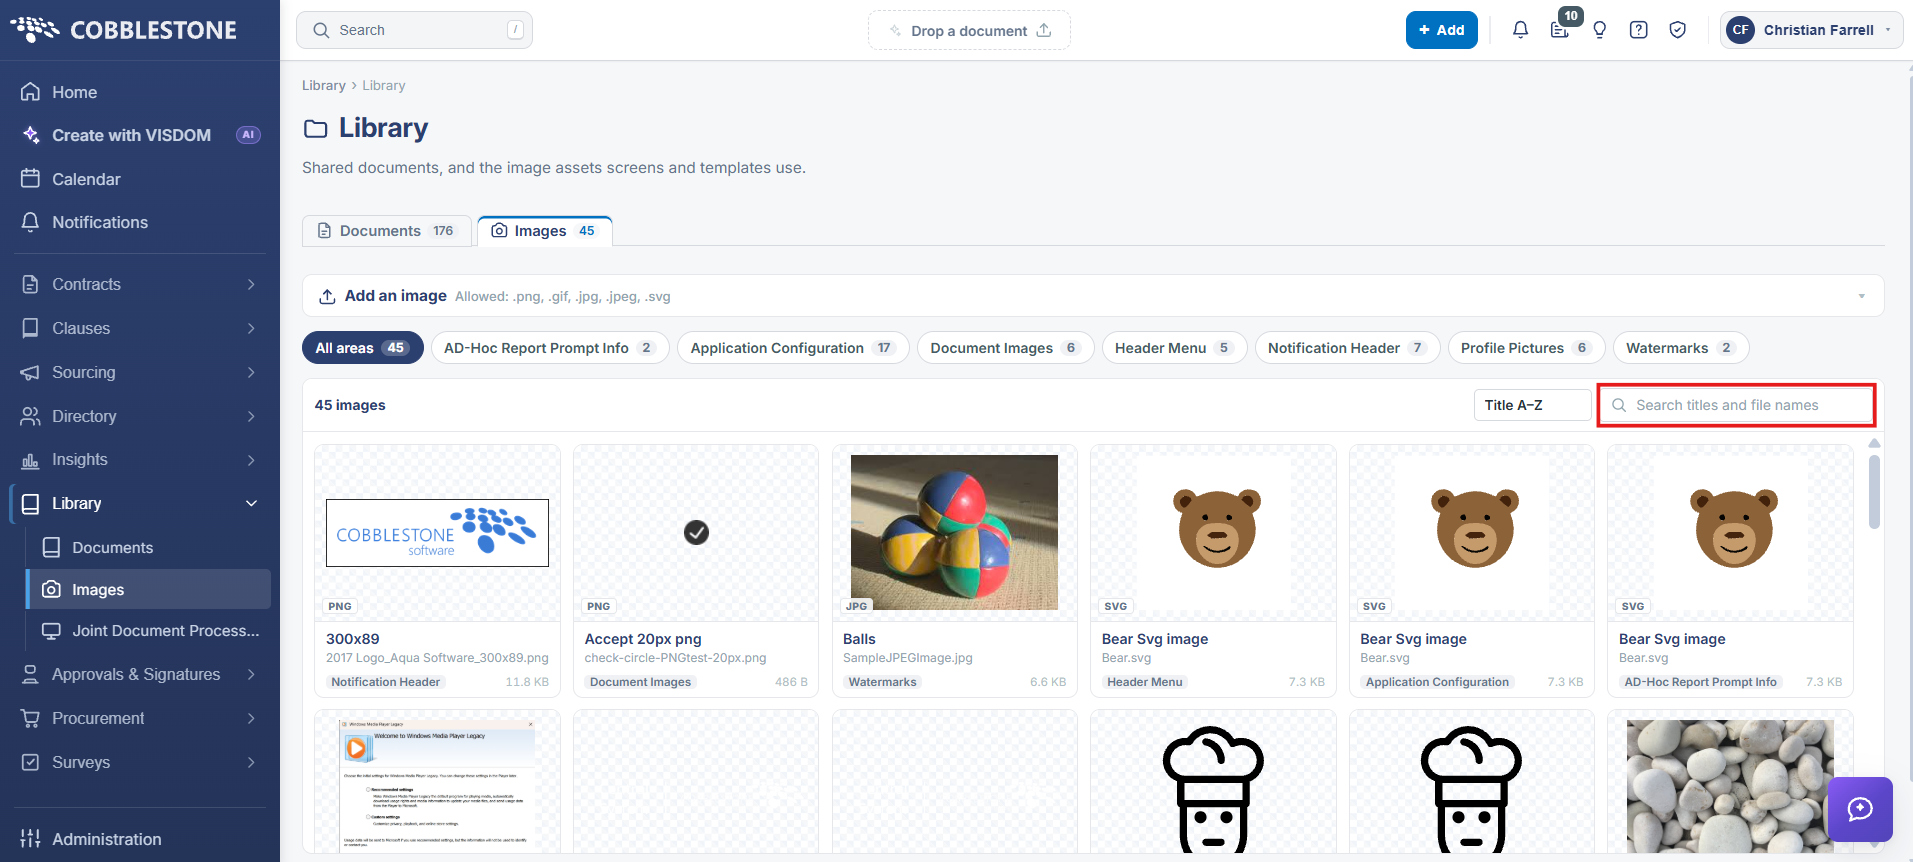
- A Search titles and file names box
- A grid of image cards, one per image
2.1 What an Image Card Shows
Each card in the grid displays the following: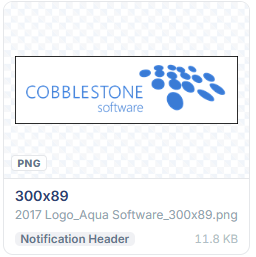
- A thumbnail — a preview of the image itself
- A format badge — the file type, for example PNG, JPG, SVG, or GIF
- The title — the name the image is listed under
- The file name — the name of the uploaded file, shown beneath the title
- An area chip — the area the image is filed against
- The file size — at the right of the card
2.2 Actions on an Image Card
Hovering over a card reveals two controls in the upper right of the thumbnail: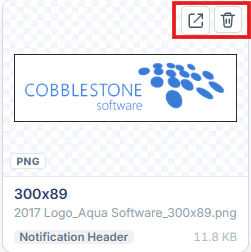
- Open full size — opens the image at its original dimensions, for checking an asset before it is used
- Remove this image — deletes the image from the library
Note: Hovering over the area chip on a card confirms where the image is filed, reading “Used for <area name>”. There is no separate record page for an image — the card is the record, and the area, title, and file are set when the image is uploaded.
3. Finding an Image
Function: Narrows the grid to the images required.
Steps:
- From the Contract Insight homepage, click Library in the left navigation menu, then select Images. The Library screen opens on the Images tab.
- To filter by area, click the chip for that area — for example Watermarks or Notification Header. The grid narrows to that area and the image count updates. Click All areas to return to the full library.
- To search, type into the Search titles and file names box at the right of the toolbar. The grid narrows to images whose title or file name matches.
- To change the order, use the sort control beside the search box:
- Title A–Z — alphabetical by title, the default
- Newest first — most recently added first
- Largest first — largest file size first
Note: Filtering by area and searching can be combined, so an area chip can be selected first and a keyword entered to narrow that area further.
4. Adding an Image
Function: Uploads a new image asset into the library and files it against an area.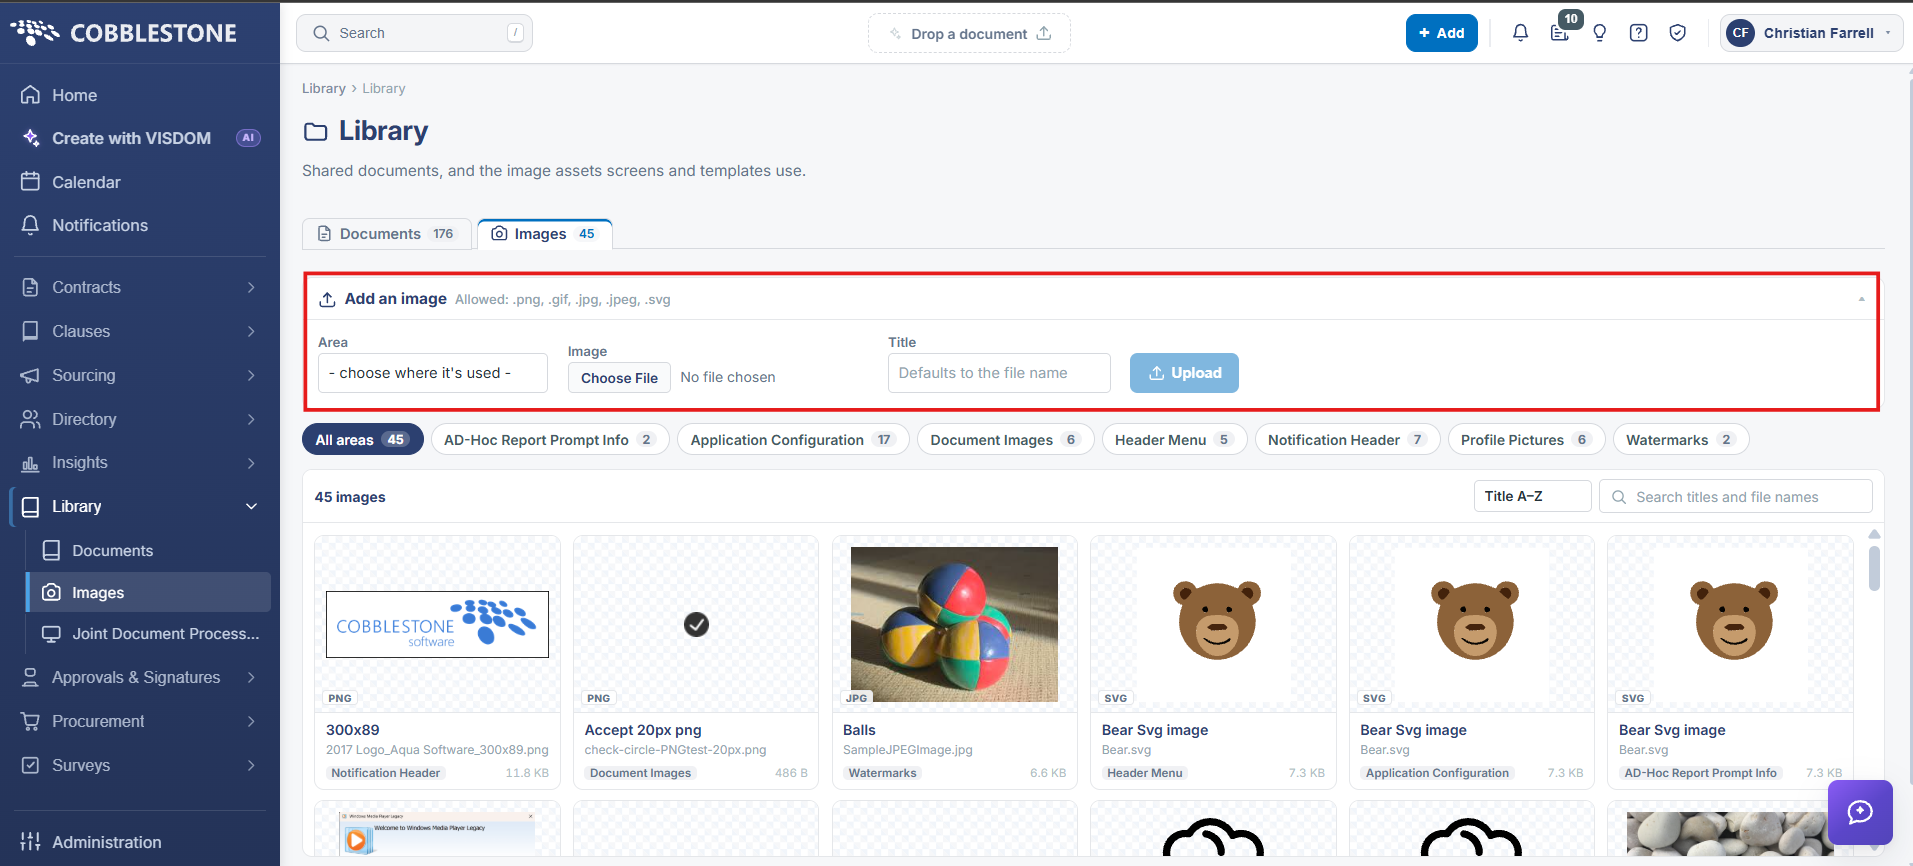
Steps:
- From the Contract Insight homepage, click Library in the left navigation menu, then select Images. The Library screen opens on the Images tab.
- Click Add an image at the top of the tab, or the chevron at the right of that bar, to expand the upload fields.
- Select the Area the image belongs to from the pick-list, which opens on “— choose where it’s used —”. The area determines where in the application the image is offered.
- Click Choose File beside Image and select the file from your computer. The field reads “No file chosen” until a file is selected.
- Enter a Title for the image. Leaving the field blank defaults the title to the file name.
- Click Upload. The image is added to the library and appears on the grid under its area, and the counts on the Images tab and the area chip both increase by one.
Note: The permitted file types are listed beside the Add an image label: .png, .gif, .jpg, .jpeg, and .svg. Give each image a clear, descriptive title, since the title is what identifies the image on the screens that draw on the library.
5. Image Areas
The Area assigned to an image records where in Contract Insight it is used. The areas available are:
- AD-Hoc Report Prompt Info — images shown alongside the prompts on ad-hoc reports and searches
- Application Configuration — general application imagery, including the logos and graphics used across the interface
- Client Branding — the organization’s own branding, such as the client header logo
- Document Images — images placed into generated documents
- Header Menu — imagery used in the application header
- Login Images — imagery used on the sign-in page
- Notification Header — the header images used at the top of notification emails
- Profile Pictures — employee profile photographs, filed against the employee record they belong to
- Watermarks — the images available as document watermarks
Note: An ar chip only appears above the grid when that area currently holds at least one image, so the chips shown vary between environments. Every area remains selectable in the Area pick-list when uploading.
6. Where Library Images Are Used
Images uploaded to the library are drawn on from several administration tools, which is why the area matters. Once an image is in the library it becomes available to:
- Branding — Administration → Templates & Presentation → Branding, which sets the logo shown in the application header
- Notification Themes — Administration → Automation & Data → Notification Themes, which designs the look of notification emails, including the header
- Watermarks — Administration → Templates & Presentation → Watermarks, which manages the document watermarks available for use
- Document Templates — Administration → Templates & Presentation → Document Templates, where images can be merged into generated documents
- Employee records — where a profile picture is held against the employee it belongs to
Note: Because a single image can be referenced from more than one of these places, confirm where an image is in use before removing it with Remove this image on its card. Uploading a replacement under a new title, and repointing the screens that use it, is safer than removing an image that may still be referenced.
7. Quick Reference Summary
Task | How to Complete It |
Open the Image Library | Homepage → Library → Images. |
Add an image | Add an image, choose the Area, Choose File, enter a Title, then Upload. |
Permitted file types | .png, .gif, .jpg, .jpeg, and .svg. |
Filter by area | Click the area chip above the grid; All areas returns the full library. |
Search for an image | Search titles and file names box at the right of the toolbar. |
Change the order | Sort control beside the search box: Title A–Z, Newest first, or Largest first. |
What a card shows | Thumbnail, format badge, title, file name, area chip, and file size. |
View an image full size | Hover the card and click Open full size. |
Remove an image | Hover the card and click Remove this image. Check first where the image is used. |
Areas available | AD-Hoc Report Prompt Info, Application Configuration, Client Branding, Document Images, Header Menu, Login Images, Notification Header, Profile Pictures, and Watermarks. |
Shared documents | The Documents tab of the same Library screen. |