COBBLESTONE SOFTWARE
Contract Insight — User Guide
IP Address Restrictions
Security & Access: Restricting Sign-in by Network
Note: Each procedure in this guide begins at the Contract Insight homepage, so any section can be followed on its own. IP address restrictions apply at sign-in and affect every user of the environment, so changes should be made deliberately and verified before they are relied on.
1. Overview
IP Address Restrictions control which networks people can sign in from. Each restriction is a range of IP addresses, recorded with a start address, an end address, and a title, and the system compares the address a person is connecting from against the ranges recorded here when they sign in.
Restrictions are governed by two settings held together on the screen. Allow IP Address Restrictions determines whether the ranges are applied at all, and Mode determines how they are applied — either as an allow list, where only the listed ranges may sign in, or as a deny list, where the listed ranges are the only ones blocked.
Each range can be marked Active or inactive. An inactive range stays on the list but is not applied, so a range can be suspended and later restored without having to be recorded again. The system also records when each range was created and who created it.
Because IP Address Restrictions are maintained from the Administration area, only Application Administrators — or other users specifically granted the appropriate permission — can enable restrictions, change the mode, or add, edit, and remove ranges.
2. Accessing IP Address Restrictions
The IP Address Restrictions screen holds both the settings and the list of ranges. To open it:
From the Contract Insight homepage, click Administration at the bottom of the left navigation menu. On the Administration page, under Security & Access, select IP Restrictions.
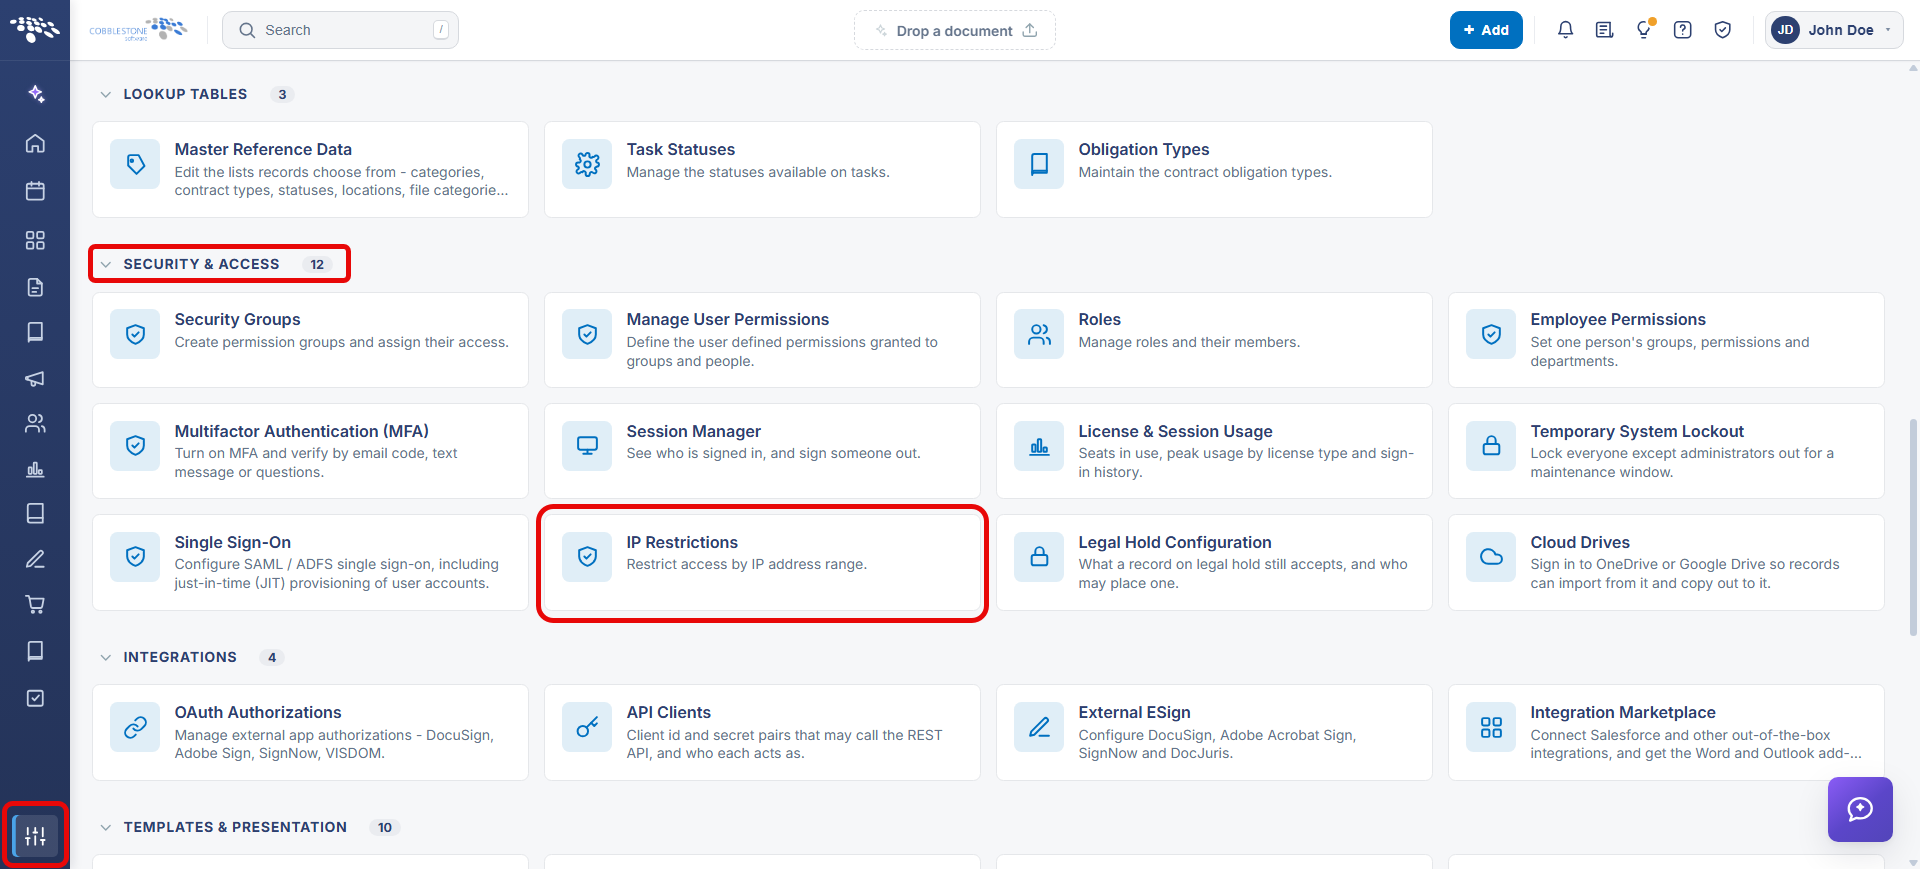
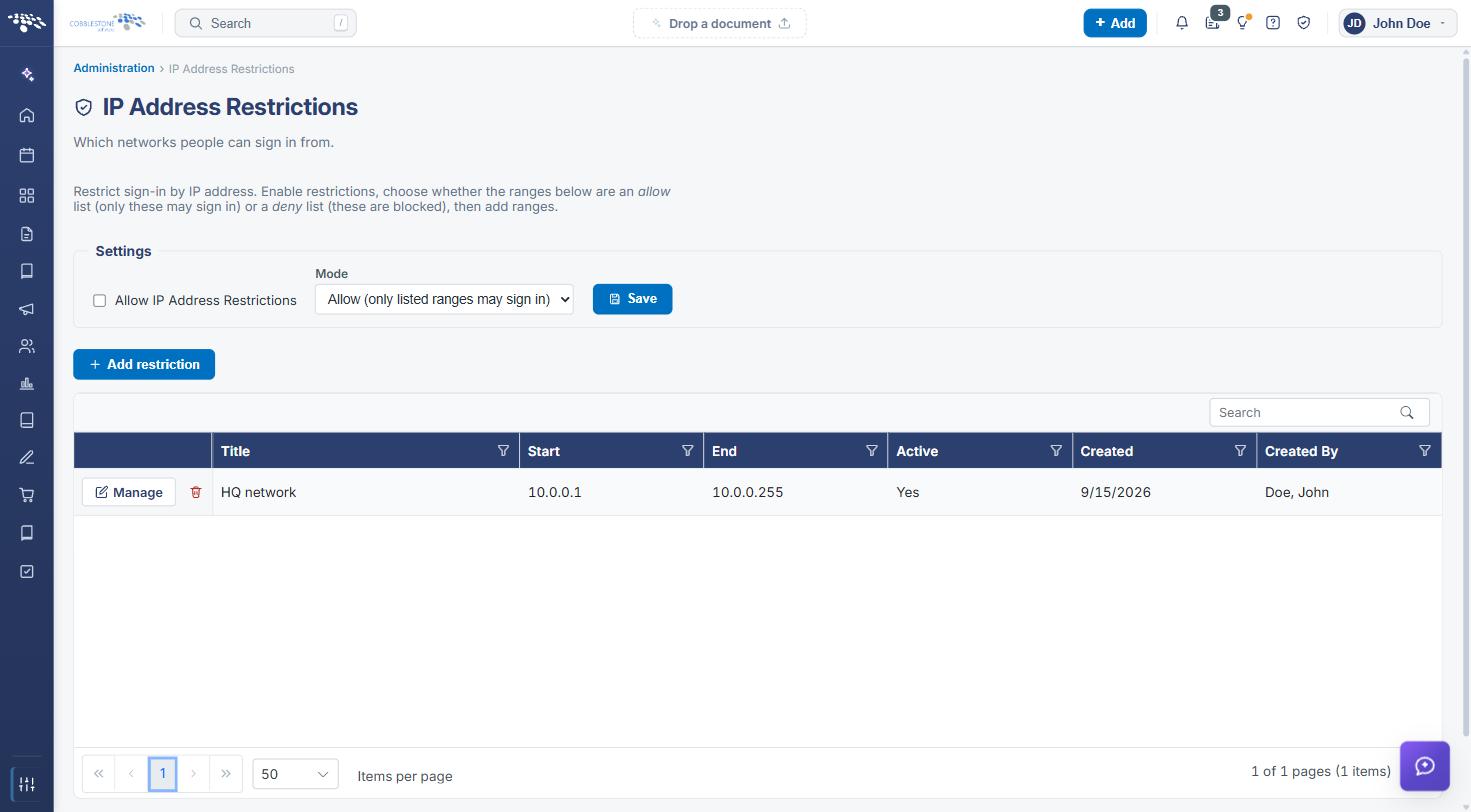
The IP Address Restrictions screen includes the following elements:
- A breadcrumb trail of Administration › IP Address Restrictions, and the page title IP Address Restrictions with the subtitle “Which networks people can sign in from.”
- An introductory line explaining that sign-in is restricted by IP address, and that the ranges below act as either an allow list or a deny list
- A Settings panel containing the Allow IP Address Restrictions tick box, the Mode dropdown, and a Save button
- An Add restriction button above the list
- A Search box at the right of the grid toolbar to filter the list by keyword
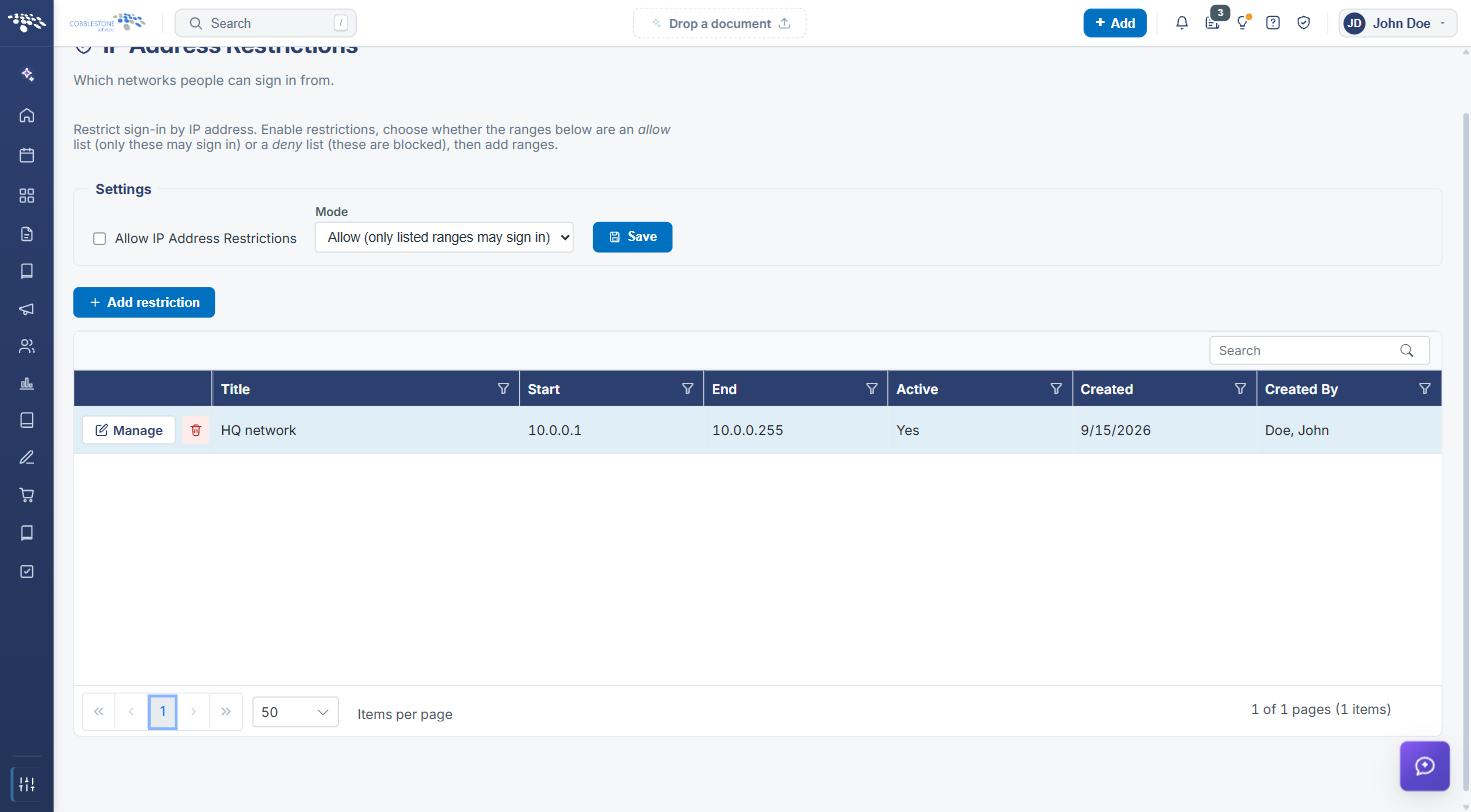
- A sortable, filterable grid with Title, Start, End, Active, Created, and Created By columns, each with its own filter icon
- Per-row Manage and delete buttons, the delete button labelled Delete this restriction
- Pagination controls beneath the grid, with a live page and record count and an Items per page selector
3. Enabling and Disabling Restrictions
Function: Determines whether the ranges recorded on this screen are applied when people sign in.
Steps:
- From the Contract Insight homepage, click Administration at the bottom of the left navigation menu. On the Administration page, under Security & Access, select IP Restrictions.
- In the Settings panel, tick Allow IP Address Restrictions to apply the ranges, or untick it to stop applying them.
- Confirm the Mode is the one you intend — see Section 4.
- Click Save to apply the change. Nothing takes effect until the setting is saved.
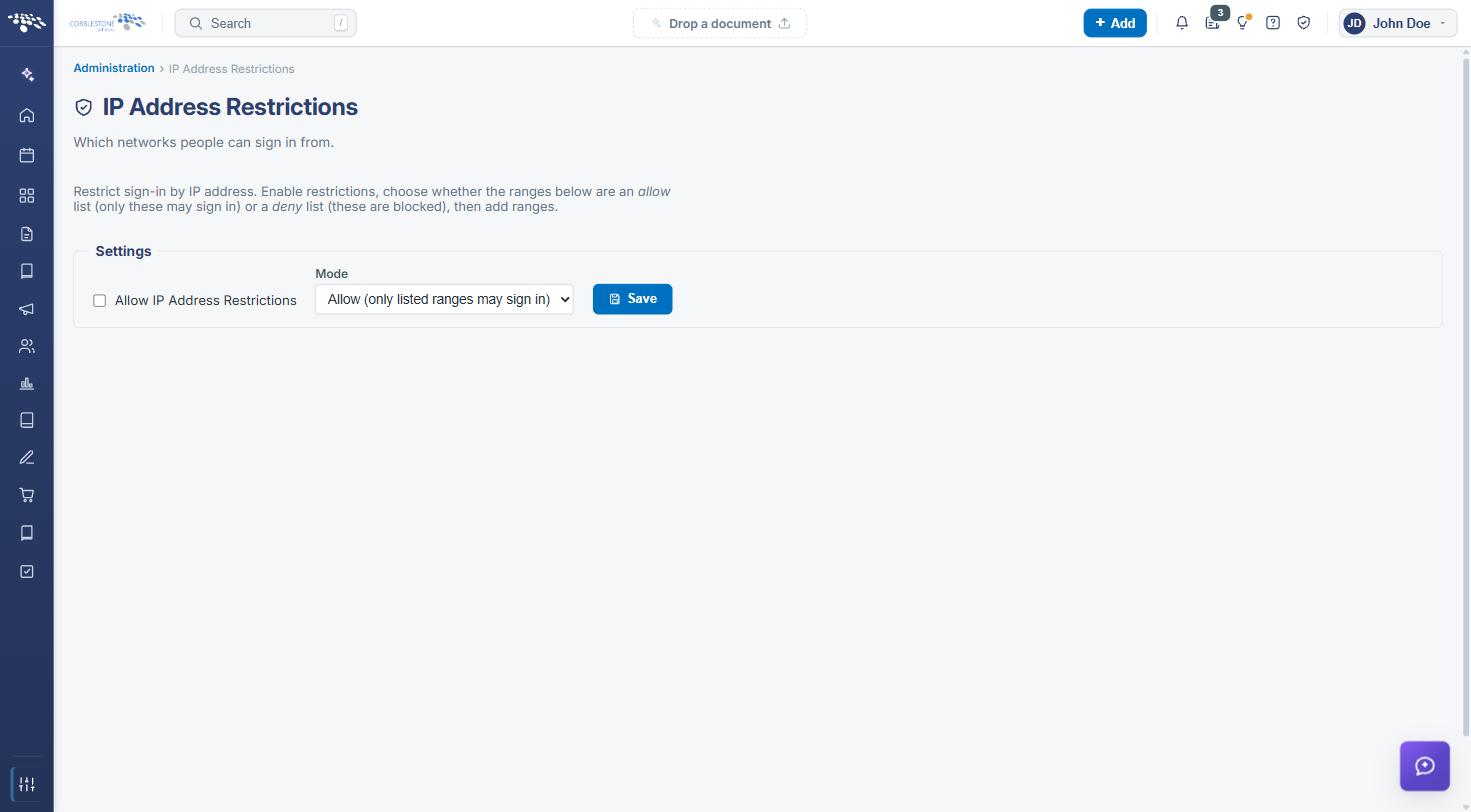
Note: Record the ranges first, then enable restrictions. Enabling the setting with no active range recorded leaves the system with nothing to apply, and in allow mode an incomplete list is what locks people out.
Note: Before enabling restrictions in allow mode, confirm that the network you administer the system from is covered by an active range. Restrictions are applied at sign-in, so an administrator whose own address falls outside every allowed range cannot sign back in to correct the list.
4. Restriction Modes
The Mode dropdown in the Settings panel determines how the ranges on the list are applied. Two modes are offered:
- Allow (only listed ranges may sign in) — the listed ranges are the only addresses permitted to reach the system. Every other address is refused, so this mode is used to confine access to known corporate networks or a VPN
- Deny (listed ranges are blocked) — the listed ranges are the only addresses explicitly refused. Every other address continues to be permitted, so this mode is used to block a specific network or address without restricting anyone else
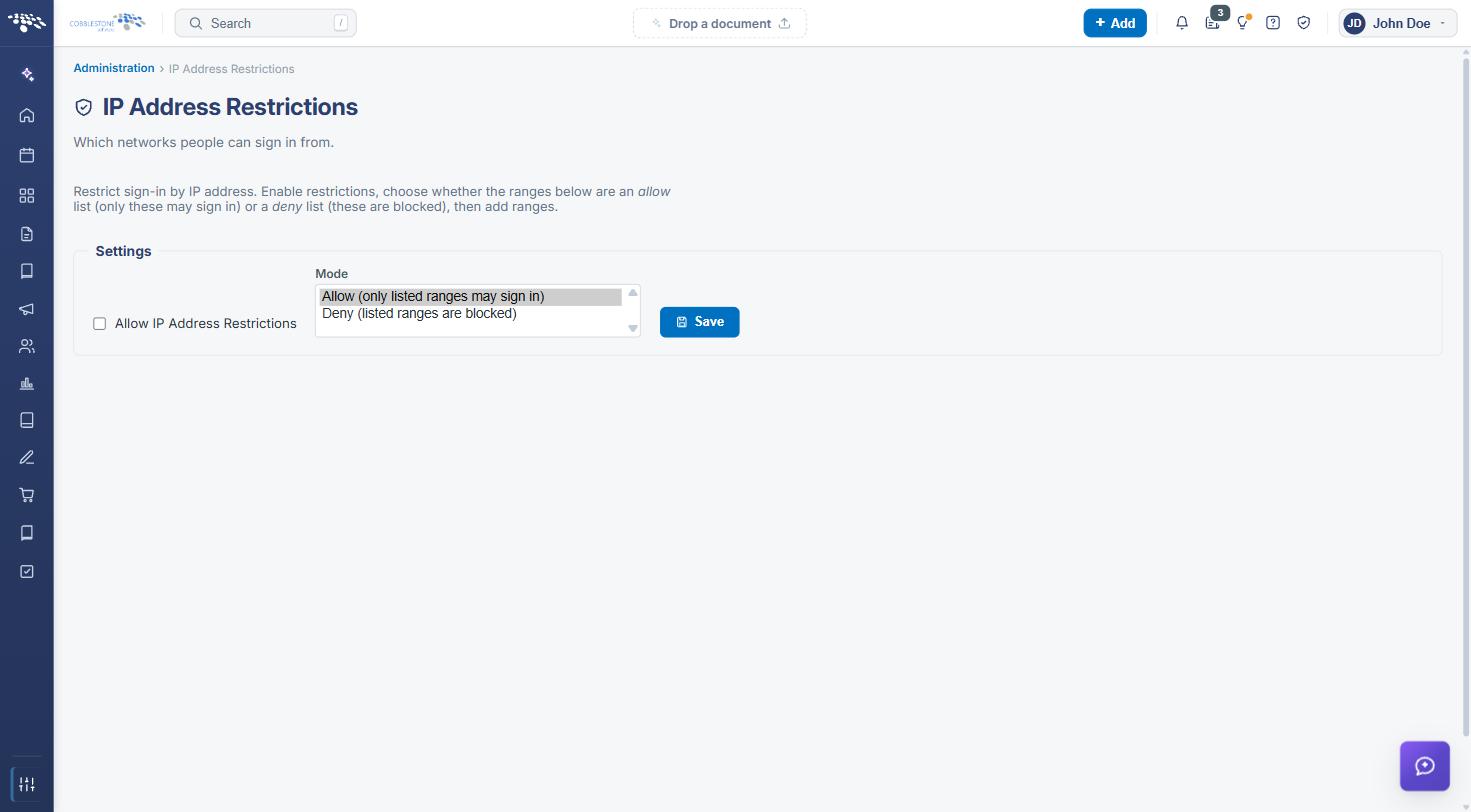
The mode applies to every active range on the list at once; ranges are not set individually to allow or deny. Changing the mode takes effect when Save is clicked in the Settings panel.
5. Adding an IP Address Range
Function: Records a range of IP addresses for the system to allow or deny, according to the mode in force.
Steps:
- From the Contract Insight homepage, click Administration at the bottom of the left navigation menu. On the Administration page, under Security & Access, select IP Restrictions.
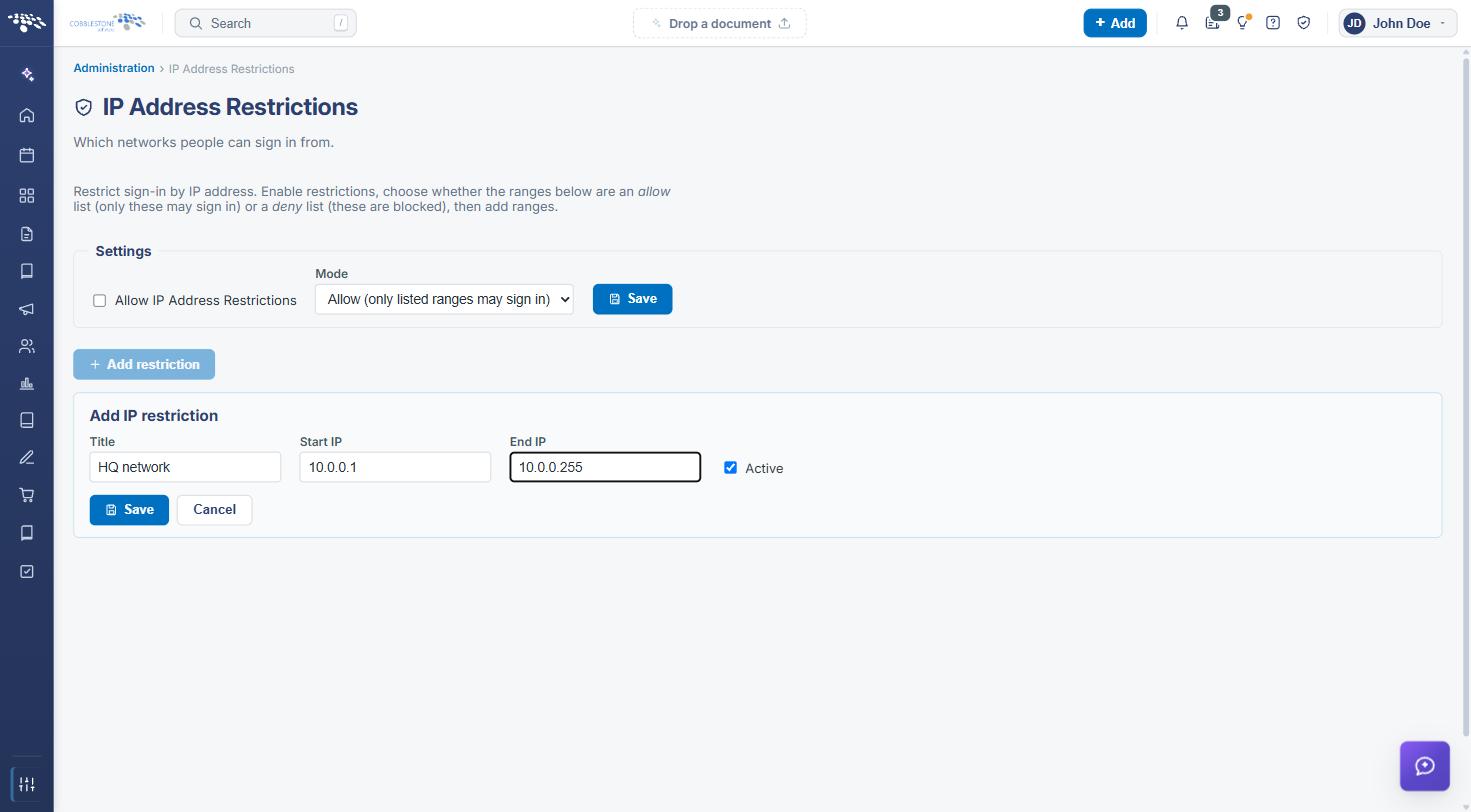
- Click Add restriction above the list. The Add IP restriction form opens beneath the button.
- In Title, enter a description of the range — for example, HQ network. This is how the range is identified on the list.
- In Start IP, enter the first address in the range — for example, 10.0.0.1.
- In End IP, enter the last address in the range — for example, 10.0.0.255. To record a single address, enter the same address in both fields.
- Leave Active ticked to apply the range, or untick it to record the range without applying it yet.
- Click Save to add the range, or Cancel to close the form without adding it.
The new range appears in the grid with its title, start and end addresses, active state, and the date and user it was created by.
6. Editing an IP Address Range
Function: Changes the title, the addresses, or the active state of a range already recorded.
Steps:
- From the Contract Insight homepage, click Administration at the bottom of the left navigation menu. On the Administration page, under Security & Access, select IP Restrictions.
- Locate the range in the grid, using the Search box or the column filters if necessary.
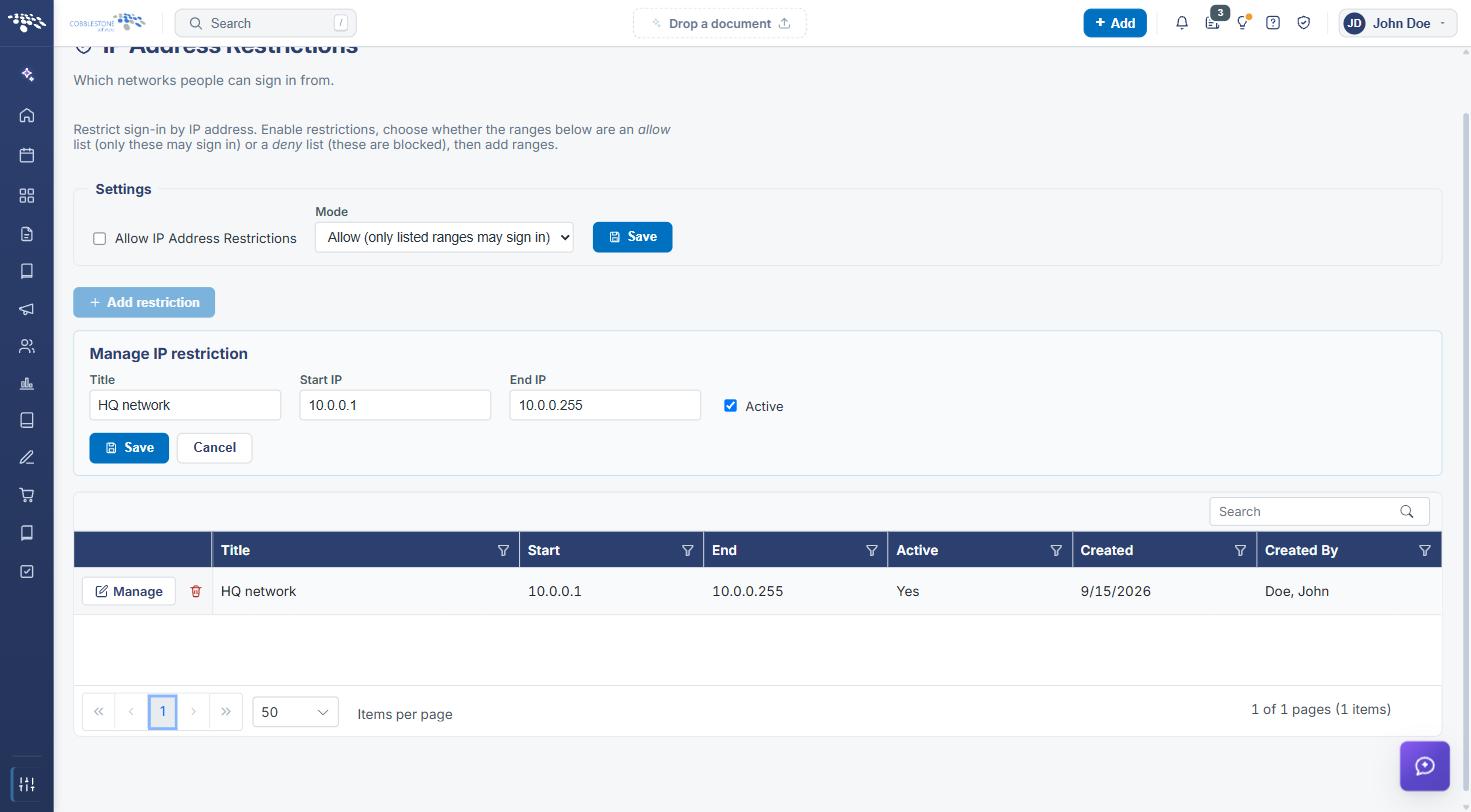
- Click Manage on its row. The Manage IP restriction form opens with the current Title, Start IP, End IP, and Active values filled in.
- Change the values as needed.
- Click Save to commit the change, or Cancel to leave the range unchanged.
7. Deleting an IP Address Range
Note: Prior to deleting a range, make sure it is no longer required. In allow mode, removing a range withdraws access from everyone connecting from it; in deny mode, removing a range restores access to it.
Steps:
- From the Contract Insight homepage, click Administration at the bottom of the left navigation menu. On the Administration page, under Security & Access, select IP Restrictions.
- Locate the range you want to remove in the grid.
- Click the delete icon at the right of its row — its tooltip reads Delete this restriction.
- Confirm the deletion if prompted. The range is removed from the list.
Where a range may be needed again, untick Active on it instead of deleting it. The range is then retained on the list, with its title and addresses intact, and is not applied until it is made active again.
8. Active and Inactive Ranges
The Active tick box on a range controls whether that range is taken into account:
- Active — the range is applied according to the mode in force, and the grid shows Yes in the Active column
- Inactive — the range is retained on the list but not applied, and the grid shows No in the Active column
An inactive range has no effect in either mode. Marking a range inactive is the way to suspend it — for an office that has closed temporarily, for example — without losing the addresses recorded against it.
9. Finding a Range in the List
Environments that restrict several networks can hold a long list of ranges. The grid provides three ways to narrow it:
- Search — the box at the right of the grid toolbar filters the list by keyword
- Column filters — the filter icon in the Title, Start, End, Active, Created, and Created By headers filters on that column alone
- Pagination — the controls beneath the grid move between pages, and the Items per page selector sets how many rows are shown at once
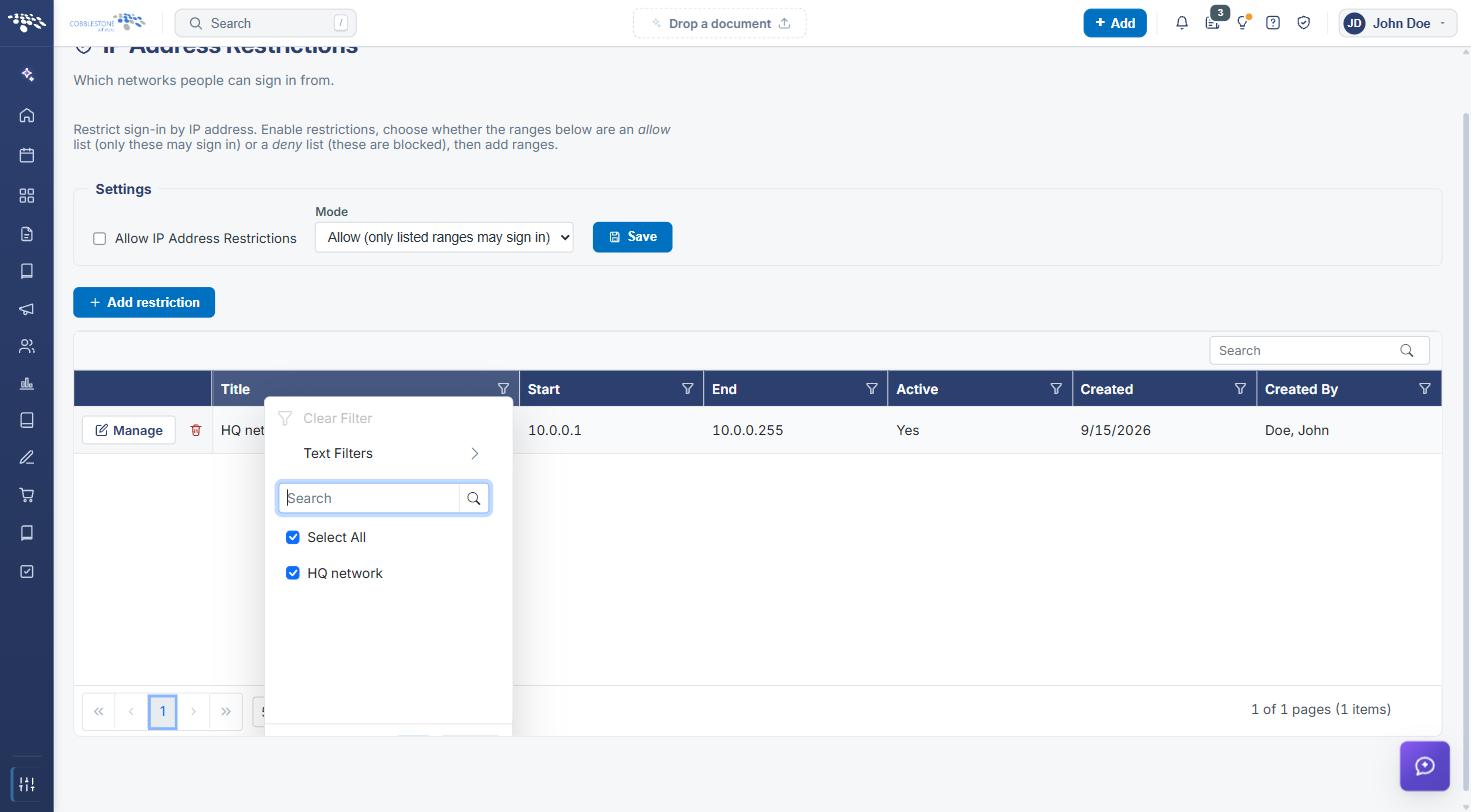
The Created and Created By columns record when each range was added and by whom, which is useful when reviewing who changed the access rules and when.
10. Quick Reference Summary
Task | How to Complete It |
Open IP restrictions | Homepage → Administration → Security & Access → IP Restrictions. |
Turn restrictions on or off | Tick or untick Allow IP Address Restrictions in Settings, then Save. |
Choose how they apply | Set Mode to Allow (only listed ranges may sign in) or Deny (listed ranges are blocked), then Save. |
Add a range | Add restriction, enter the Title, Start IP and End IP, leave Active ticked, then Save. |
Edit a range | Manage on its row, change the values, then Save. |
Suspend a range | Manage on its row, untick Active, then Save. |
Remove a range | Delete this restriction on its row, then confirm if prompted. |
Find a range | Search box on the grid toolbar, or the filter icon on any column. |
Fields on a range | Title, Start IP, End IP, and Active, plus the system-recorded Created and Created By. |