COBBLESTONE SOFTWARE
Contract Insight — User Guide
IntelliApprove Overview
Module: Document Collaboration Gateway › IntelliApprove › IntelliApprove Overview
Note: Each procedure in this guide begins at the Contract Insight homepage, so any section can be followed on its own. Custom fields are configurable, so the exact field list on a contract category record may vary between environments.
1. Overview
IntelliApprove is CobbleStone's own approval mechanism, available as its own action in a record's Actions menu (Document Processing group, alongside Approval Processes) and flagged with an INTELLIAPPROVE badge on any process console it applies to, distinguishing it from a standard, non-IntelliApprove approval process.
Choosing IntelliApprove opens the Negotiation Processes page filtered to the current record, where you can review the record's existing approval processes or send one of the record's documents out for approval.
2. Key Elements
- Actions → IntelliApprove (Document Processing group) starts an IntelliApprove process.
- Negotiation Processes page: opens filtered to the current record (for example, “Showing only this record's processes - Contracts #5”) and set to Approvals only.
- New approval process: opens the Send a document for approval dialog, which lists only documents attached to this record.
- Process console: lists the documents, people to notify, approval groups, and process settings. Nothing is sent until you click Start process.
- A process console's INTELLIAPPROVE badge marks it as an IntelliApprove process. Standard approval processes show other badges (for example, MASS SIGN) instead.
3. Navigating to a Contract Record
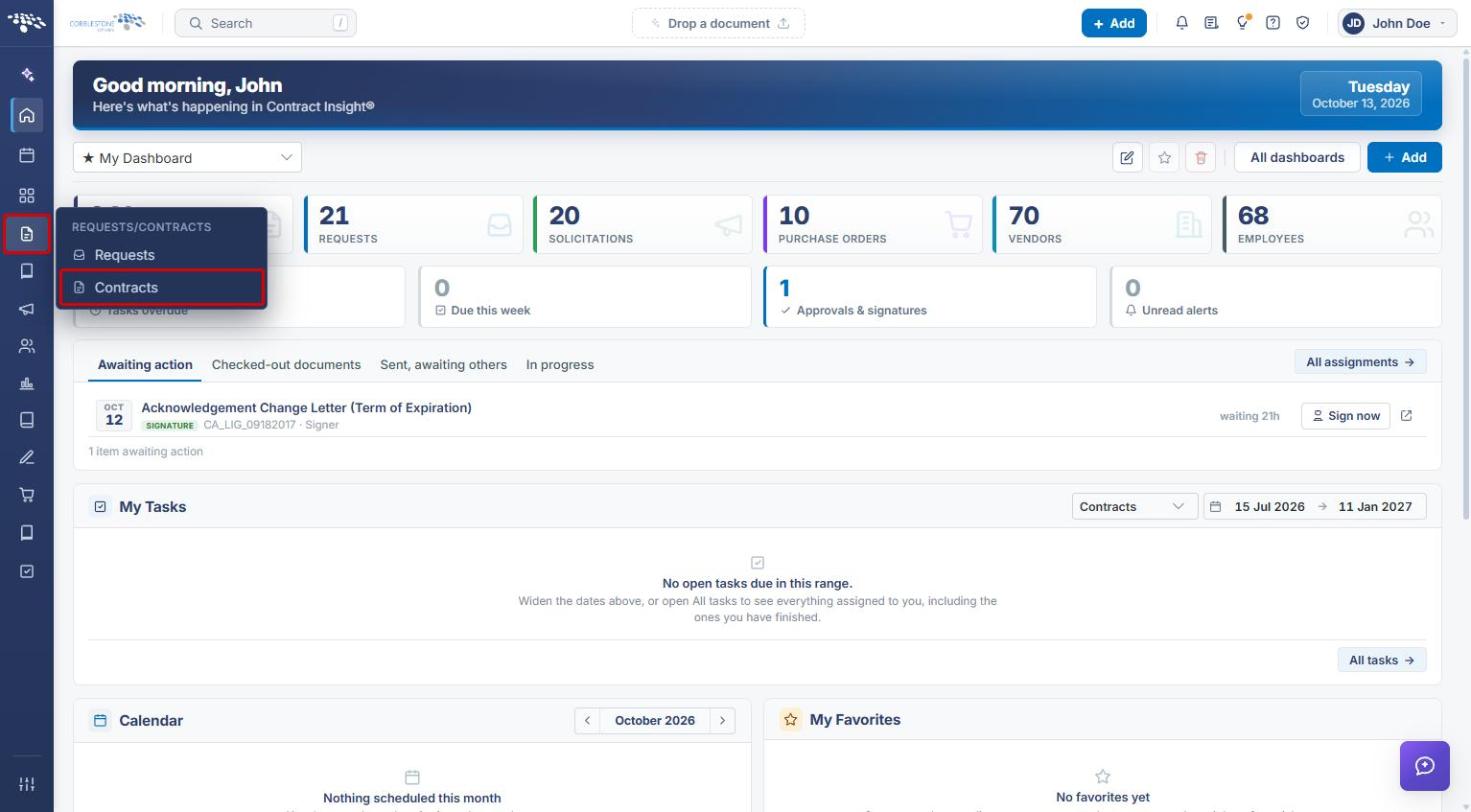
- From the Contract Insight homepage, click the Requests/Contracts icon in the left navigation bar.
- Select Contracts.
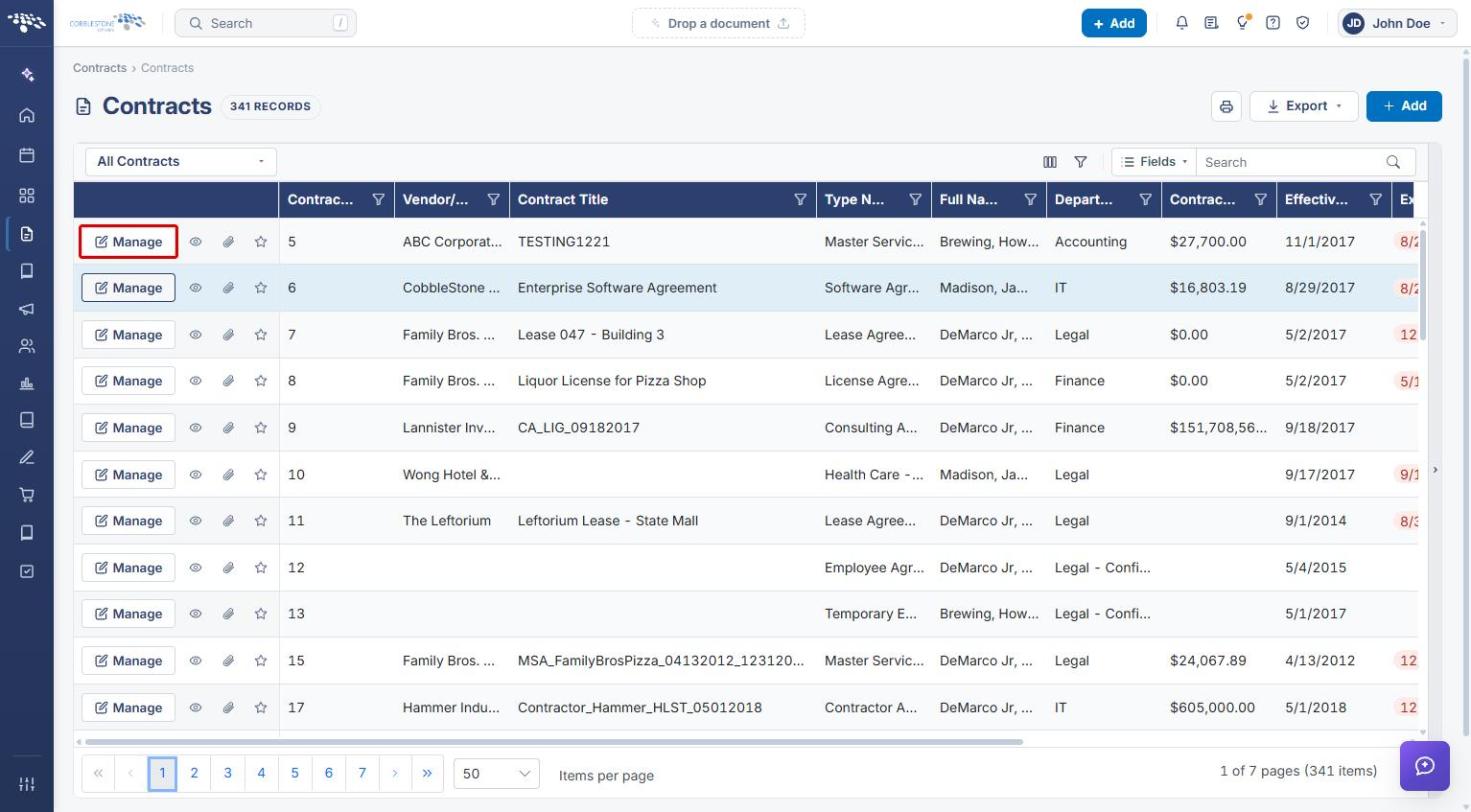
- On the Contracts list, locate the record whose document needs approval. Use the Search box, column filters, or the view drop-down to narrow the list.
- Click Manage on that record's row to open its Record Details.
4. Starting IntelliApprove from a Record
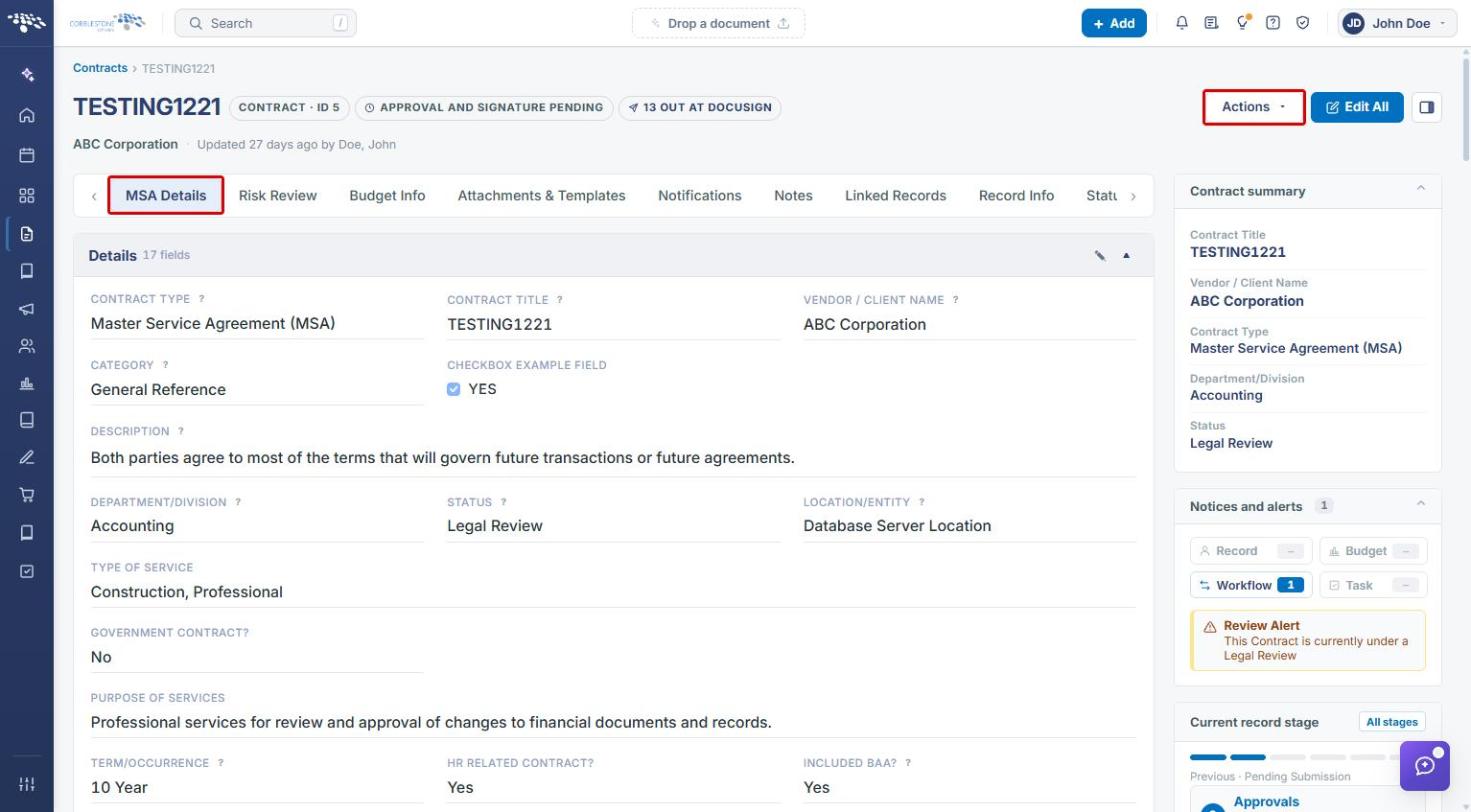
- The record opens on its default landing tab (in this example, MSA Details). Click the Actions button in the upper-right corner of the record.
- Scroll to the Document Processing group at the bottom of the Actions menu.
- Click IntelliApprove.
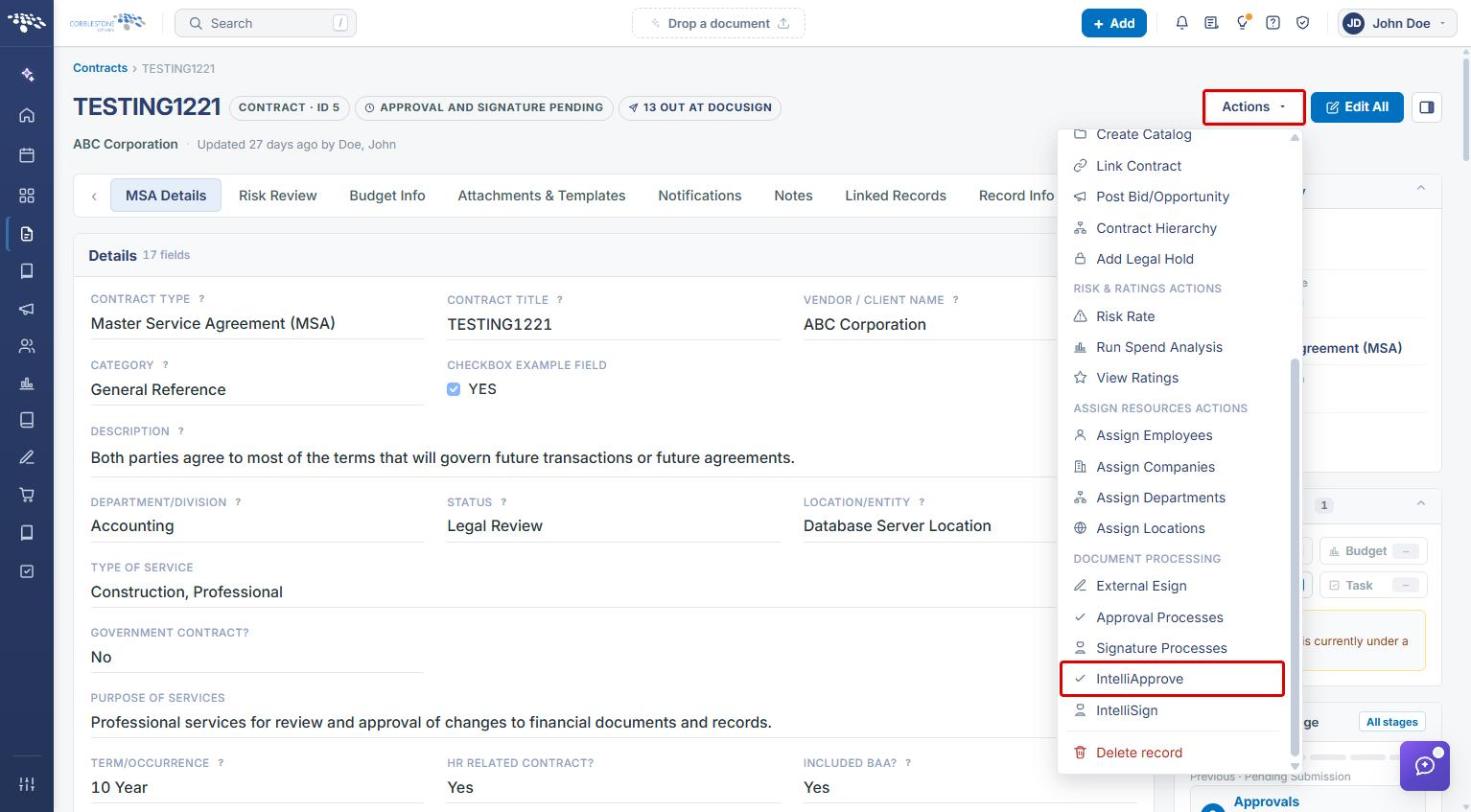
Note: Approval Processes, listed directly above IntelliApprove, starts a standard (non-IntelliApprove) approval process.
5. Reviewing the Record's Approval Processes
The Negotiation Processes page opens, showing only the approvals raised on documents in this record, with the controls to intervene in a running one.
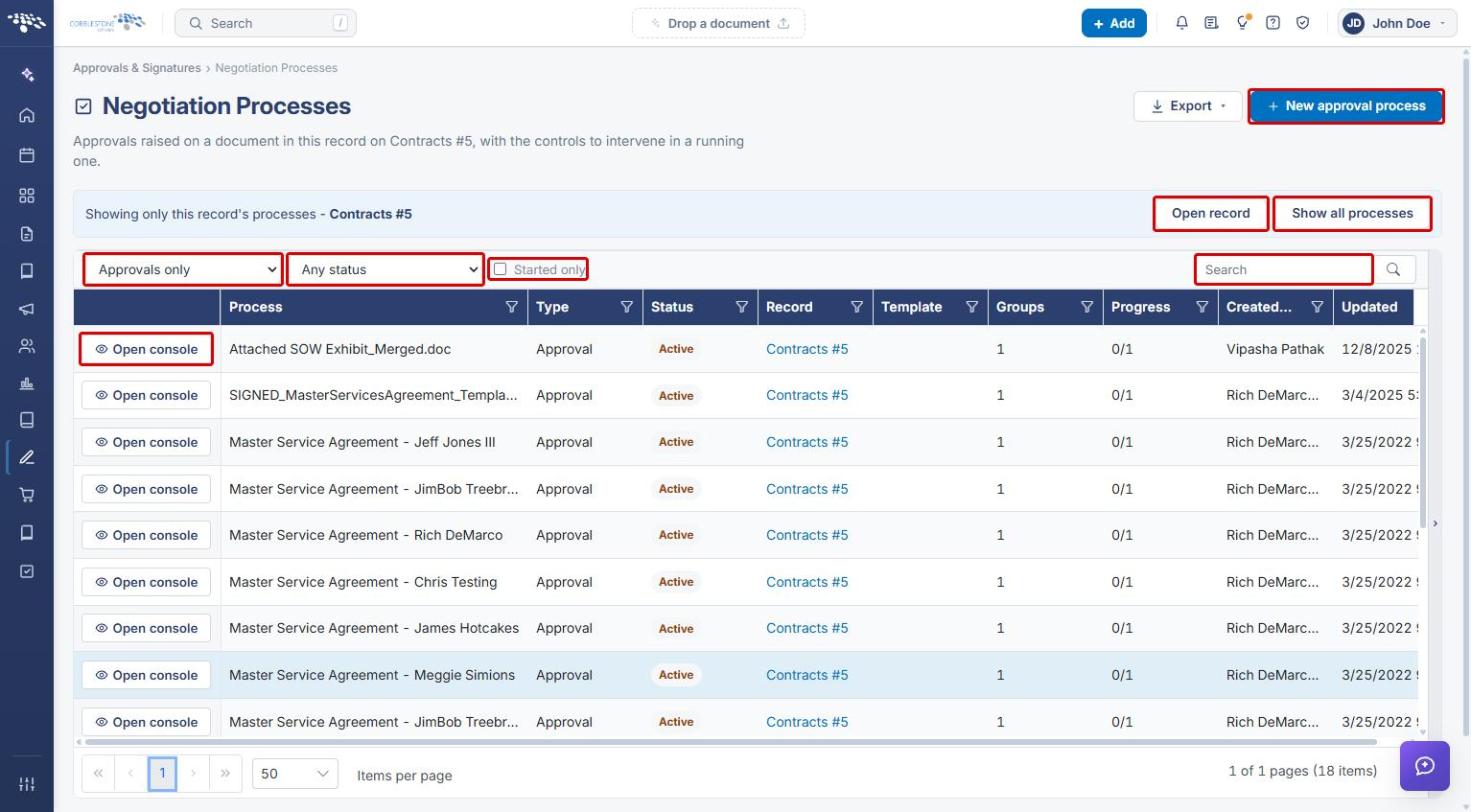
- New approval process: starts a new IntelliApprove process for this record (see Section 6).
- Open record: returns to the record's Record Details.
- Show all processes: removes the record filter and shows processes for all records.
- Process type filter: choose Approvals and signatures, Approvals only (the default when opened from IntelliApprove), or Signatures only.
- Status filter: choose Any status, Active, Paused, Completed, Rejected, Cancelled after starting, or Cancelled before starting.
- Started only: select to hide processes that have not been started yet.
- Search: find a process by name or other column values.
- Open console: opens that process's console (see Sections 7 and 8).
6. Creating a New IntelliApprove Process
- On the Negotiation Processes page, click New approval process. The Send a document for approval dialog opens.
- Complete the fields below.
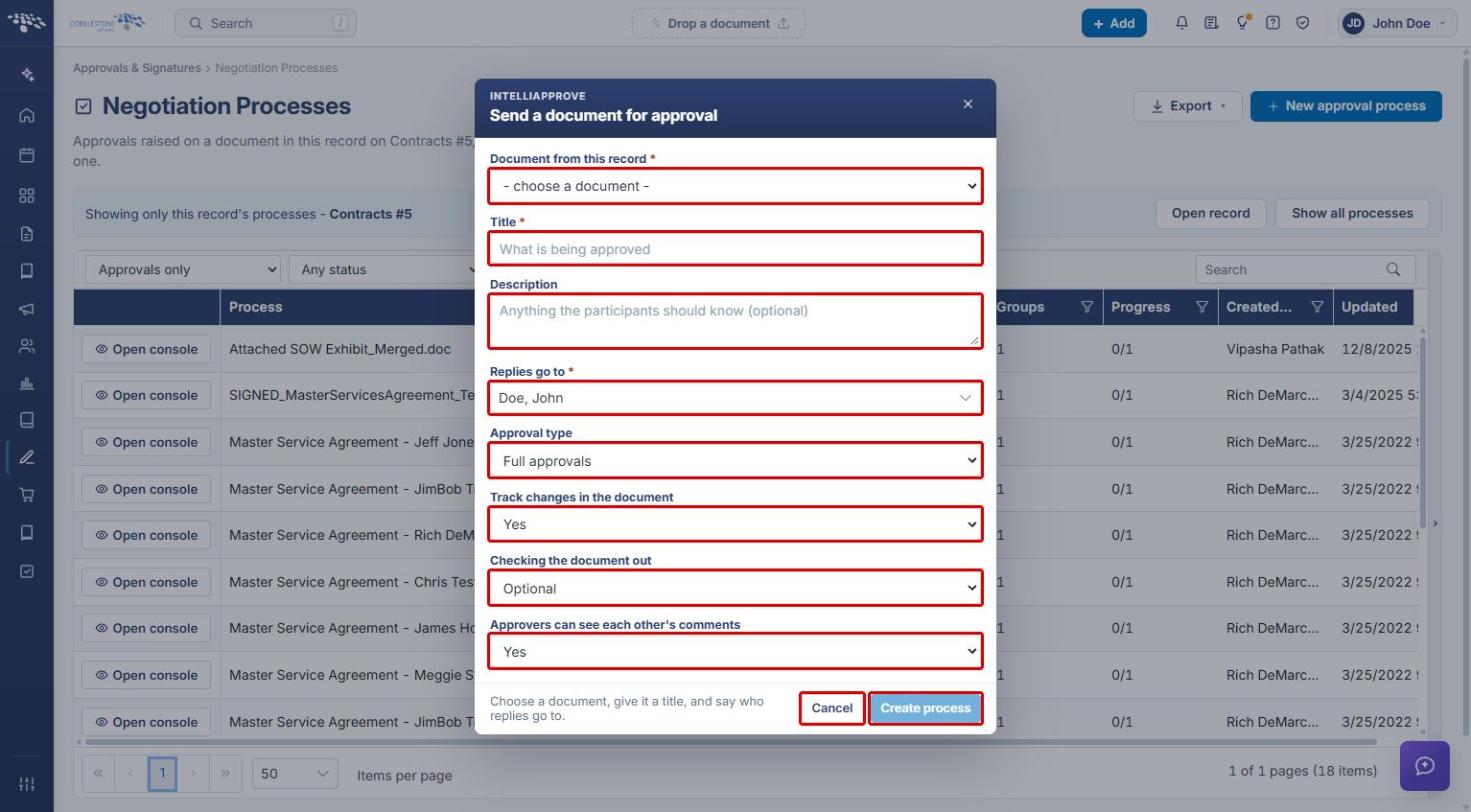
- Document from this record (required): choose the document to be approved. Only documents attached to the current record are listed.
- Title (required): enter what is being approved. This becomes the process name.
- Description (optional): add anything the participants should know.
- Replies go to (required): the employee who receives replies. This defaults to the current user.
- Approval type: Full approvals (participants approve or reject) or Acknowledge only (participants confirm they have seen it).
- Track changes in the document: Yes or No.
- Checking the document out: Optional or Required before editing.
- Approvers can see each other's comments: Yes or No.
- Click Create process. (Click Cancel to close the dialog without creating a process.)
7. Completing the Process Setup
After the process is created, its console opens. The console lists everything the process needs before it goes out — nothing is sent until you start it. A status badge such as NOT READY - REVIEW EACH ITEM BELOW appears beside the process name until all required items are complete.
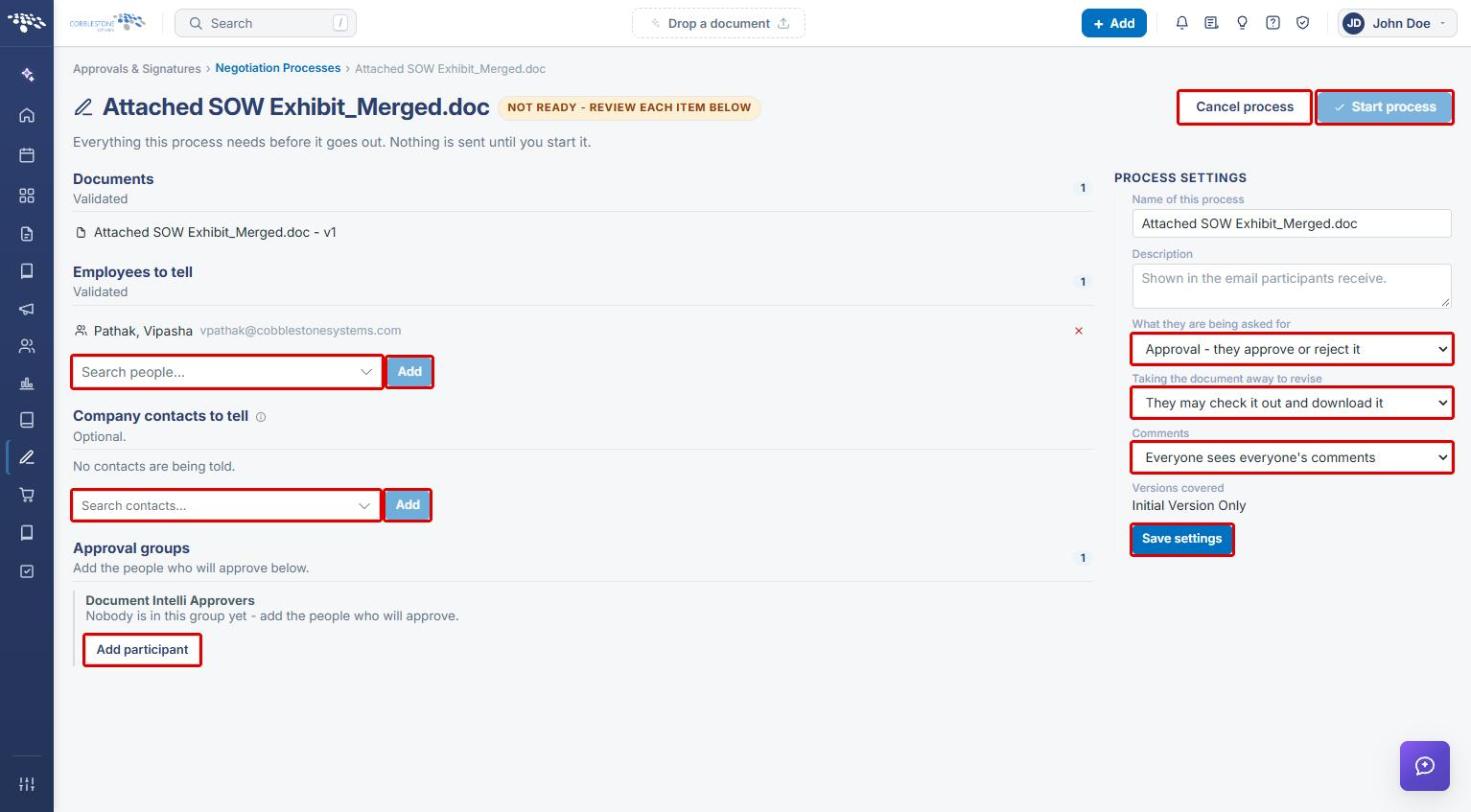
- Documents: confirm the correct document and version are listed.
- Employees to tell: use Search people... and click Add to notify internal employees. Click the red × beside a name to remove it.
- Company contacts to tell (optional): use Search contacts... and click Add to notify external contacts.
- Approval groups: in the Document Intelli Approvers group, click Add participant to add the people who will approve.
- Under Process Settings, review the following and click Save settings:
- Name of this process and Description (shown in the email participants receive).
- What they are being asked for: Approval - they approve or reject it or Acknowledgement only - they confirm they have seen it.
- Taking the document away to revise: They review it in place or They may check it out and download it.
- Comments: Each person sees only their own or Everyone sees everyone's comments.
- When every item is complete, click Start process to send the document for approval. To discard the process instead, click Cancel process.
8. Identifying and Managing a Running IntelliApprove Process
Once started, the process console shows the process status, groups, participants, and files. An INTELLIAPPROVE badge on the right side of the console confirms that the process is an IntelliApprove process.
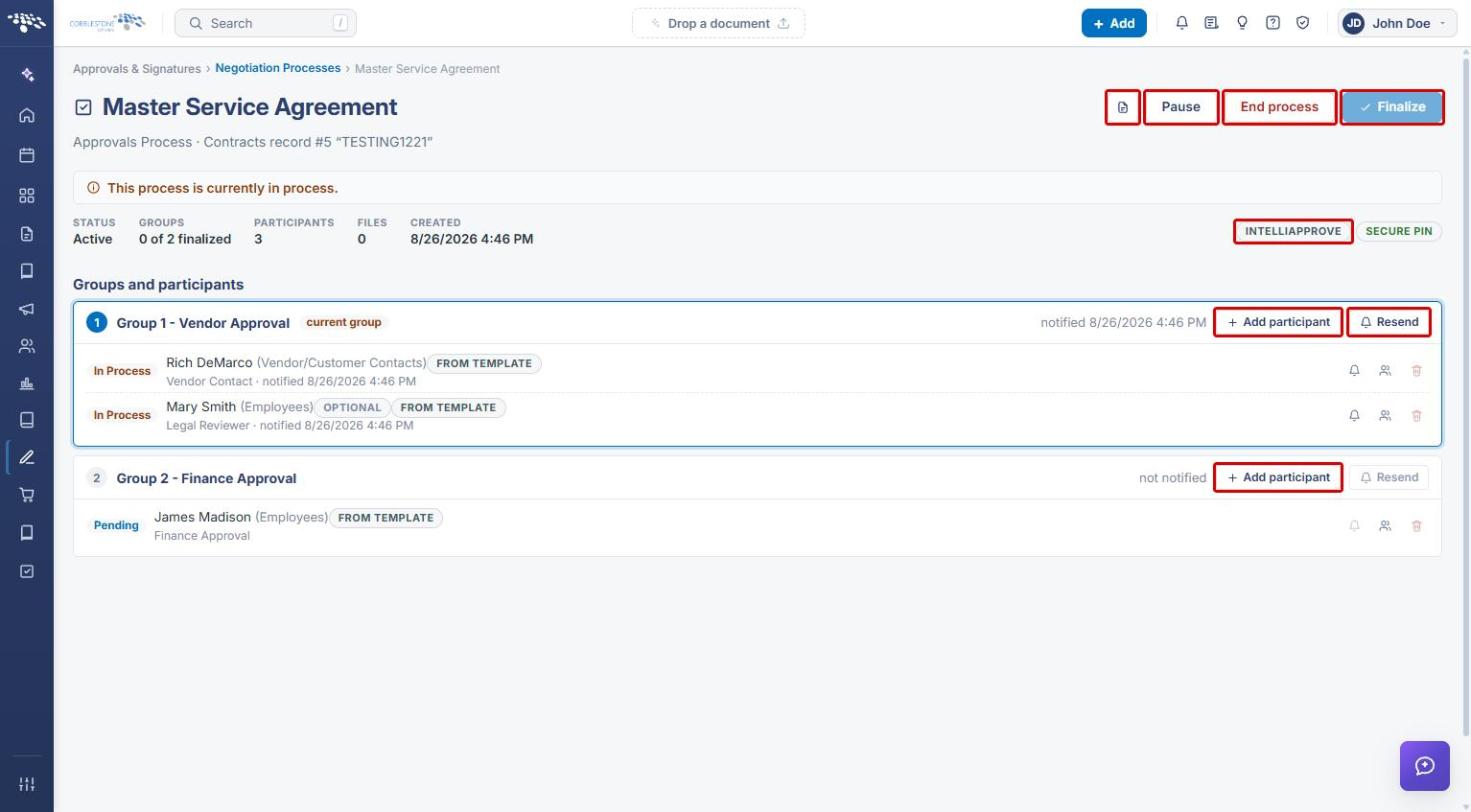
- INTELLIAPPROVE badge: marks the process as an IntelliApprove process rather than a standard approval process.
- Open record (document icon): returns to the record the process belongs to.
- Pause: temporarily stops the process.
- End process: ends the process before it is complete.
- Finalize: completes the process once approvals are in.
- Add participant: adds another person to an approval group.
- Resend: re-sends the notification to the group's participants. For individual participants, use the bell icon (Re-send this invitation) or the people icon (Replace this participant).
9. Related Articles
- IntelliSign Process from Record Details
- IntelliSign Overview