COBBLESTONE SOFTWARE
Contract Insight — User Guide
Initiating an eApproval
Module: Document Collaboration Gateway › Document Collaboration Gateway E-Approvals & E-Signatures › Initiating an eApproval
Note: Each procedure in this guide begins at the Contract Insight homepage, so any section can be followed on its own. Custom fields are configurable, so the exact field list on a contract category record may vary between environments.
1. Overview
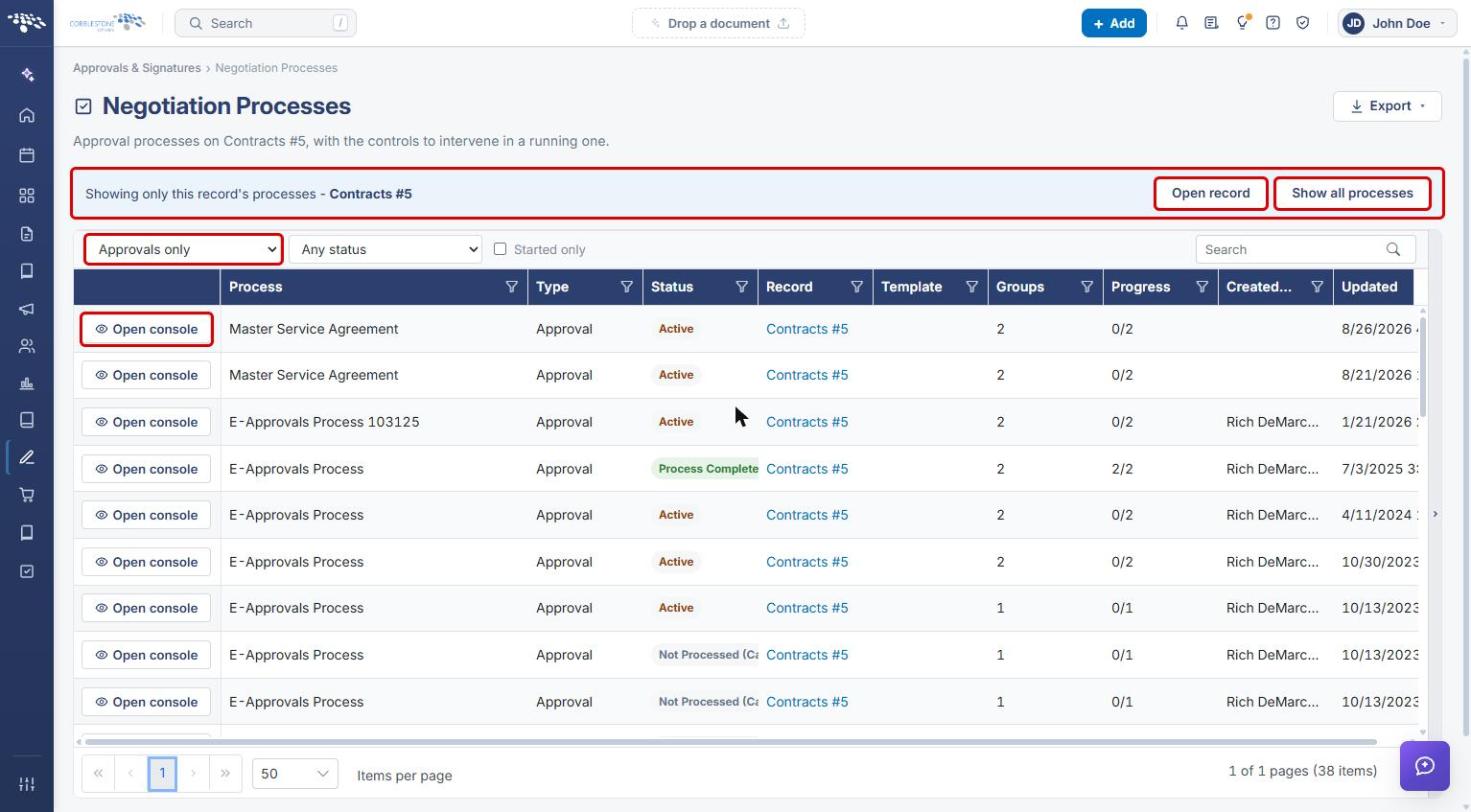
An e-approval is started on a generated document package. When a document is generated from a template that has E-Approvals turned on, the template's approval groups are copied onto the package, dormant until someone starts them. From the record's Attachments & Templates tab, the package's Approvals action shows the groups and a Set up approval process button, which opens the New approval process page — “The name, the settings and who is told — before anything is sent.” Once created, the process is tracked from the record's Actions › Approval Processes view, a Negotiation Processes list scoped to that one record (“Approval processes on [record], with the controls to intervene in a running one”).
2. Key Elements
- Record → Attachments & Templates → Merged Document Templates → Saved documents → Approvals (check icon) shows the approval groups and Set up approval process.
- The Approvals section on the document package page offers the same Set up approval process button.
- New approval process sets the process name, description, who replies go to, what participants are asked for, whether they can take the document away to revise, and how comments are shared.
- Record → Actions → Approval Processes (Document Processing group) opens a Negotiation Processes view scoped to that one record.
- Show all processes on the same screen switches to the system-wide list; Open record returns to the record.
3. Starting an Approval Process
3a. From the Record's Saved Documents
- Open the record (for example, a contract) and click the Attachments & Templates tab.
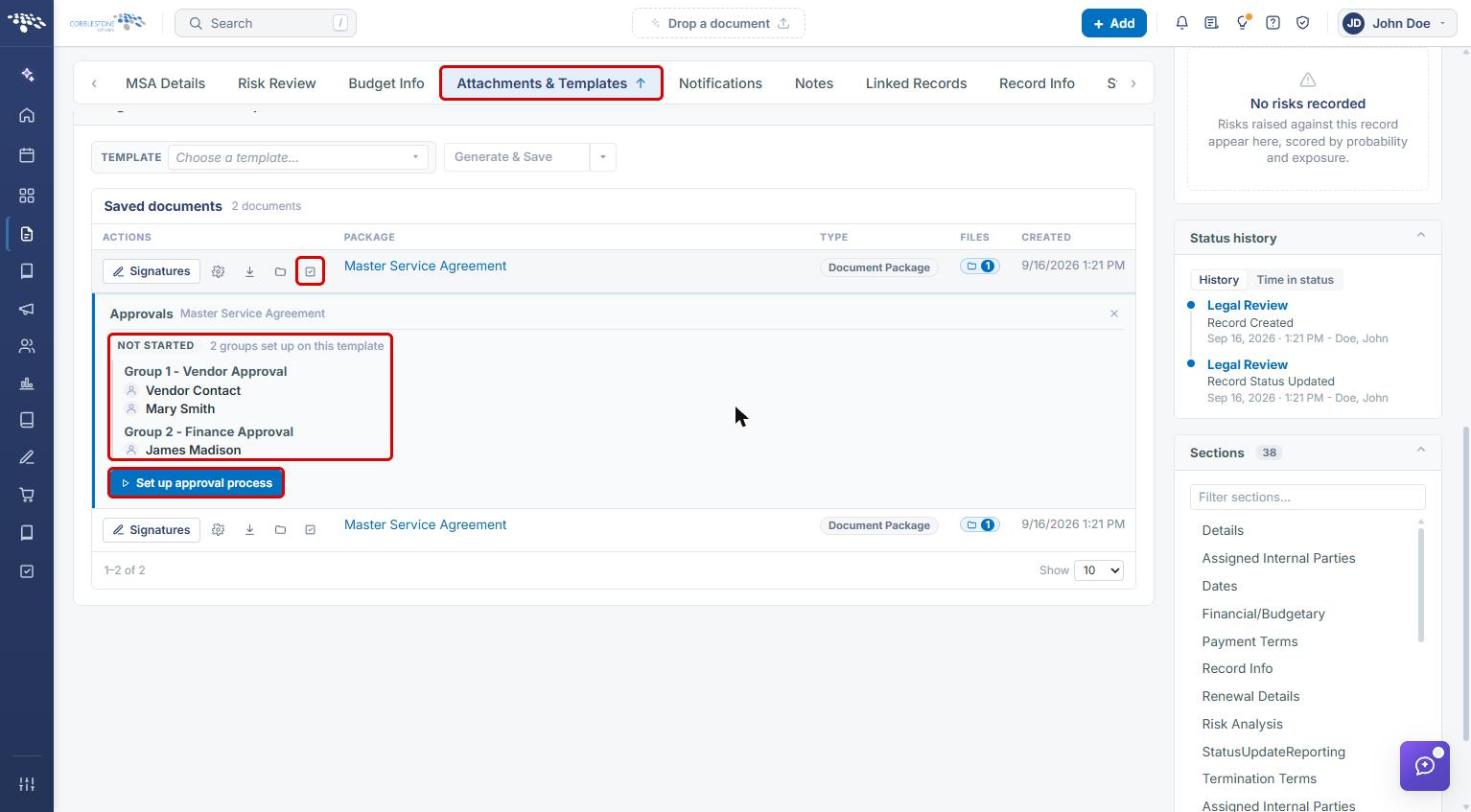
- Scroll to Merged Document Templates. In the Saved documents list, click the Approvals (check) icon on the document package's row.
- Review the approval groups shown under NOT STARTED (copied from the template).
- Click Set up approval process.
Note: If no groups are listed, add approval groups first, either on the template (Approvals & signing › E-Approvals) or on the document package (see 3b).
3b. From the Document Package
- Open the document package (for example, click the Manage icon on its Saved documents row, or open it from Administration › Merged Documents).
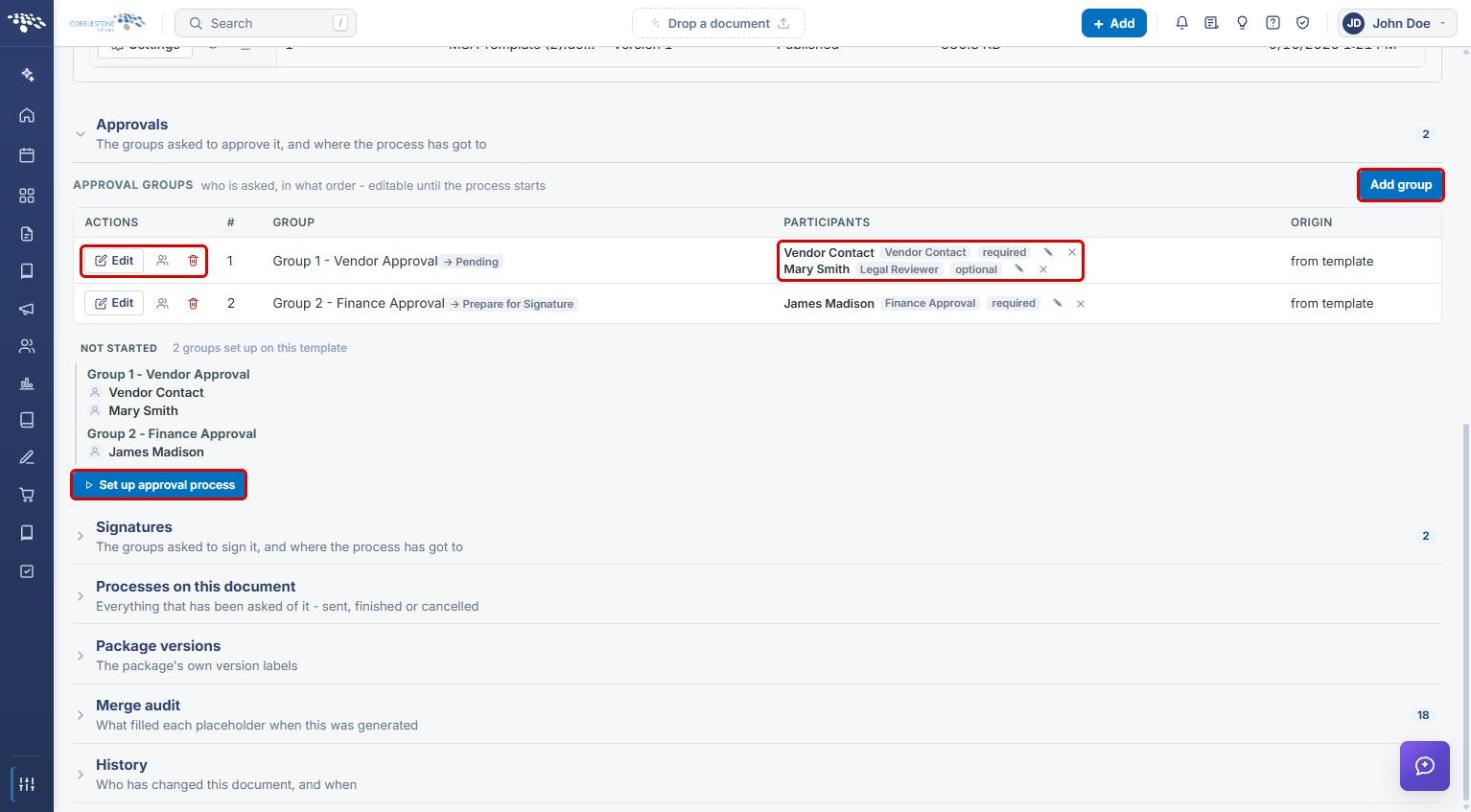
- Expand the Approvals section. Use Add group, Edit, and the participant icons to adjust who approves and in what order.
- Click Set up approval process.
4. Creating the Process
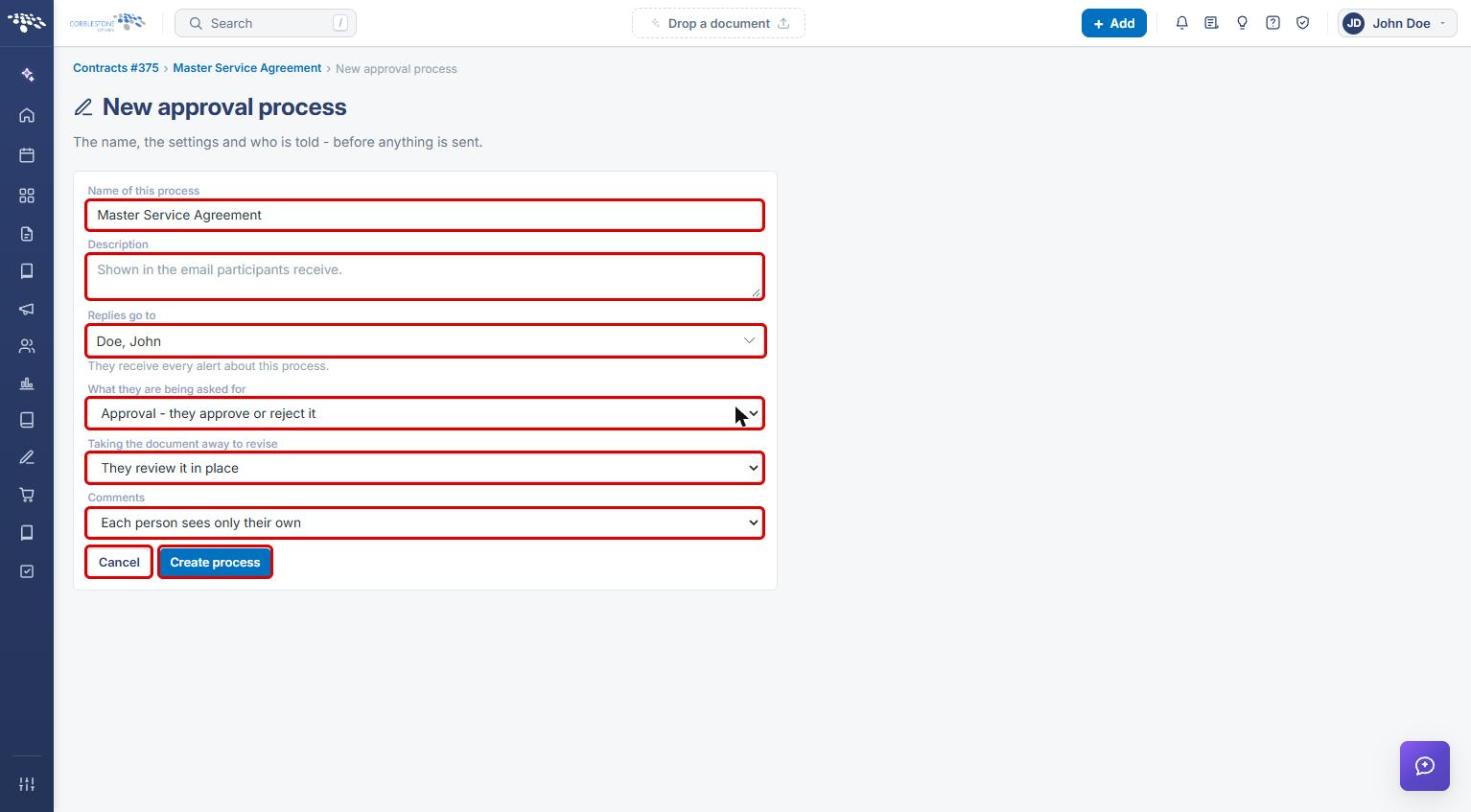
The New approval process page opens. Nothing is sent until the process is created and sent.
- Confirm or change the Name of this process.
- Enter a Description. It is shown in the email participants receive.
- Choose who Replies go to. This person receives every alert about the process.
- Choose What they are being asked for: Approval — they approve or reject it, or Acknowledgement only — they confirm they have seen it.
- Choose Taking the document away to revise: They review it in place, or They may check it out and download it.
- Choose how Comments are shared: Each person sees only their own, or Everyone sees everyone's comments.
- Click Create process, or Cancel to leave without creating it.
Note: After the process is created, it is sent to the first group. Approvers are invited group by group: within a group they act in parallel, and across groups sequentially.
5. Viewing a Record's Approval Processes
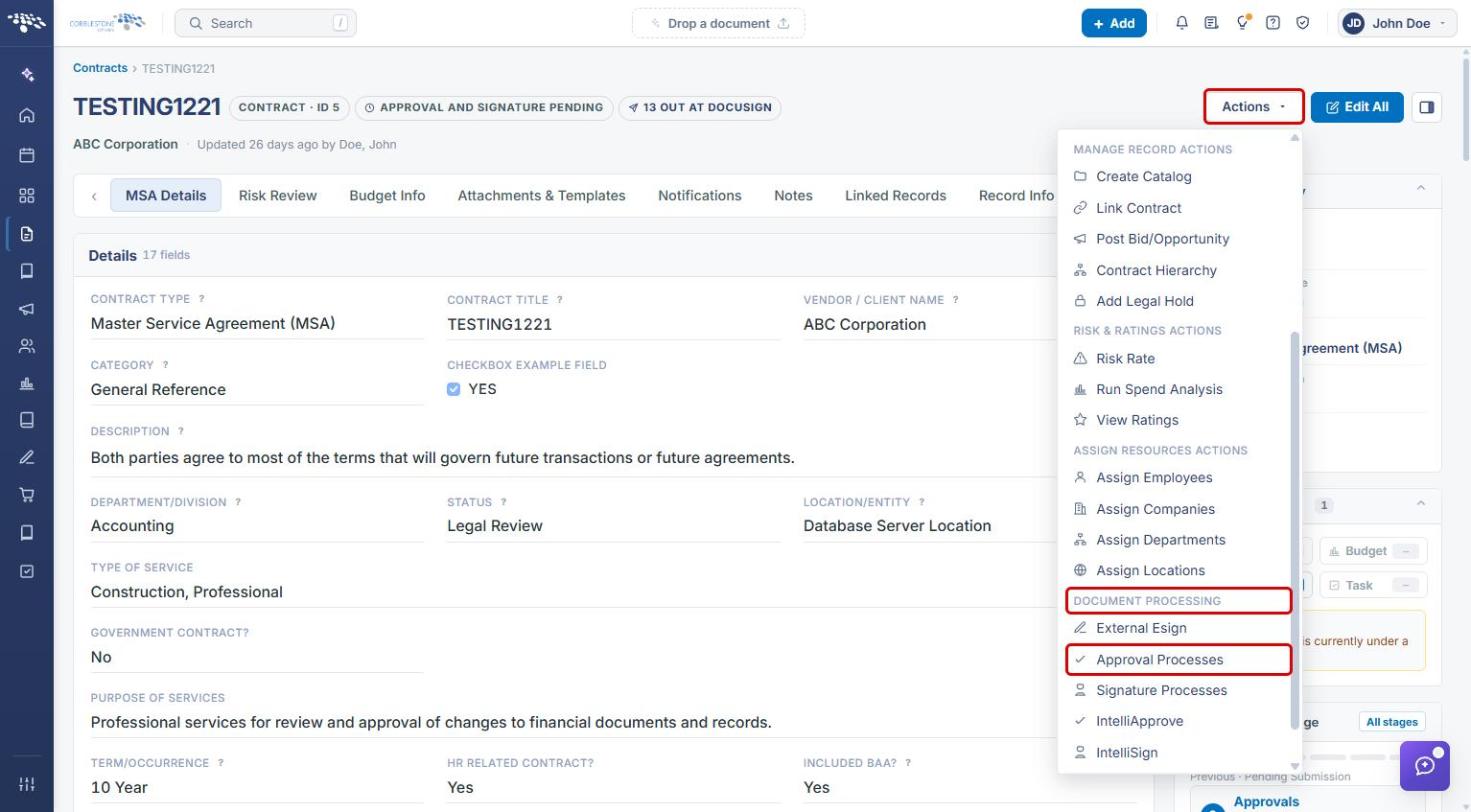
- Open the record and click Actions.
- Under Document Processing, select Approval Processes.
- The Negotiation Processes view opens, showing only this record's processes (“Showing only this record's processes — Contracts #5”).
- Click Open console on a process to manage it. Click Show all processes to switch to the system-wide list, or Open record to return to the record.
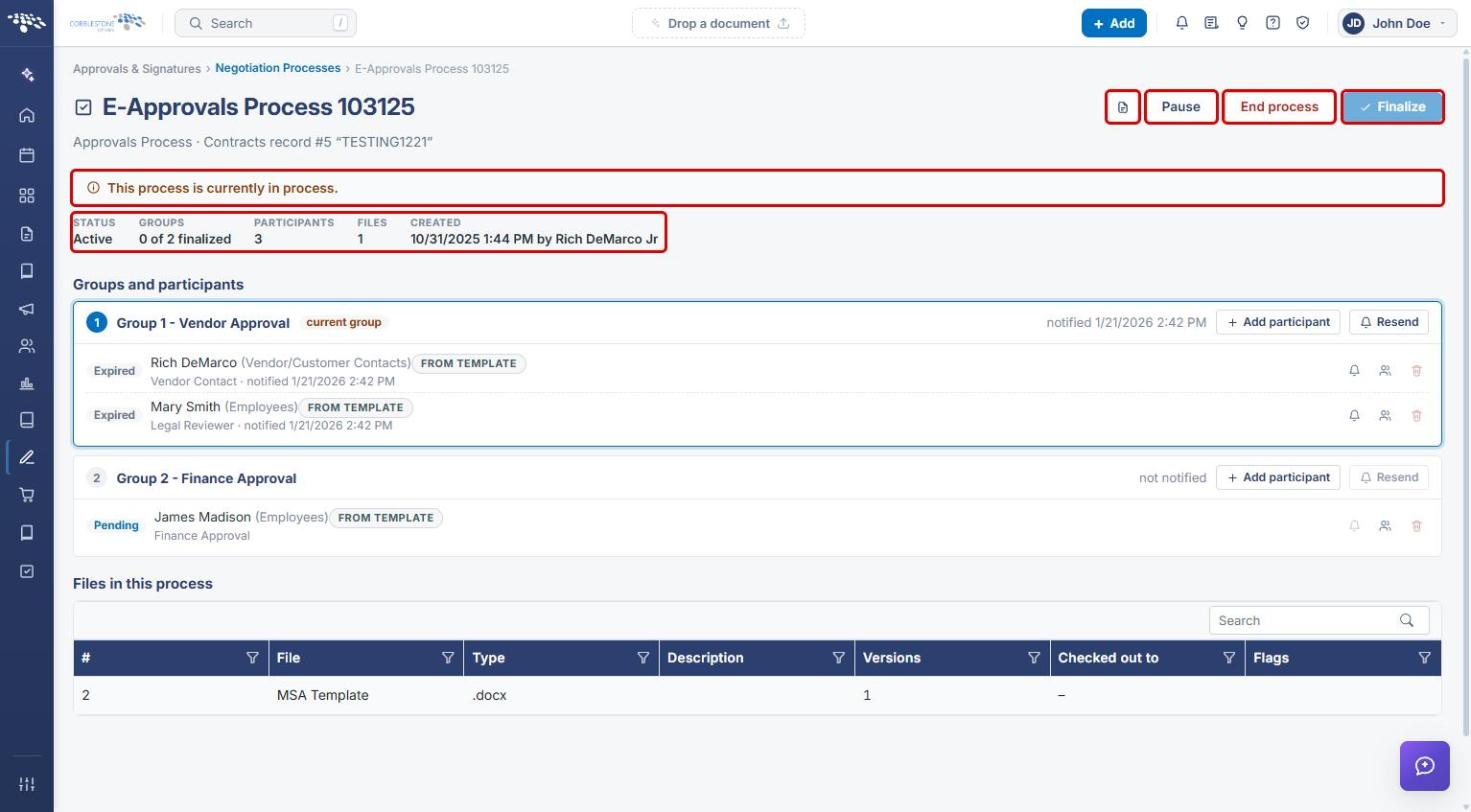
The console shows the process status, groups and participants, and files, with Pause, End process, and Finalize controls (see E-Approvals Processing).
6. Quick Reference Summary
| Task | How to Complete It |
|---|---|
| Start an approval from a record | Attachments & Templates → Saved documents → Approvals icon → Set up approval process. |
| Start an approval from a document package | Package → Approvals section → Set up approval process. |
| Adjust approvers before starting | Package → Approvals → Add group / Edit / participant icons. |
| Set name, recipient of replies, and options | New approval process page → fill in fields → Create process. |
| See a record's approval processes | Record → Actions → Approval Processes. |
| See all approval processes | Record-scoped view → Show all processes. |