Vendor/Company Contacts
Vendor/Company Details: Adding, Viewing, and Editing Contacts
Contract Insight enables authorized users to add contacts for a company through the Company Details screen.
1. Click Company Contacts on the side menu of the Company Details screen or scroll to the area.
.png)
2. Either method goes to the Contacts section of the Company Details screen.
To Add a Contact for the Company
3. Click Add Contact in the Contacts section.
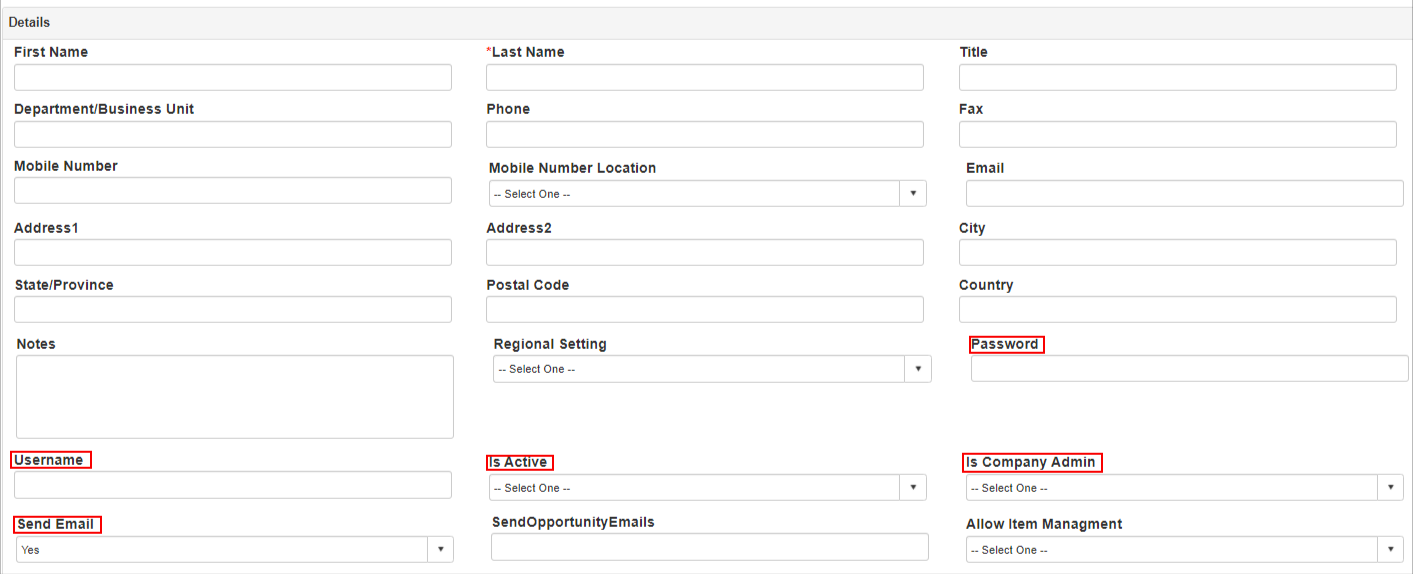
4. The Add Company Contact screen displays.
Note: The following fields only apply for organizations that have purchase the optional Vendor/Client Gateway add-on module:
a. Username & Password: Each Company Contact will need his or her own Username and Password to be able to log-in to the Gateway.
b. Is Active: If the Company Contact is allowed to log-in to the Vendor/Client Gateway, the Is Active field needs to be set to Yes (in addition to having a username and password set for the contact).
c. Is Company Admin: If the Company Contact you are adding is the main point of contact for the Company, the Is Company Admin should be set to Yes. The Company Admin will be able to log-in to the Vendor/Client Gateway and will have the ability to manage (Add, Update, and Delete) additional users within his or her organization.
5. Enter all additional necessary/required information and click Save & Continue to save the new contact information (click Return to Vendor Details on the side menu to cancel the addition of the new contact).
6. The new contact is added to the Contacts section of the Company Details screen..png)
Edit a Company Contact
1. Click the View for the Company Contact line item to edit.
2. The Company Contact Details screen for the Contact displays.![]() 3. Click the Pencil icon that appears to the right of the field name on the Contact. To update multiple fields at one time, click the Pencil icon to the right of the Field Group name.
3. Click the Pencil icon that appears to the right of the field name on the Contact. To update multiple fields at one time, click the Pencil icon to the right of the Field Group name.
4. The Edit Record pop up screen displays where you can update the value of the field. When done making changes, click Save Record to save the updated value for the field (click the X in the upper right corner of the Edit Record pop up screen to cancel updating the field value). Click the Pencil icon to the right of the field group to edit multiple fields at once. For example, if you edit two fields and click Save Record, only those two fields are updated..png)
.png)