COBBLESTONE SOFTWARE
Contract Insight — User Guide
Launchpad
Application Configuration: Implementation Readiness and Stored Data
Note: Each procedure in this guide begins at the Contract Insight homepage, so any section can be followed on its own. The Launchpad reports on configuration and data across the whole application and is intended for Application Administrators.
1. Overview
Bringing a Contract Insight system into service means entering or importing data across a good many areas, in a sensible order — reference data before the records that draw on it, people and permissions before anyone signs in. Keeping track of what has been done and what is outstanding is the job of the Launchpad, described on screen as “everything it takes to get this system ready for go-live.”
The Launchpad presents every setup area as a card showing what that area currently holds — a count of records, or a short statement of how it is configured — together with a status and a link straight through to the screen that manages it. Read together, the cards are a road map of what has been populated and what still needs attention.
Counts are the key to reading it. Several areas arrive with default records as standard, so a non-zero count does not by itself mean the area has been reviewed. Treat the Launchpad as an overview that guides the work rather than as a definitive statement that an area is finished.
2. Accessing the Launchpad
To open it:
From the Contract Insight homepage, click Administration at the bottom of the left navigation menu. On the Administration page, under Configuration & Fields, select Launchpad.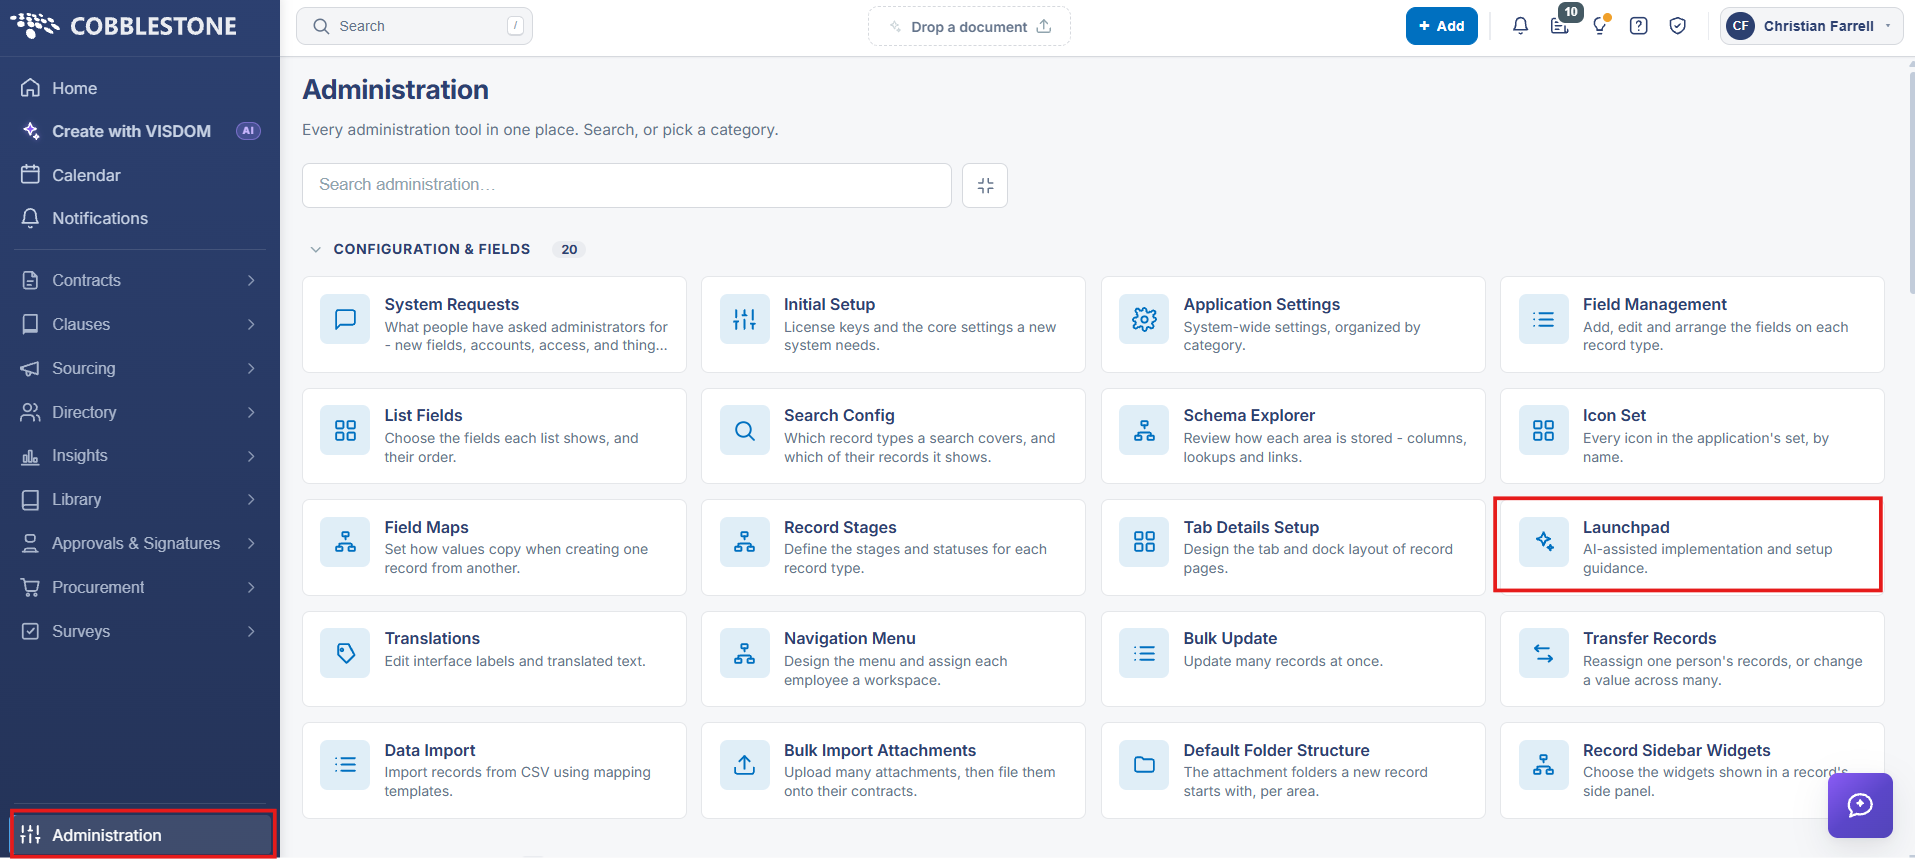
Three views are offered by the buttons in the left column: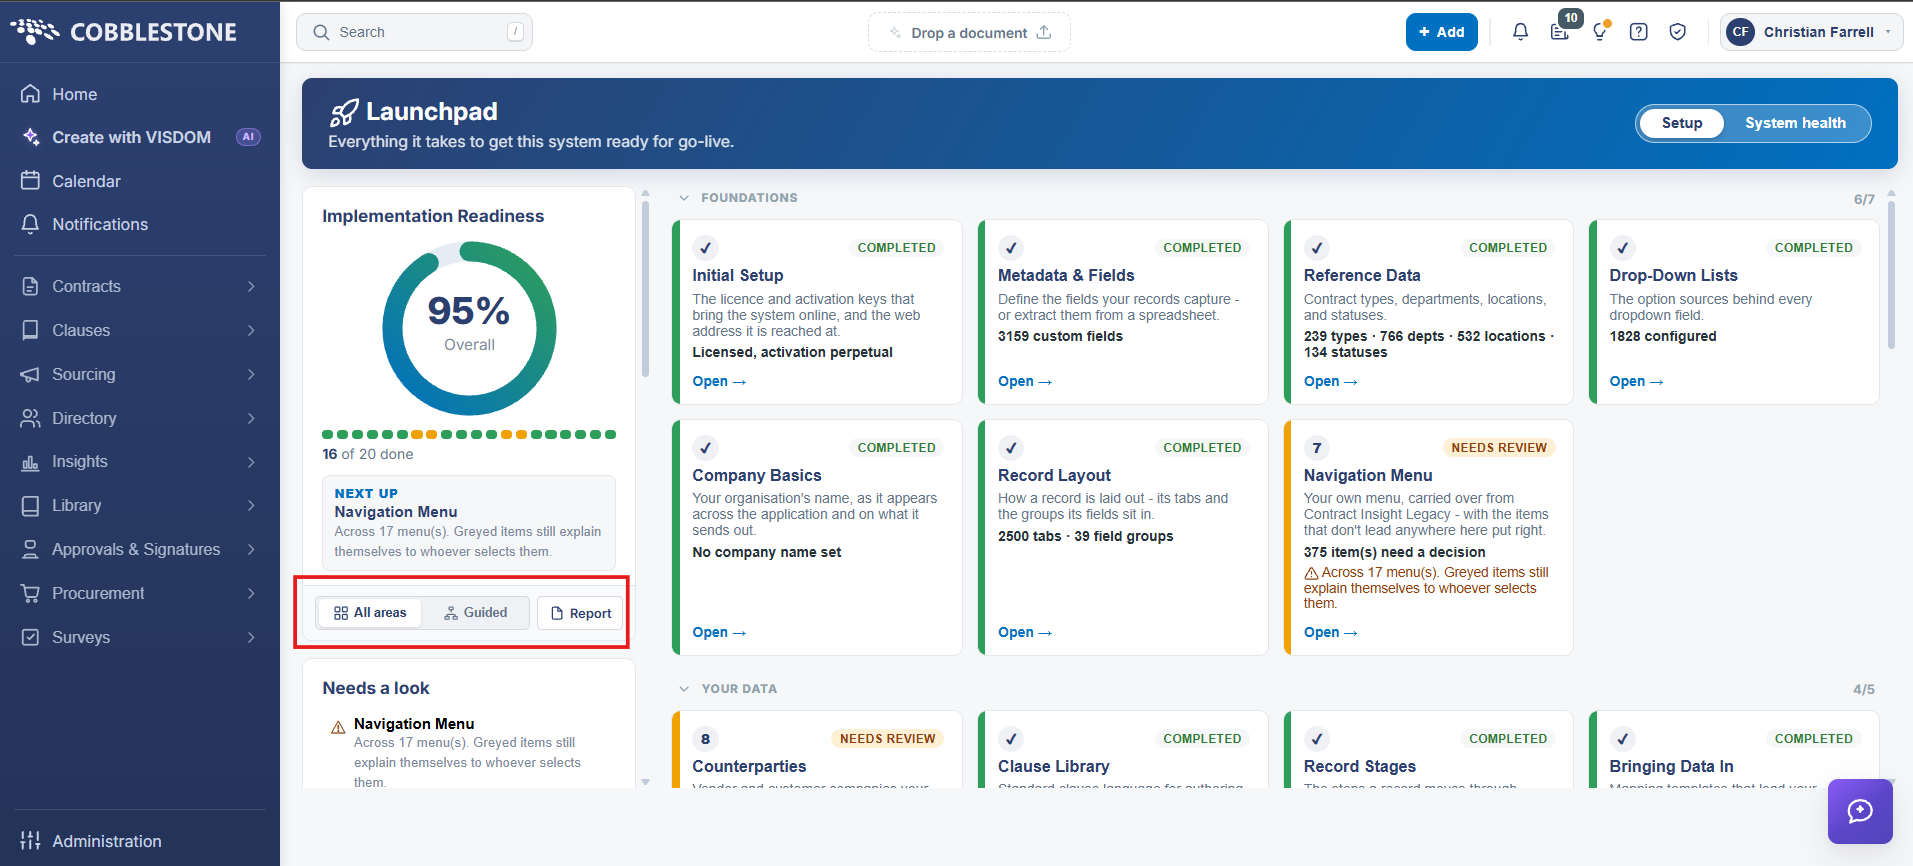
- All areas — every setup area as a card, grouped into sections
- Guided path — the same areas one at a time, in the recommended order
- Report — a printable Implementation Readiness Report, opened in a new tab
3. Reading Implementation Readiness
The column down the left side summarises where the implementation stands: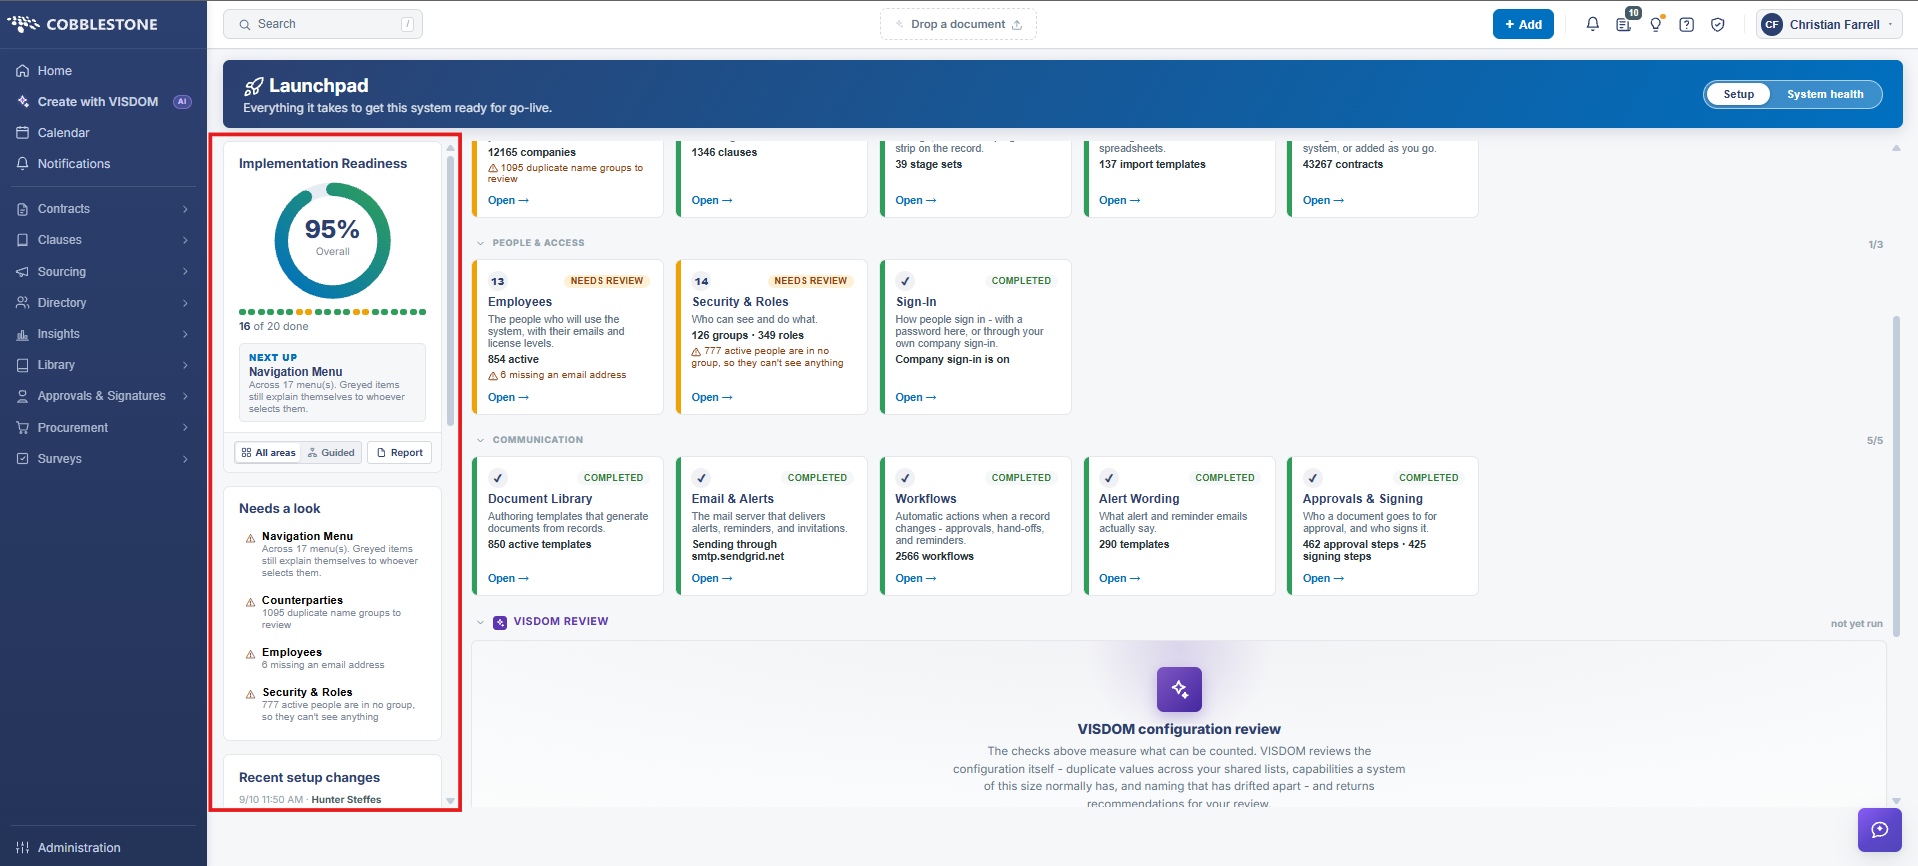
- Implementation Readiness — an overall percentage with a progress ring, a row of markers for the individual areas, and a count such as “16 of 20 done”
- Next up — the area the Launchpad suggests working on next, with a one-line explanation of why
- Needs a look — the areas currently flagged, each with the specific issue, for example an area where people are in no security group, or one with duplicate company names to review
- Recent setup changes — a running log of configuration changes with the date, time and who made them
Note: Needs a look is the most directly useful part of the screen day to day. It names concrete problems rather than incomplete sections, so it stays worth checking well after go-live.
4. The Area Cards
In the All areas view the cards are grouped into sections, each showing how many of its areas are done — for example Foundations, Your Data, People & Access and Communication.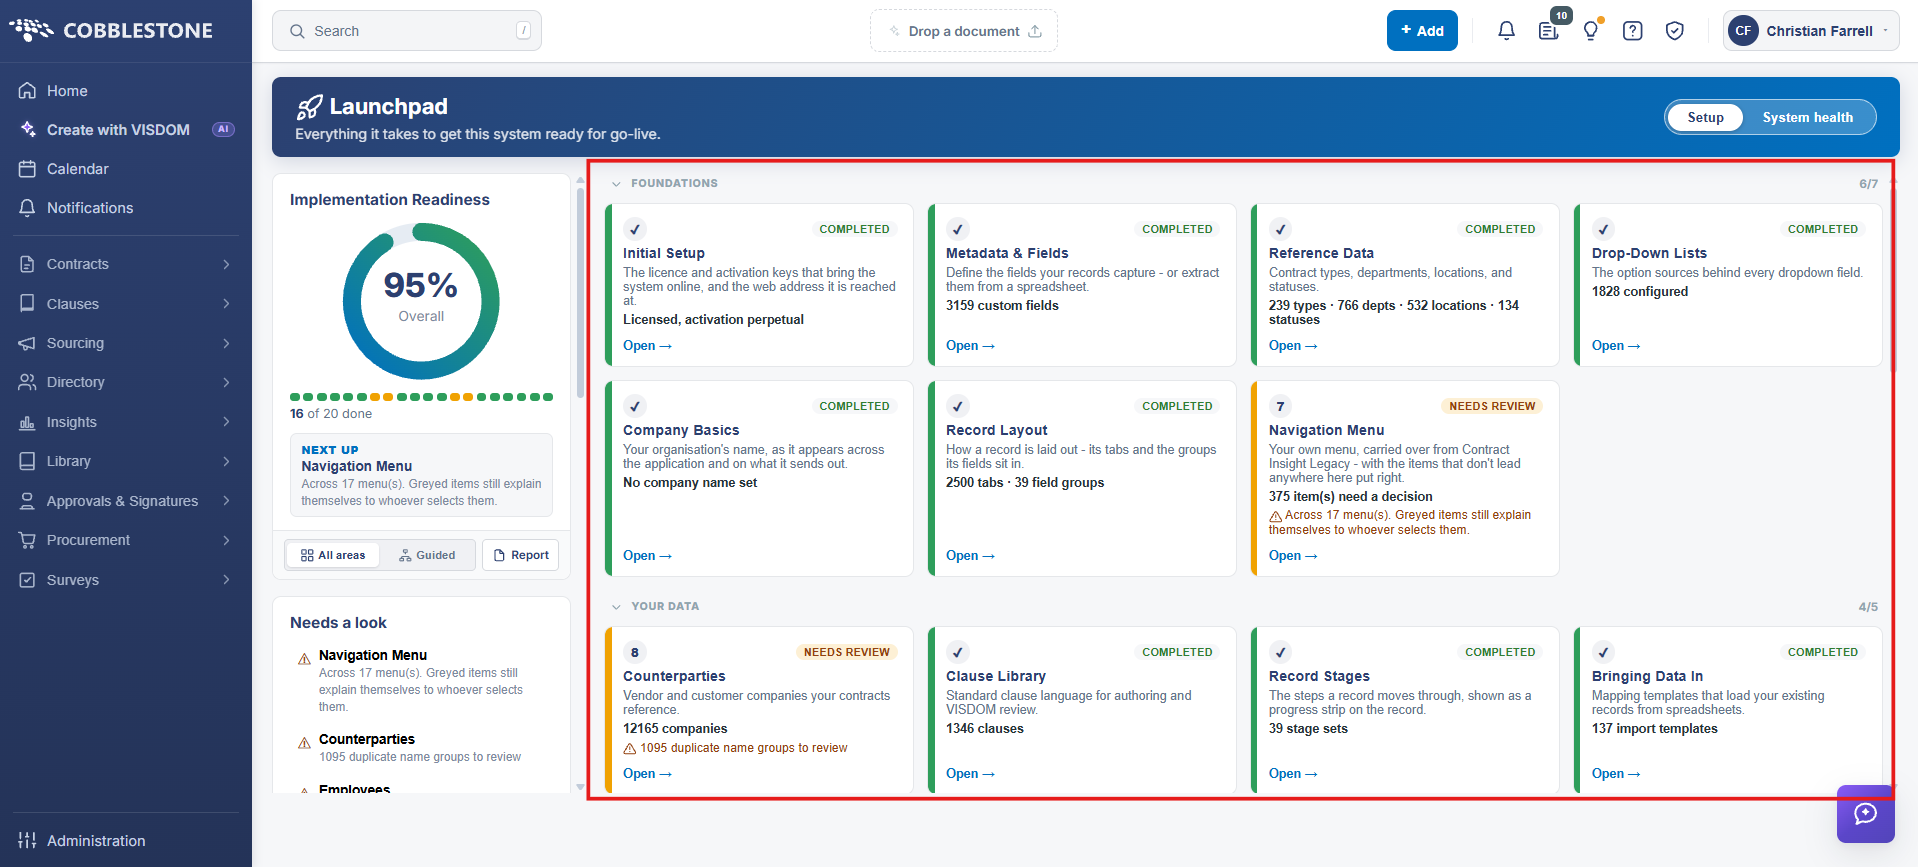
Each card carries:
- A status — Completed, Needs review, In progress, Not started, or Signed off — or the area’s step number where it is still outstanding
- The area name and a plain-language description of what it covers
- A current state line: the number of records found, or a short statement of how the area is configured — for example a count of contract types, departments, locations and statuses, or the mail server alerts are sent through
- A warning line where the area needs attention, naming the specific issue
- An Open → link that goes directly to the screen where that area is managed
Note: The current-state line is the equivalent of a record count, and is what makes the Launchpad useful as a data overview: it answers “is there anything in this area yet, and how much” without opening each screen in turn.
5. Working Through the Guided Path
The Guided path view presents the areas one at a time in the recommended order, which is the order CobbleStone advises data be entered or imported.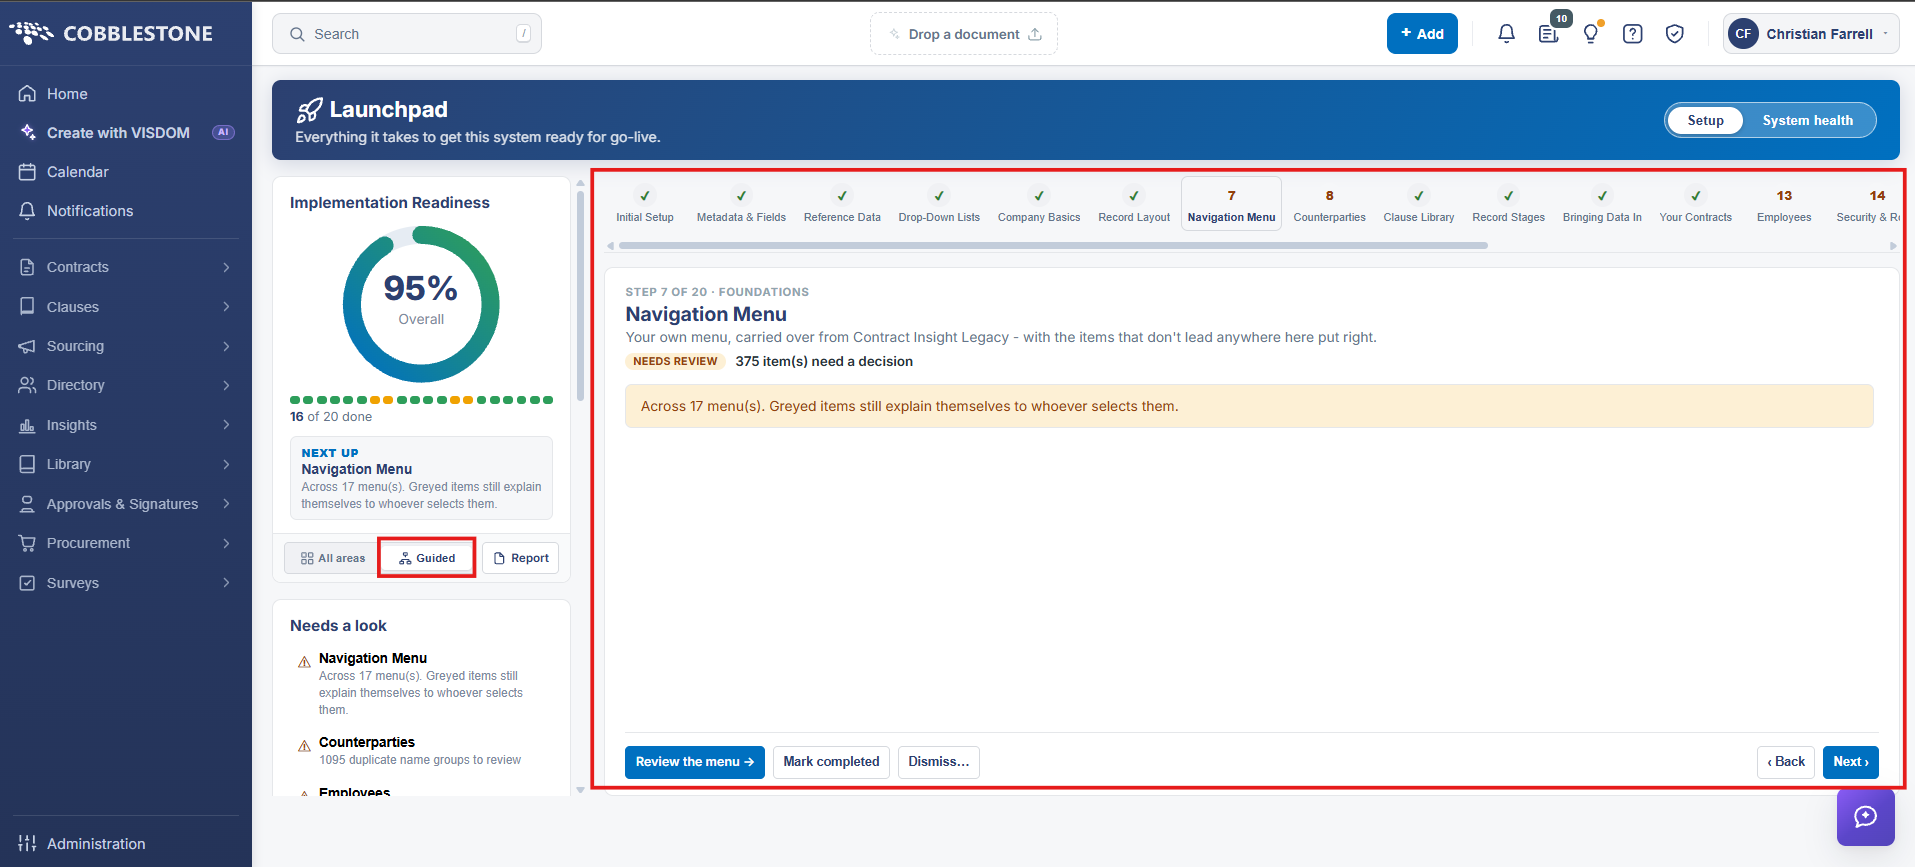
Steps:
- From the Contract Insight homepage, click Administration at the bottom of the left navigation menu. On the Administration page, under Configuration & Fields, select Launchpad.
- Click Guided path in the column.
- Use the stepper strip across the top to see the sequence and which steps are already ticked, or move with ‹ Back and Next ›.
- Read the current step — it shows its position in the sequence and section, for example “Step 7 of 20 · Foundations”, along with the area’s description, status and any warning.
- Use the action button on the step to go to the screen that manages that area and do the work there.
- Return to the Launchpad and mark the step Mark completed, or Not needed… where the area does not apply to your implementation.
Note: Marking an area Not needed… takes it out of the readiness calculation and lists it under “Deliberately not set up” on the report, which is how an implementation records a considered decision to skip something rather than leaving it looking unfinished.
6. The Implementation Readiness Report
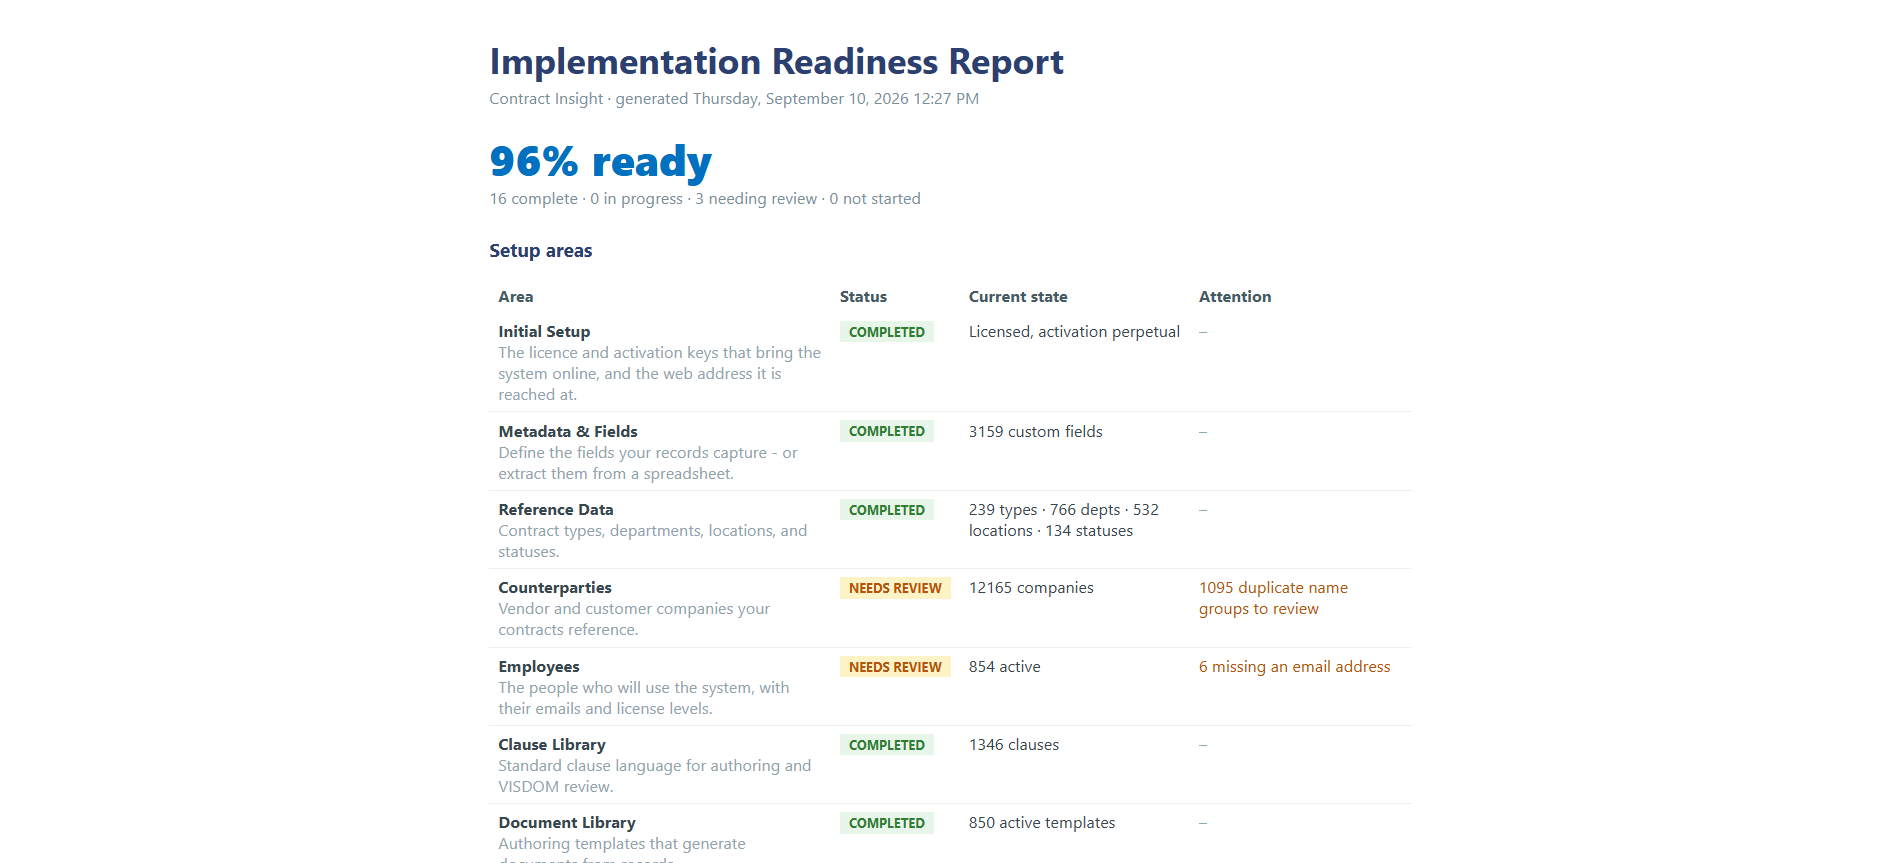
The Report button produces a printable Implementation Readiness Report in a new tab, headed with the system name and the date and time it was generated.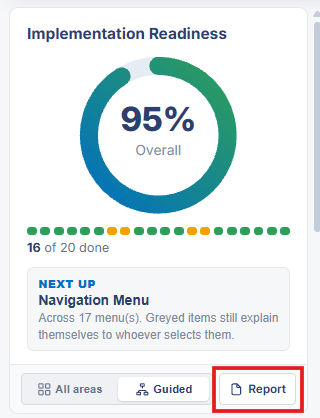
Steps:
- From the Contract Insight homepage, click Administration at the bottom of the left navigation menu. On the Administration page, under Configuration & Fields, select Launchpad.
- Click Report in the upper right. The report opens in a new tab.
- Read the headline figure — a readiness percentage with a breakdown such as “16 complete · 0 in progress · 3 needing review · 0 not started”.
- Work down the Setup areas table, which lists every area with its Status, Current state and Attention columns, so outstanding items can be seen at a glance.
- Check Deliberately not set up for anything ruled out of scope.
- Print or save the page from the browser to share the position with the project team.
Note: The report also expands the flagged items into detail — the counterparty duplicate review queue, for example, lists the affected company names and record counts, which makes it a working list rather than just a summary.
7. Using the Launchpad with Data Import
The Launchpad tells you which areas still need data; the Data Import screen is how volume data is loaded into them. Used together, the Launchpad identifies the gap and reports the count afterwards, and Data Import does the filling.
The Launchpad reflects this directly: the Bringing Data In card reports how many import templates exist, and links through to the Data Import screen. Working an area then means reading its count on the Launchpad, loading or entering the data, and returning to confirm the count has moved.
Note: A count alone does not confirm the data is right. After a bulk load, open a few of the records themselves — the Launchpad reports how many records exist, not whether their field values are correct.
8. Quick Reference Summary
Task | How to Complete It |
Open the Launchpad | Homepage → Administration → Configuration & Fields → Launchpad. |
Switch views | All areas for the cards, Guided path for one step at a time, Report for a printable summary. |
Check readiness | The Implementation Readiness ring, the overall count such as “16 of 20 done”, and the Next up suggestion. |
Find problems | The Needs a look list names the specific issue in each flagged area. |
Read a card | Status, description, a current-state line of counts or configuration, any warning, and an Open → link. |
Work in order | Guided path follows the recommended sequence; ‹ Back and Next › move between steps. |
Record a decision | Mark completed when an area is done, or Not needed… to rule it out of scope. |
Share the position | Report opens the Implementation Readiness Report in a new tab; print or save it from the browser. |
Fill the gaps | Load volume data through Data Import, then return to the Launchpad to confirm the count has moved. |