COBBLESTONE SOFTWARE
Contract Insight — User Guide
File Queue
04. End User General Information › Header Area and Top & Side Menus › File Queue
Note: Each procedure in this guide begins at the Contract Insight homepage, so any section can be followed on its own. Custom fields are configurable, so the exact field list on a contract category record may vary between environments.
Adding a File: File Queue
This feature allows users with the proper permissions to select a text-based document/file to upload and then go through the file and select text (within the file) to be highlighted and copied over to a field on the applicable add screen. If not processing the file immediately or assigning the process to another user, the File Queue is invaluable.
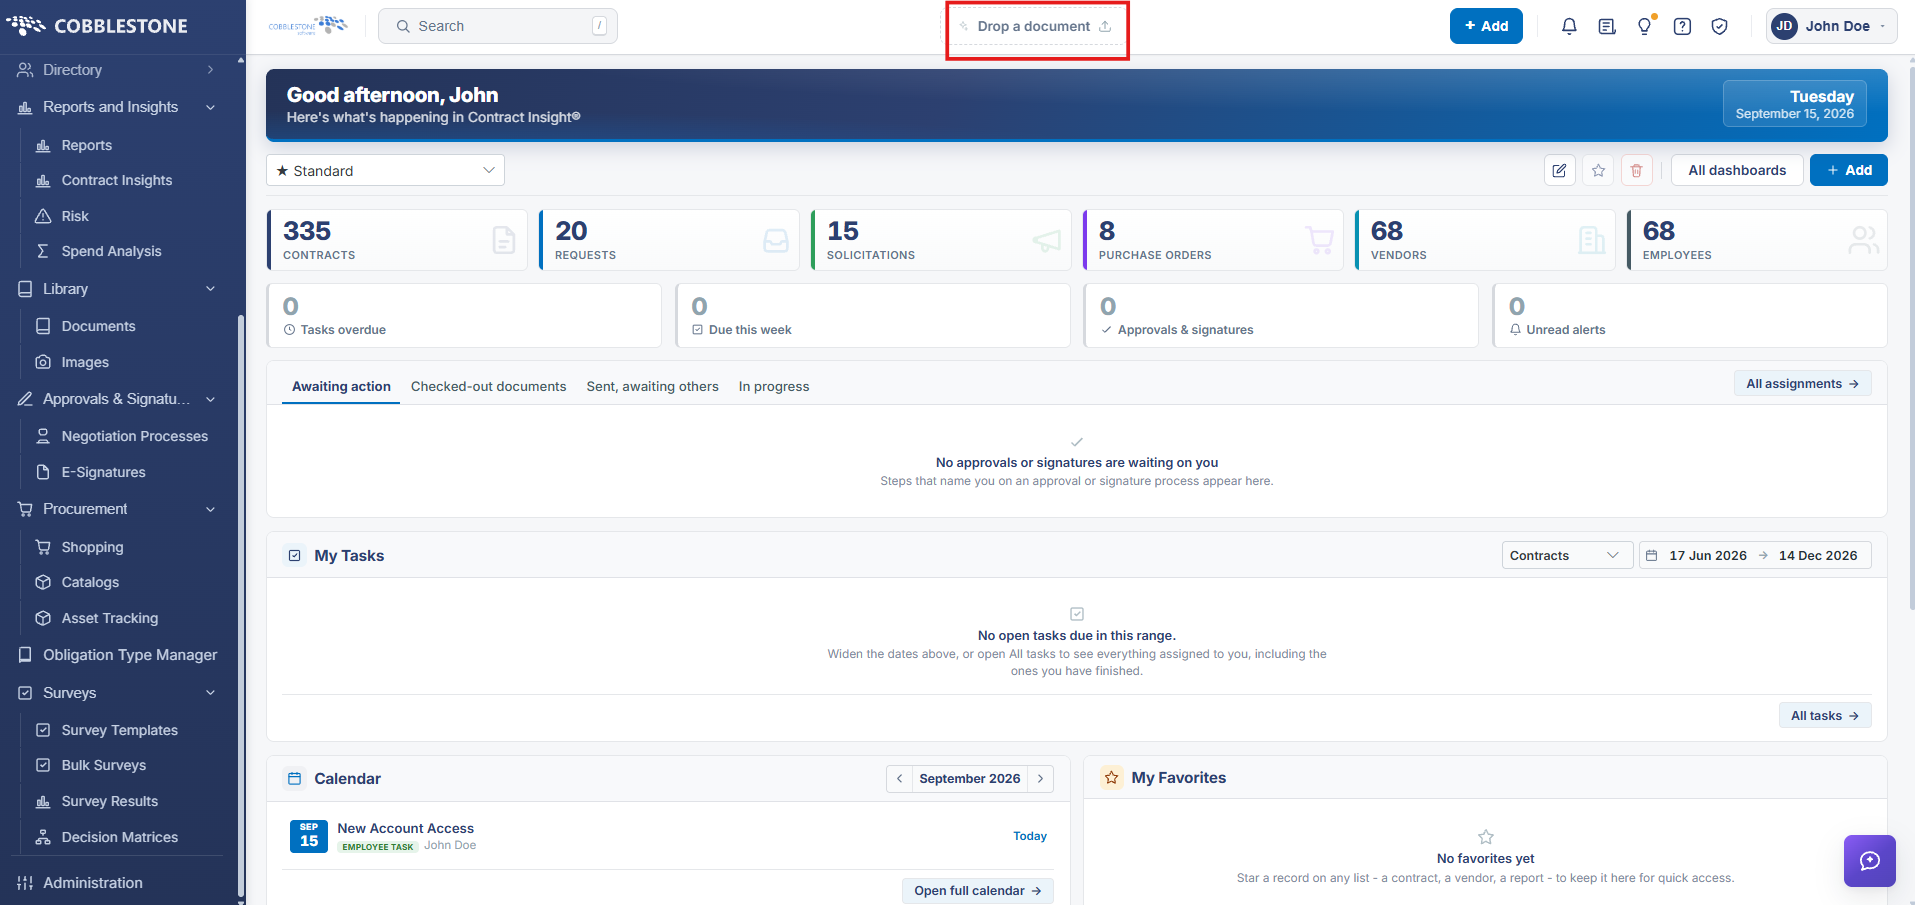
Add a File to the Queue
Or on any screen that has the grey drag and drop box in the side menu you can drag and drop a file.
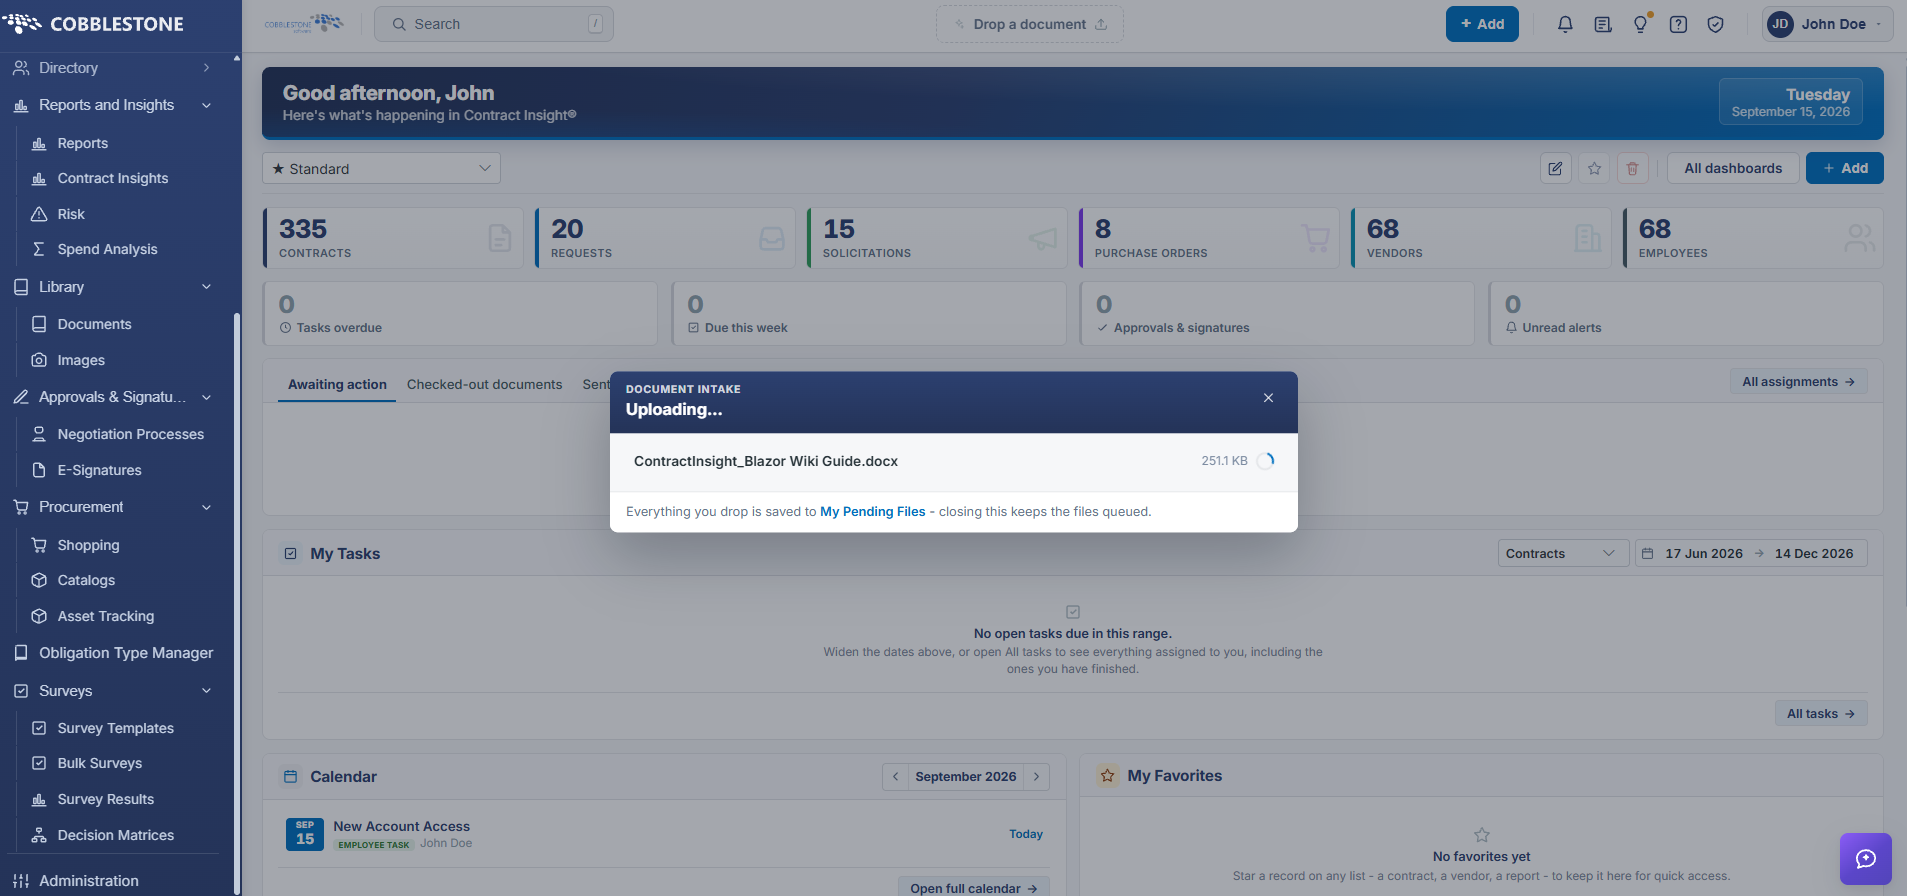
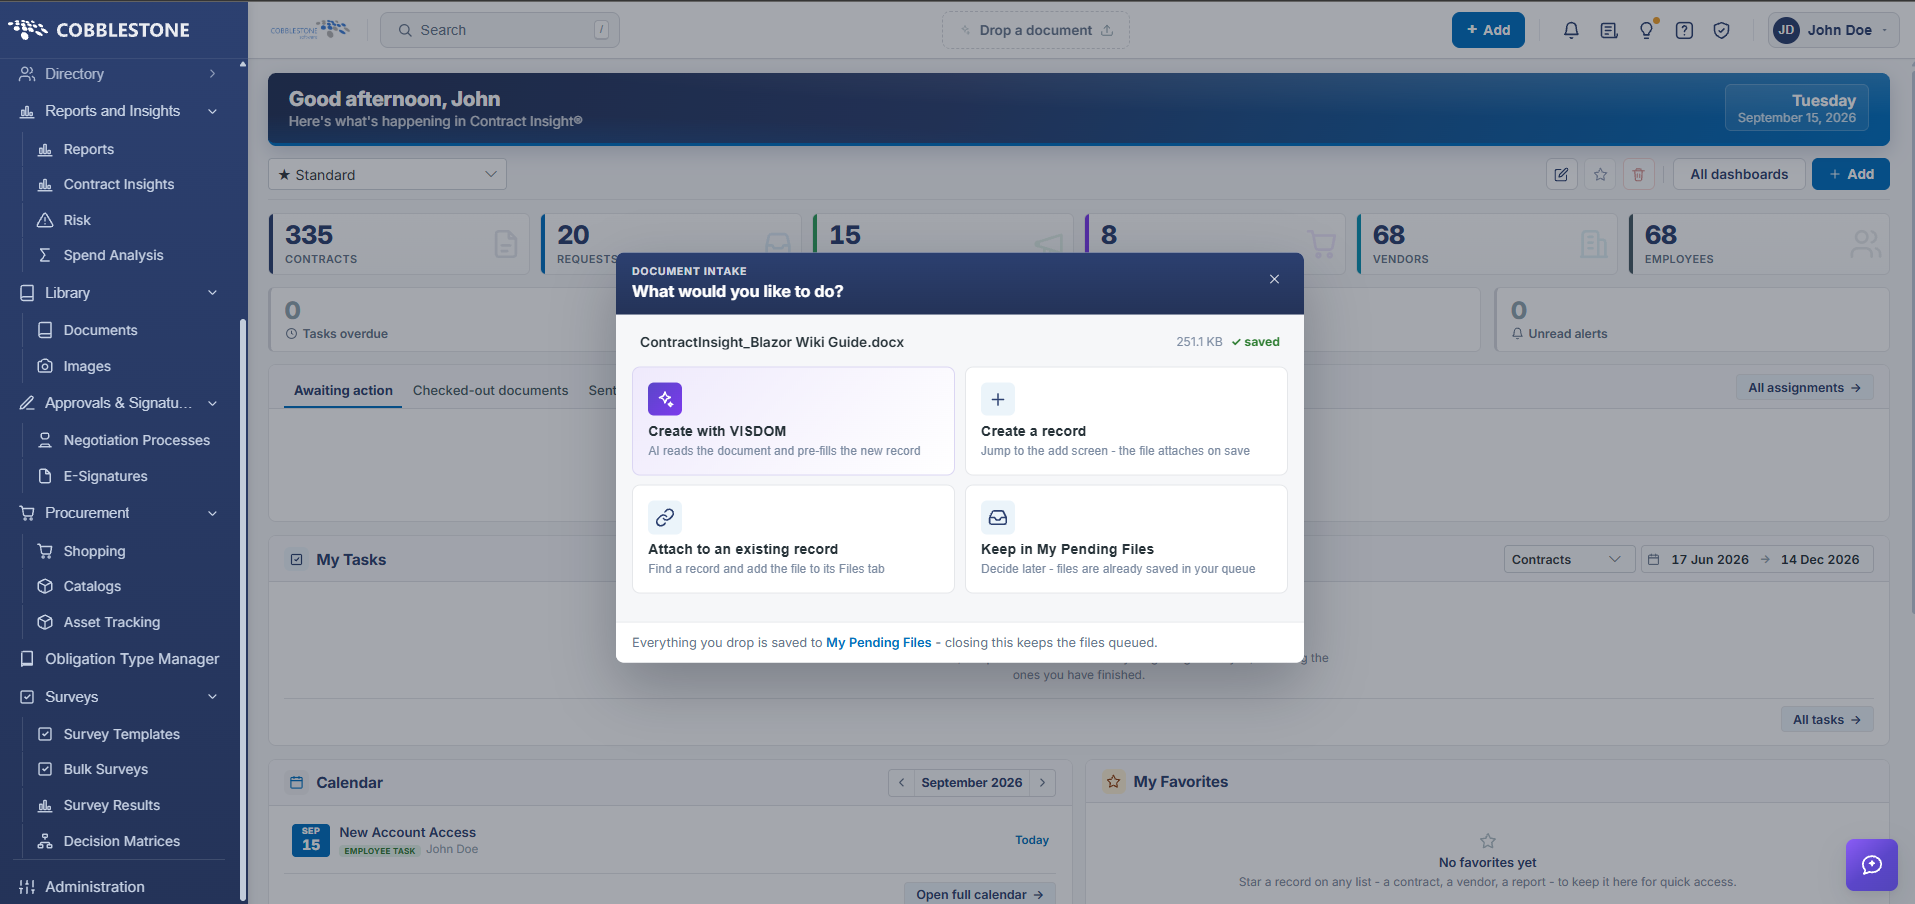
After dropping the file it will prompt for what kind of record you wish to create or to add to the File Queue. Click Keep in File Queue to hold onto the document without immediately processing it.
View the File Queue:
1. To take action with a file in the File Queue, open the User Menu and select My Pending Files.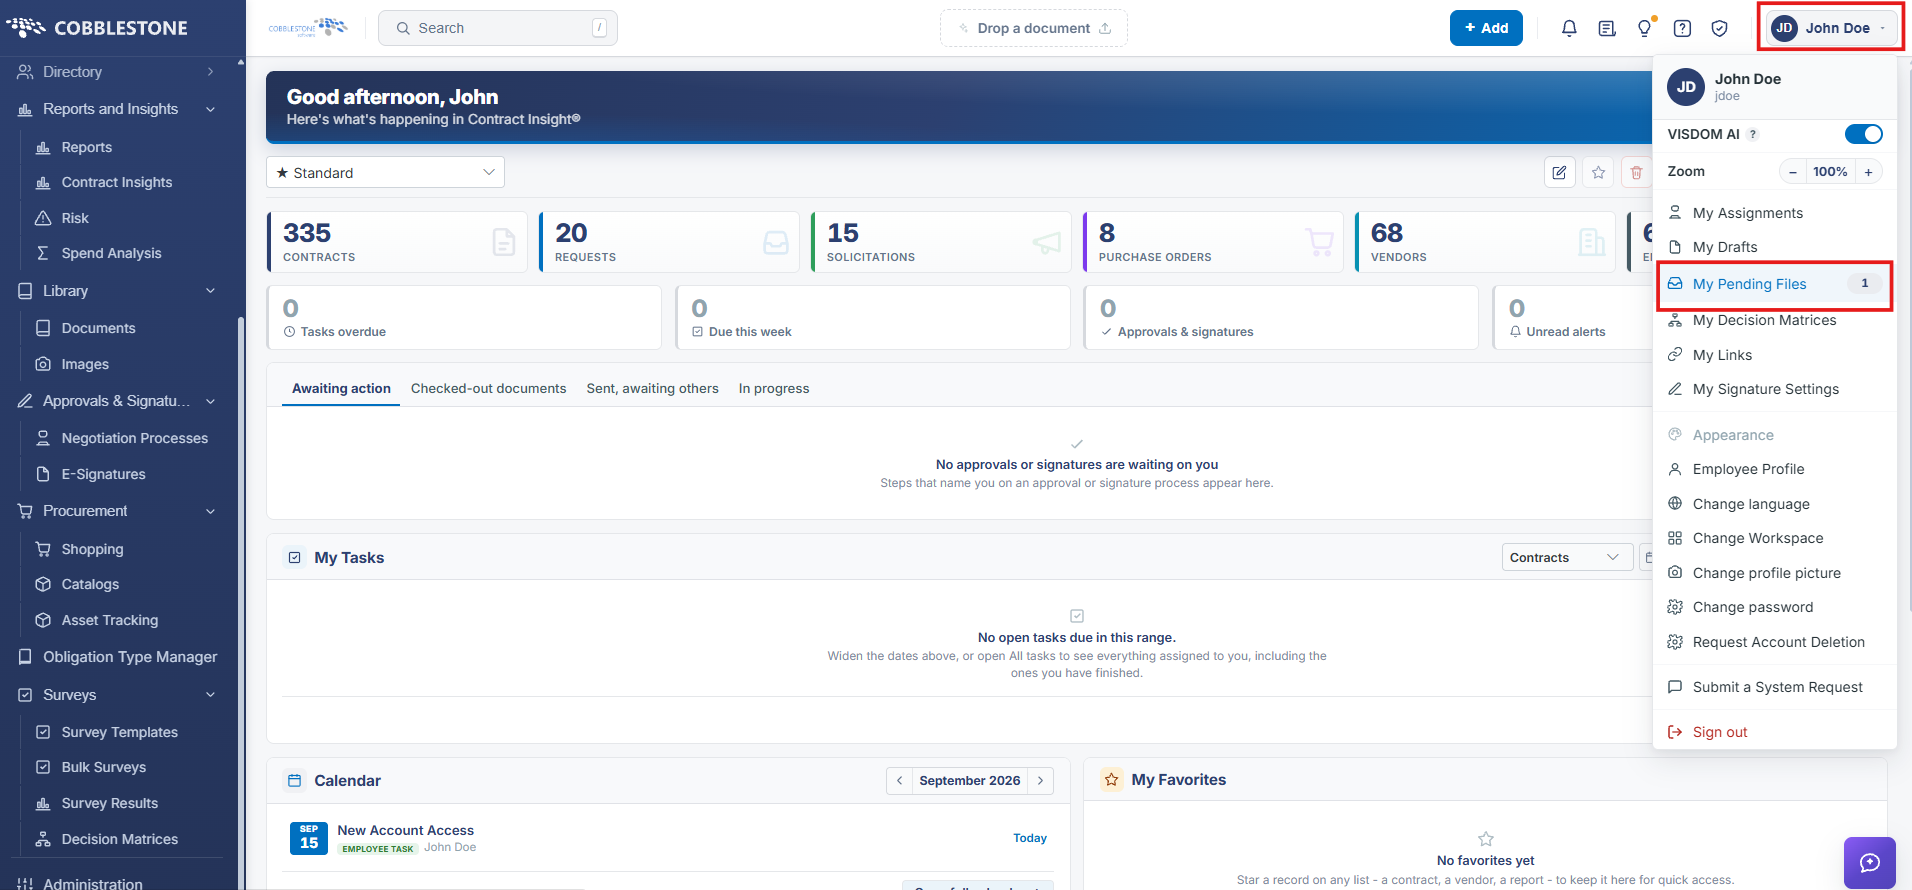
2. The My Pending Files screen opens, showing all pending files in the File Queue.
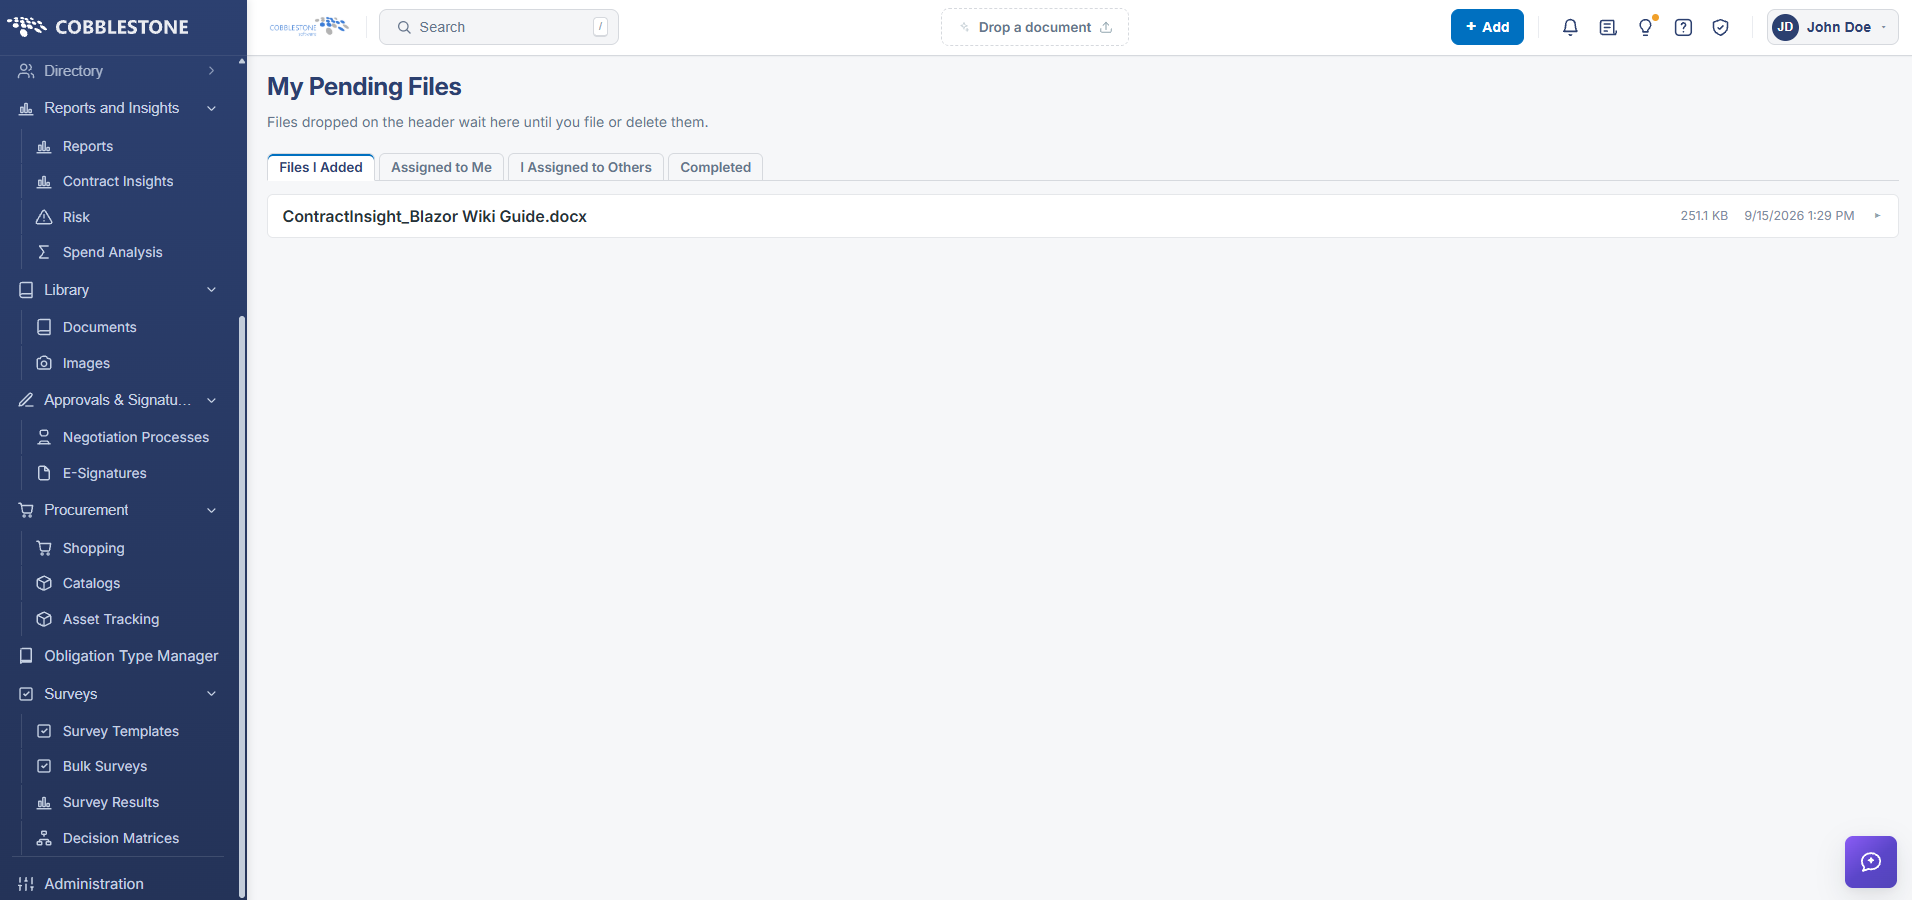
Multiple pages are available:
A. Files I Added: files added by the current user that have not been acted upon.
B. Files Assigned to Me: files added by other users that have been assigned to the current user and have not otherwise been acted upon.
C. Files I Assigned to Others: files the current user assigned to others but have not otherwise been acted upon.
D. Completed Files: files that have been acted upon.
Numerous options for the file are available:
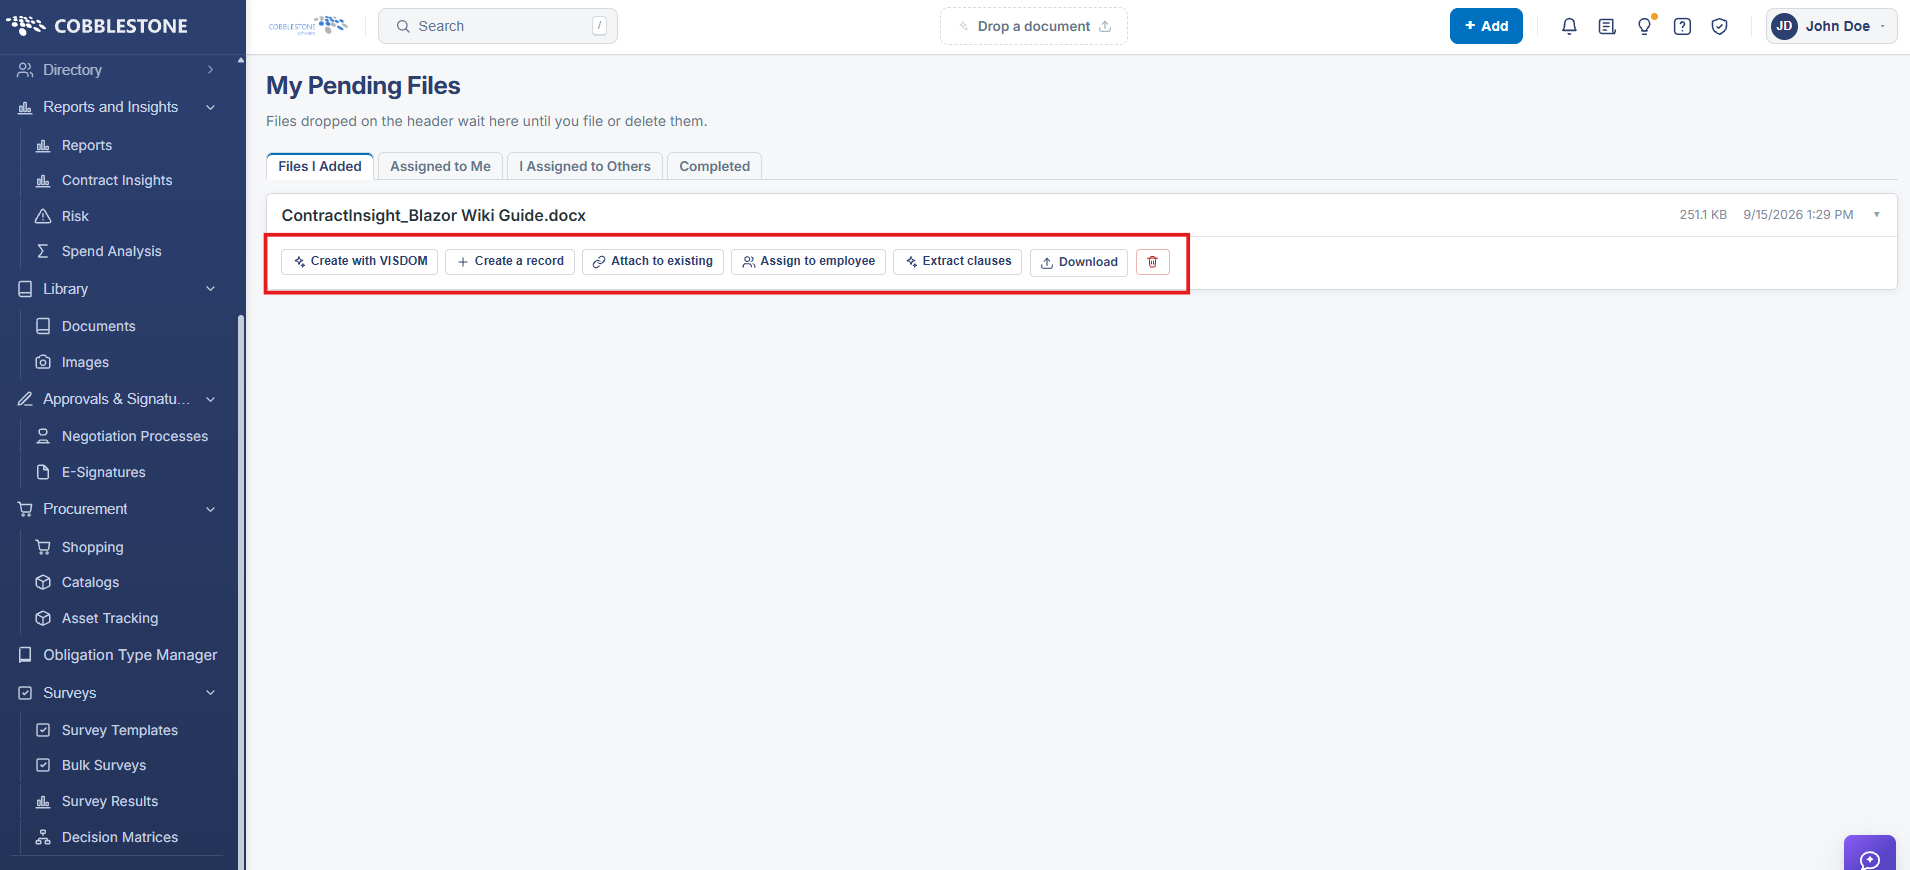
E. Create with VISDOM
F. Create a new record from the file
G. Attach the file to an existing record
H. Assign the file to an employee
I. Extract clauses
J. Download the file
K. Delete the file from the queue
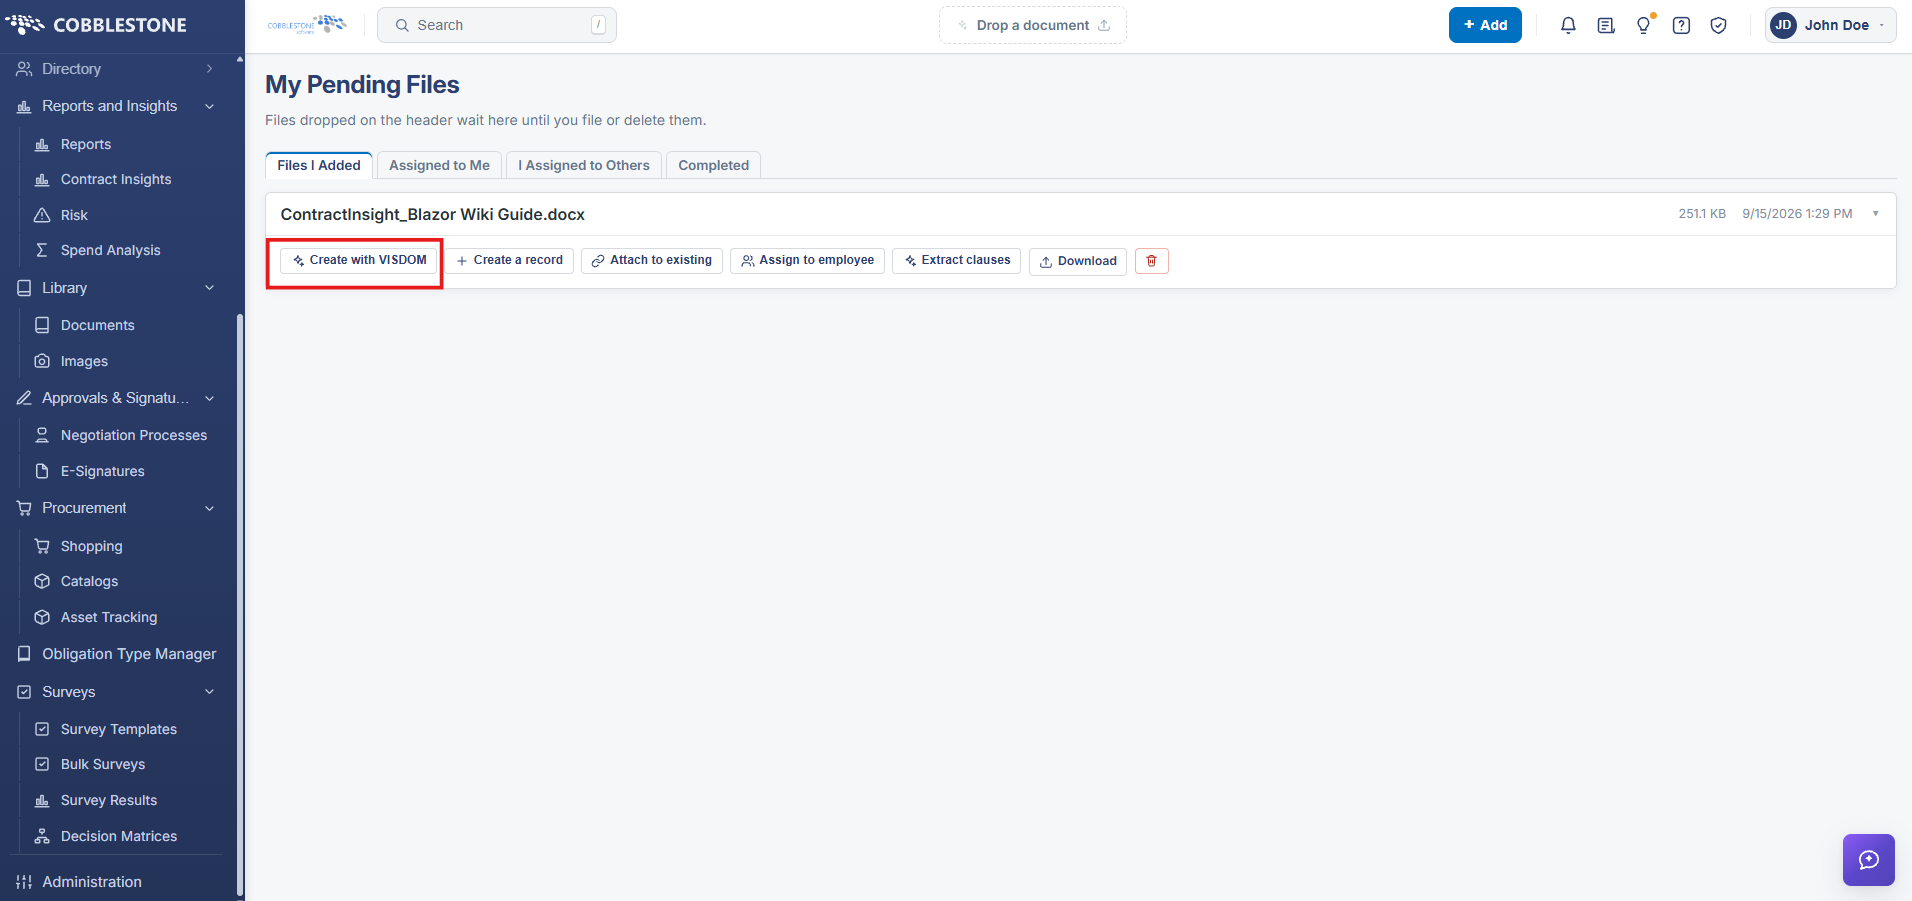
Creating a with VISDOM:
1) Click the Create with VISDOM button for the line item.
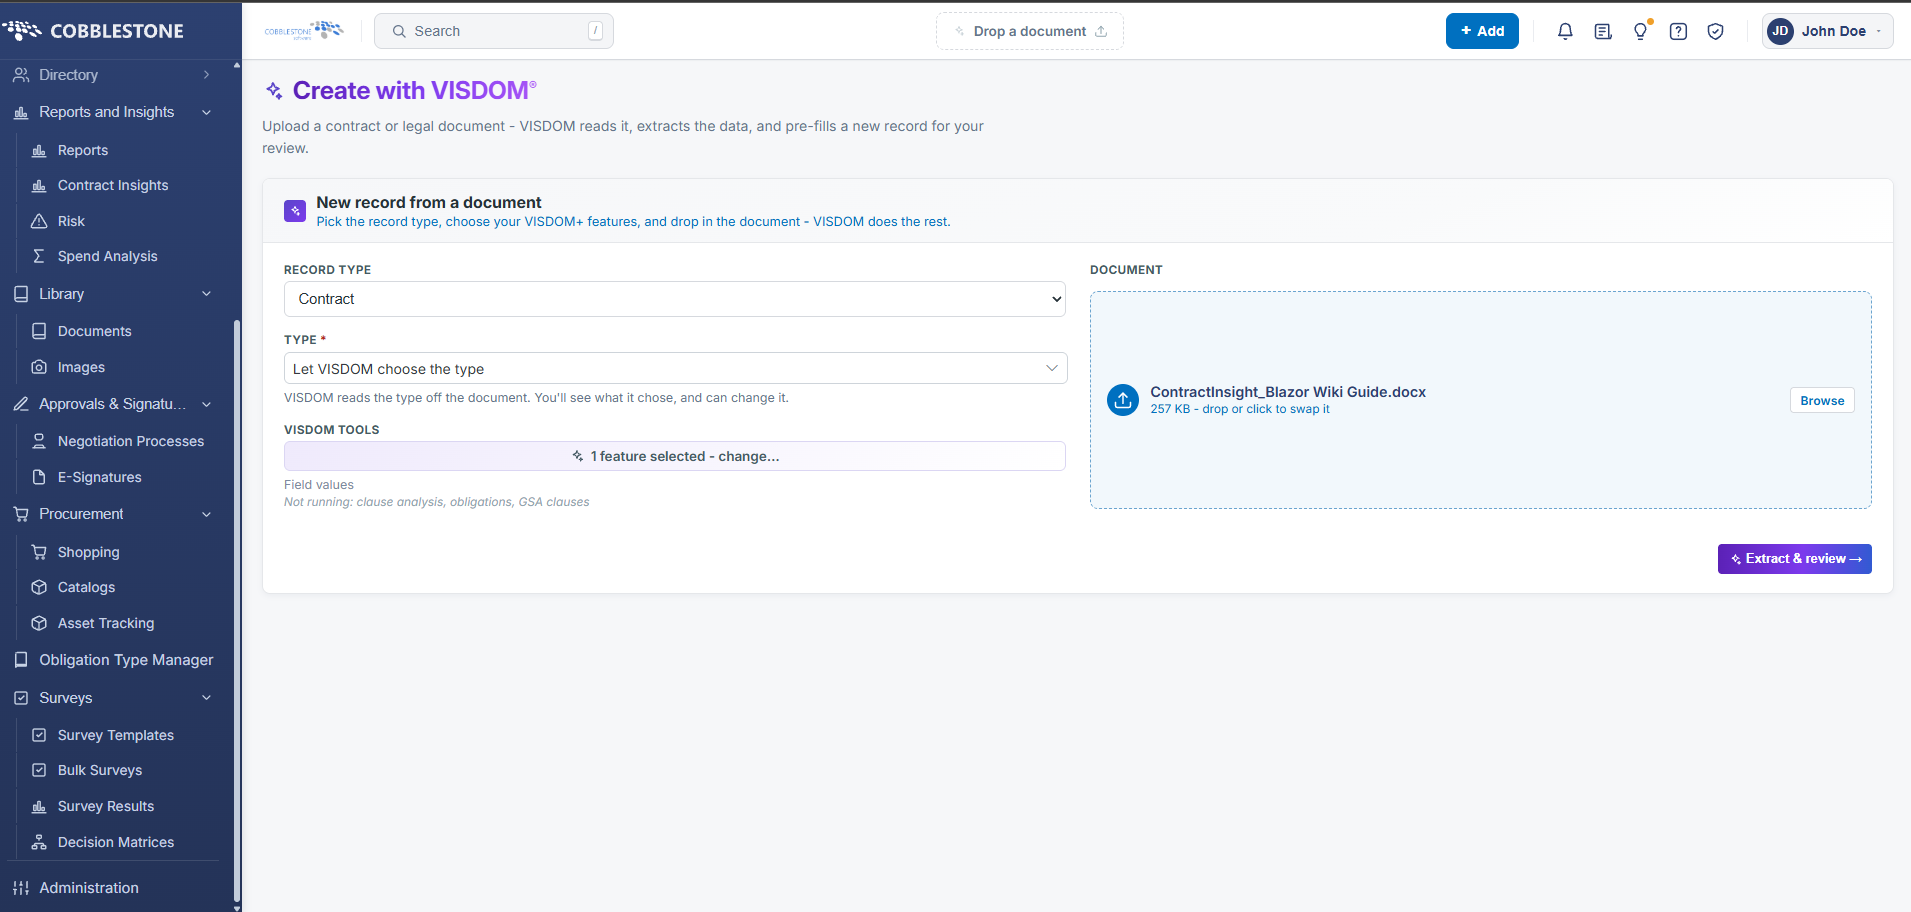
2.) Fill out the fields as desired. When complete, click Extract and review
Creating a New Record:
1) Click the Create a record button for the line item.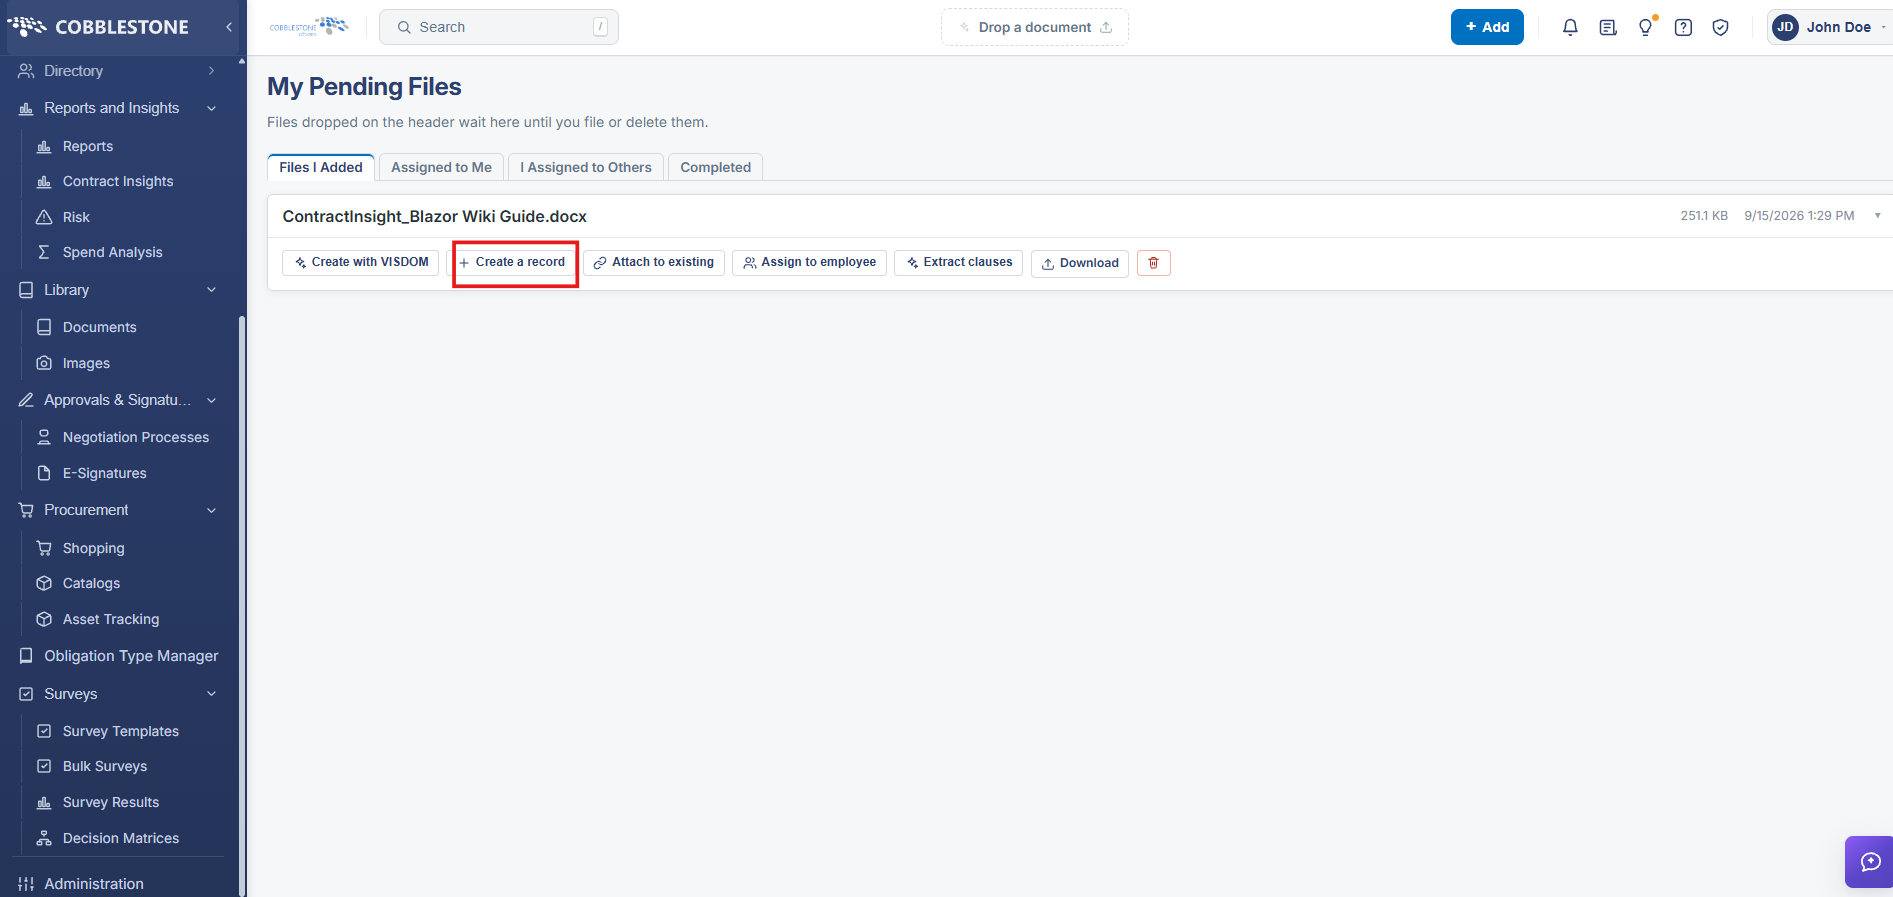
2) Another window displays below.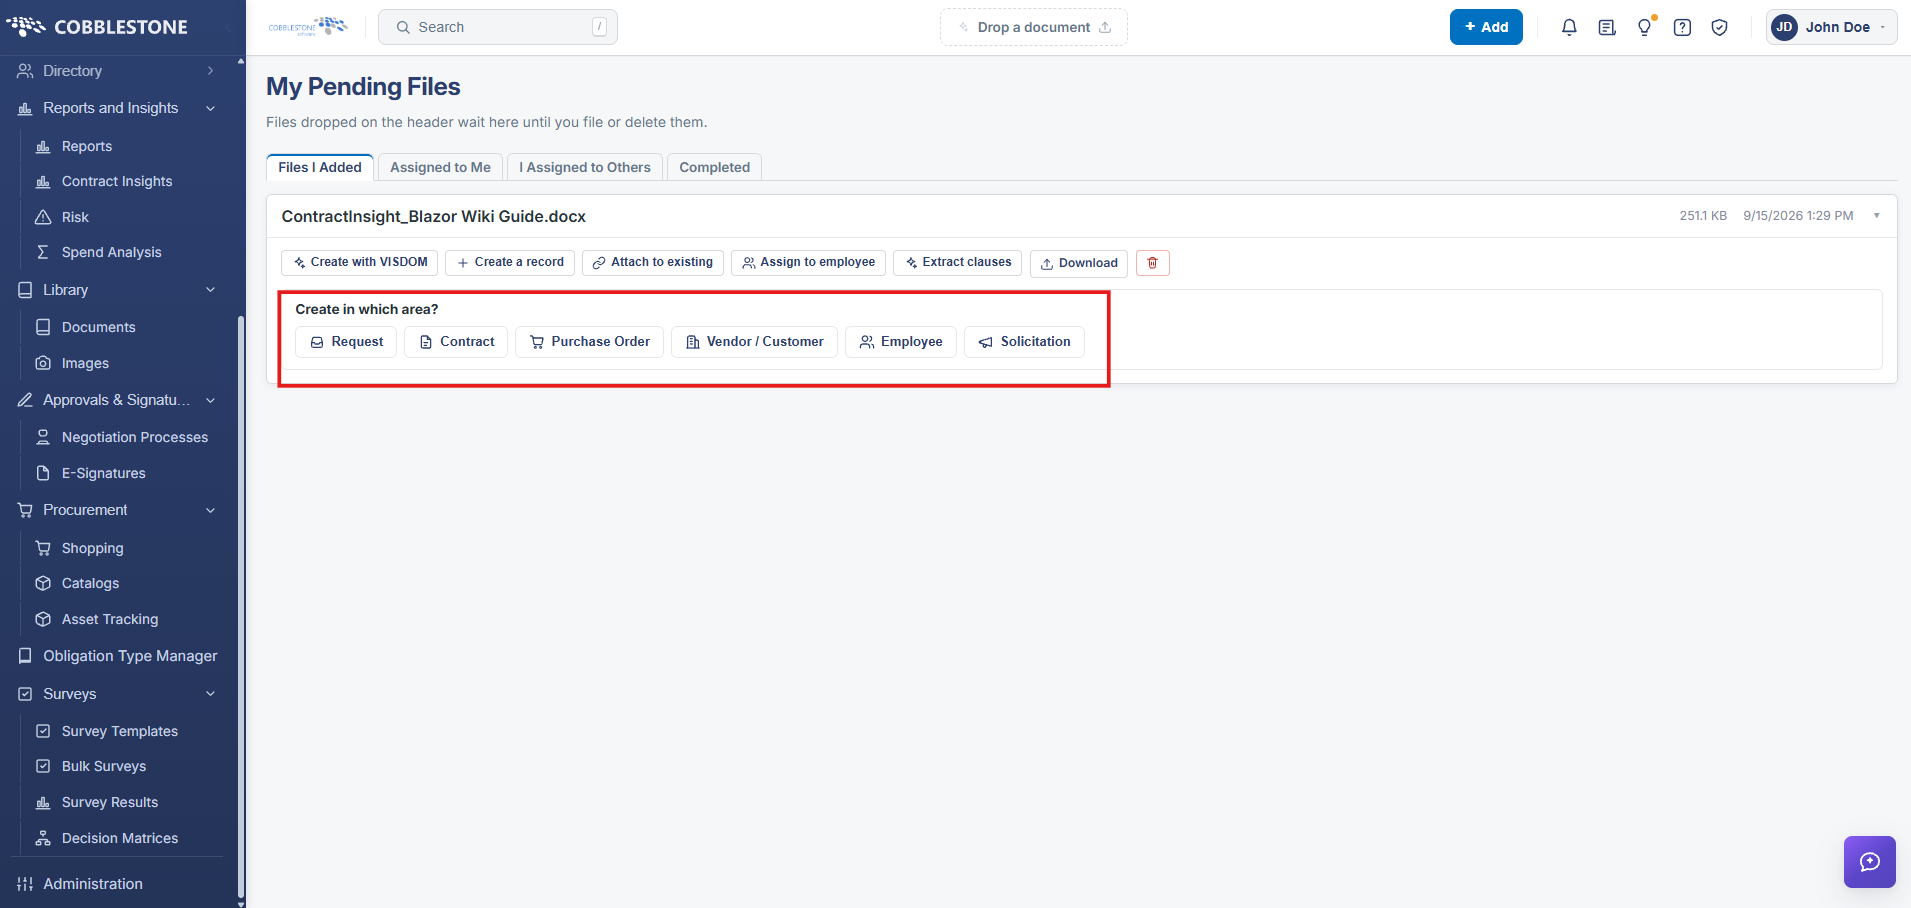
3) Select the desired area for the new record.
4.) Select the record type.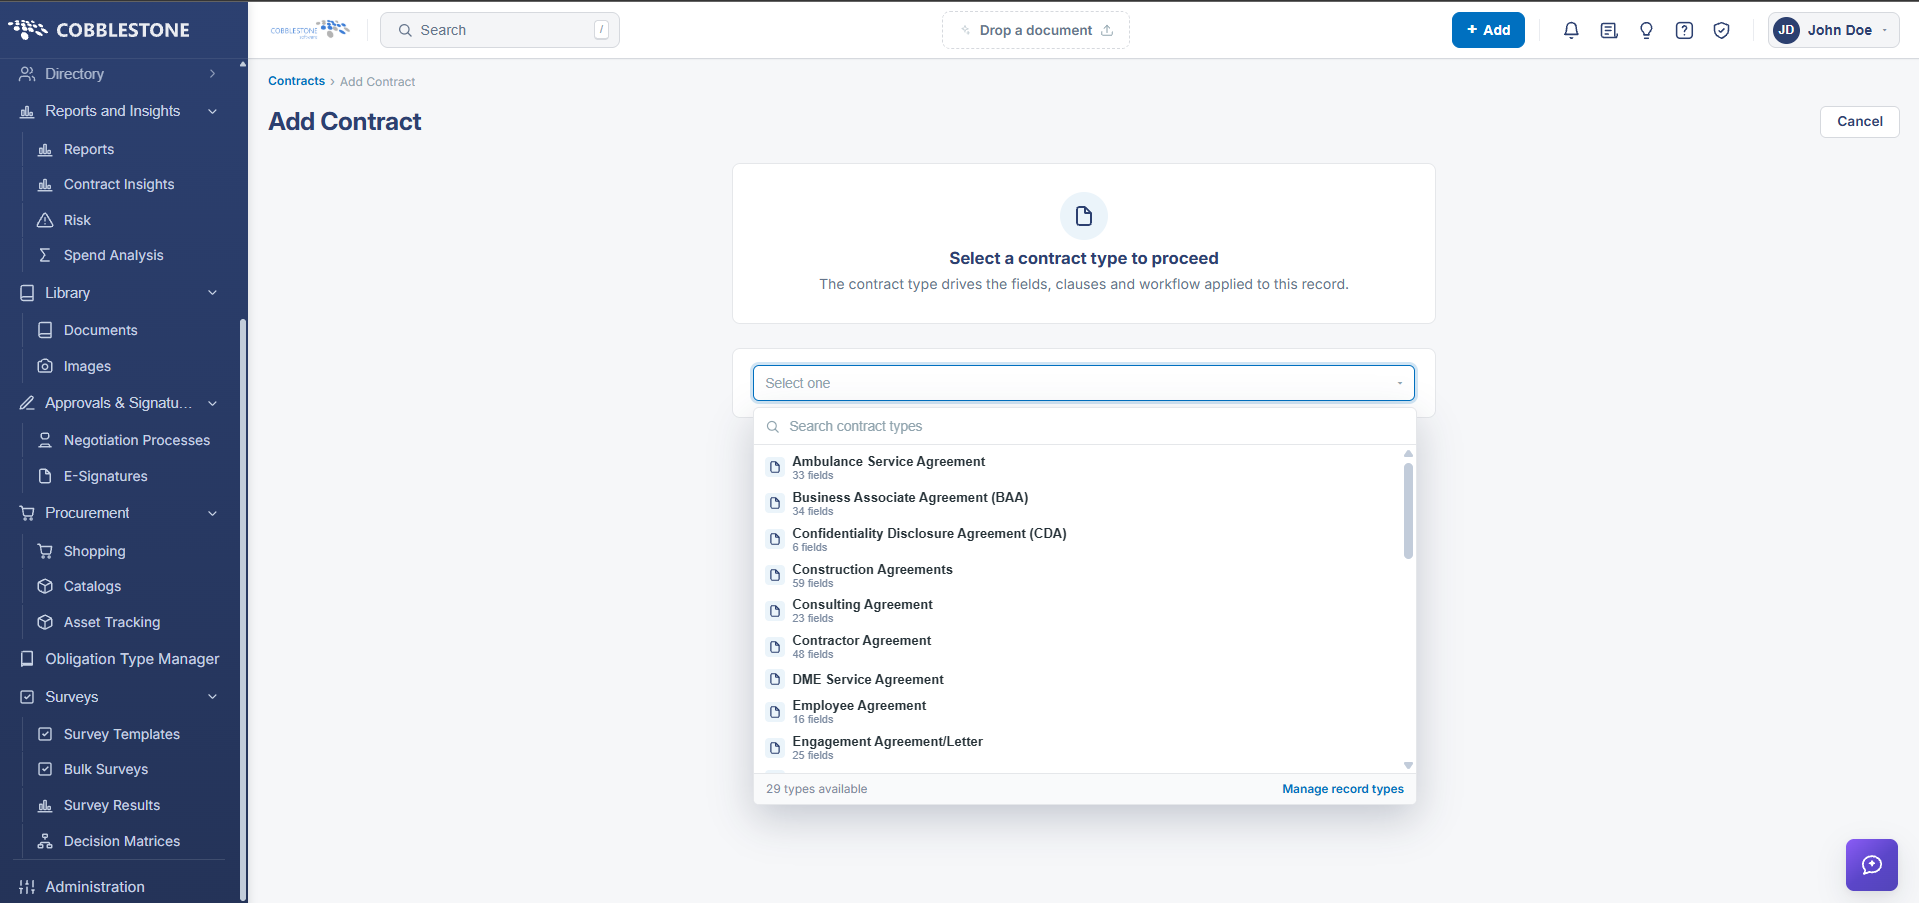
5) Follow the steps for the record type (as found on their respective pages).
Adding to an Existing Record:
1) Click the Attach to existing button for the line item.
2) Another window displays below.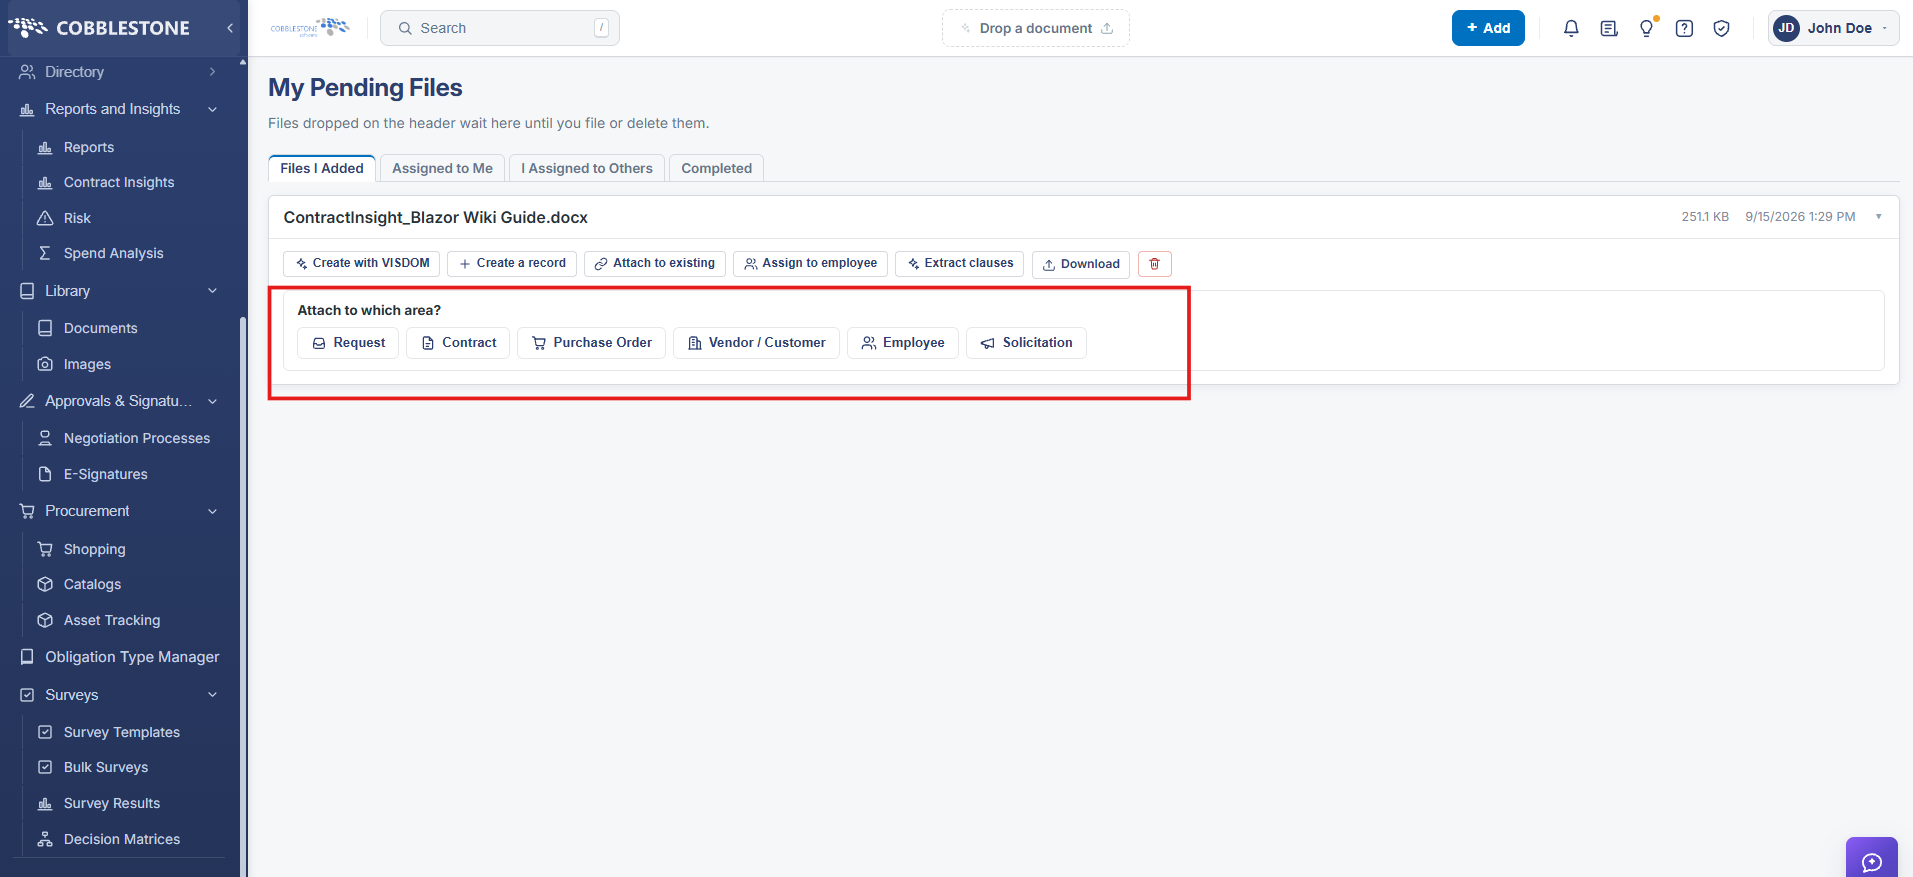
3) Select the desired area for the new record.
4.) Select the desired record.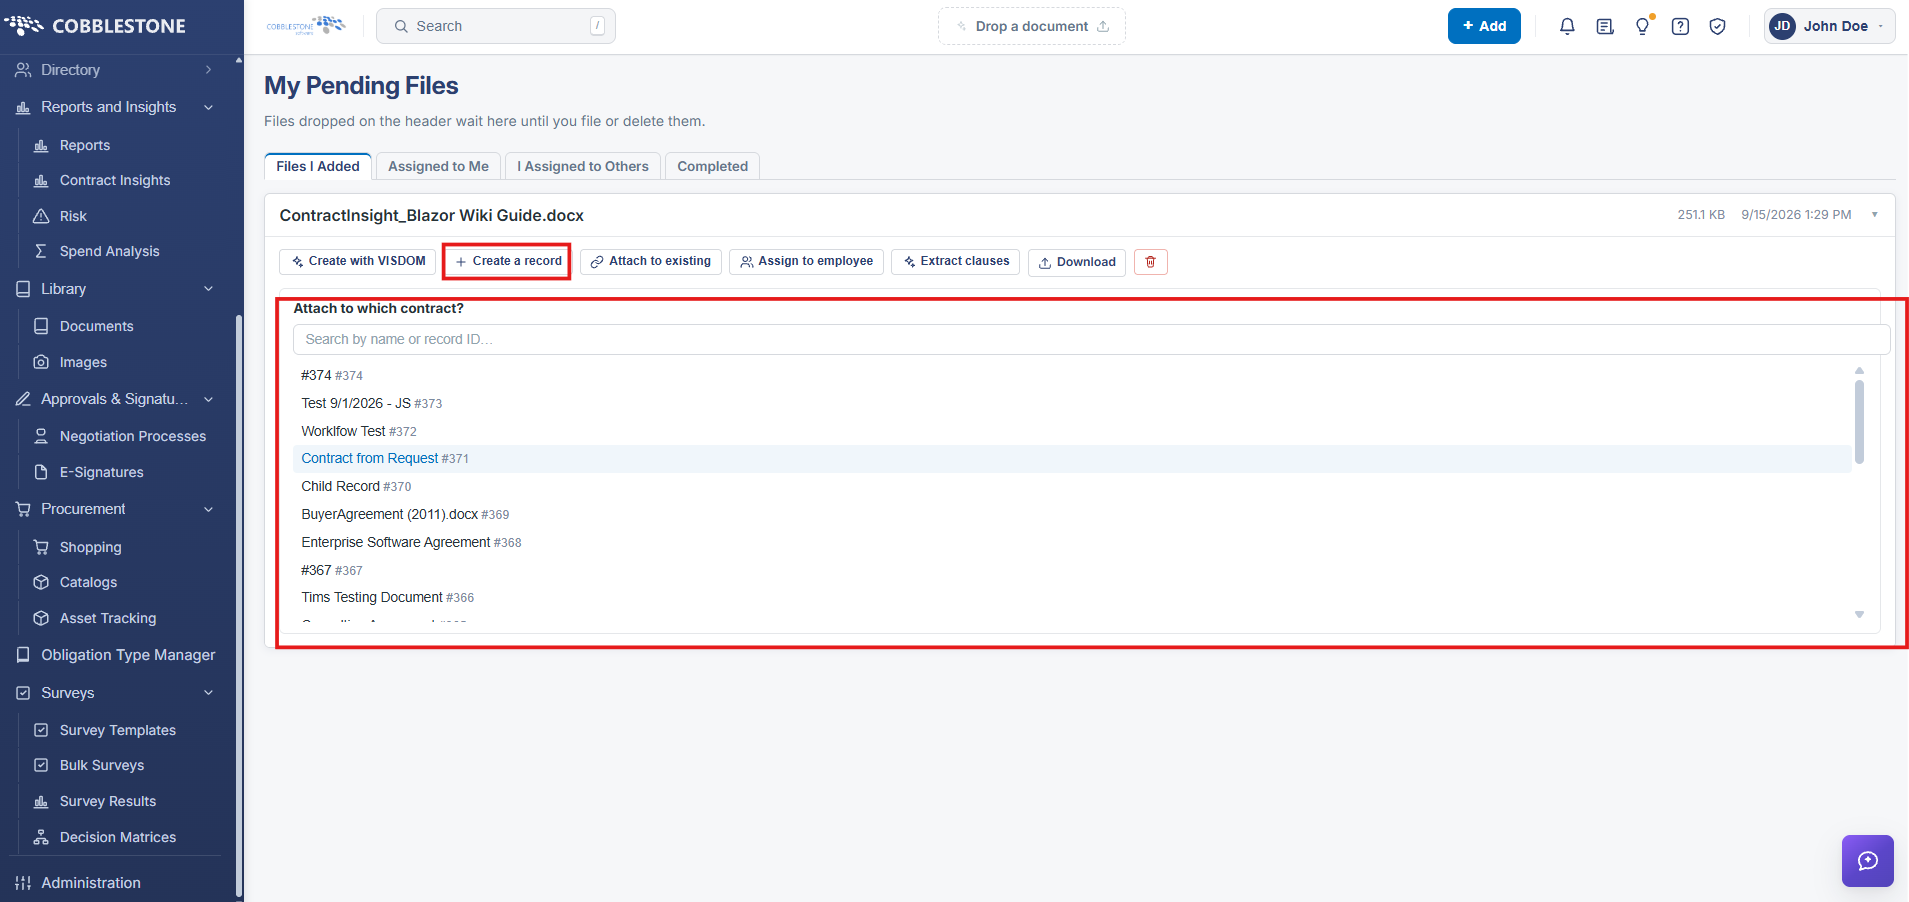
Assigning to an Employee:
1) Click the Assign to employee button for the line item.
2) Another window displays below.
3.) Choose an employee, then click assign.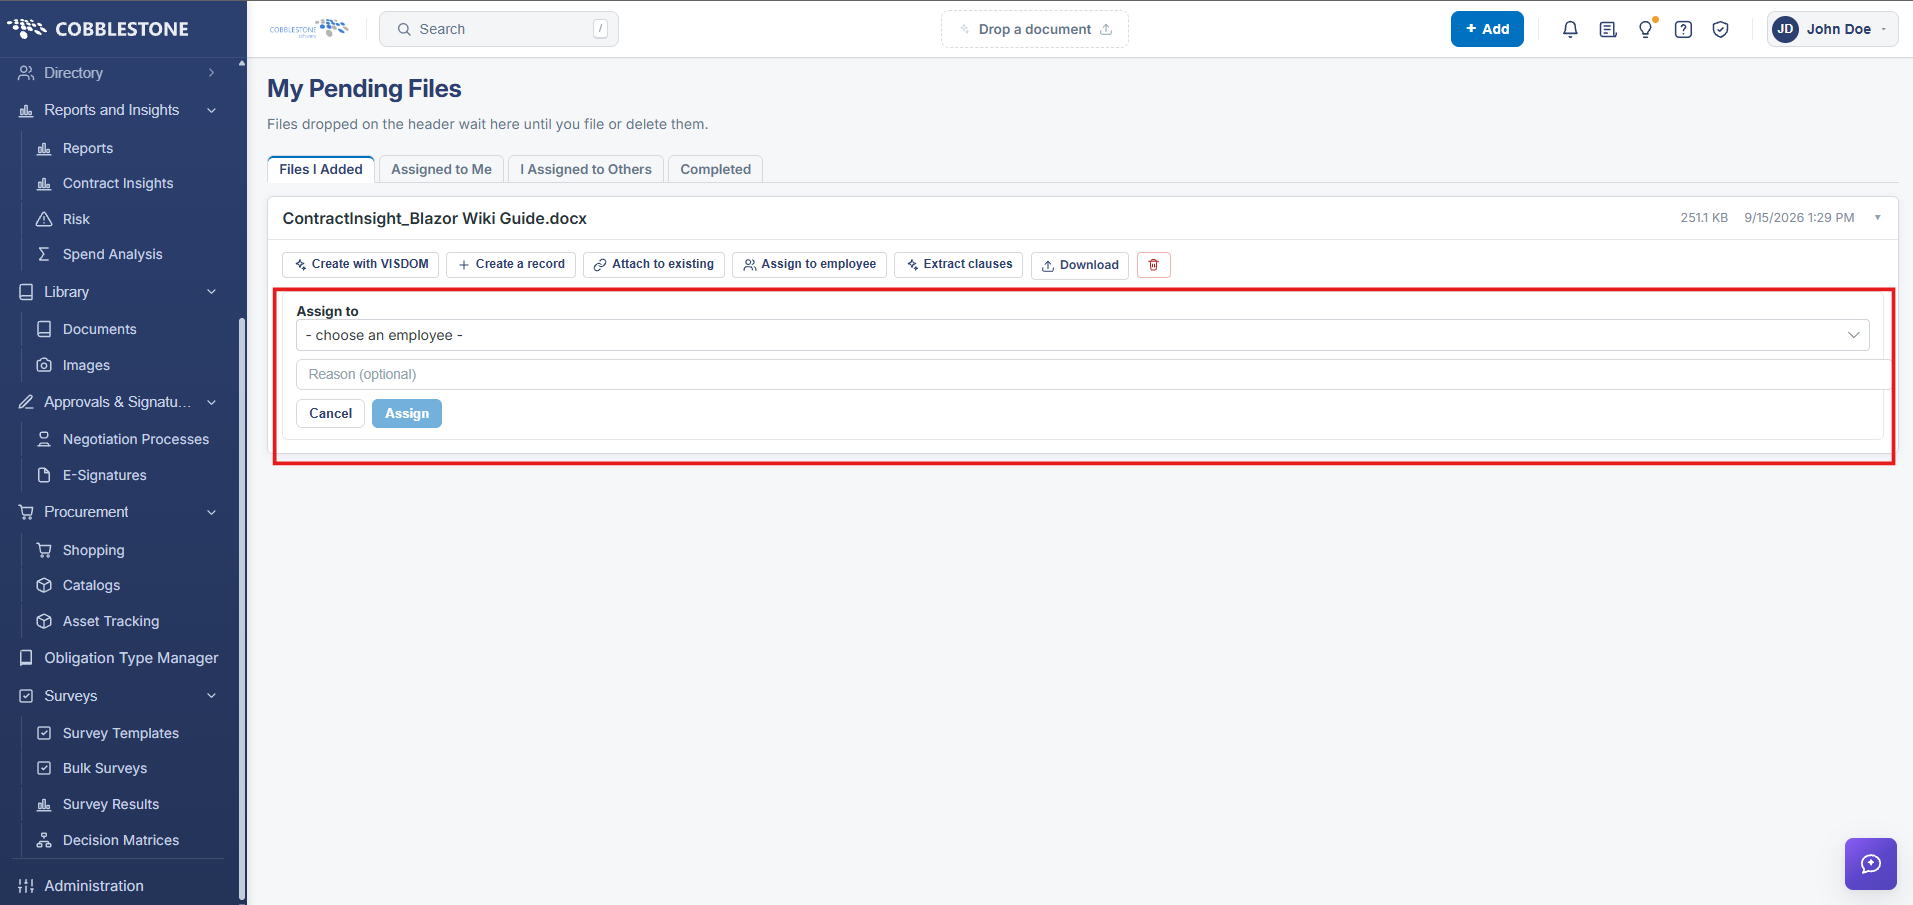
Extracting Clauses:
1) Click the Extract Clauses button for the line item.
2) A new page opens.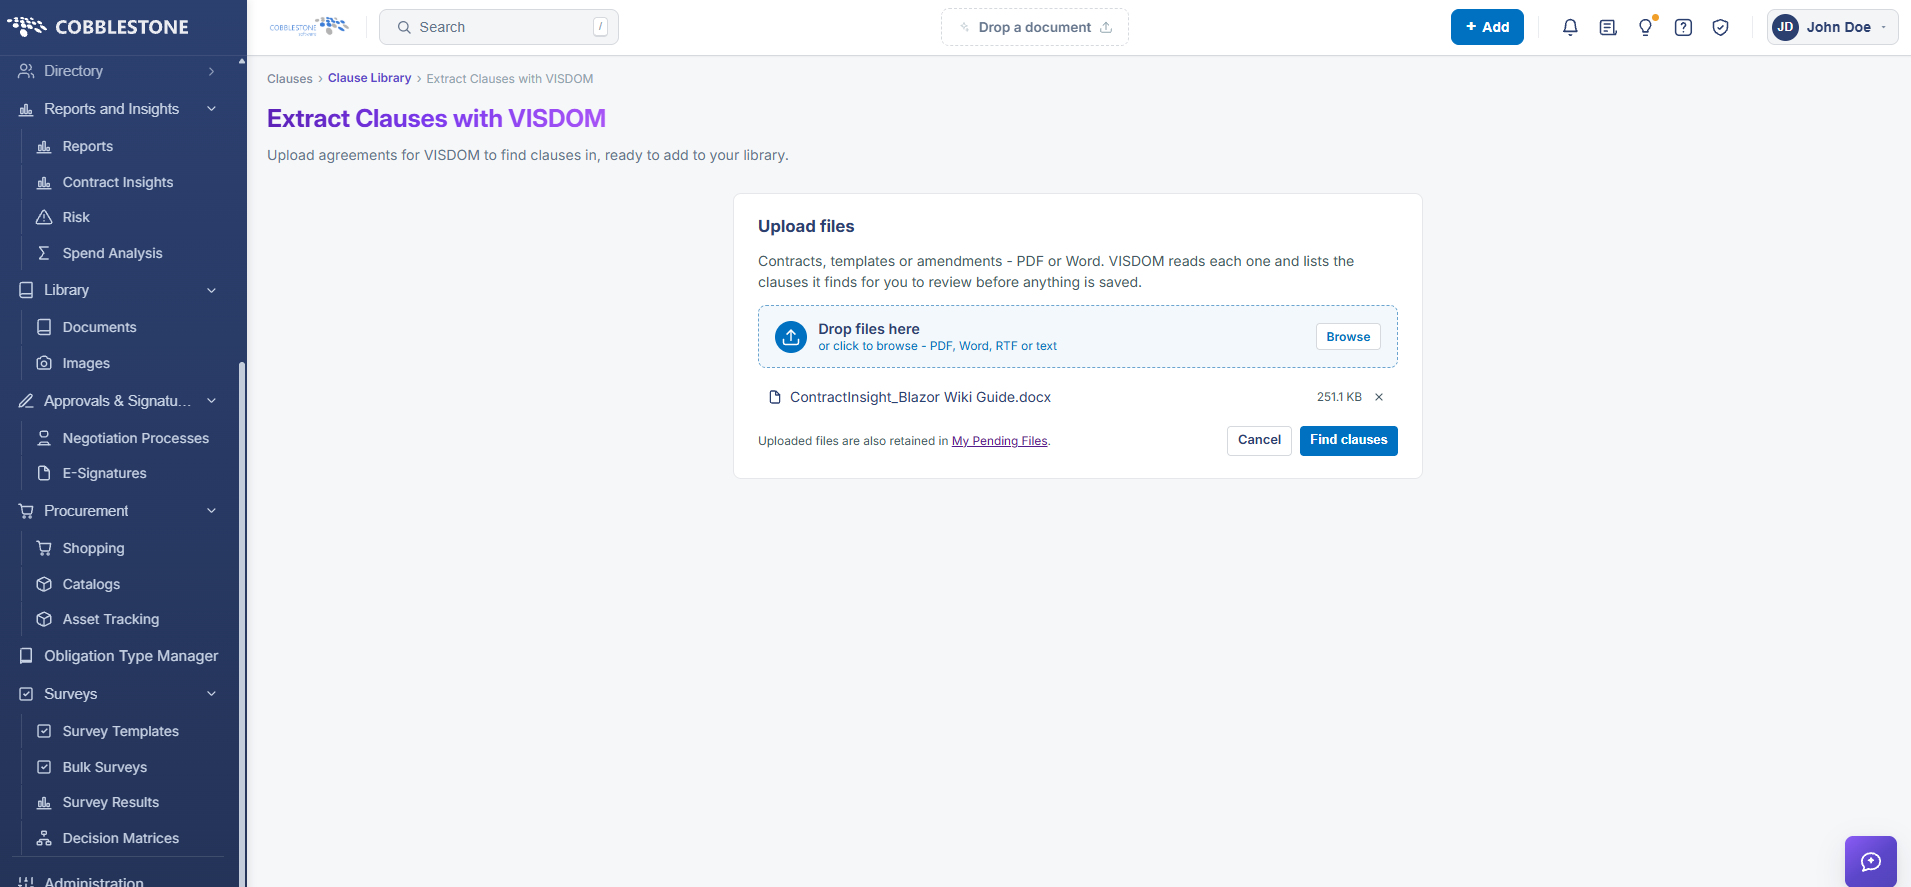
3.) Upload desired files then click the blue Find Clauses button.