CobbleStone® University Certification Program - Unit 4
Data Importing
Data Import Manager Overview
Data Import Manager Overview
The Data Import Manager is primarily used to bulk import legacy metadata into CobbleStone® Contract Insight. Contract Insight offers the ability to import data from a structured CSV file. CSV files contain structured data and can be opened with standard spreadsheet programs such as MS Excel. The importing/updating of data should be performed by your CobbleStone® Contract Insight System Administrator. To navigate to the Data Import Manager screen, log into the application as a System Administrator and go to the Manage/Setup top menu item and click Account Maintenance.

On the Account Maintenance screen, click Data Import Manager on the side menu.
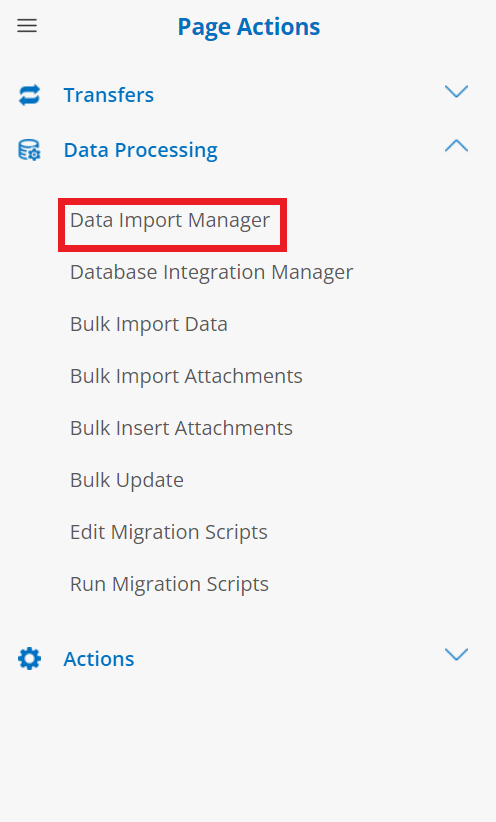
This will bring you to the Inbound Integration Wizard: Integration & Import File List page. On this page, users can view, add, and edit templates for the Data Import Manager.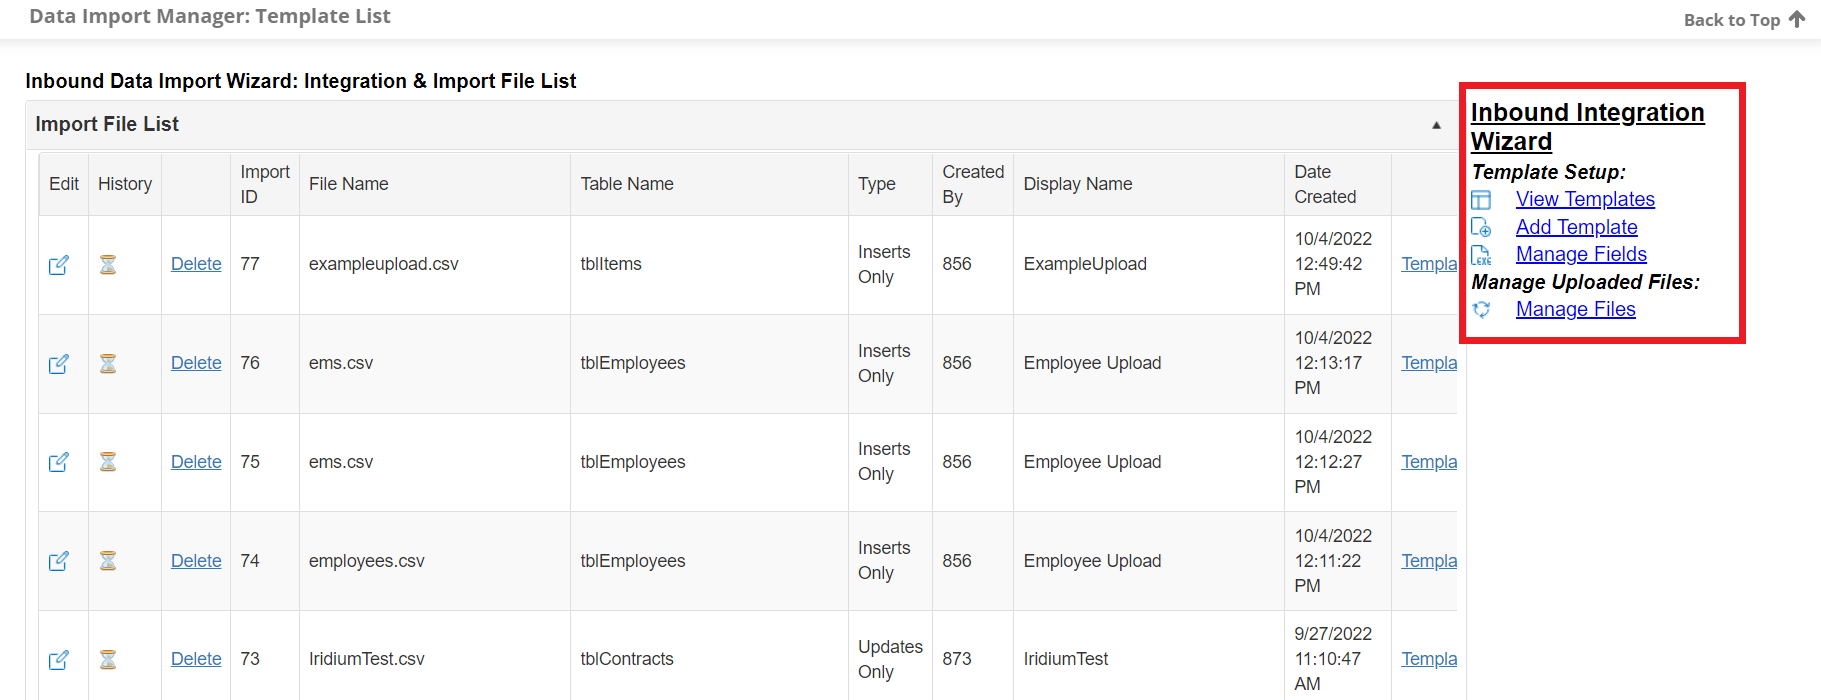
To learn more about Data Importing, watch the video below.
Create New Import/Update Template
Data Import Manager: Creating/ Updating Import Templates
Contract Insight offers the ability to import data from a structured CSV file. CSV files contain structured data and can be opened with standard spreadsheet programs such as MS Excel. Typically, the importing of data should be performed by your CobbleStone® Contract Insight System Administrator.
Accessing the Data Import Manager
1. Log into the application as a System Administrator and, from the Manage/Setup top menu item, click Account Maintenance..png)
2. On the Account Maintenance screen click Data Import Manager on the side menu..png)
3. The Inbound Integration Wizard: Integration & Import File List page displays on which a user can view, add, and edit templates for the Data Import Manager.
.png)
Add a new Import Template
1. Click Add Template on the side menu.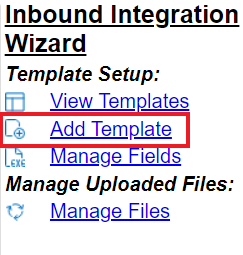
2. This will bring you to the Inbound Data Import:File Mapping page where you will give the template a Display Name, specify a File Name.
Note: the File Name must include the file extension of .csv), and then select the Linked To area (the table) in the system for which the template will be used. LinkedTo areas include Counterparties, Employees, Clauses, & Contracts.
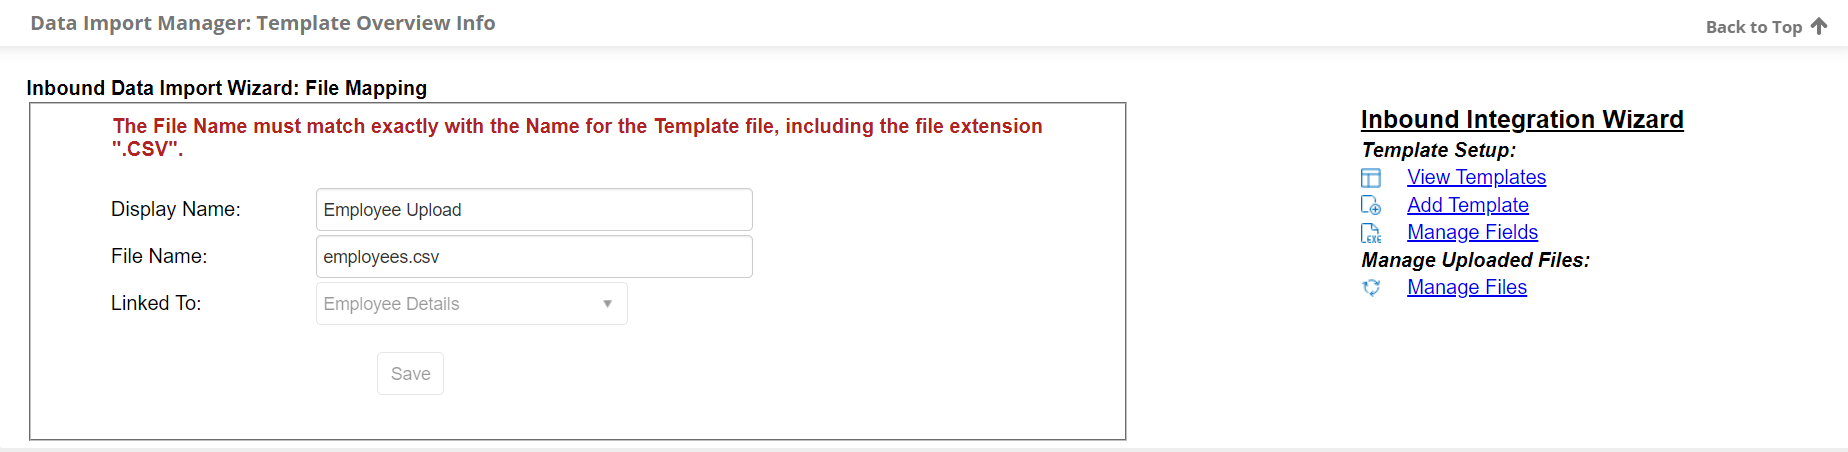
Note: The file name you enter must match exactly to the name of the file you wish to Import, including the file extension. Example: Employees.csv. The system will not upload any file that does not have a template with a matching file name (else the error shown below is displayed).
3. Click Save. The Inbound Integration Wizard: Field Mapping page displays. select which fields (columns) to be be included in THE template.
4. A list of fields associated with the table/area selected in the Linked To drop down on the previous page displays. To select and add fields to the template, click the name of the field in the Table- Field List then click the navigation arrow in the center to move the field to the Selected Table- Field list. Alternatively, drag and drop the fields to select.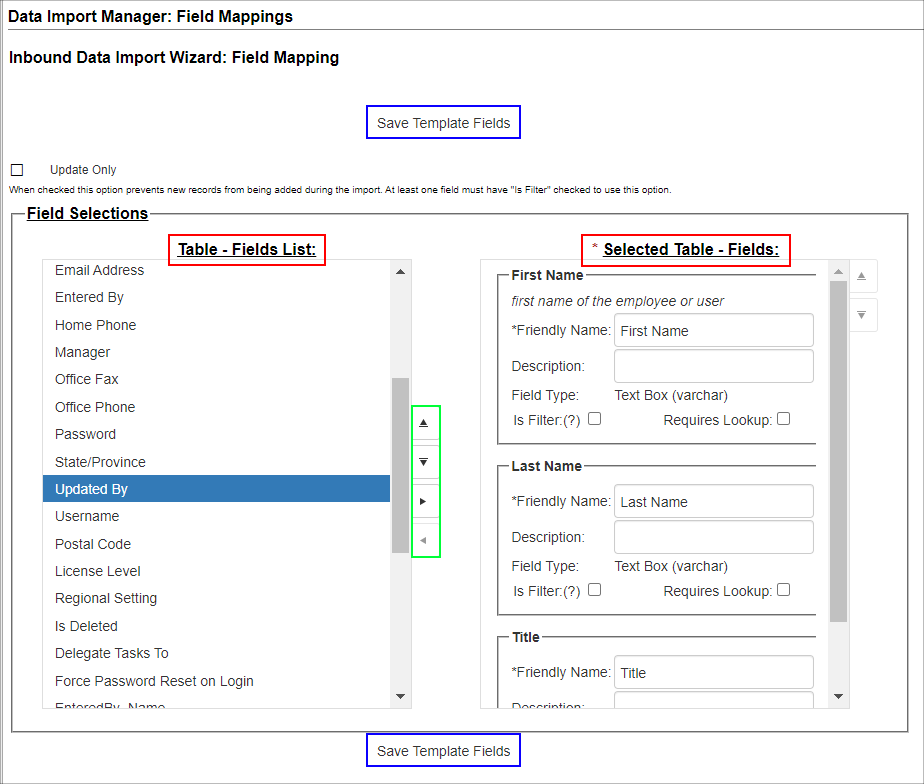
5. Once the field(s) to include in your template are selected, give each selected field a unique Friendly Name. The Friendly Name is the column name in your template (Excel spreadsheet).
Note: the field layout must match the same order of the spreadsheet.
Example: First Name must be the first column) and you may either drag and drop the fields into the correct order or you may select the field and then use the navigation arrow to move it up or down.

The Is Filter:(?) checkbox determines if the record is an insert or an update to an existing record. Select Is Filter for templates that will be updating and inserting.
Note: If the Is Filter:(?) box is checked, the record will update any existing record with a matching value in that field. If no matching value is found, the record will be inserted as a new record.
The Requires Lookup checkbox is referencing fields linked to Master Reference Data areas that store the ID of the value stored in that field's associated tab (Department, Locations, Contract Types, Employees, etc.).
Note: If Requires Lookup is checked for a field, make sure the text entered into the field in the spreadsheet matches exactly with the text you have in the system for that Master Reference Data area (see below). If Requires Lookup is not marked, use the ID in your spreadsheet for the import/update.

6. Once all fields are selected and each selected field has a unique Friendly Name, click Save Template Fields.
Note: For fields like Active, Allow Login, System Admin, and Force Password Reset, 1 = Yes and 0 = No. (This is not true for user defined fields. With User Defined Drop Down fields, Yes = Yes, Y = Y, No = No, N = N, etc.).
Update Only
To ensure a template is only updating existing records and not creating new ones, mark the Update Only tick-box.
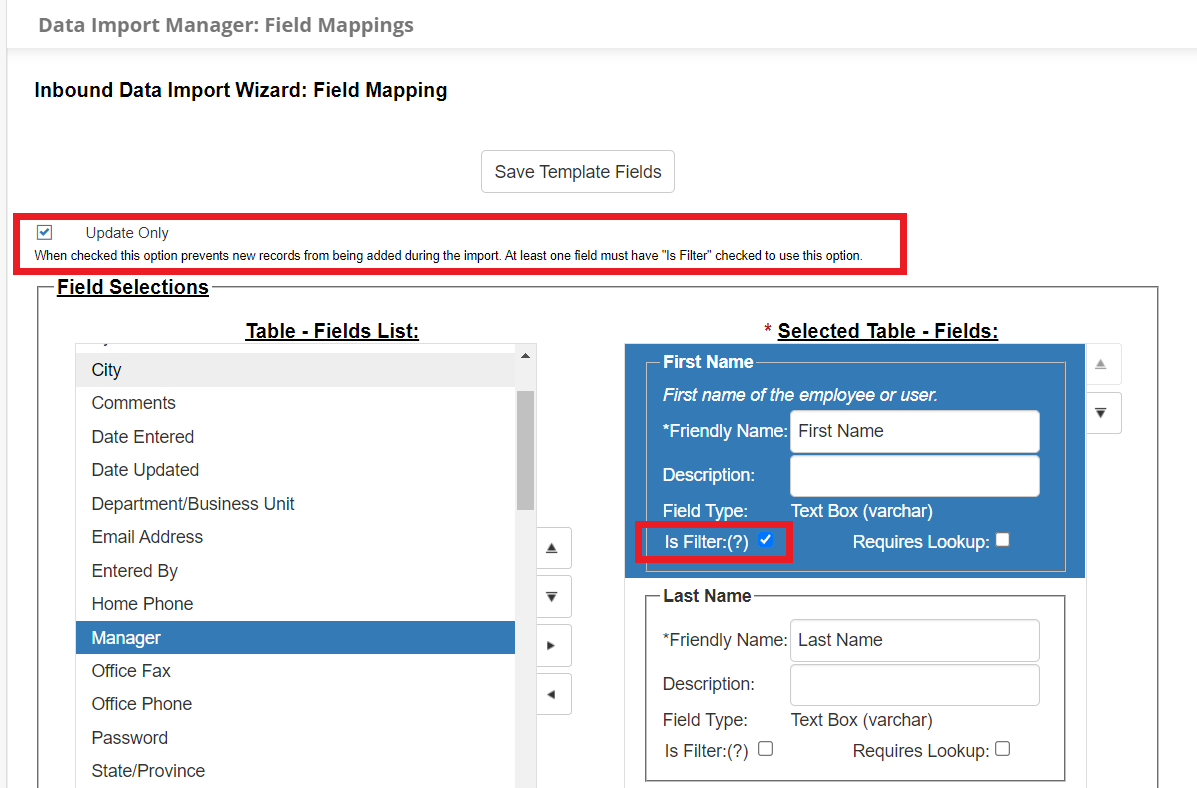
Note: At least one field must have the Is Filter: (?) box marked.
To watch more on the Data Import Manager Template process, watch the video below.