COBBLESTONE SOFTWARE
Contract Insight — User Guide
Branding and Appearance
Administration: Branding and Appearance
Note: Each procedure in this guide begins at the Contract Insight homepage, so any section can be followed on its own. Branding applies to everyone in the workspace and should be set by an Application Administrator; the Appearance screen affects only the person using it.
1. Overview
The look of Contract Insight is set in two places, and the split matters. Branding is an administration screen: it sets the logo in the application header and the colours everyone in the workspace starts with. Appearance is a personal screen: it lets an individual choose the colours they see, without affecting anyone else.
Administrators control how much personal choice is allowed. The Branding screen carries a switch that turns the personal Appearance choice on or off for the whole workspace — with it off, everyone sees the workspace palette.
Both screens show a live Preview of a themed surface — navigation, headings, a link, primary and secondary buttons and a small table — so a palette can be judged before it is applied.
2. Where Theme and Style Are Set
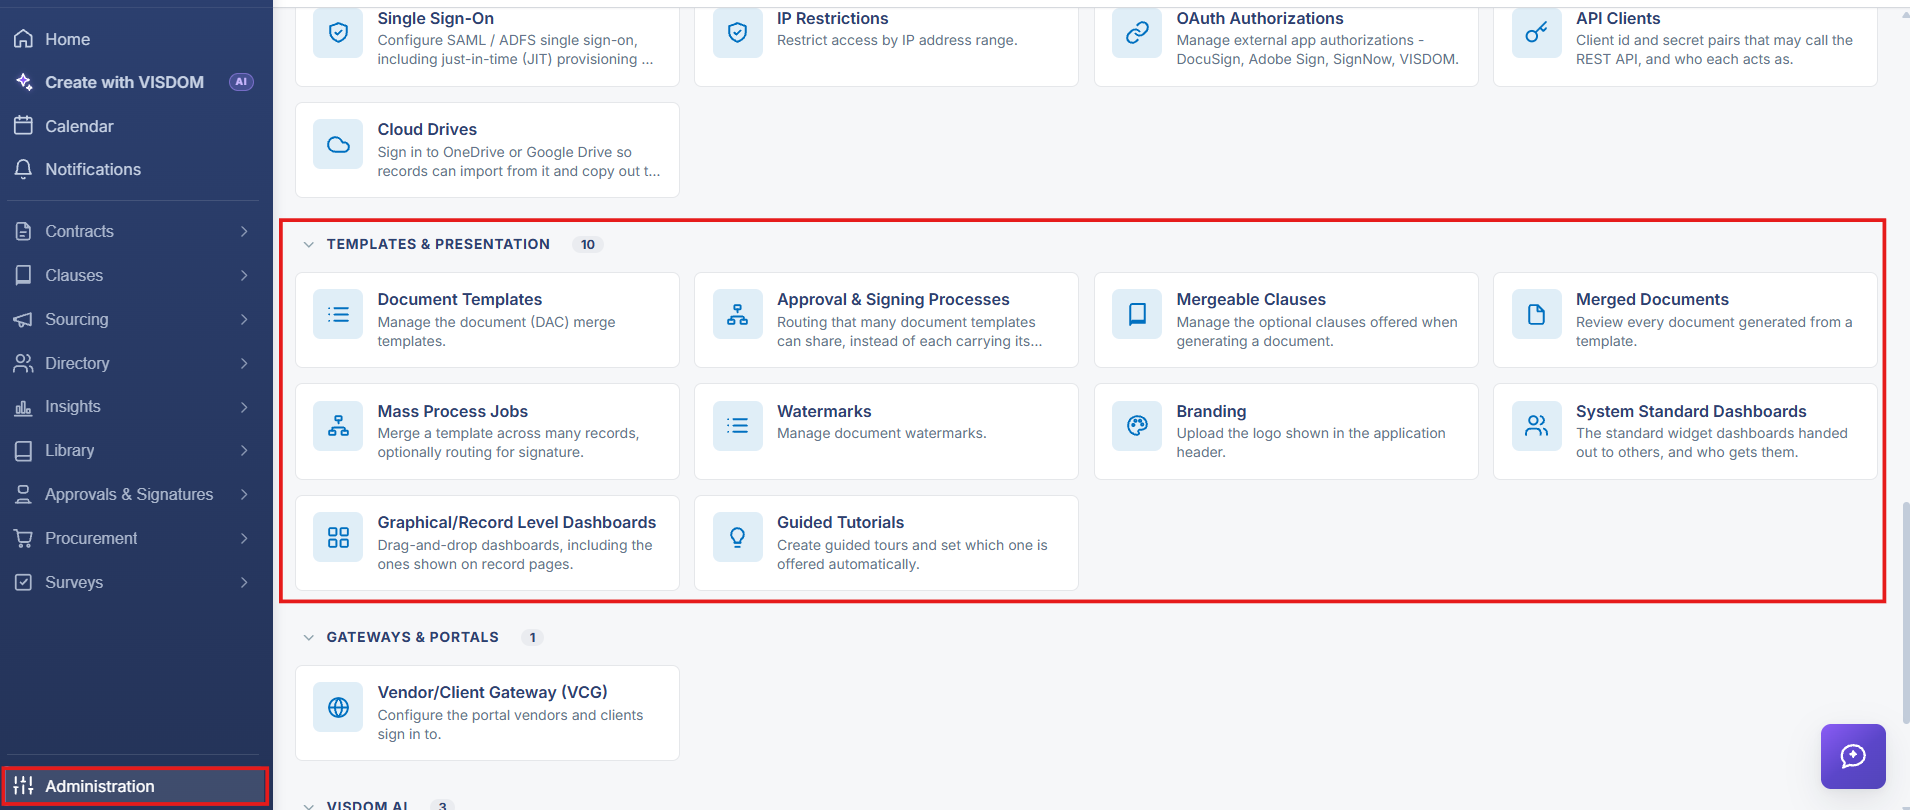
- Branding (Administration → Templates & Presentation) — the header logo, the default colour palette for the workspace, and whether people may choose their own colours
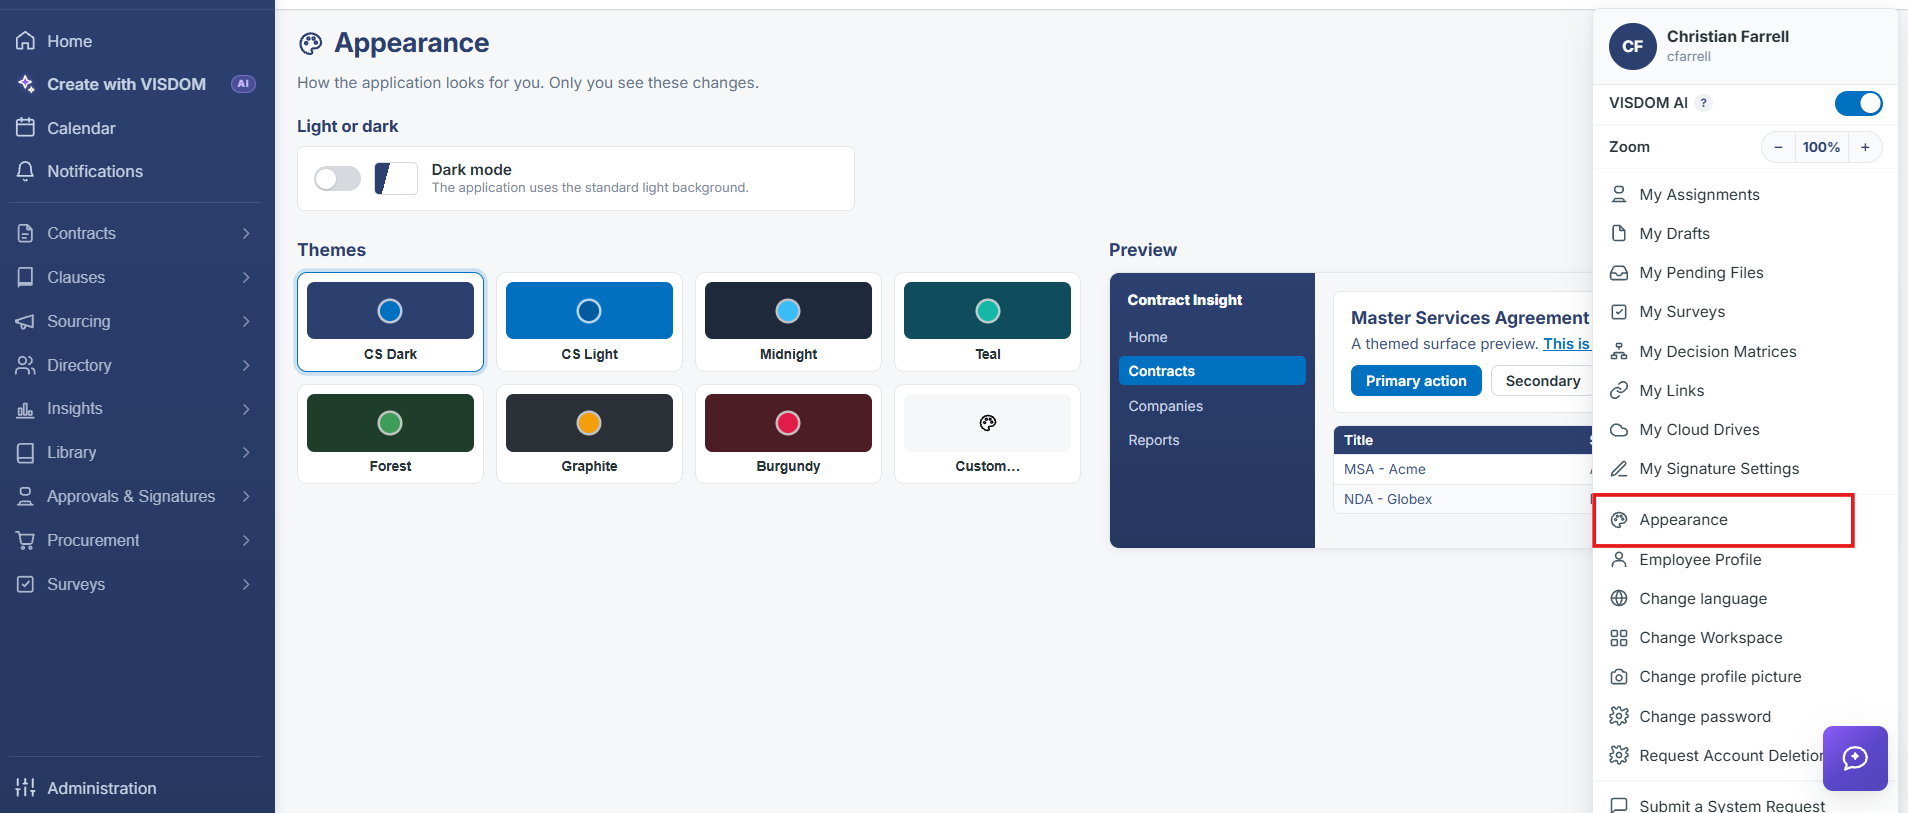
- Appearance (the account menu in the upper right) — the colour palette an individual sees, applied to that person only
Note: The two screens offer the same set of palettes. The difference is scope: Branding sets the starting point for everyone, Appearance overrides it for one person.
3. Setting the Header Logo
The Branding screen sets “the logo shown in the application header. Everyone in this workspace sees it, on every page.”
Steps:
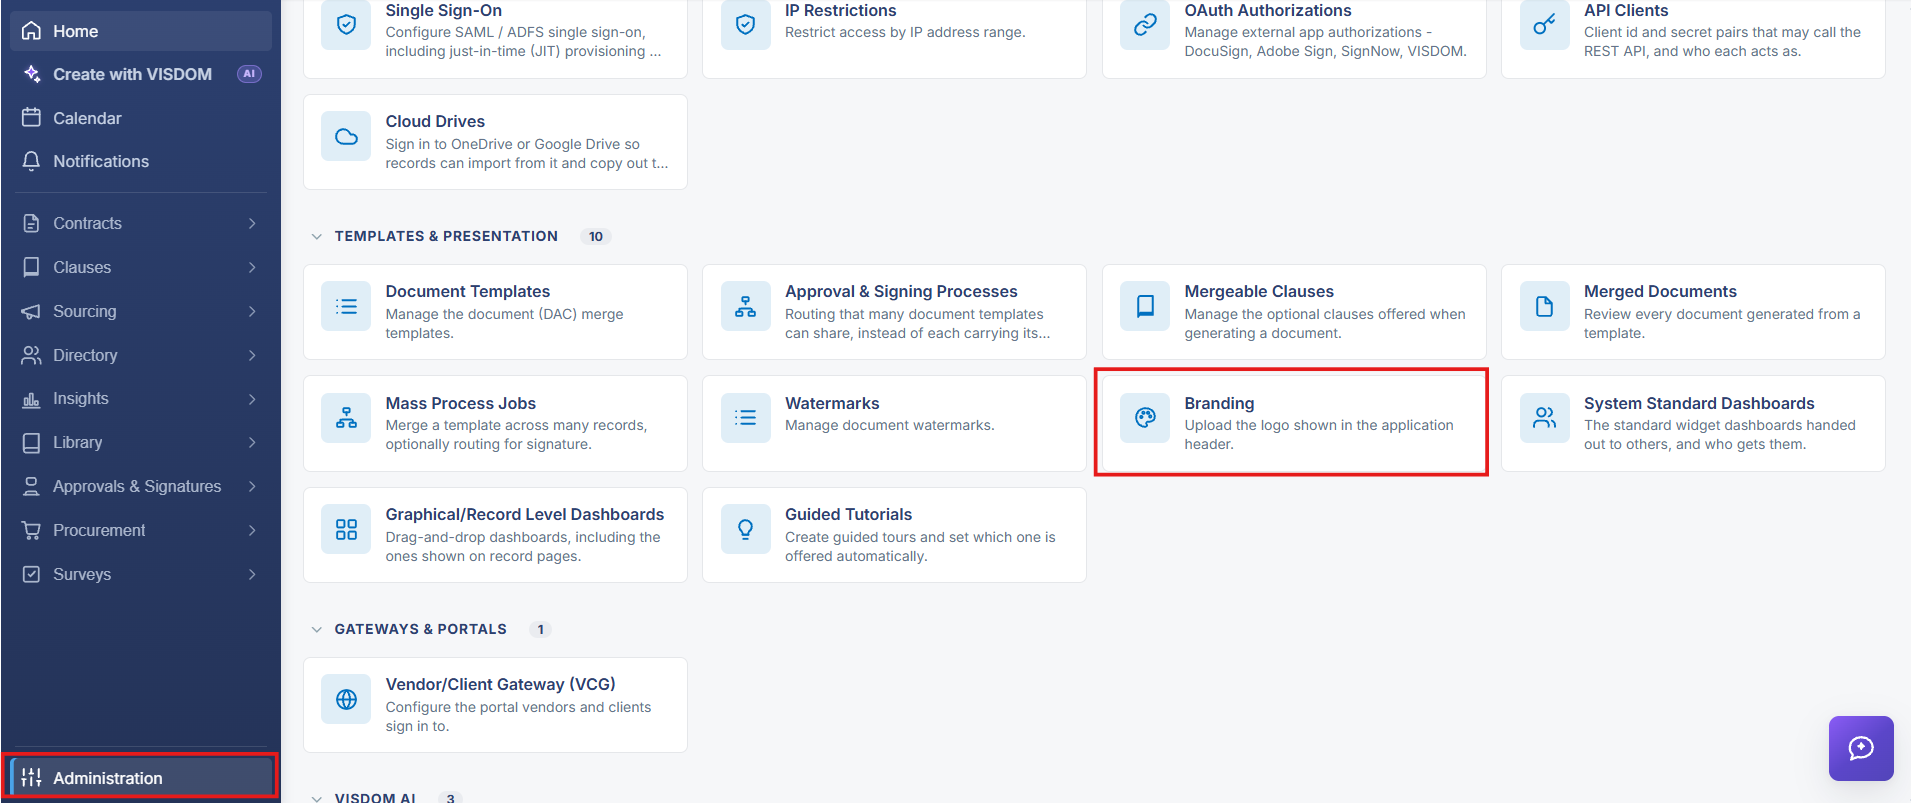
- From the Contract Insight homepage, click Administration at the bottom of the left navigation menu. On the Administration page, under Templates & Presentation, select Branding.
- In the Header logo panel, review the strip at the top, which previews the header as it will appear, along with the current file’s name, format and the date it was added.
- Click Choose image… and select the logo file.
- Enter the Organization name. It is read aloud in place of the image by a screen reader, and shown if the image cannot load.
- Click Replace logo to apply the new image, or Remove logo to clear it.
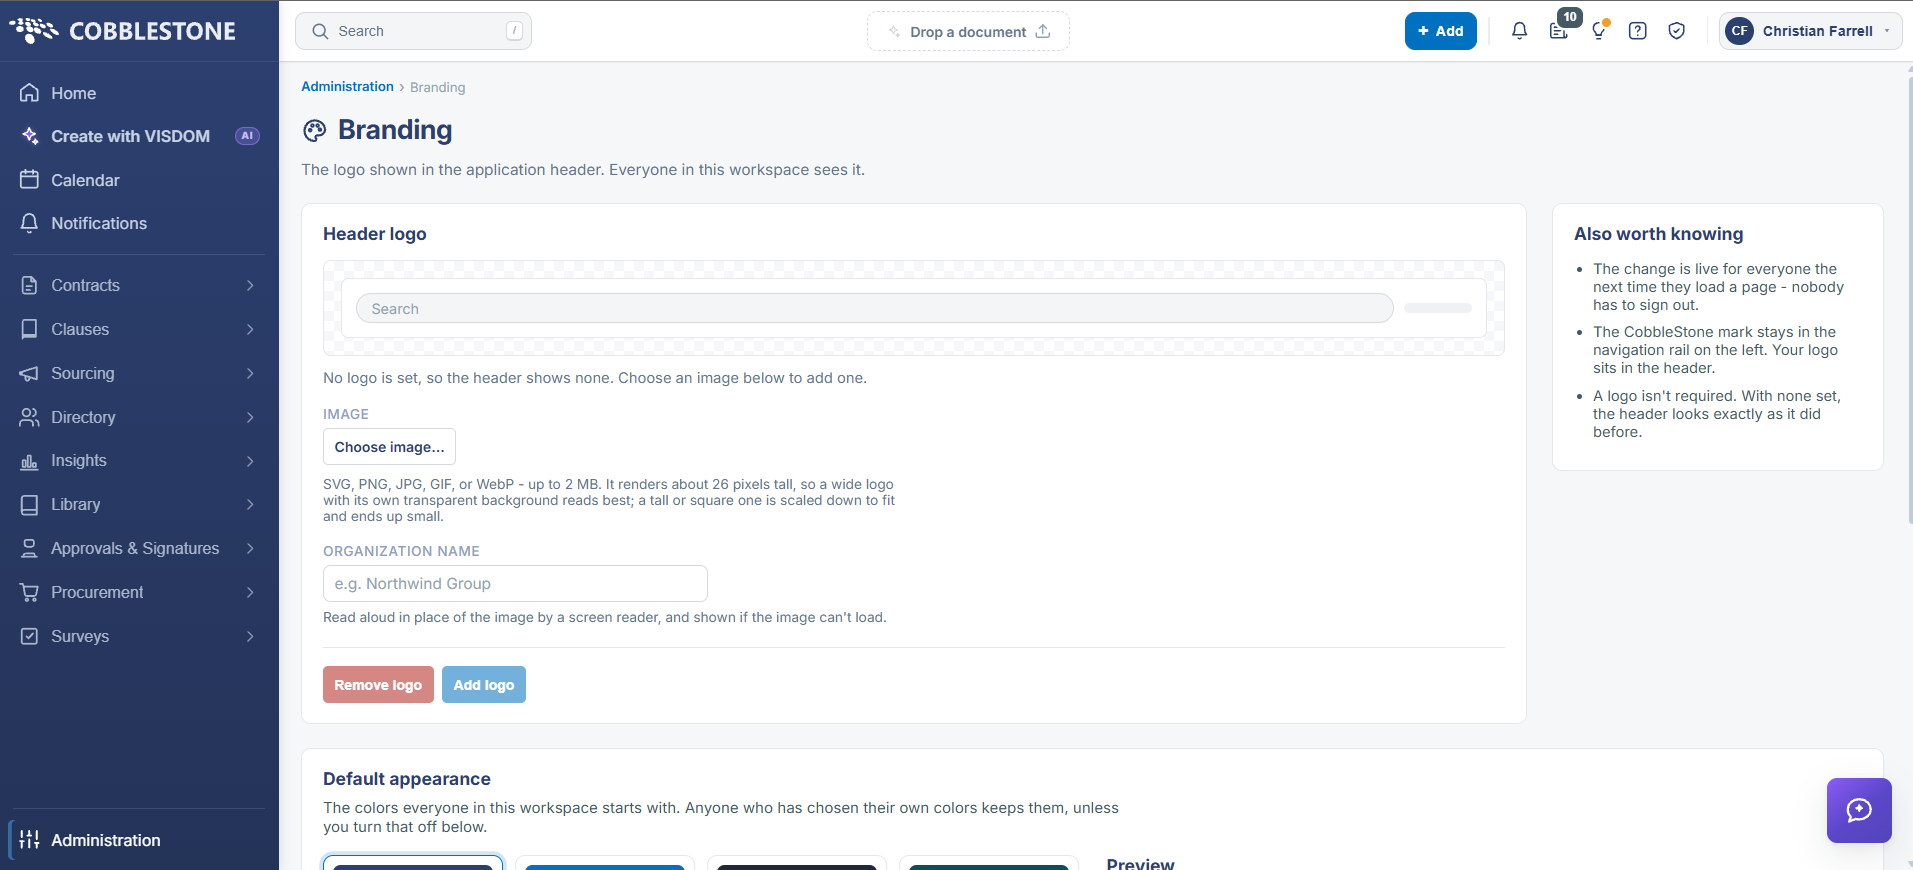
The image requirements are stated on the screen:
- SVG, PNG, JPG, GIF or WebP, up to 2 MB
- It renders about 26 pixels tall, so a wide logo with its own transparent background reads best
- A tall or square logo is scaled down to fit and ends up small
Note: The change is live for everyone the next time they load a page — nobody has to sign out. The CobbleStone mark stays in the navigation rail on the left; your logo sits in the header. A logo is not required, and with none set the header looks exactly as it did before.
4. Setting the Default Appearance
The Default appearance panel on the same screen sets “the colors everyone in this workspace starts with.” Seven named palettes are offered — CS Dark, CS Light, Midnight, Teal, Forest, Graphite and Burgundy — along with a Custom… option for choosing your own colours.
Steps:
- From the Contract Insight homepage, click Administration at the bottom of the left navigation menu. On the Administration page, under Templates & Presentation, select Branding.
- Scroll to the Default appearance panel.
- Click a palette to select it. The Preview beside the palettes updates immediately to show how that palette renders.
- Judge the palette against the preview — navigation, headings, links, primary and secondary buttons and table headers are all represented.
- Click Save appearance to apply it as the workspace default.
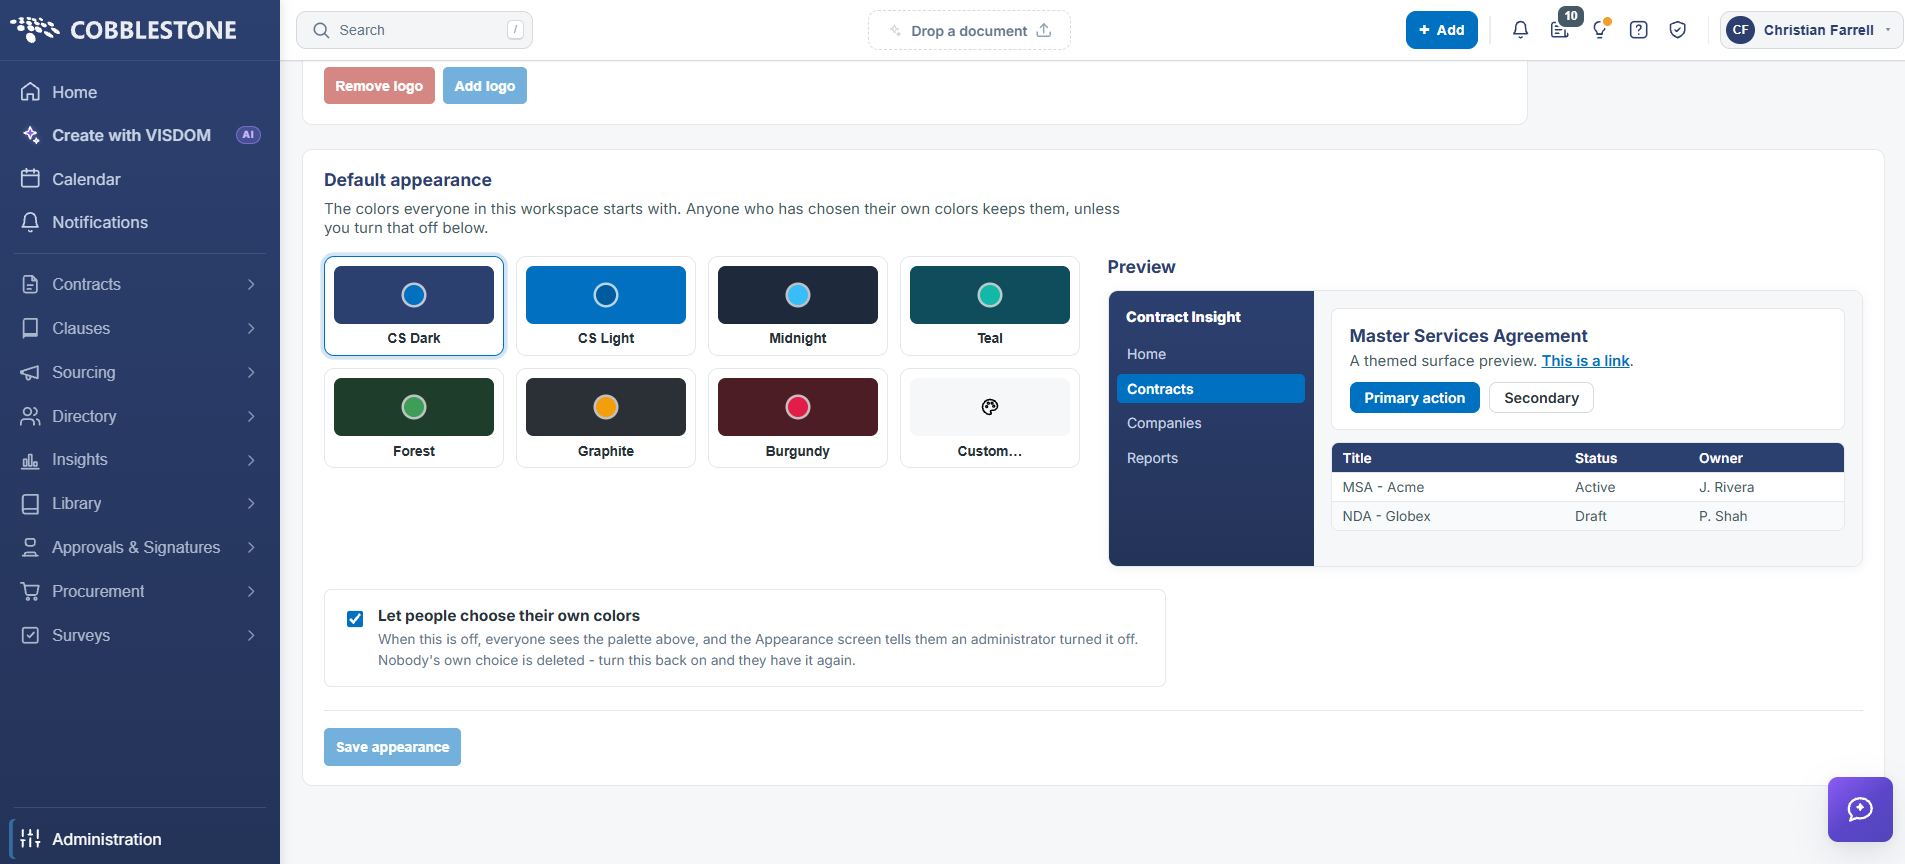
Note: Choosing a palette here changes the starting point for the workspace. Anyone who has already chosen their own colours keeps them, unless personal choice is switched off as described in Section 5.
5. Allowing or Preventing Personal Colour Choice
Beneath the palettes is the Let people choose their own colors switch. Left on, individuals can set their own palette on the Appearance screen. Turned off, everyone sees the workspace palette instead, and the Appearance screen tells them an administrator has turned the option off.
Note: Turning the switch off does not delete anyone’s choice. Turn it back on and each person has their previous palette again — which makes it safe to enforce a single look temporarily, for a demonstration or a training session, without anyone losing their preference.
6. Choosing Your Own Appearance
The Appearance screen is described as “Choose how Contract Insight looks for you. Only you see these changes, and they apply as you make them.”
Steps:
- From anywhere in Contract Insight, click your name in the upper right to open the account menu.
- Select Appearance.
- Click one of the palettes under Themes — the same seven named palettes offered on the Branding screen, plus Custom….
- Check the Preview beside the palettes, which shows the navigation, headings, buttons and table styling for the selected palette.
Note: The change applies as it is made and affects only the person making it — there is no save step, and no one else sees the difference. Where an administrator has switched personal choice off, the screen says so instead of offering the palettes.
7. Other Personal Display Options
The account menu carries a few other options that affect how the application looks and reads for the individual:
- Zoom — a − / percentage / + control at the top of the account menu that scales the interface
- Change language — the language the interface is presented in
- Change profile picture — the image shown against your account
Note: These are personal, like Appearance. Application-wide presentation is set from Administration: Branding for the logo and default palette, Navigation Menu for the structure of the left-hand menu, and Tab Details Setup for the layout of record pages.
8. Quick Reference Summary
Task | How to Complete It |
Open branding | Homepage → Administration → Templates & Presentation → Branding. |
Set the logo | Header logo panel: Choose image…, enter the Organization name, then Replace logo. |
Logo requirements | SVG, PNG, JPG, GIF or WebP up to 2 MB; renders about 26 pixels tall, so a wide transparent logo reads best. |
Set the default palette | Default appearance panel: pick a palette, check the Preview, then Save appearance. |
Palettes offered | CS Dark, CS Light, Midnight, Teal, Forest, Graphite, Burgundy, and Custom… |
Allow personal choice | Let people choose their own colors — off means everyone sees the workspace palette; nobody’s choice is deleted. |
Choose your own | Account menu (your name, upper right) → Appearance → pick a palette. Applies immediately, to you only. |
Other display options | Zoom, Change language and Change profile picture, all in the account menu. |