- 07 Nov 2023
- 6 Minutes to read
- Print
- DarkLight
Requests
- Updated on 07 Nov 2023
- 6 Minutes to read
- Print
- DarkLight
CobbleStone® University Certification Program - Unit 2
Create a Contract Request
Contract Request Process:
A Request Record is usually submitted by an End User to request that a new record is created, such as a Contract or Vendor.
Requests are an “informal” record that must be reviewed and approved/rejected by a Review Group.
Adding a Request Record
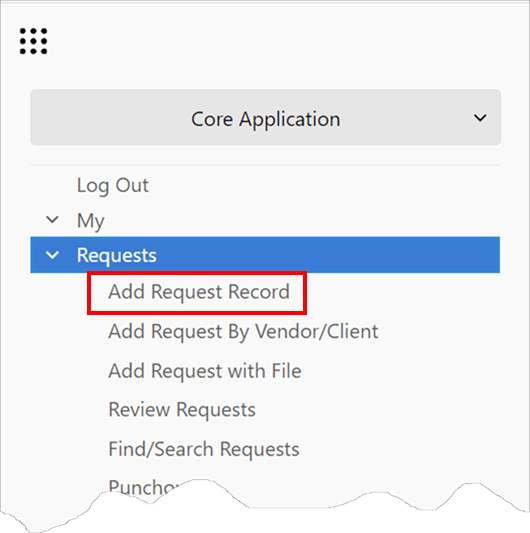
Initiating the Contract Request Function is accomplished by navigating to Requests > Add Request Record.
1. A page where the type must be selected in a drop-down menu displays
2. Click Continue.

The Request a Contract entry screen for adding/creating a new Contract Request displays.
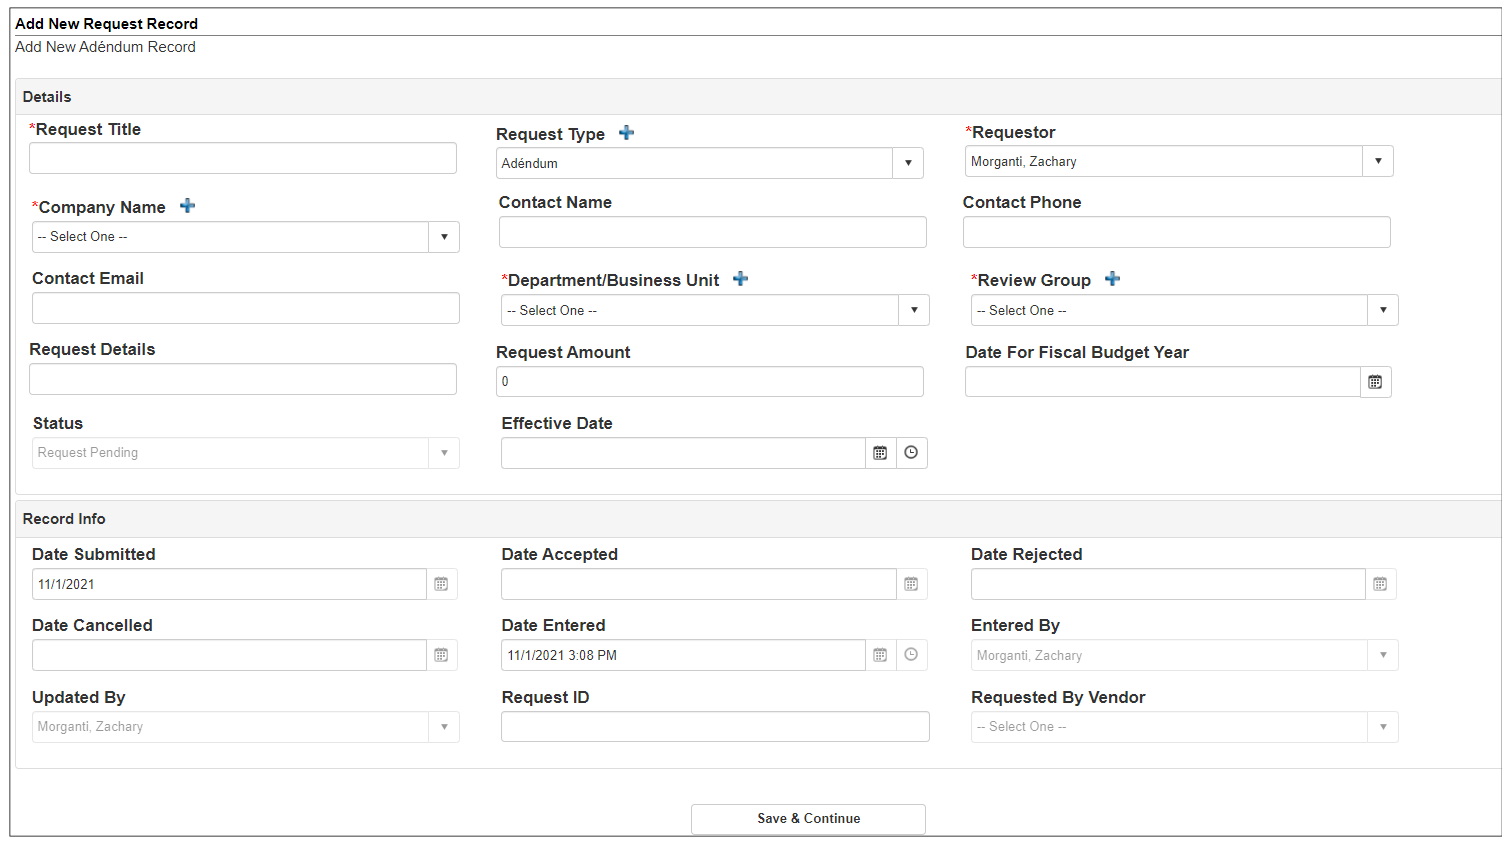
1. Enter the information/data for your Contract Request into the appropriate fields, being sure to populate all required fields, as indicated by a Red Asterisk (*).
Note:
- Fields on the Request a Contract screen that are grayed out are fields that the system automatically populates/fills in and cannot be changed/edited.
- Each Contract Request must be assigned to an appropriate Review Group. The assigned Review Group is comprised of individual users who have been tasked with reviewing and determining the disposition for each submitted Contract Request. Creation and management of Review Groups is a Contract Insight Application Administrator function which should be completed during Contract Request Configuration. To create a Review Group, please see the Employee Groups & Roles Wiki page.
- When creating a Contract Request for review and acceptance, the value in the Status field triggers the Contract Request to be submitted, to the individual users assigned to the Review Group, for the review and acceptance activities. A Status value of Request Pending triggers alert emails once Save & Continue for the Contract Request has been clicked. Contract Request Email Alerts are sent to all individual users assigned to the assigned Review Group, the requester (Entered By), and the Employee Contact (primary person assigned responsibility as the point of contact for the Contract Request).
2. Add Sub-Table Data
If configured to, some sub-tables may be available to data entry on the record's Add Screen.
Adding Sub-Table Lines on the Record Add Screen
A. Add a new record as usual.
B. Between the individual fields and the Save & Continue button, each selected sub-table is available. If a particular sub-table is not available, your system administrator has not enabled it for use on the add screen.
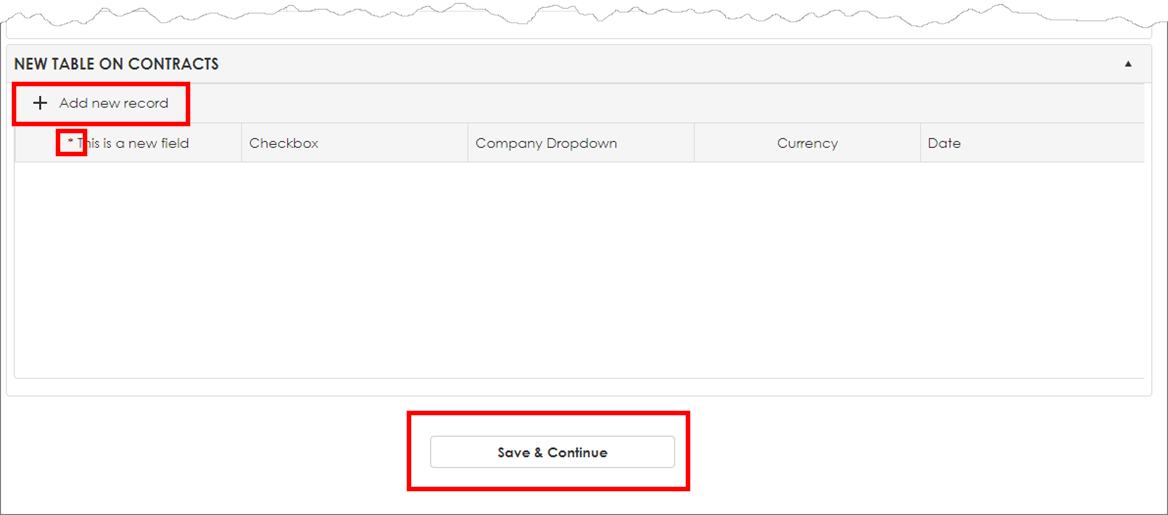
C. Click Add New Record.
D. A set of fields appears for each column header for each sub-table. Enter data into all required fields (as marked with a red asterisk (*) in the column header) and all other data available.
Note: For more information regarding sub-tables, please visit the wiki page for Custom Sub-Tables.
2. Once all of the appropriate data/information has been entered, click Save & Continue to save the Contract Request, trigger the alert emails. The Contract Request Details screen displays.
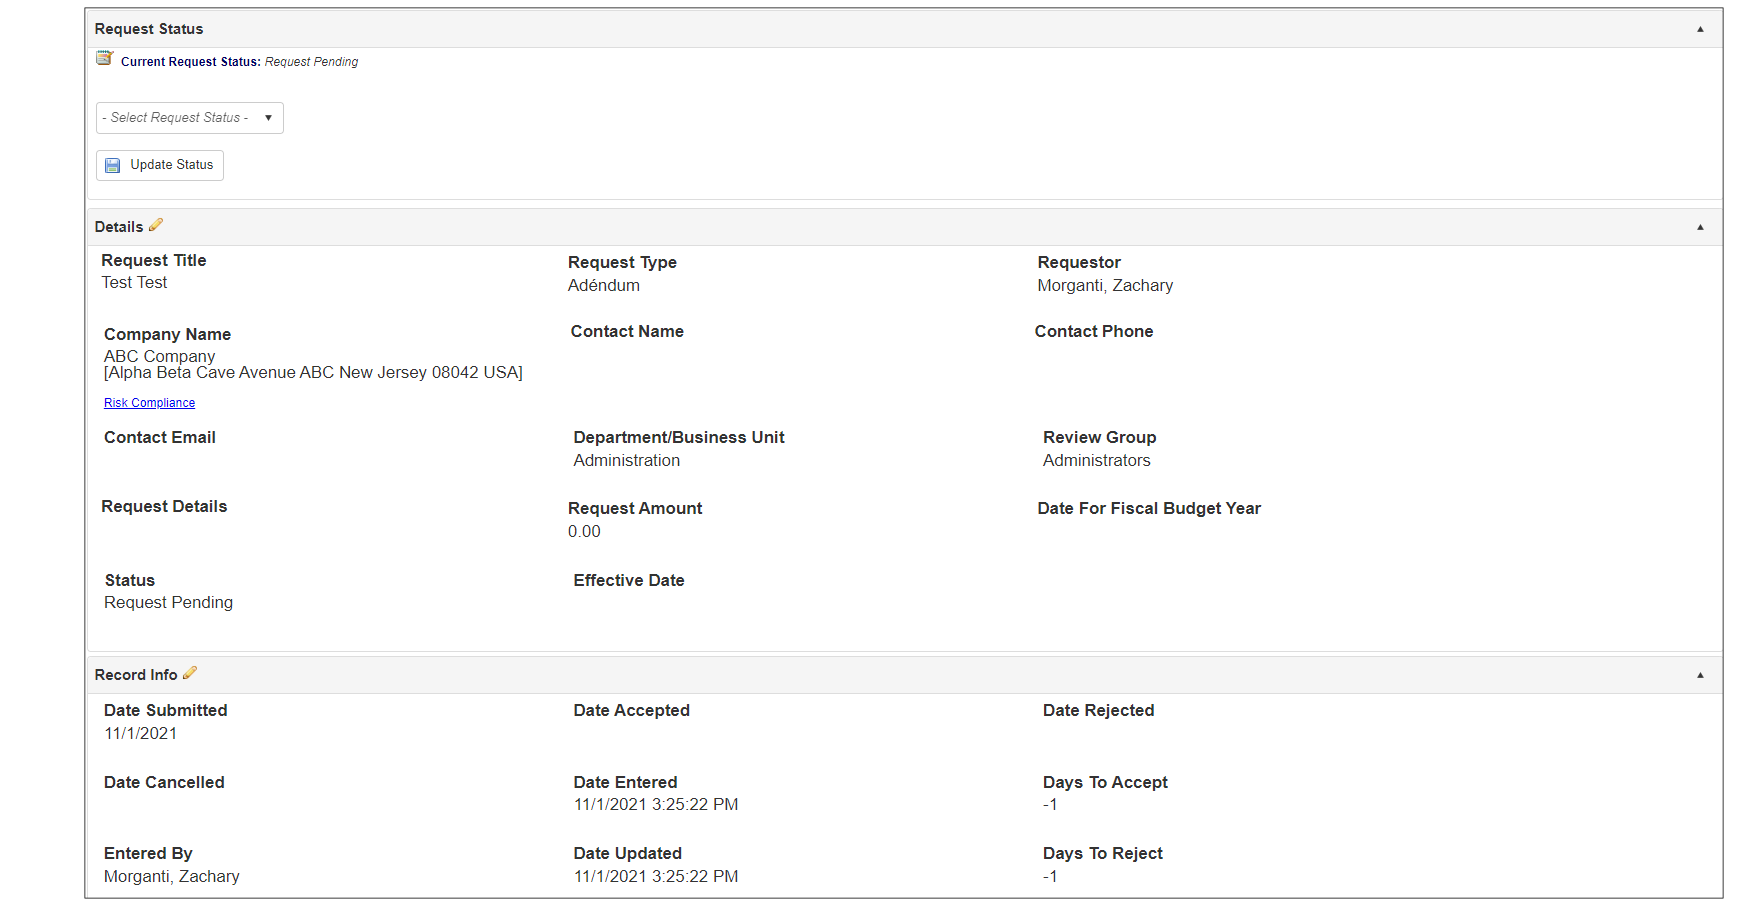
The Request Details screen contains 6 distinct sections/components:
- Contract Request Meta-data (Record Details)
- Contract Request Attachments (Files & Documents)
- Contract Request Task Alerts (Tasks, E-mails, Workflow, Alerts)
- Contract Request Line Items (Line Items)
- Contract Request Notes Repository (File Notes & Comments)
- Contracts Linked to this Request
You are also able to create a request from a file from any screen with the grey Drag and Drop box in the Top Menu by dragging and dropping a file onto that screen

That will then prompt you to choose what type of record to create from the file. To create a request, you would need to click on the request button.
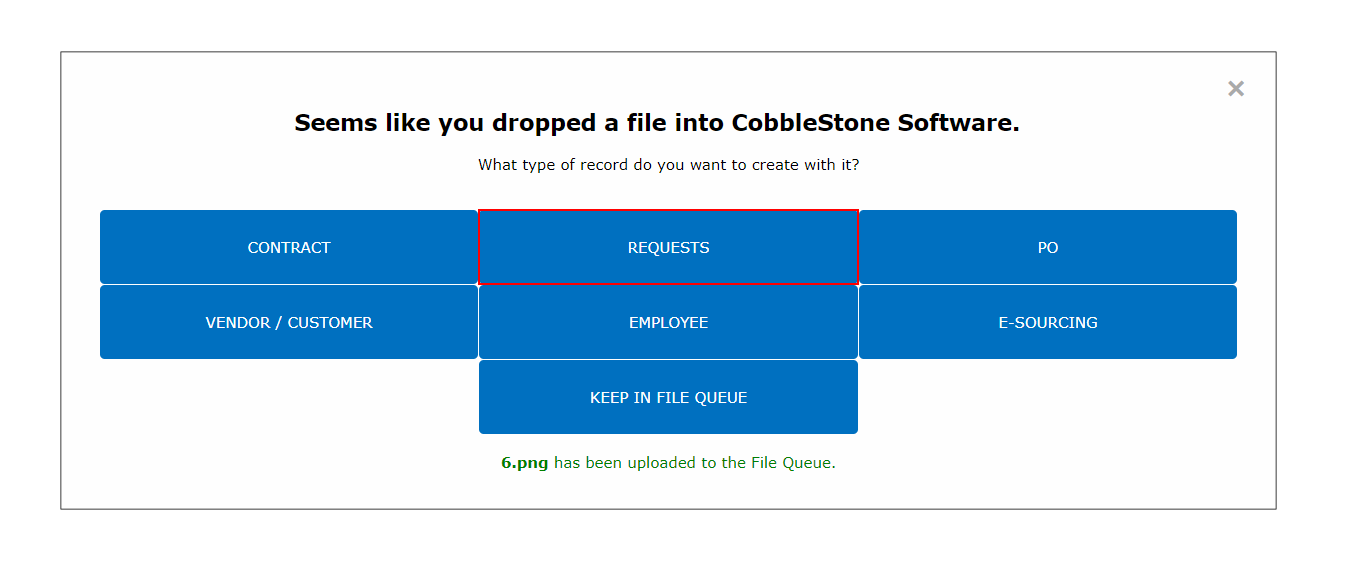
Afterwards you will be able to review the file and enter all metadata for the record.
To learn more about Request Records, watch the following video.
Accepting/Rejecting a Contract Request
Contract Request Process: Accepting/Rejecting a Request
Once the Contract Request has been reviewed by a member of the assigned Review Group (or a System Administrator), the Reviewer will then change the Status of the Contract Request.
To change the Status of a Contract Request, the Reviewer must go to the top of the Contract Request Details screen. From there, the status can be changed using the Request Status drop-down menu.
Only Members of the Review Group (an assigned Employee Role/Group) and System Administrators can change the Status on a Request Record.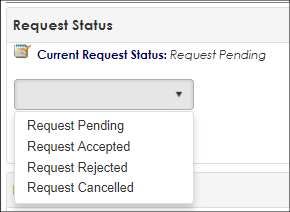
Once the new status has been selected, click Update Status.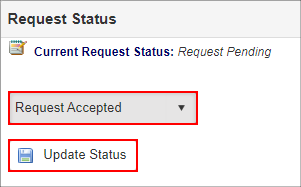
Note: If a Request Status is set to Request Rejected or Request Cancelled, the user who submitted the Contract Request will be notified via e-mail.
If a Request Status has been updated to Request Accepted, the screen refreshes to show a new link for Create Contract. Please see the Create a Contract from a Contract Request Wiki page for information about creating a Contract Record from an accepted Contract Request.
To watch more about approving a request, watch the following video.
Create a New Record from a Contract Request
Contract Request Process: Create a Contract Record from a Request
Once a Contract Request's Status has been updated to Request Accepted, a new option becomes available on the Contract Request Details screen: New Contract Record.
(Note: New Contracts, Counterparties, Solicitations, and Employees may be created from an approved Request Record)
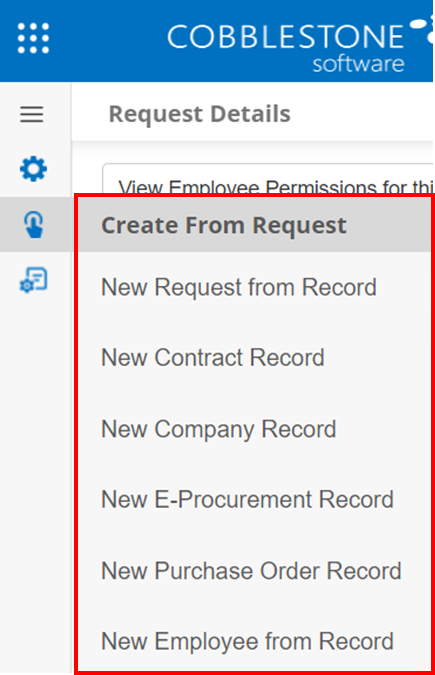
Click New Contract Record on the side menu is clicked, the Select Files to Include in Copy page displays. Select which files to copy from the request to the contract by clicking the check box to copy over to the Contract Record for the needed line item. Click Continue.

The Contract Type selection page displays. Choose the appropriate type and click Continue.

Depending on the field mapping assignments specified in the Field Mapper, the Add New Contract screen will open with the fields specified in the Field Mapper already populated with the values specified in the Contract Request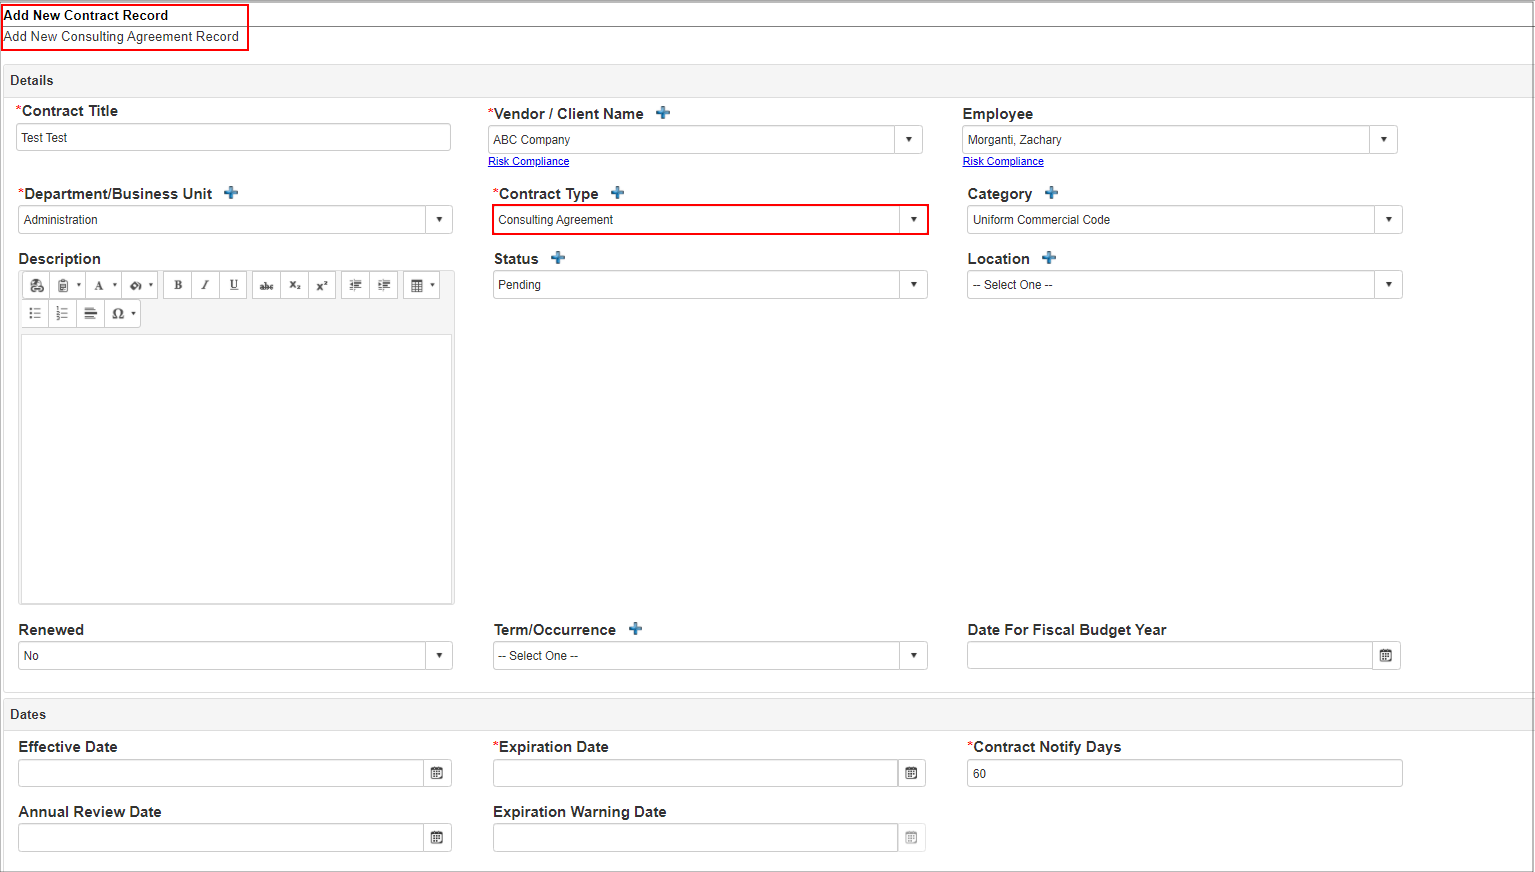
Add any additional information to the new Contract Record as needed/required. Once all necessary/required information has been entered, click Save & Continue to create the new Contract Record. The new Contract Record's Contract Details screen opens to display the details of the newly added contract. For more information about Adding a Contract, see the Adding a Contract Record Wiki page.
Sub-Table Mapping -Manual Selection of Sub-Table Rows
As CobbleStone® advances the software, more and more features are not only added, but expanded on, to provide an ideal experience for the user. With this, the functionality of the Field Mapper is actively being expanded upon to encompass the manual selection of any sub-table rows to map to any other sub-table, as defined in the field mapper. The Field Mapper is the utility that transfers data from Requests to other records.
Enable a table for manual mapping
1. Click Manage/Setup
2. Click Account Maintenance
3. In the side menu, click Field Mapper
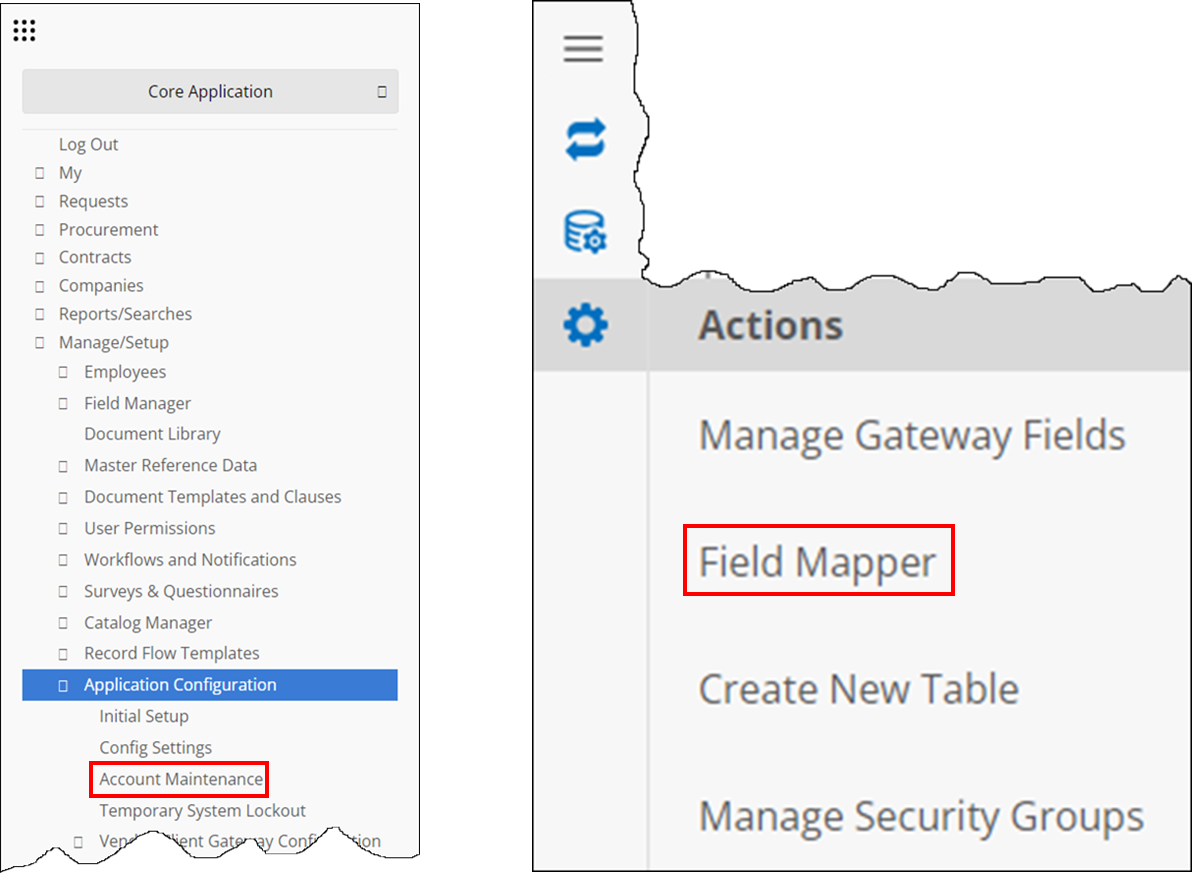
Note: The next few steps will be an example. The user may have different fields they would like to map, but for the sake of this example, the fields that need mapping are Contract Requests to Contract Details while enabling manual file selection for the Notes Sub-Table.
4. Under the Map From section, Select Contract Requests (1)
5. Under the Map To section, select Contract Details (2)

6. Scroll down to the section that reads Subtable mappings from “Contract Requests” to Contract Details”
7. Under Map Subtable From, Select Request Notes (3)
8. Under Map Subtable To, select Contract Notes (4)
9. Under this section, click the drop dox box and make sure Choose Rows Manually (5) is selected. This will allow individual notes to be selected during the mapping process.
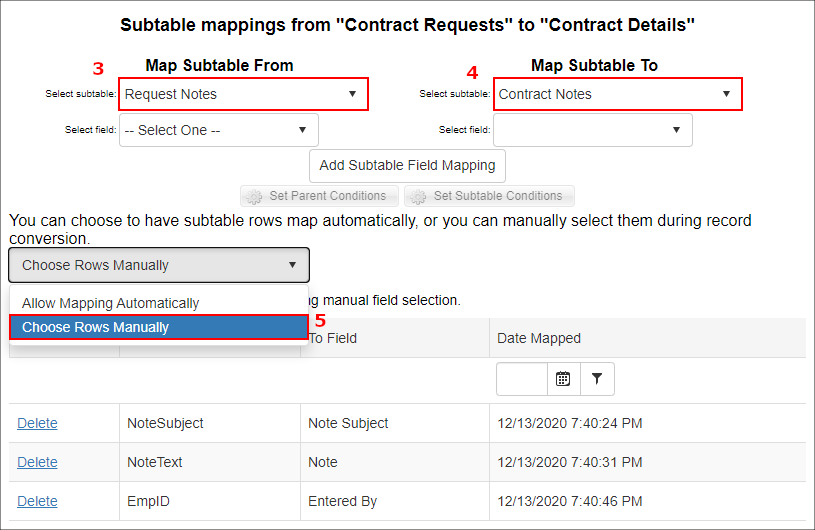
Mapping In Action
1. Go to a Request Record.
2. On the side menu, click New Request [from] Record.
3. A grid displays for every subtable the record has Choose Rows Manually enabled for in the field mapper. Check/uncheck the boxes for the rows you want to manually select to be mapped.
4. Click Continue. The user will see the parent record, as well as the selected subtable rows that were just mapped, based on the field mappings the user previously made in the Field Mapper page.
To learn more about the field mapper, watch the video below.
.png)

