Check Version of ASP.NET Framework installed on Application server
Contract Insight requires the ASP.NET framework 4.8.1 or higher to be installed on the application server. The best way to be sure that it is installed is to do the following:
To check the version of .NET installed on your server run the following from a cmd prompt:
reg query "HKEY_LOCAL_MACHINE\SOFTWARE\Microsoft\NET Framework Setup\NDP"
To check the latest .NET 4 version installed on your server run the following from a cmd prompt:
reg query "HKEY_LOCAL_MACHINE\SOFTWARE\Microsoft\NET Framework Setup\NDP\v4\full" /v version
.png)
IIS Installation Notes
Below are the key installation notes that need to be followed when setting up a Microsoft IIS environment for Contract Insight.
IIS Role Services Selections
When installing IIS, please ensure that you keep all the default options selected.
Please be sure to check/enable AT LEAST the following Role Services when installing Microsoft IIS:
Common HTTP Features Area
1. Default Document
2. Directory Browsing
3. HTTP Errors
4. Static Content
5. HTTP Redirection
Health and Diagnostics Area
1. HTTP Logging
2. Logging Tools
3. Request Monitor
4. Tracing
Performance Area
1. Static Content Compression
2. Dynamic Content
Compression Security Area
1. Request Filtering
2. URL Authorization
3. Windows Authentication
Application Development
1. .NET Extensibility 3.5
2. .NET Extensibility 4.8
3. Application Initialization
4. ASP
5. ASP.NET 3.5
6. ASP.NET 4.8
7. ISAPI Extensions
8. ISAPI Filters
9. Server Side Includes
Application Pool
Session Management
Once Microsoft IIS has been installed, the session management has to be configured. To properly configure the session management the Application Pool assigned to the Contract Insight website/virtual directory created in the steps below must be altered as follows:
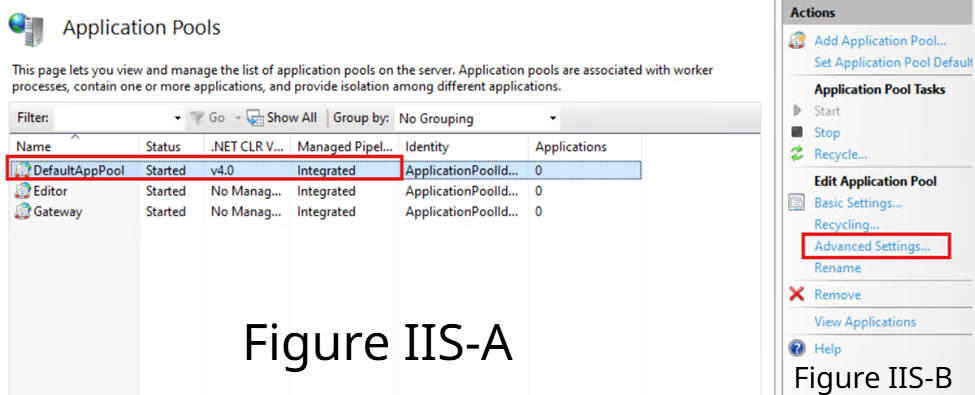
- First select the Application Pool that the Contract Insight website/virtual directory will be/is bound to (the application pool must utilize the 4.8.1 .Net Framework and run in Integrated Mode)
- Once you have selected the appropriate application pool (Figure IIS-A), click on the ‘Advanced Settings’ link in the righthand Actions Menu (Figure IIS-B).
- Clicking on the ‘Advanced Settings’ link will open the properties window (Figure IIS-C) as shown below:
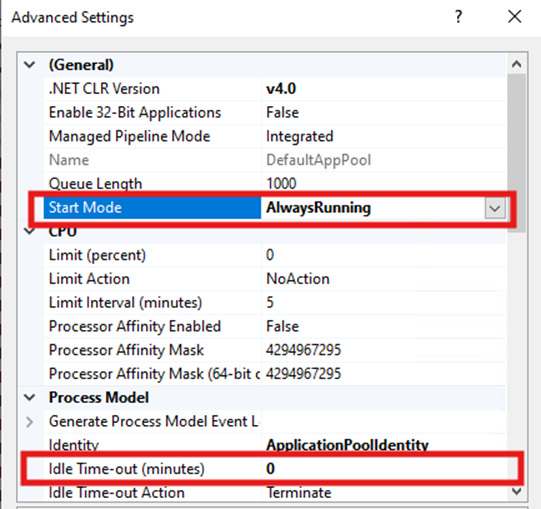
- On this window, two settings need to be changed. “Start Mode” must be set to AlwaysRunning and the “Idle Time-out (minutes)” must be set to 0 (this is the same number that will be stored in Contract Insight’s web.config setting for session timeout).
- A second Application Pool named Editor must be created.
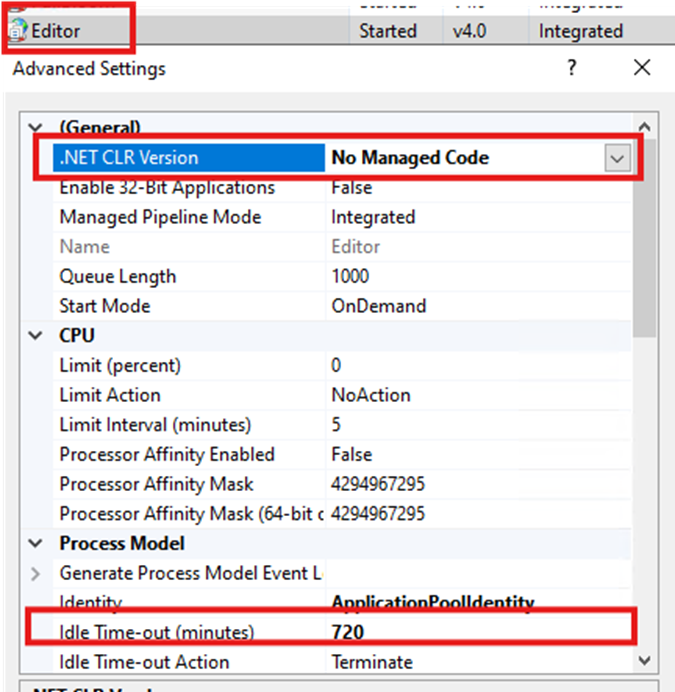 On this window, two settings need to be changed. “.NET CLR Version” must be set to No Managed Code and the “Idle Time-out (minutes)” must be set to 720.
 - A third Application Pool named Gateway must be created
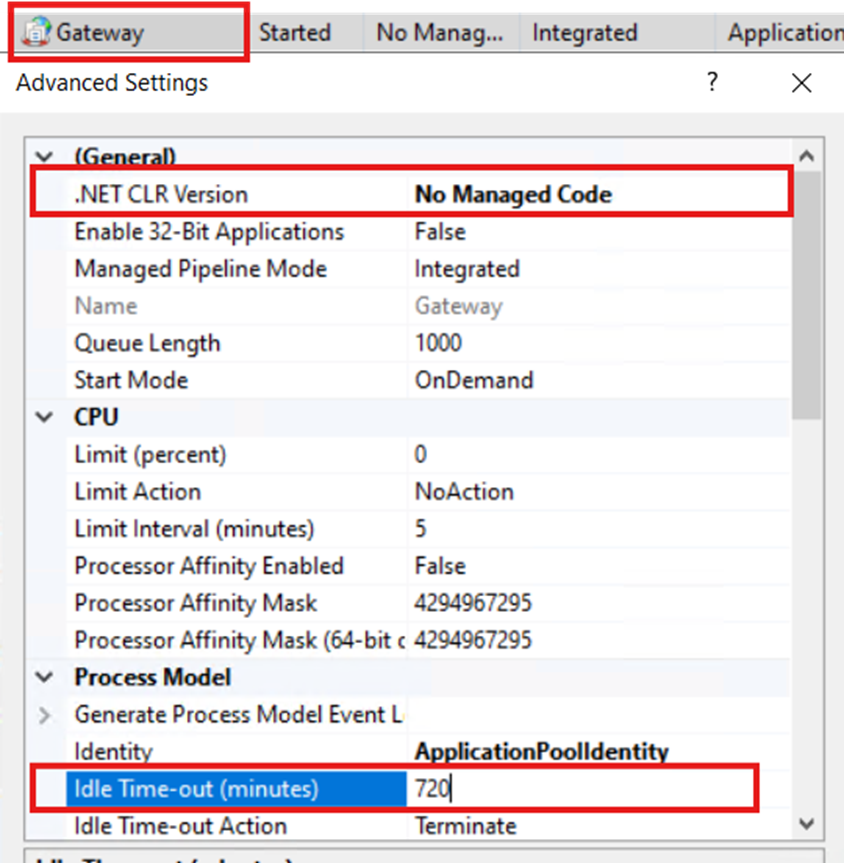
On this window, two settings need to be changed. “.NET CLR Version” must be set to No Managed Code and the “Idle Time-out (minutes)” must be set to 720.
- **Please note: If you selected Windows Authentication in SQL security you will need to make an additional change under ‘Advanced Settings’ **
-Click on the button in the Identity box
 -Change the account from Built-in to Custom Account:
 - Enter the Windows domain/username and password that you are using for SQL Authentication.
Recycling Best Practice
It is a CobbleStone® best practice to change the recycle settings of the application pool. By default, Microsoft sets up IIS application pools to recycle every 1740 minutes. This can potentially cause issues where Microsoft recycles the application pool in the middle of a working day since 1740 minutes is 29 hours. CobbleStone® recommends changing the recycle settings to a specific time of day (typically sometime overnight or when no user would be in the system each day).
To change the recycle settings of the application pool:
**Please note all three Application Pools (Default App Pool, Gateway AND Editor) must be set to recycle at the same time.
- Click on Application Pools on the left menu
- Click on the Application Pool assigned to Contract Insight
- On the right-hand side for the selected application pool, click on the “Recycling” link and the screen below (Figure IIS-D) will pop up.
- By default, you will see “Regular time intervals (in minutes)” checked with 1740 as the value. To change this:
- Uncheck the Regular time intervals box
- Check the box for “Specific time(s)”
- In the value for specific times follow the example and provide a time of day (including the AM or PM as shown in Microsoft’s examples).
- Click next
- Follow the prompts to finish and save the new recycling conditions for the application pool.
- By default, you will see “Regular time intervals (in minutes)” checked with 1740 as the value. To change this:
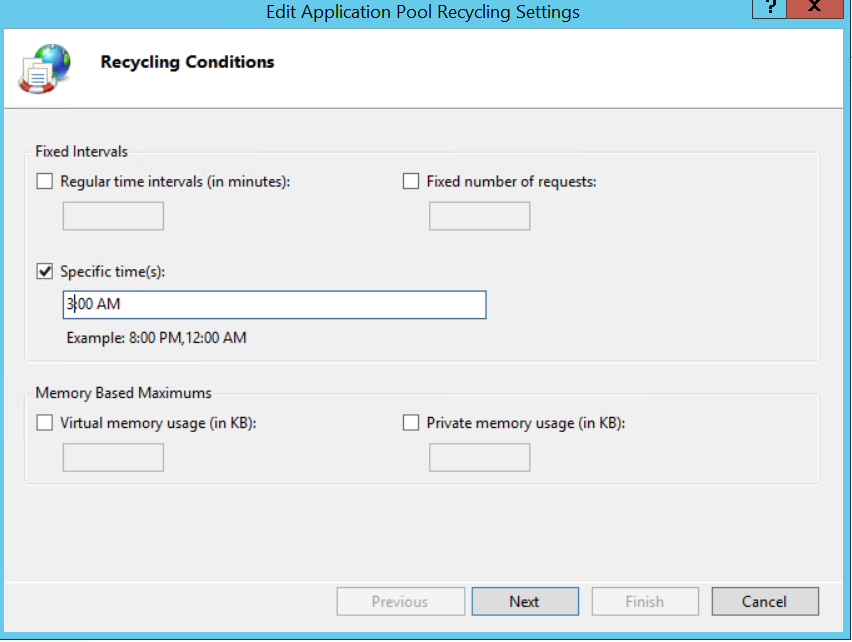 Figure IIS-D
Add Files to IIS
Go to "Explore" on default website and clean out default IIS folders created by IIS install.
- Create empty folders called:
- api2
- core
- gateway
- hangfire
- ocr
- TextControlService30
- Lucene
- esign
- Lucene will be an empty folder with no files, this gets populated when hangfire is executed
- Place install files in appropriate folders (core to core etc)
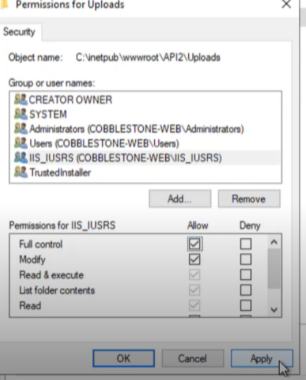
- Right Click on the following folder: C:\inetpub\wwwroot\API2\Uploads and select properties (Folder paths may vary)
Click on the group IIS_IUSERS and check off Full control for Permissions for IIS_IUSRS
*Please note that for all API functionality API needs to be publicly accessible via web, which means your IIS server will require an SSL cert. The API may be placed on an IIS server in a DMZ if your environment requires it.
Right Click on the following folder: C:\inetpub\wwwroot\Core and select properties (Folder paths may vary)
Click on the group IIS_IUSERS and check off Modify for Permissions for IIS_IUSRS. You may need to click ‘Edit’ then ‘Add’ to add the IIS_IUSRS group if it is not already there. Please ensure after adding the Modify Permission you click on Apply to allow the permissions to propagate before hitting OK.
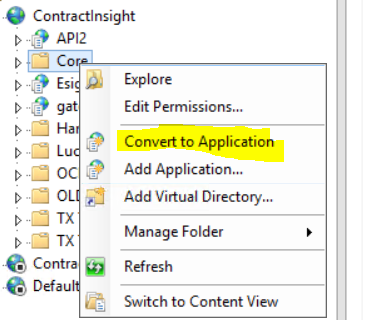
- Right click the following folders (core, gateway, esign, api2) within iis and select Convert to Application.
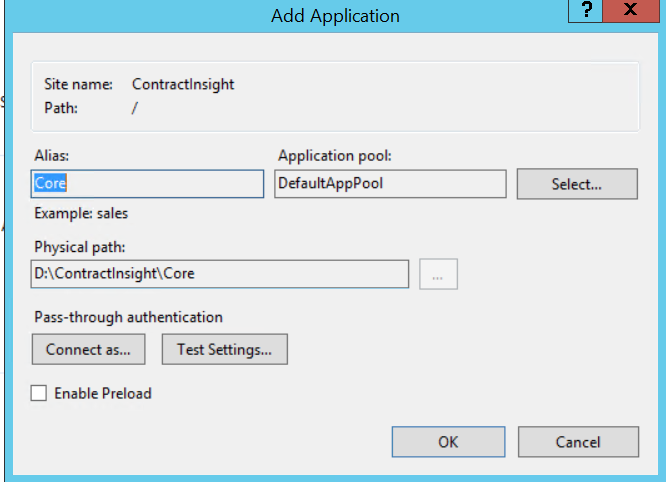
7. Right click on the Core folder, click Manage Application then click Advanced Settings.
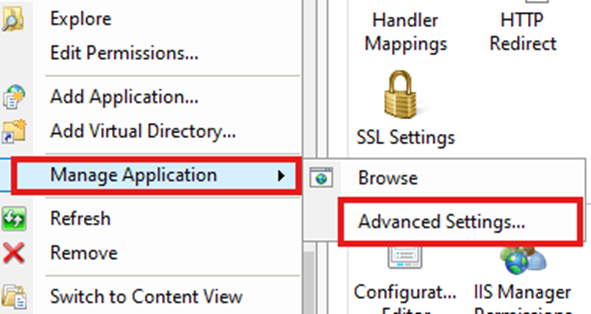
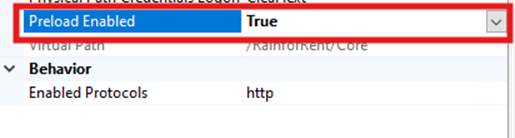
You must change “Preload Enabled” to True.
IIS Authentication
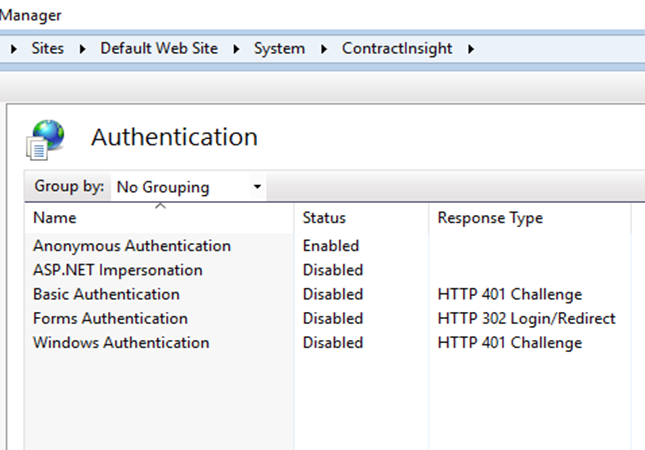
Check setting in Authentication to be sure they are set correctly as per the client’s login process.
Standard Username and Password
Recommended for initial install:
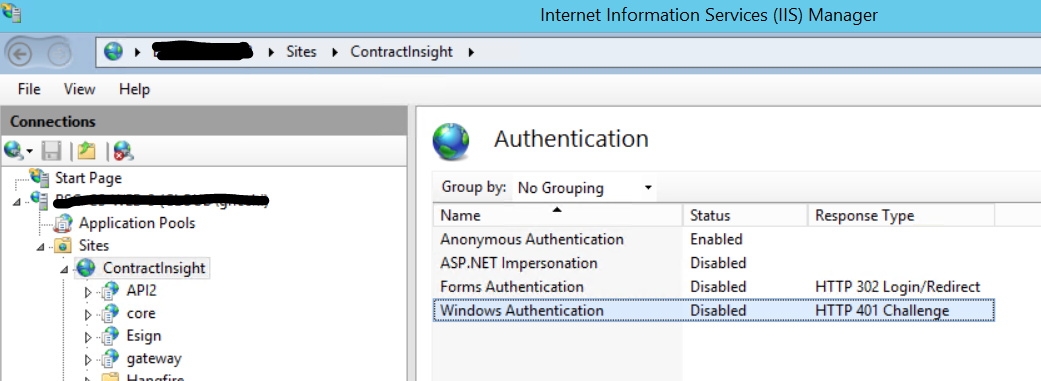
When you receive your initial install files from CobbleStone® you will be provided with a username and password. Setting Windows Authentication to disabled and enabling Anonymous Authentication as shown below is the standard login method.
Active Directory
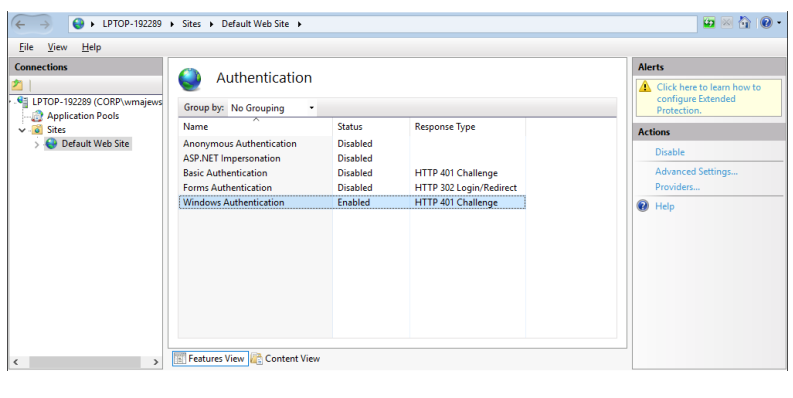
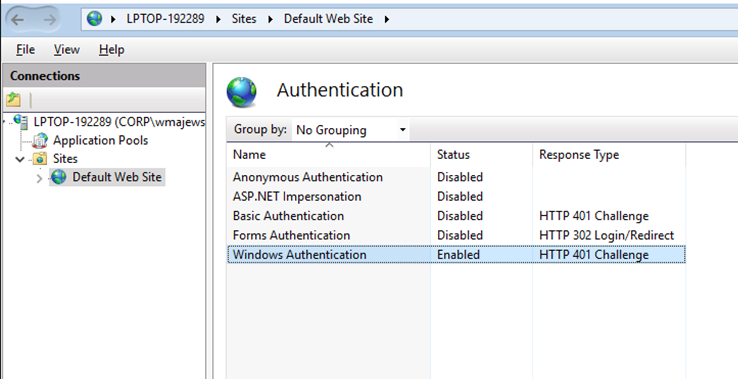
Setting Windows Authentication to enabled and disabling Anonymous Authentication as shown below is the Active Directory method. This forgoes a username and password and instead uses the Windows Directory to verify users.
Changing login method from Standard to Active Directory
First step, all usernames must be their active directory name with no Domain (Example of what NOT to do: css\JohnDoe). This must match exactly what their username is in your Active directory.
It is a 3 step process that requires a change in IIS and the Database.
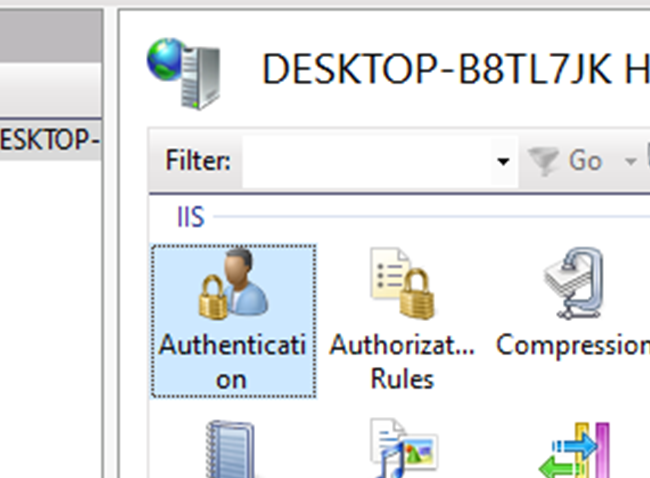
- In IIS Make sure you are on the Core folder, then click on authentication.
- Disable anonymous authentication and Enable windows authentication.
- Then, in the database run the following script:
UPDATE t_appconfig
  SET Configvalue='ActiveDirectory'
  WHERE Name='LoginMethod' and Displayname='Application Login Method'
  GO
Changing login method from Active Directory to Standard
It is a 2-step process that requires a change in IIS and the Database.
- In IIS Make sure you are on the Core folder, then click on authentication.
- Enable anonymous authentication and Disable windows authentication.
- Then, in the database run the following script:
  UPDATE t_appconfig
  SET Configvalue='Standard'
  WHERE Name='LoginMethod' and Displayname='Application Login Method'
  GO