CobbleStone® University Certification Program - Unit 1
Log-in
CobbleStone® Contract Insight is a web-based solution, so only an internet connection and a modern web browser are needed to access the system. To login to the system, users will need an their system URL (if they are not using SSO), their username, and their password.
1. Open a web browser, connect to the Internet, and go to the URL web address site that was assigned (or obtained from the Application Administrator).
2. The Log In screen will display. Enter the username and password that has been assigned by the Application Administrator.
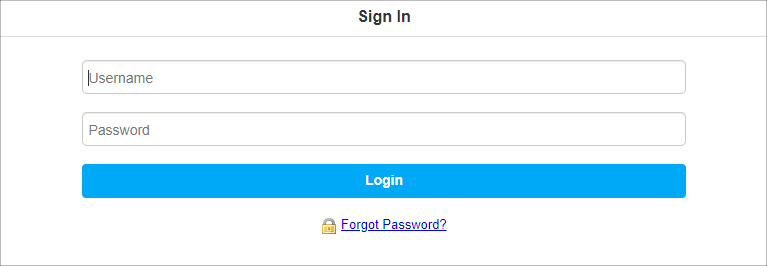
If you have forgotten your password, contact your application administrator to have it reset by clicking Forgot Password.
To reset your password, go to the Employees top navigation menu and select Change My Password.
General Navigation
Contract Insight Basic Navigation
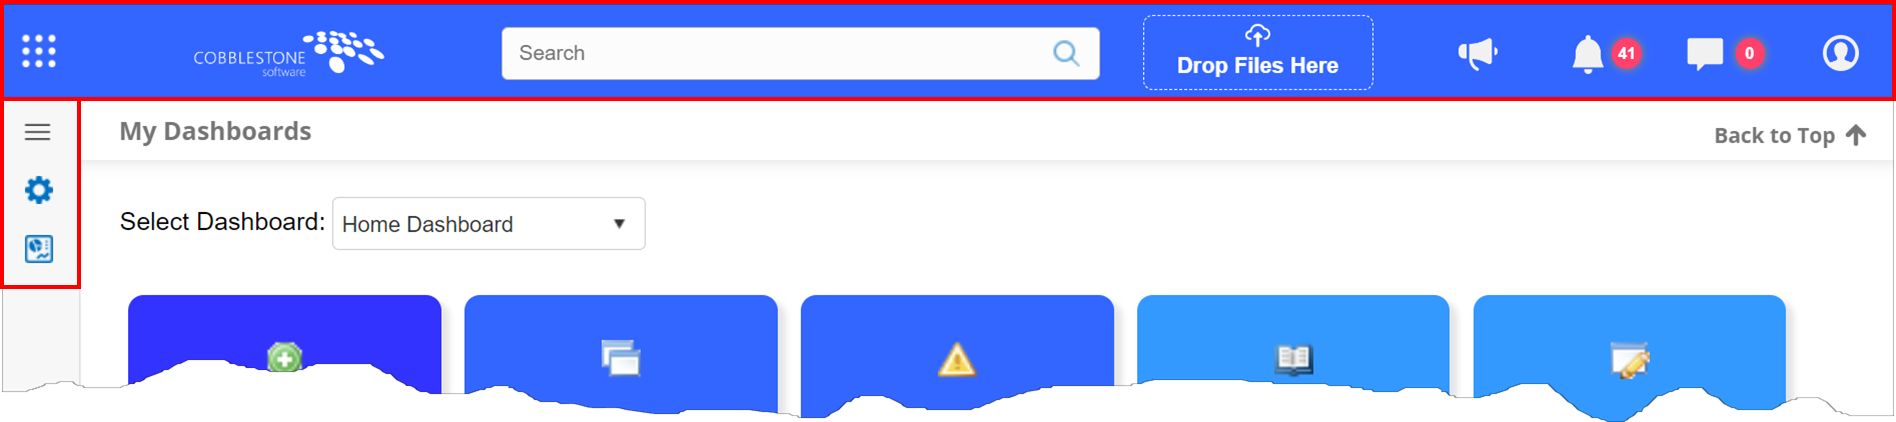
Users have access to the Main Menu to navigate the system, and the Side Menu to navigate the current page.
The Main Menu is used to navigate to other pages in the system. This menu can change based on User Permissions and Workspaces in the system.
The Side Menu changes dynamically depending on the current page.
Contract Insight Main Menu
Hover over the Waffle Icon to access the Main Menu.
Click the caret dropdown lists to access the contents of each folder.
Note that Manage/Setup is an especially important folder for Admins.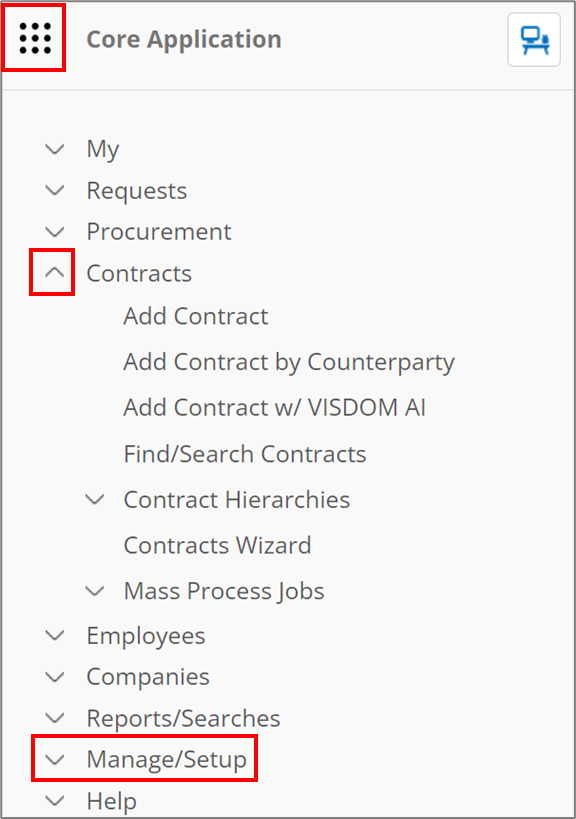
Contract Insight Side Menu
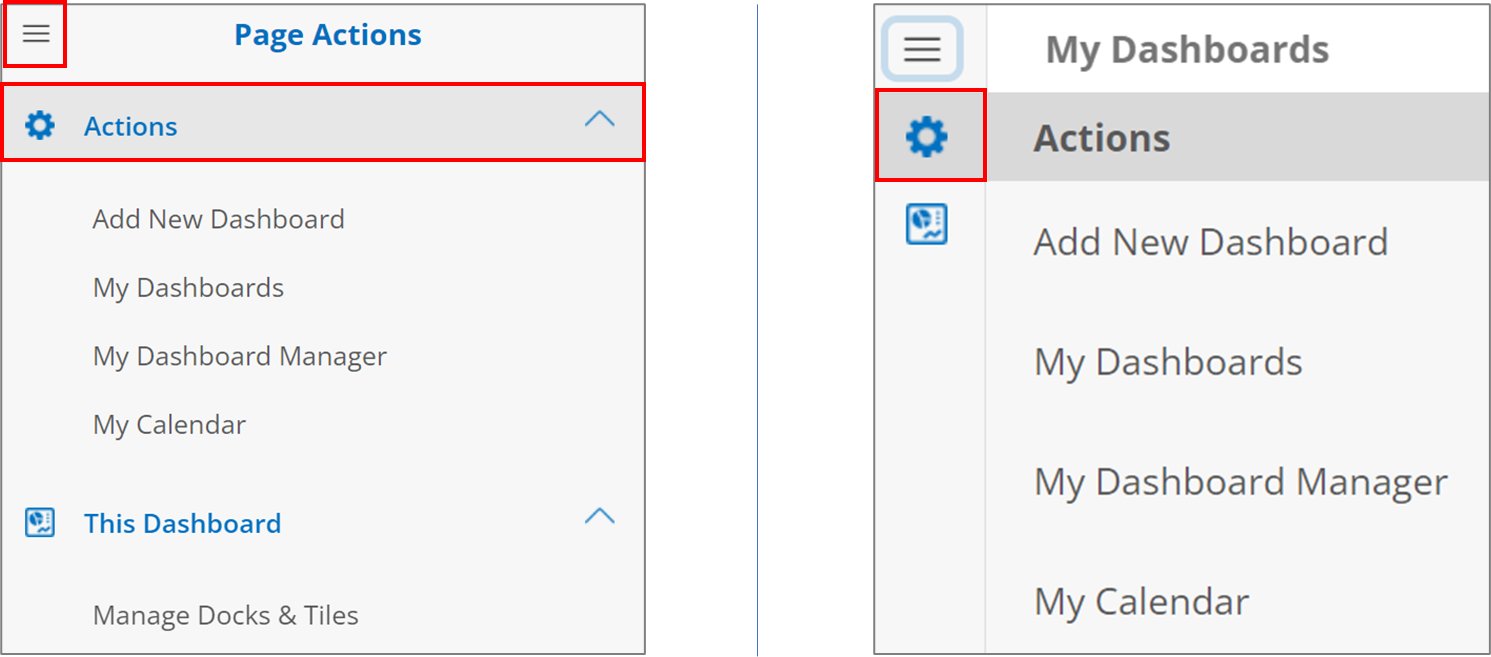
The Side Menu can be accessed by clicking the Hamburger Icon or hovering over an individual icon.
Quick Search
The Quick Search box is in the Top Menu for easy access. Type a search string into the Quick Search box and press Enter or click the Magnifying Glass Icon.

Quick Search: Spell Check
When possible, Quick Search looks for entries that may have been intended and suggests an alternate spelling or word.
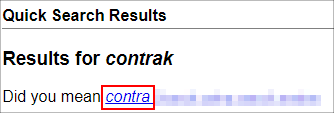
Click the suggestion to perform a search on that instead.

Date & Time
The date and time displaying in the Top Menu reflects the last time a page was loaded by the current user.

Icons
The icons at the top allow access to the in-application Notifications, Alerts, and Chat features. See each feature's page for more information on each.

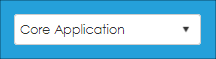
Work Spaces
If multiple Work Spaces are available to you on your Dashboard, select the preferred Work Space via the pick list.
To watch more about these topics, please watch the video below.
CobbleStone® Screen Layouts
CobbleStone® has three screens that are seen often in the system: the Add Screen, the Details Screen, and the List Screen. All screens will be discussed in this section.
Add Screen
The Add Screen is seen whenever creating a Department, Employee, Counterparty, Request, Contract, and more. This page will use Contract Records for example purposes.
Fields with a red asterisk (*) are Required Fields. If any required field is left blank while clicking Save & Continue, the system will NOT advance to the Details Screen. The blank required fields will be highlighted in red for the user to key in. Please note that it is always best practice to fill in as many fields as possible. Fields are broken down by Field Group (Details, Dates, Financial/Budgetary, & Record Info in this example).
Date Entered, Updated By, Entered By, and Contract ID are filled out, automatically, by the system. Every record entered will be assigned a unique ID field.
Once all required and applicable fields have been completed, click Save & Continue.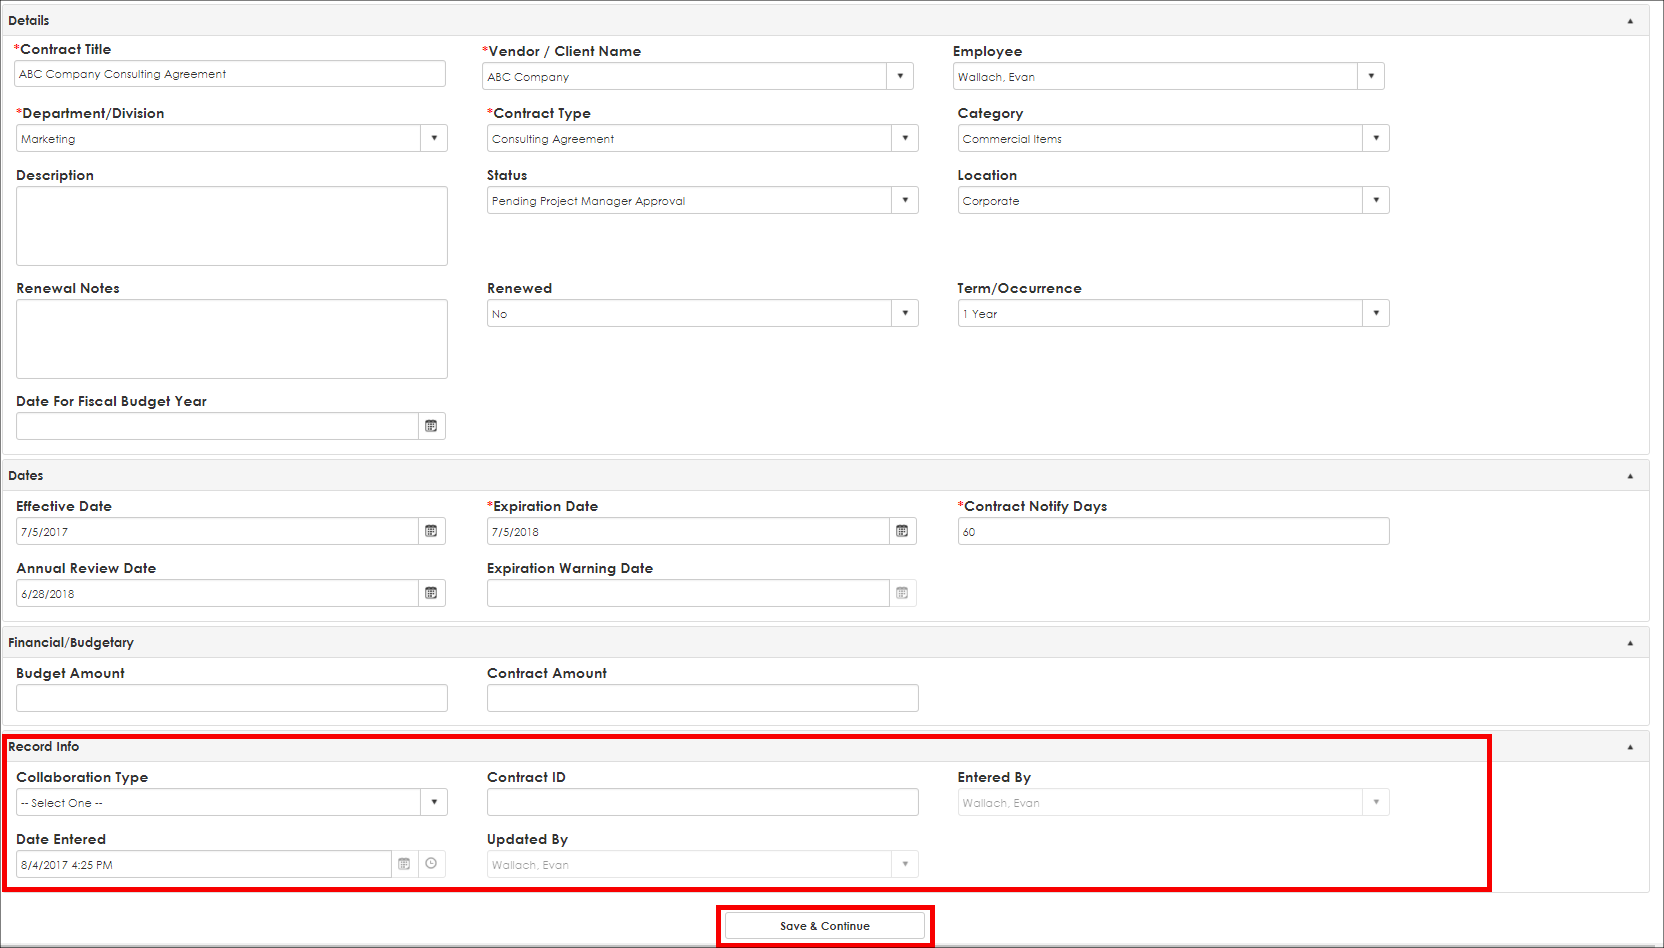
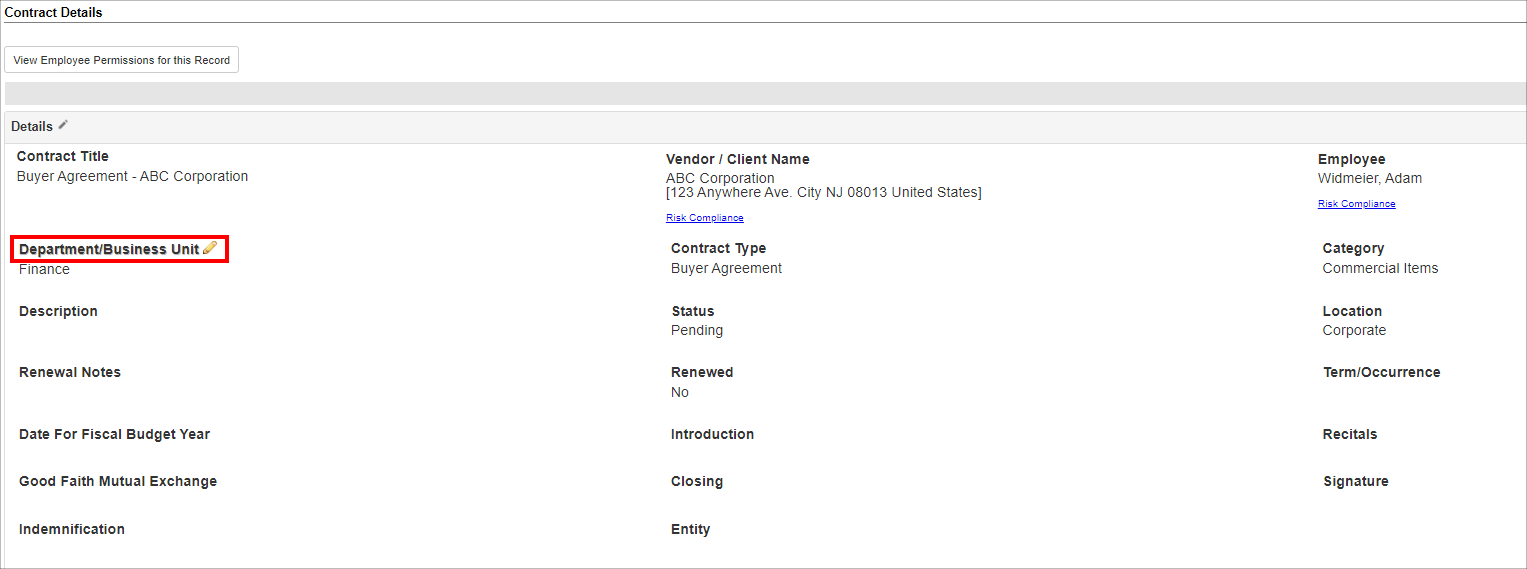
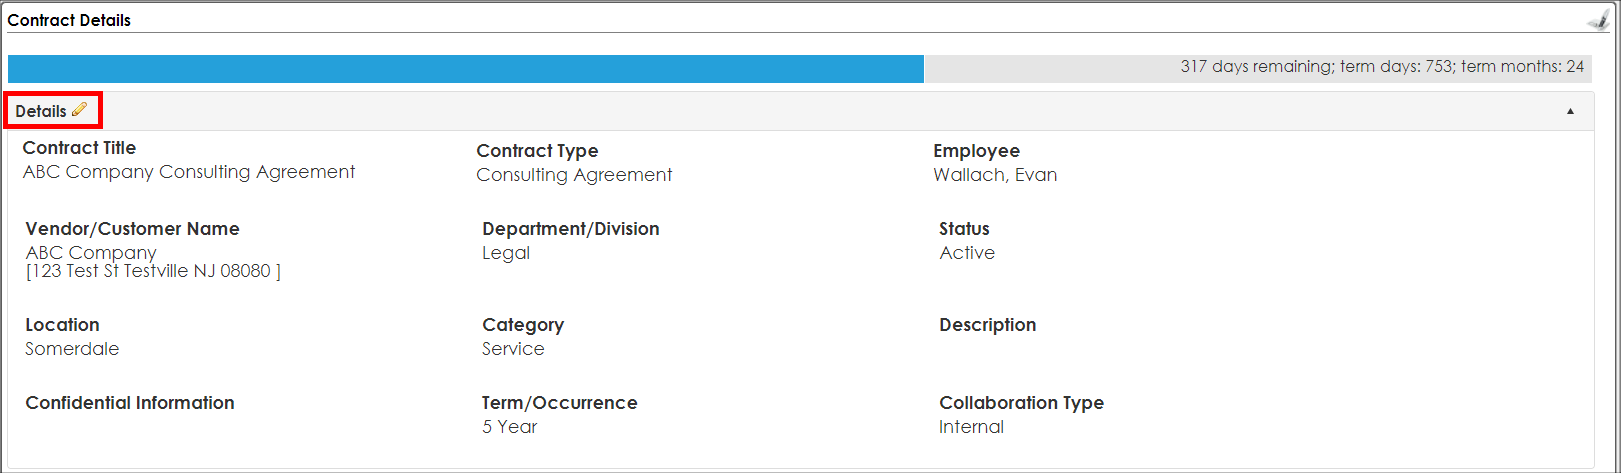
Details Screen
To manage/edit a contract record, go to the contract record’s Contract Details page. To get there, search for the contract using either the QuickSearch method (see the “QuickSearch” Wiki page for instructions) or the Find/Search option (see the "Find/Search Contracts" Wiki page). You are also taken to the record's Details Screen after you click Save and Continue on the Add Screen.
From the Contract Details screen, fields can be edited by hovering over the field in question and clicking the Pencil icon ( ).
).
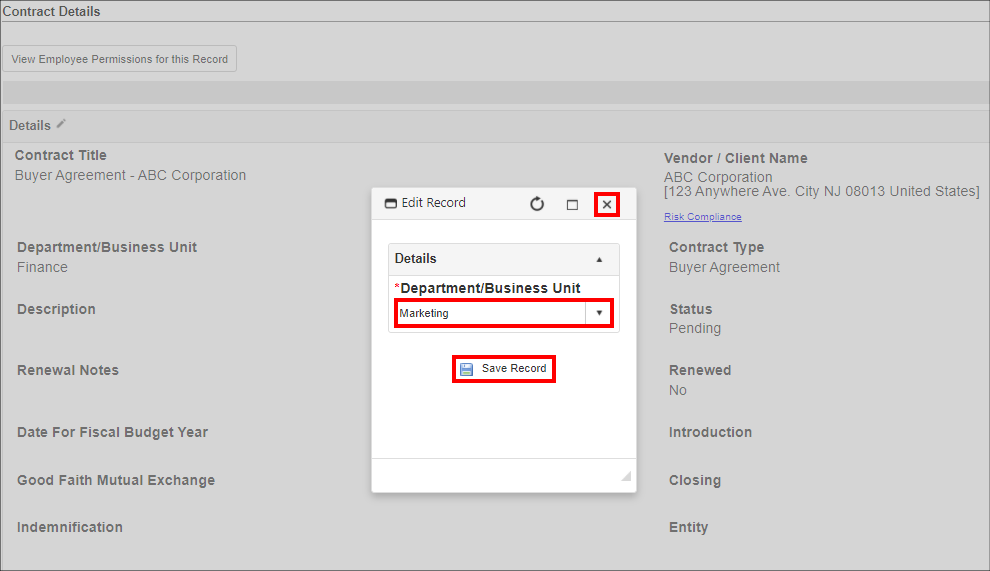
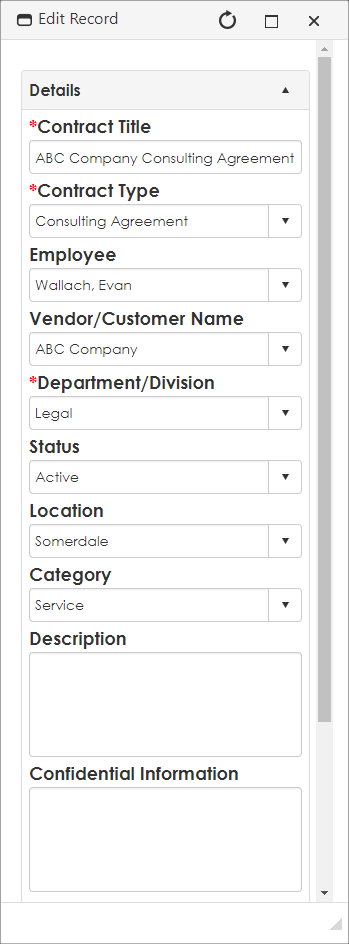
Fields can also be edited by Field Group. Click the Pencil icon ( ) next to the Field Group to edit. A similar editing module displays, but all fields assigned to the Field Group are shown. Please note that scrolling down to see the Save Record button may be necessary.
Note: the Expiration Warning Date field is an auto-calculated field determined by the Contract Expiration Date minus the number of Notify Days entered.
When done making changes, click Save Changes on the editing screen. Cancel at any time by clicking the X on the top-right of the menu of the editing screen.
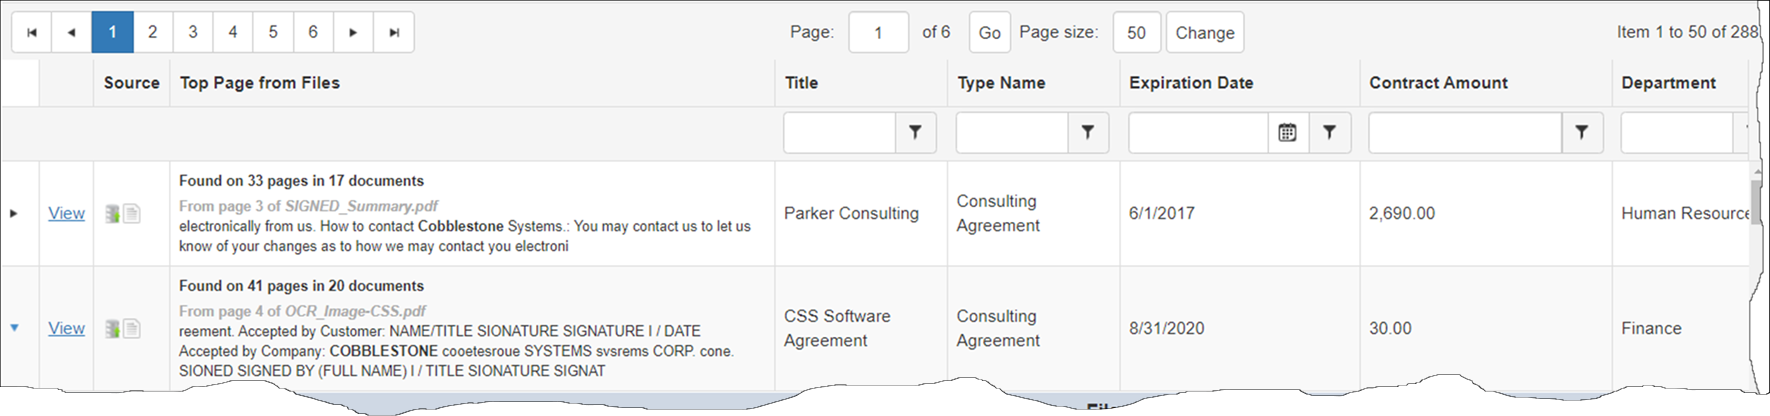
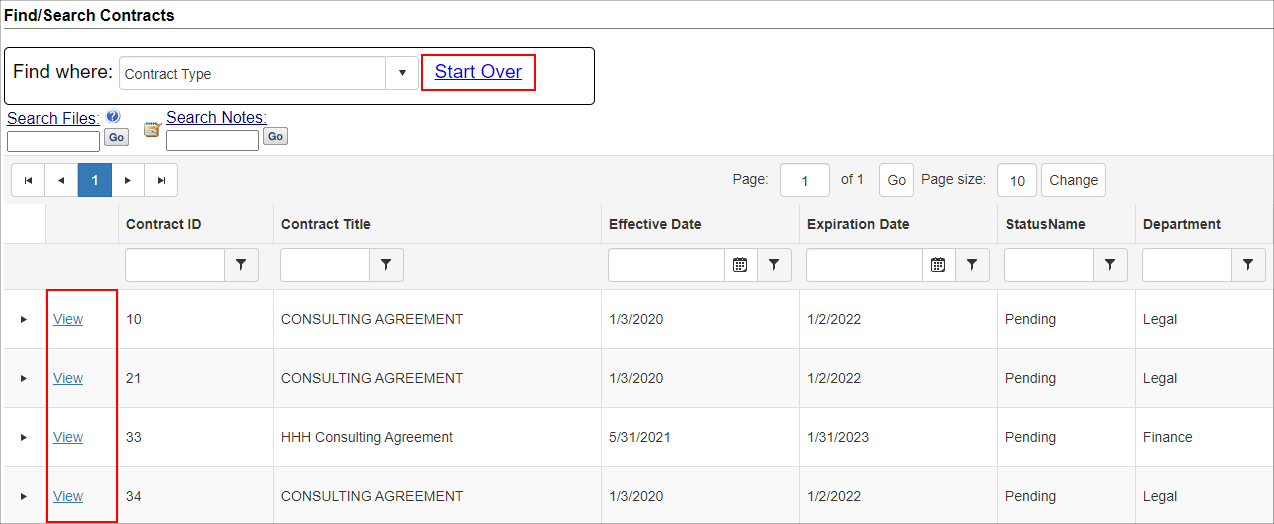
List Screen
List Screens are the common interface for searching/reporting. Search results on a search or report can be organized by filtering or sorting using the column headers. Click into the search box under the column header to filter, or click the column header to sort in ascending/descending order.
The Find/Search Contracts feature allows users to perform field-level searching and reporting for contracts. This search option is helpful when searching for something such as all of the contracts to which a particular employee is assigned.
View All Contracts in your Contract Insight Application
Click View All under Actions on the side menu of the Find/Search Contracts screen.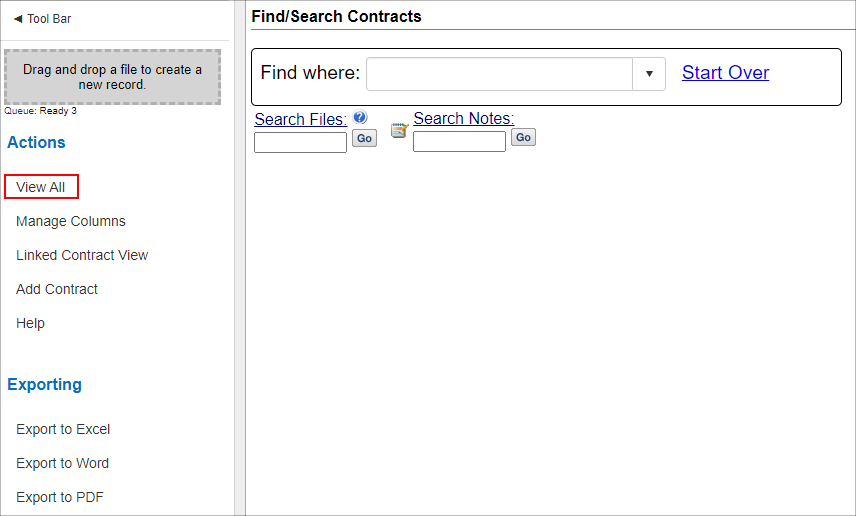
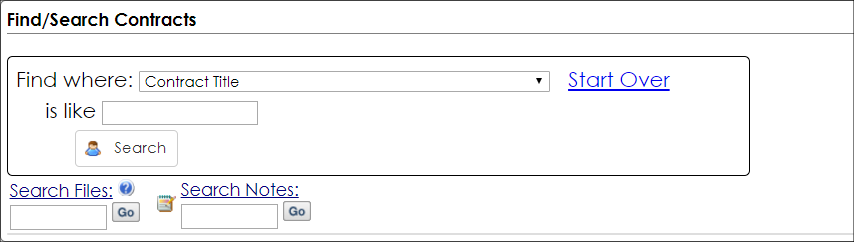
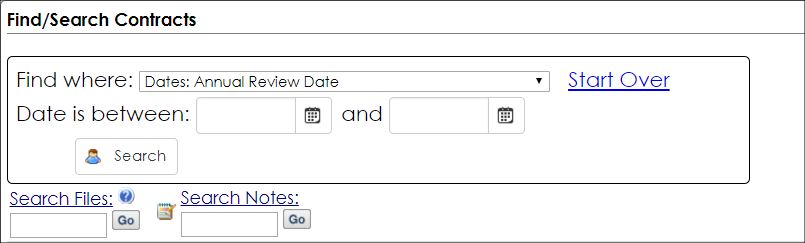
Field-Level Searching
1. On the top navigation bar, navigate to Contracts > Find/Search Contracts.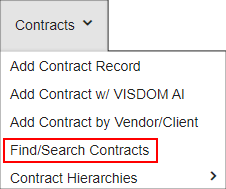
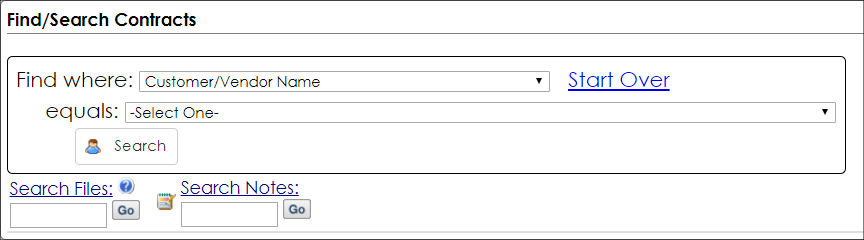
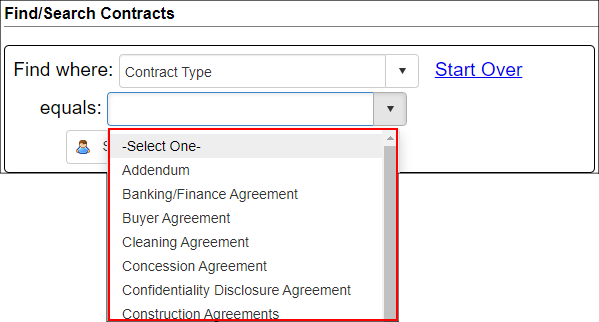
2. In the Find where drop down menu, select the area to be searched.
3. Depending on the selected field's field type, presented additional options display.
- For Drop Down Fields: a second drop down, one from which to select the value for which to search where the field Equals, displays. User-defined drop-down field values are also available.
- For Text Entered Fields (such as Text Box, Currency, Integer, Decimal Field Types): enter text into a text box where you can find where the selected field Is Like.
- For Date fields: enter/select (using the calendar icon) two dates between which to search the selected field where the Date is Between.
NOTE: If a Find Where field is selected, View All cannot be used. Click Start Over before clicking View All.
4. Click Search to display all Contract Records that match the search criteria entered.
5. To start a new search, click Start Over (to the right of the Find Where drop down menu).
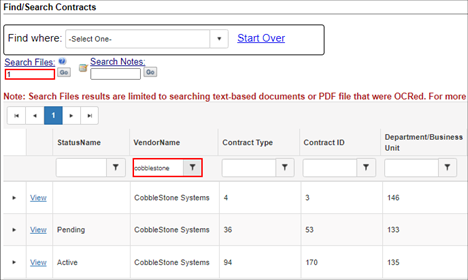
The system is also able to maintain filters and sorts on the Contract Find/Search screen. After filtering the grid on the Contract Find/Search screen, the system will retain results when performing a secondary Search Files or Search Notes on the Find/Search Screen.
To learn more about the Screen Layout(s), watch the video below.