Mergeable Content & Attachments
Content Setup: Mergeable Content & Attachments
The next step is looking at mergeable content. This is where users can copy the placeholders and put them into the template. You can find this by navigating to Content Setup on the sidebar..png)
.png)
.png)
.png)
Note: when pasting templates be sure to past them in the same formatting as the rest of your document. Also, treat the place holders as a word putting a space before and after just like you would normally. Ex -This {---Company Name---} is….
When finished copying, go to the attachments tab..png)
Attachments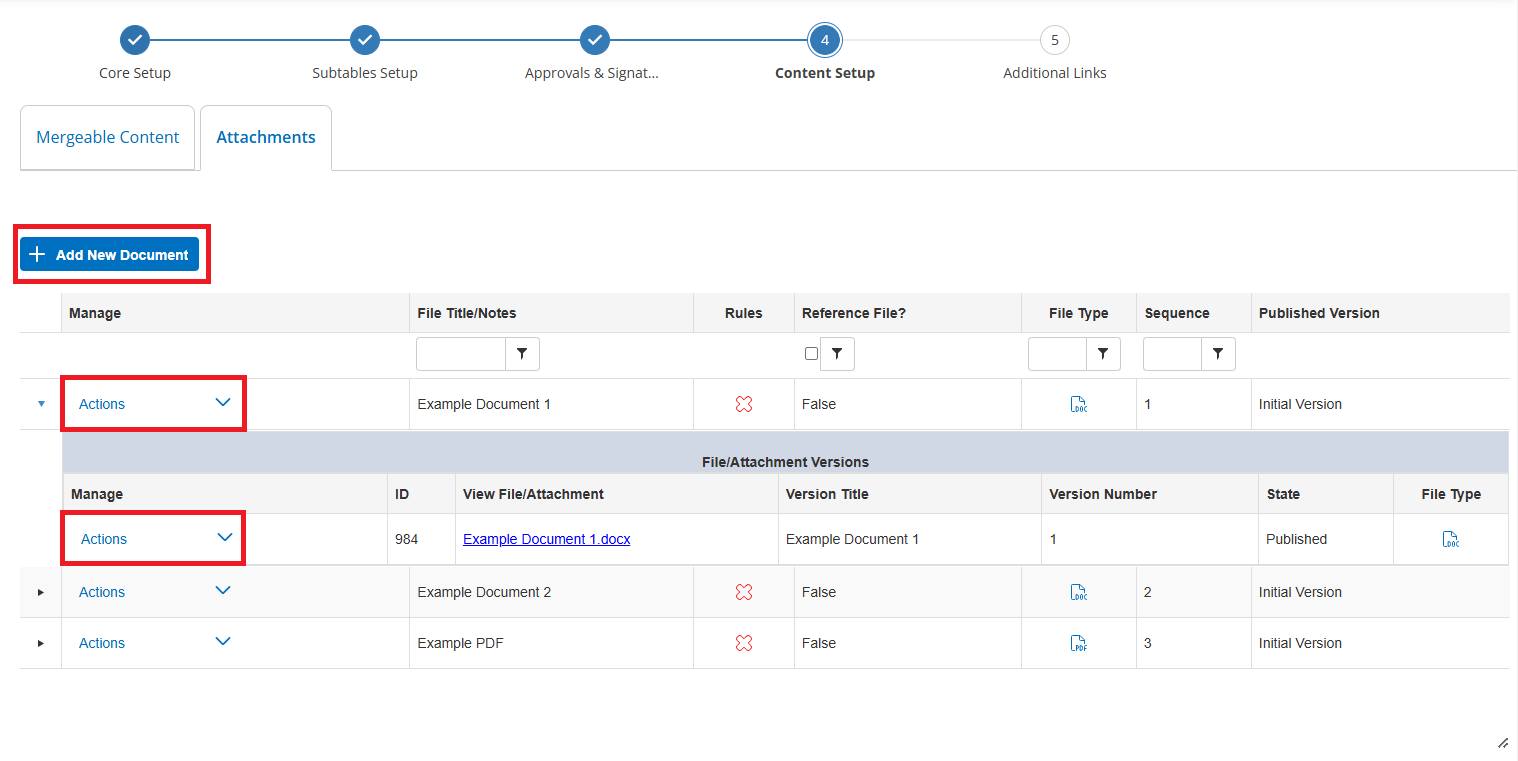
Once on the attachment page you’re able to upload and manage documents within the template. Click Add New Document to get started with uploading your first document in your template.
.png)
Add Web Document: This option will send you to the Online Editor and using this you can edit the document within CobbleStone allowing you to stay within the software while you edit.
Import Cloud File: This option will ask what application you would like to import from. You can configure these by navigating to My → Cloud Drives.
Upload Files: This option allows you to upload files from your local machine.
Document Builder: This option is an HTML document builder that allows users to construct and assemble a new document or file directly within Contract Insight.
Expand an attachment on the grid and click the Actions drop down for an uploaded file
.png)
Click Actions drop down for the Files/Attachment Versions and select Manage Version Information
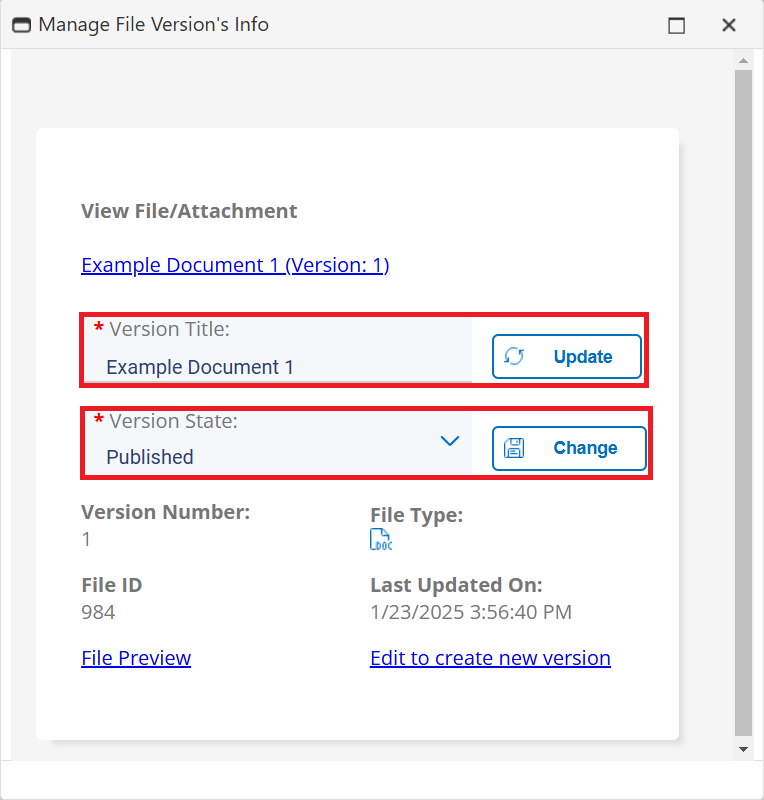
NOTE: if you have the Document Authoring Module this is where, by clicking the Actions dropdown on the top level attachment grid and clicking Manage File’s Information, users can protect the document with a password as well as set the track change settings for the file as well.

.png)
Document Protection:
Specify the protection level of the file after it has been merged or generated.
There are three (3) types of protection levels that can be specified.
Document Protection Levels:
Allow Only Reading (Viewing Only
All management is disabled.
Track Changes (Revisions & Comments)
Enables management of document but only with red line track changes.
No Protection
There is not protection applied to the document.
When using the password and protection level options together, users can set up a document that could force red line track changes for any editing of the document as well as password protecting the document so that track changes cannot be disabled.
Select the option and click Save.
Once this has been saved, a user can Generate Documents.