Initiating an eSignature Process
Initiating an eSignature Process
Once a template has an eSignature flow configured, the participants can be finalized and the process can be initiated from the created document package.

Confirm the E-Signature Flow/Group
1. Click E-Signature Flow/Group.
2. Click the Carat for the desired group.

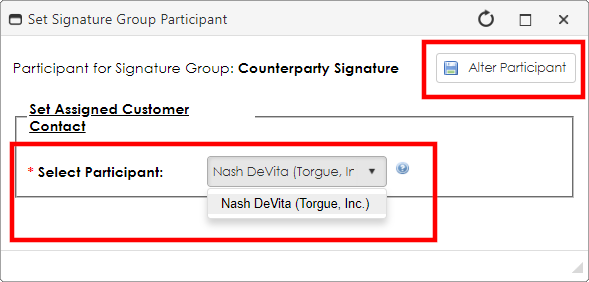
3. Click Set Participant.
4. From the Select Participant pick-list, select the desired participant.

5. Click Alter Participant.
6. Repeat as necessary for other Signature Groups.
Starting the E-Signature Process
1. On the side menu, click E-Signature Processing.
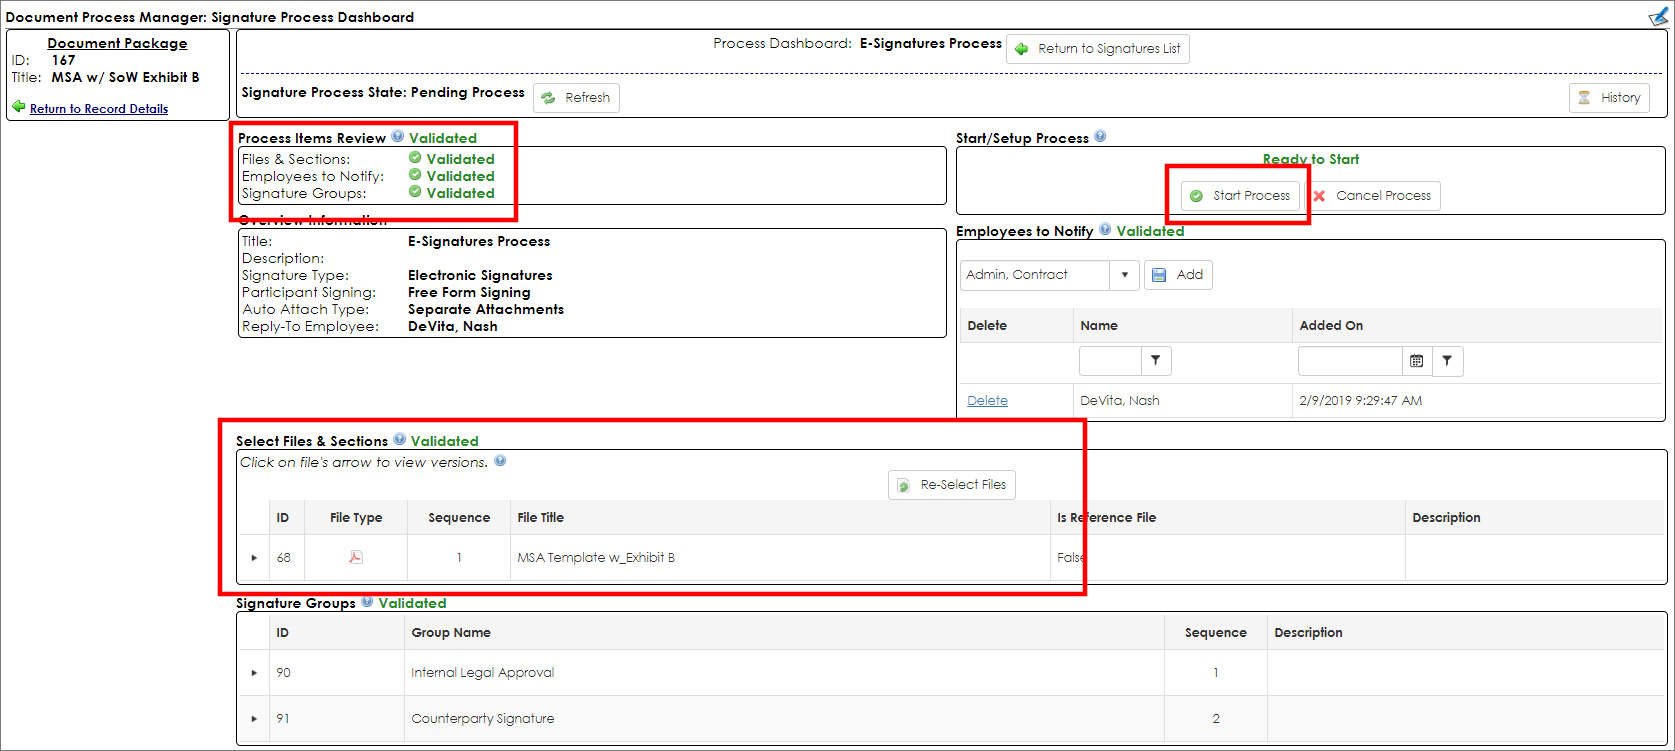
2. The Process Manager screen displays.

3. If all participants have been set, New Signature Process and Assigned Participants will both display as Validated. If they are not Validated, check the assigned participants.
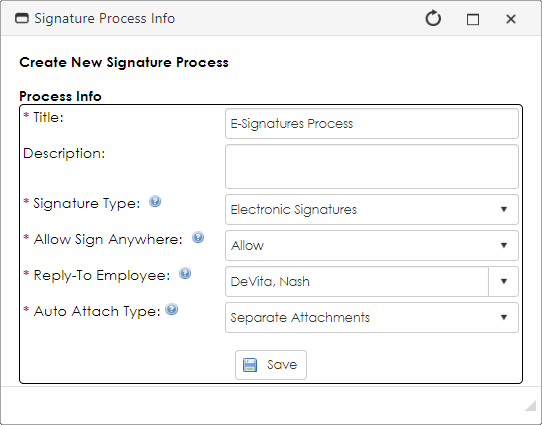
4. Click New Signature Process.

5. Set all options - paying special attention to the Auto Attach Type.

Auto Attach Type has two options:
Separate Attachments: Each document must be signed individually.
Single PDF: All documents selected are merged into a single document for signing.
6. Once all options have been set, click Save.
7. Select all documents for signature.

8. Once all participants and documents for processing have been selected, verify that all Process Items are listed as Verified.
9. Click Start Process to launch the signature process to send alerts to the appropriate participants.
