Overview
Clients with a DocuSign license can use our connector to sign documents in Contract Insight using DocuSign. Configuration instructions can be found HERE.
Signing a File with DocuSign
Scroll down to the File Browser/Explorer section of your record and click the document toolbox icon next to the document you wish to sign.

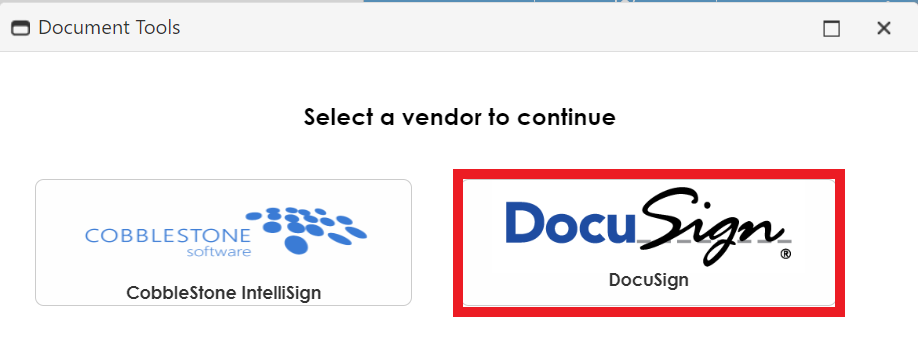
Select ESign Document, then select DocuSign.
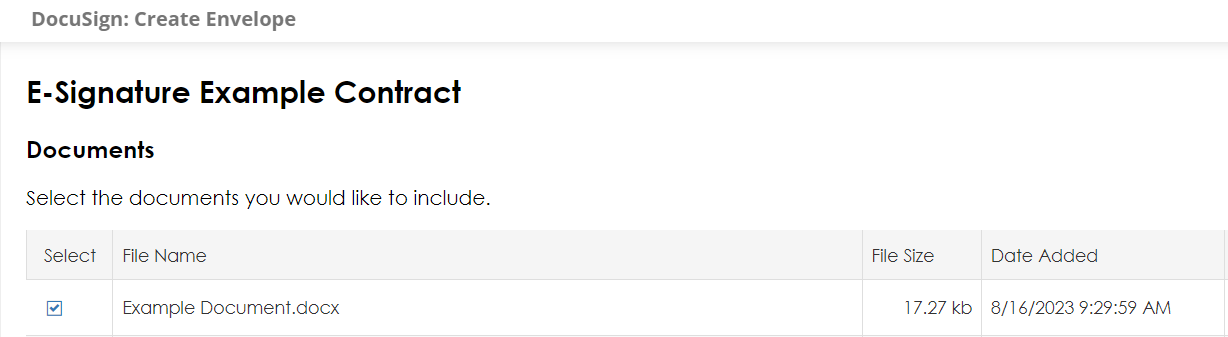
On the next page, you will choose which documents to include. The document you selected with the toolbox will already be selected.
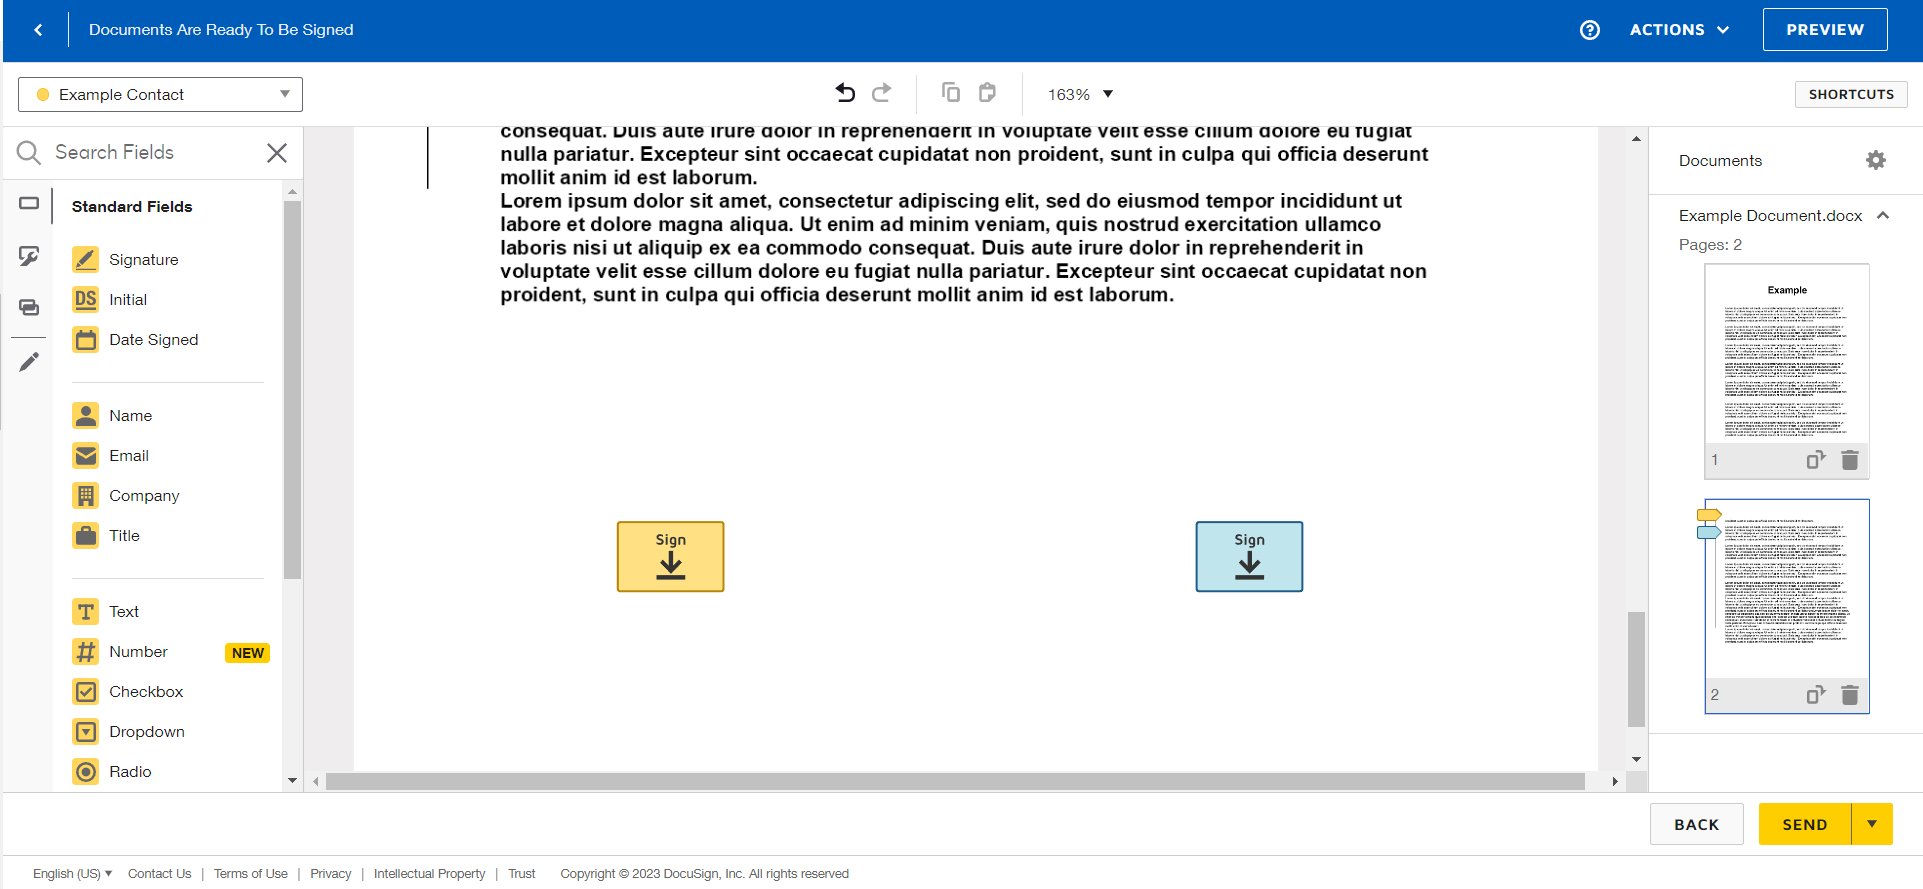
After your document is selected, the user will select recipients.

Recipient Types
Add
Adds a new Recipient Slot where the user is able to enter any name or email address.
Add Employee
User is able to select from a list of Employees within Contract Insight.
Add Contact
User is able to select from a list of Company Contacts within Contract Insight.
Add DocuSign Contact
User is able to select from a list of their DocuSign Contacts.

Recipient Action Types
Signer
A recipient that must sign, initial, date or add data to form fields on the documents in the envelope.
Needs to View
A recipient that must receive the completed documents for the envelope to be completed, but does not need to sign, initial, date or add information to any of the documents.
Receives a Copy
A recipient that should get a copy of the envelope, but does not need to sign, initial, date or add information to any of the documents. This type of recipient can be placed in any order in the recipient list. The recipient receives a copy of the envelope when the envelope reaches the recipient’s order in the process flow and when the envelope is completed.

Notifications
Reminders:
You can set reminders in increments of days. Reminder delay is the amount of days before the first reminder is sent. Reminder Frequency is the amount of days between each reminder.
Expirations:
The envelope can be set to expire after a set number of days. Expire After is the amount of days until the envelope expires. Expire Warning is the amount of days before the expiration date that a warning message is sent.
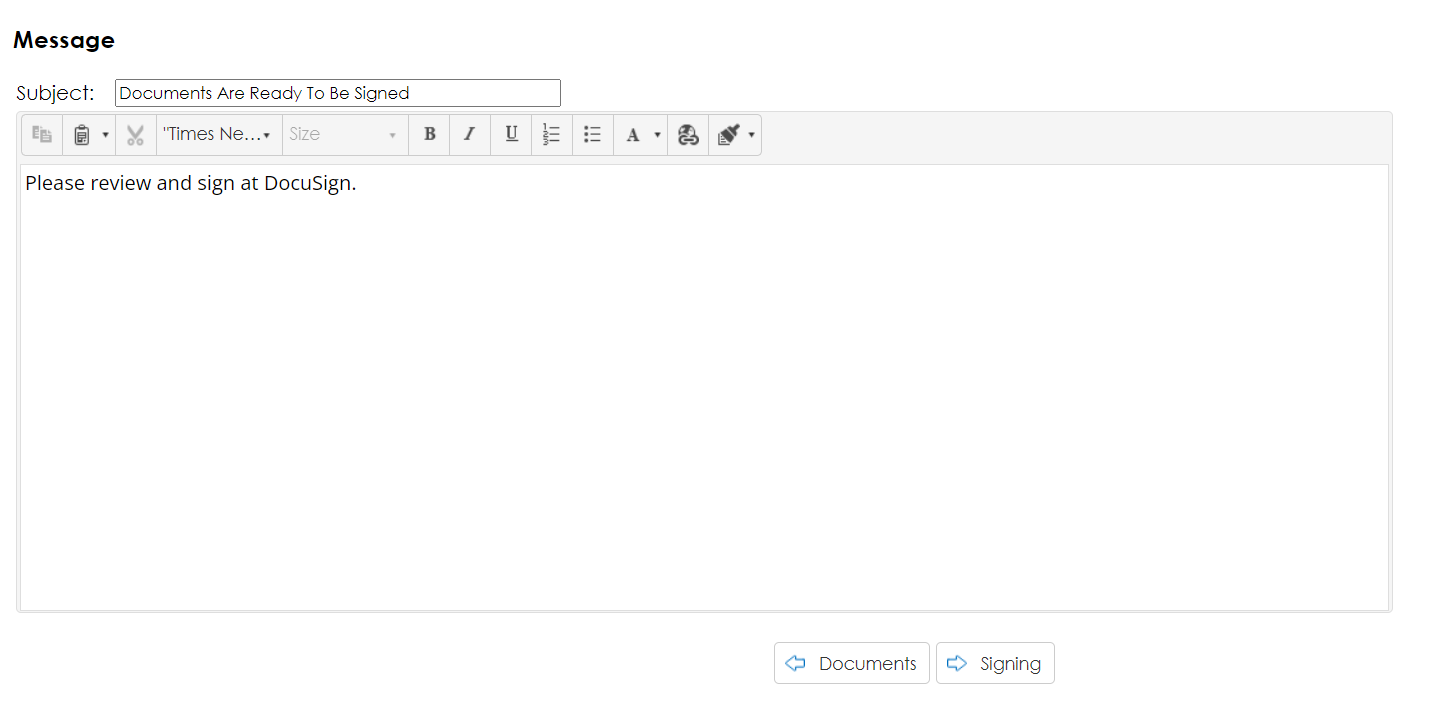
After Recipients are selected and Notification Settings are determined, the user can compose the message that is sent out for signing.
The email's subject is set in the Subject box, and the body text of the email is input through the text box.
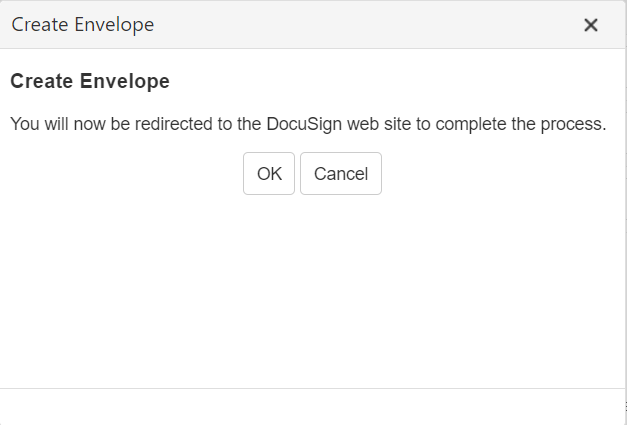
After clicking the Signing button, the user will be asked if they want to create the Envelope and be sent to DocuSign to set placeholders.
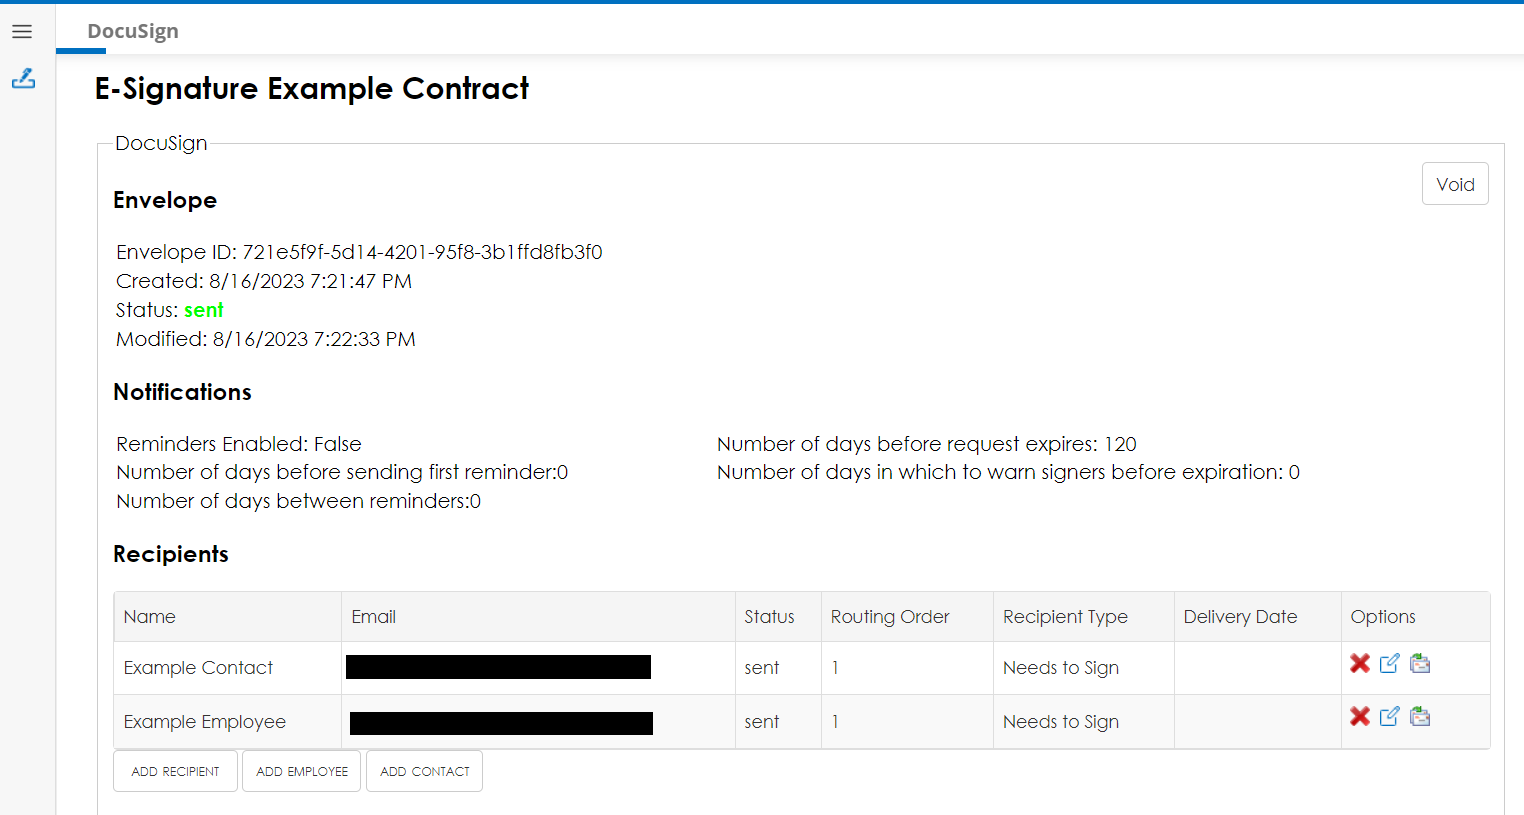
After the envelope is sent for signing, the user will be taken to a landing page. Extra recipients can be added if needed, or the process can be voided.
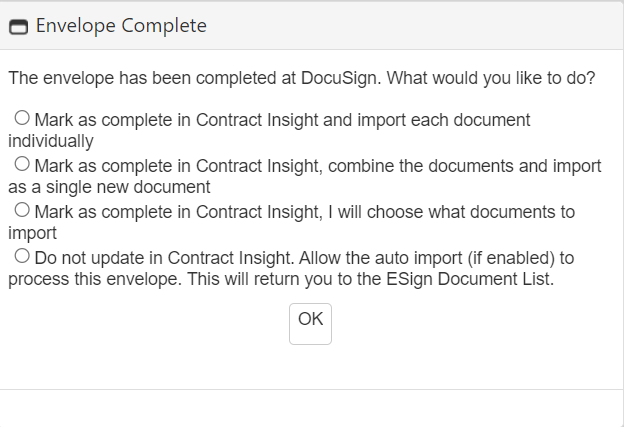
Once all recipients have signed, the Envelope Complete pop-up will appear. Users can choose to mark the process as complete and upload the documents separately, combined, or choose which documents to import. Alternatively, they can choose not to update and allow the auto-importer to handle the process.
DocuSign – Envelope Custom Fields
The following description of Envelope Custom Fields was taken from DocuSign’s support pages and can be found here
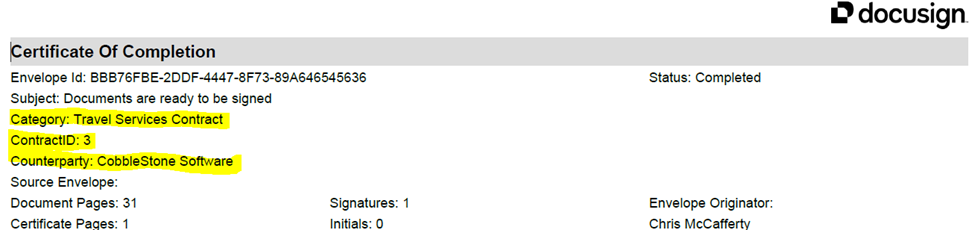
Envelope custom fields are used to classify, record, and track information about envelopes sent for signature. The sender enters field values when preparing an envelope. Envelope custom fields and their values are not shown to recipients during signing. However, the fields and their values can be seen in the Certificate of Completion by all with access to it. Certificate of Completion access can be disabled for your account. Contact Docusign Support for more information.
Additional documentation from DocuSign found here further describes Envelope Custom Fields
Envelope custom fields (ECFs) offer an additional way to categorize and identify the envelopes you send for signature. Your account administrator sets up these fields and you can enter the values when you prepare an envelope to send.
ECF values are not visible to envelope recipients when signing. Only the sender, users with shared access, and account administrators can see envelope custom fields and values in the envelope details view. However, the fields and their values are included in the Certificate of Completion, and generally, all envelope recipients have access to the Certificate.
CobbleStone Implementation
CobbleStone’s implementation of Envelope Custom Fields (ECF) provides a way for administrators to specify custom fields for envelopes originating from Contract Insight. Administrators can configure the ECF fields that will be added to an envelope at the object level (Contract, Request, Vendor, Employee, Purchase Order, eSourcing) Each of the six primary objects may contain a different set of custom fields where each custom field is mapped to a Contract Insight field on the associated record.
Configuration
General Docusign Configuration instructions can be found here.
Configuring ECF fields requires System Administrator privileges in Contract Insight.
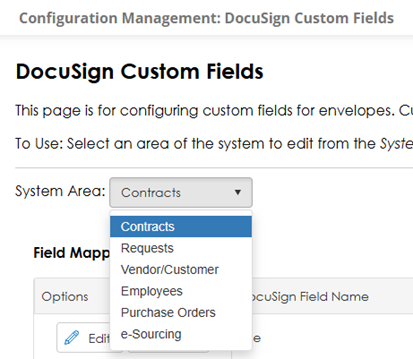
To configure ECF fields navigate to the DocuSign configuration page in the main menu under Manage/Setup > Application Configuration > External ESign Setup. Click the DocuSign button on the Esign page to continue to the DocuSign configuration areas.
Use the menu on the DocuSign configuration page to navigate to the Custom Fields configuration page.

On the Custom Field configuration page choose one of the six primary system areas to begin the configuration.
Use the Add Field button located in the upper right corner of the mapping grid to add a new Custom Field.
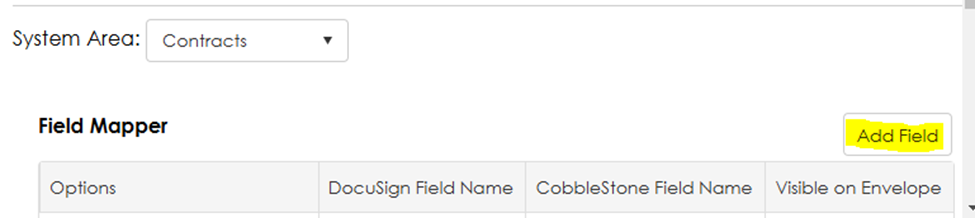
A new row will be added to the grid containing data entry controls to configure the mapping.

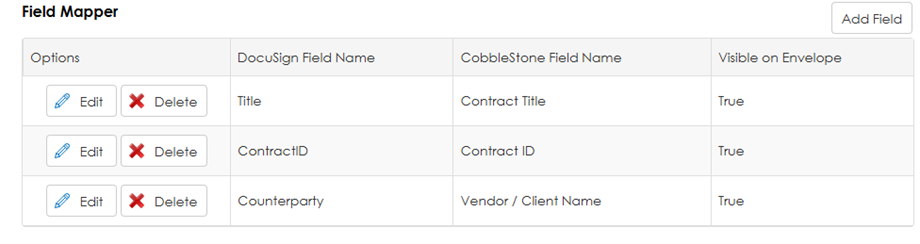
Enter a name for the Custom Field in the text box located in the DocuSign Field Name column.
Select a Contract Insight field from the dropdown located in the CobbleStone Field Name column.
Select if the Custom Field is visible on the envelope.
When all three fields are complete click the Update button located in the left column of the grid row to save the new mapping.

The example above will create a custom field named Title and map the value of the Contract Insight field Contract Title when the envelope is sent.
Repeat this process to add additional Custom Fields.
To make changes to a mapping, use the Edit button located in the left column of each row to return to the data entry screen.

Update the values in the three columns as desired, then click the Update button to save the changes.

Use
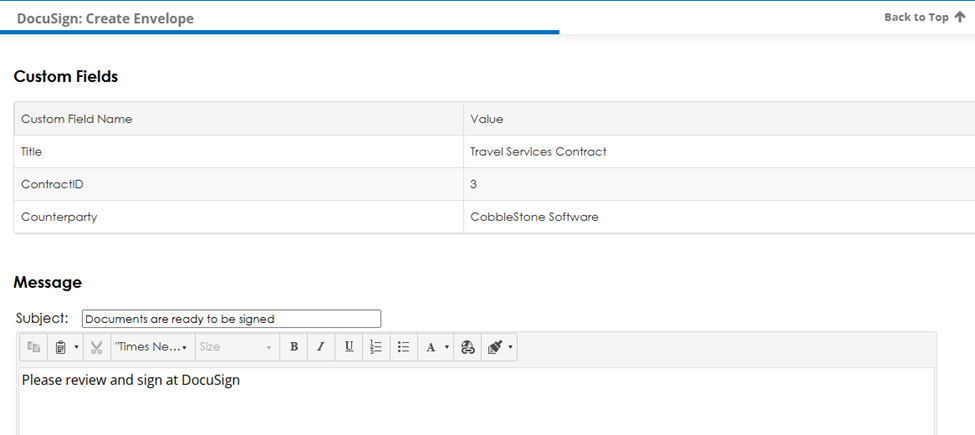
There are no additional steps required to use Custom Fields when sending an envelope from Contract Insight. The procedure for configuring and sending an envelope through DocuSign remains unchanged. As a convenience, if custom fields have been configured, the custom fields and values will be displayed on the Create Envelope page. Users can review this information and choose to cancel the Envelope and return to the associated record to update the fields and associate the desired values.
Once the Envelope has been sent by DocuSign, the user is returned to Contract Insight where a summary of the Envelope is displayed.
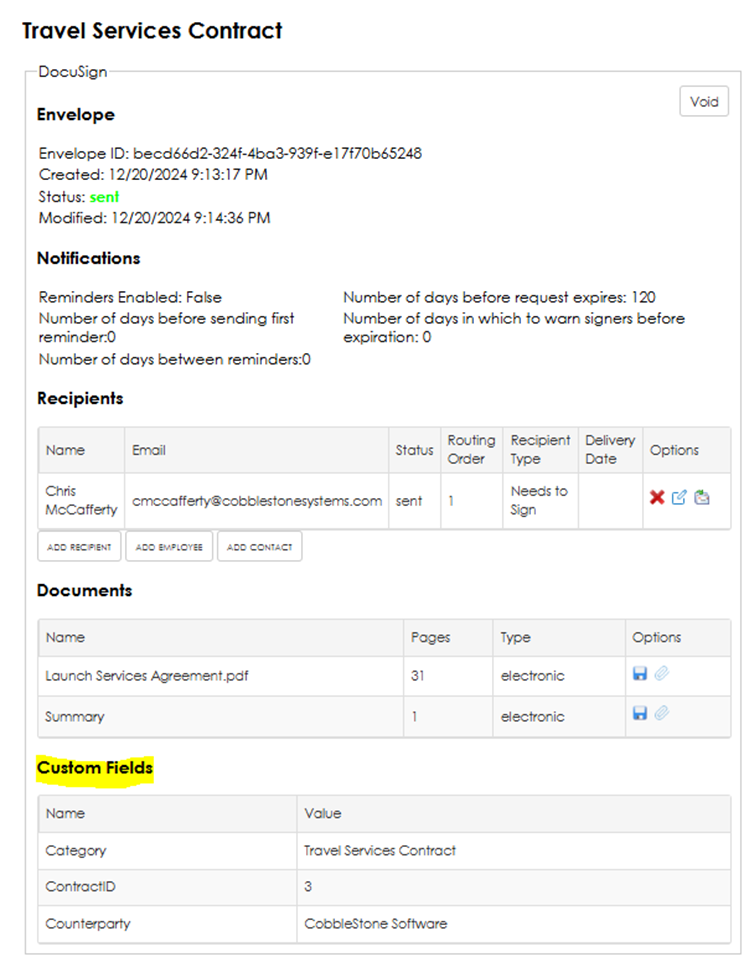
This information is also visible in DocuSign
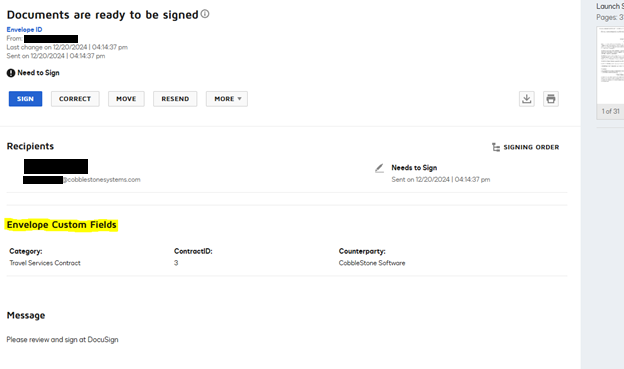
When the envelope is completed, the DocuSign Completion Certificate PDF will contain the custom fields.