Create a Contract Request
Contract Request Process: Create a Request
Adding a Request Record
Initiating the Contract Request Function is accomplished by navigating to Requests > Add Request Record.
.png) 1. A page where the type must be selected in a drop-down menu displays
1. A page where the type must be selected in a drop-down menu displays
2. Click Continue.
.png)
The Request a Contract entry screen for adding/creating a new Contract Request displays.
.png)
1. Enter the information/data for your Contract Request into the appropriate fields, being sure to populate all required fields, as indicated by a Red Asterisk (*).
Note:
- Fields on the Request a Contract screen that are grayed out are fields that the system automatically populates/fills in and cannot be changed/edited.
- Each Contract Request must be assigned to an appropriate Review Group. The assigned Review Group is comprised of individual users who have been tasked with reviewing and determining the disposition for each submitted Contract Request. Creation and management of Review Groups is a Contract Insight Application Administrator function which should be completed during Contract Request Configuration. To create a Review Group, please see the Employee Groups & Roles Wiki page.
- When creating a Contract Request for review and acceptance, the value in the Status field triggers the Contract Request to be submitted, to the individual users assigned to the Review Group, for the review and acceptance activities. A Status value of Request Pending triggers alert emails once Save & Continue for the Contract Request has been clicked. Contract Request Email Alerts are sent to all individual users assigned to the assigned Review Group, the requester (Entered By), and the Employee Contact (primary person assigned responsibility as the point of contact for the Contract Request).
2. Add Subtable Data
If configured to, some subtables may be available to data entry on the record's Add Screen.
Adding Subtable Lines on the Record Add Screen
A. Add a new record as usual.
B. Between the individual fields and the Save & Continue button, each selected subtable is available. If a particular subtable is not available, your system administrator has not enabled it for use on the add screen.
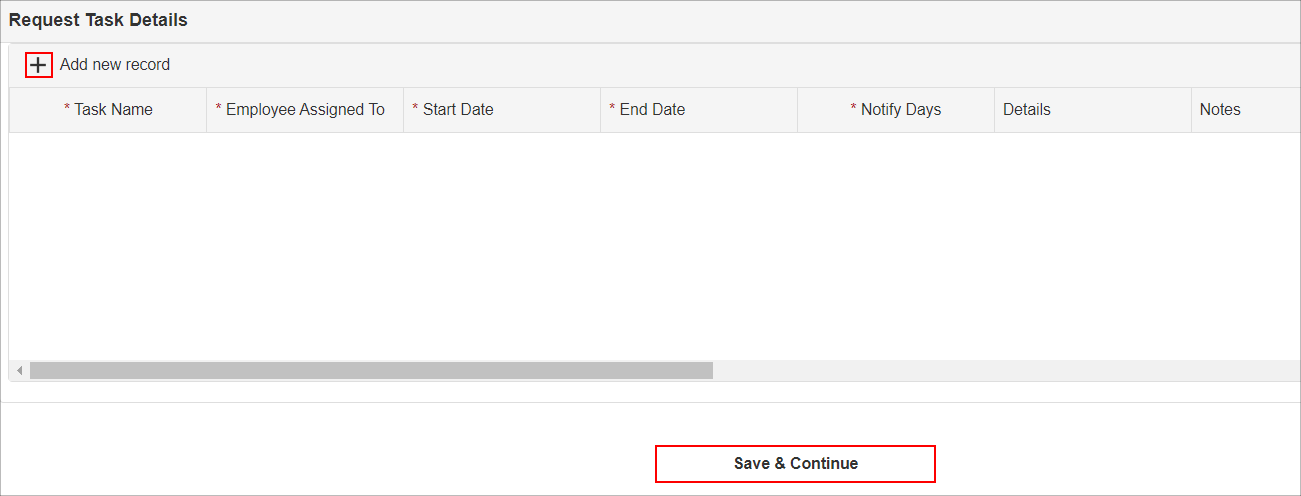
C. Click Add New Record.
D. A set of fields appears for each column header for each subtable. Enter data into all required fields (as marked with a red asterisk (*) in the column header) and all other data available.
Note: For more information regarding subtables, please visit the wiki page for Custom Subtables.
2. Once all of the appropriate data/information has been entered, click Save & Continue to save the Contract Request, trigger the alert emails. The Contract Request Details screen displays.
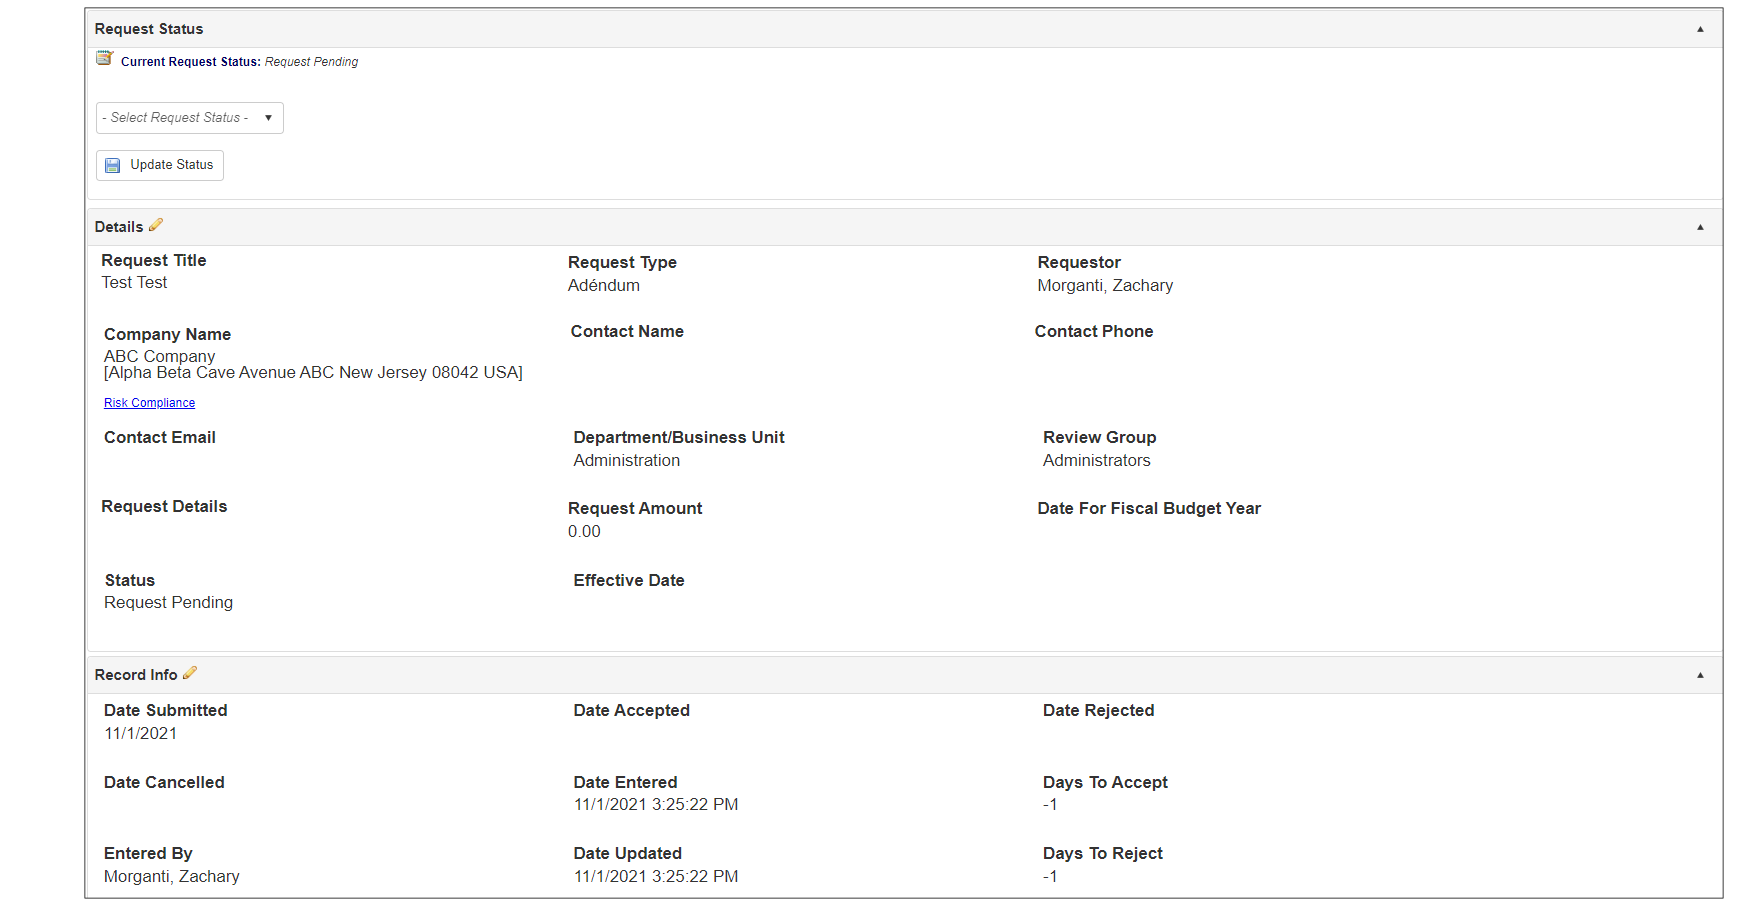
The Request Details screen contains 6 distinct sections/components:
- Contract Request Meta-data (Record Details)
- Contract Request Attachments (Files & Documents)
- Contract Request Task Alerts (Tasks, E-mails, Workflow, Alerts)
- Contract Request Line Items (Line Items)
- Contract Request Notes Repository (File Notes & Comments)
- Contracts Linked to this Request
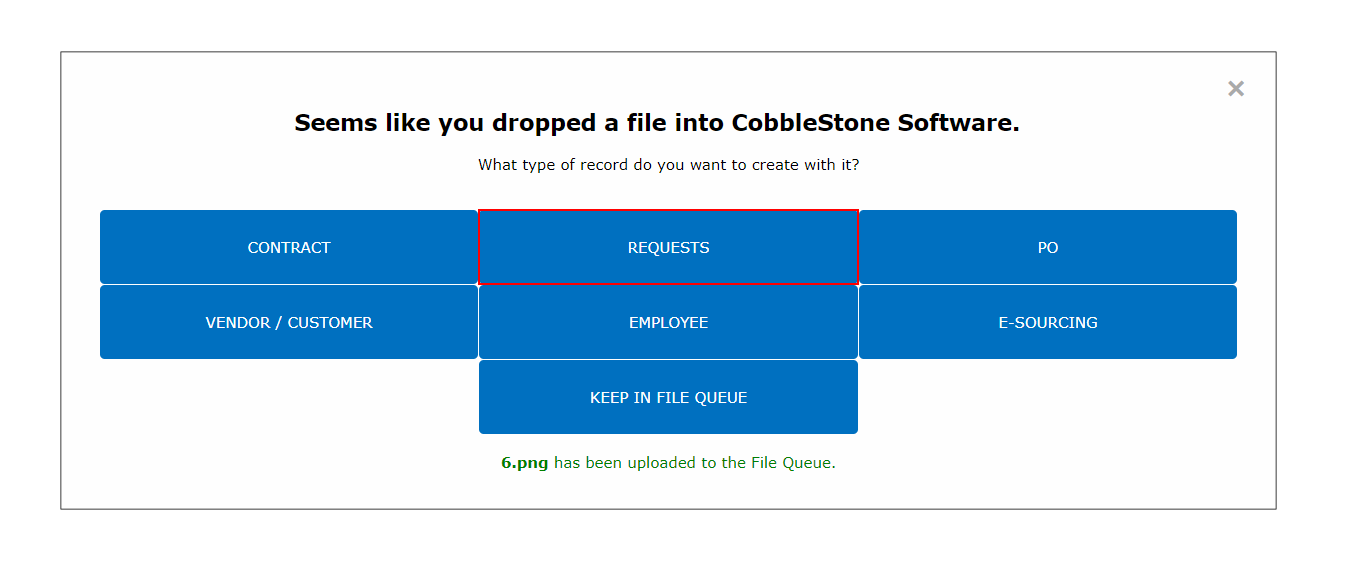
You are also able to create a request from a file from any screen with the grey Drag and Drop box in the side menu by dragging and dropping a file onto that screen
.png)
That will then prompt you to choose what type of record to create from the file. To create a request, you would need to click on the request button.
Afterwards you will be able to review the file and enter all metadata for the record.