Create a Contract from a Contract Request
Contract Request Process: Create a Contract Record from a Request
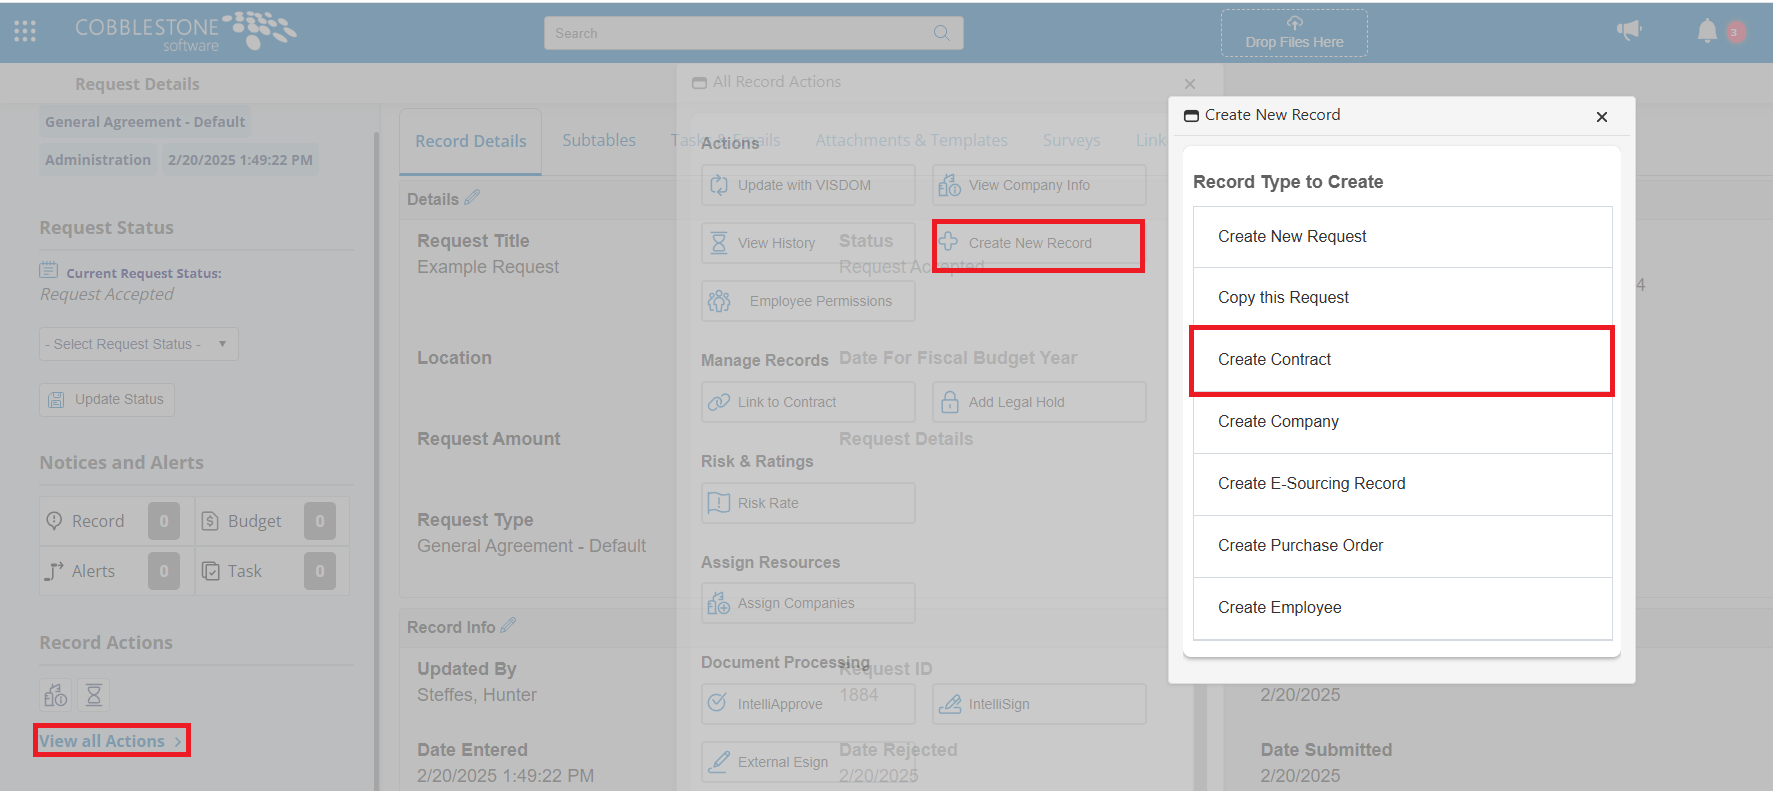
Once a Contract Request's Status has been updated to Request Accepted, a new option becomes available on the Contract Request Details screen: New Contract Record. Click View All Actions, then Create New Record, then Create Contract.
Once New Contract Record on the side menu is clicked, the Select Files to Include in Copy page displays. Select which files to copy from the request to the contract by clicking the check box to copy over to the Contract Record for the needed line item. Click Continue.

The Contract Type selection page displays. Choose the appropriate type and click Continue.
.png)
Depending on the field mapping assignments specified in the Field Mapper, the Add New Contract screen will open with the fields specified in the Field Mapper already populated with the values specified in the Contract Request.png)
Add any additional information to the new Contract Record as needed/required. Once all necessary/required information has been entered, click Save & Continue to create the new Contract Record. The new Contract Record's Contract Details screen opens to display the details of the newly added contract. For more information about Adding a Contract, see the Adding a Contract Record Wiki page.
Sub-Table Mapping -Manual Selection of Sub-Table Rows
As CobbleStone® advances the software, more and more features are not only added, but expanded on, to provide an ideal experience for the user. With this, the functionality of the Field Mapper is actively being expanded on to encompass the manual selection of any subtable rows to map to any other subtable, as defined in the field mapper.
Enable a table for manual mapping
1. Click Manage/Setup
2. Click Account Maintenance
3. In the side menu, click Field Mapper
.png)
Note: The next few steps will be an example. The user may have different fields they would like to map, but for the sake of this example, the fields that need mapping are Contract Requests to Contract Details while enabling manual file selection for the Notes Sub-Table.
4. Under the Map From section, Select Contract Requests (1)
5. Under the Map To section, select Contract Details (2)
.png)
6. Scroll down to the section that reads Subtable mappings from “Contract Requests” to Contract Details”
7. Under Map Subtable From, Select Request Notes (3)
8. Under Map Subtable To, select Contract Notes (4)
9. Under this section, click the drop dox box and make sure Choose Rows Manually (5) is selected. This will allow individual notes to be selected during the mapping process.
.png)
Mapping In Action
1. Go to a Request Record.
2. On the side menu, click New Request [from] Record.
3. A grid displays for every subtable the record has Choose Rows Manually enabled for in the field mapper. Check/uncheck the boxes for the rows you want to manually select to be mapped.
4. Click Continue. The user will see the parent record, as well as the selected subtable rows that were just mapped, based on the field mappings the user previously made in the Field Mapper page.
