Audit Logging
Searching & Reporting: Audit Logging
Contract Insight includes an audit log that tracks system activity. Typical events that are tracked are:
- Who logged in when
- Failed log in attempts
- Standard record actions (creation, updates, deletes)
- Tracking users that view contract records and documents
- Tracking attached documents and/or files
- Tracking the viewing of attached files and/or documents
- Tracking e-mails sent via the one-off e-mail function available on the Contract Record Details
- Tracking e-mails sent via the Task E-Mailer Job
- Tracking changes to field values (before and after snap-shots)
- And much more...
The audit log tracks changes and audit history down to the user, record, and field level with history tracking. The system tracks original values, dates/times, and employees that changed field data.
Audit and History Log for an Individual Record
Standard End-Users may view an individual records history via View History on the side menu of many of the detail record pages. Below is an example of the View History for the contract details screen..png) After clicking the View History, the system displays a listing of audit events for the record. The history log can be filtered and sorted by column header (include name, date, event text) and exported to a spreadsheet.
After clicking the View History, the system displays a listing of audit events for the record. The history log can be filtered and sorted by column header (include name, date, event text) and exported to a spreadsheet..png)
System Wide Audit Log.png)
Contract Insight Enterprise offers a system wide view and analysis of the audit log. Authorized Administrator and Super Users may create user-defined searches (queries) that enables the analysis of audited events system-wide. The audit log is found by creating an ad-hoc search (report) from the Reports/Searches menu. [ This section does not cover how to create complex ad-hoc searching, however it does cover a basic log file search.]
.png)
.PNG)
Click Save and Continue.
The system displays the Ad-Hoc Report Manager: 2. Field Selection screen. We selected the Employee First Name, Last Name, Event text, Date, Days until Event Date, and the Table on which the event happened.
.png)
Click Save Field Selections.
Next, select Filter & Conditions to set our criteria. In this example, we are going to filter by Days Until Event Date is greater than-30 (since the event is a historic event and took place in the past we use a negative value for this condition).
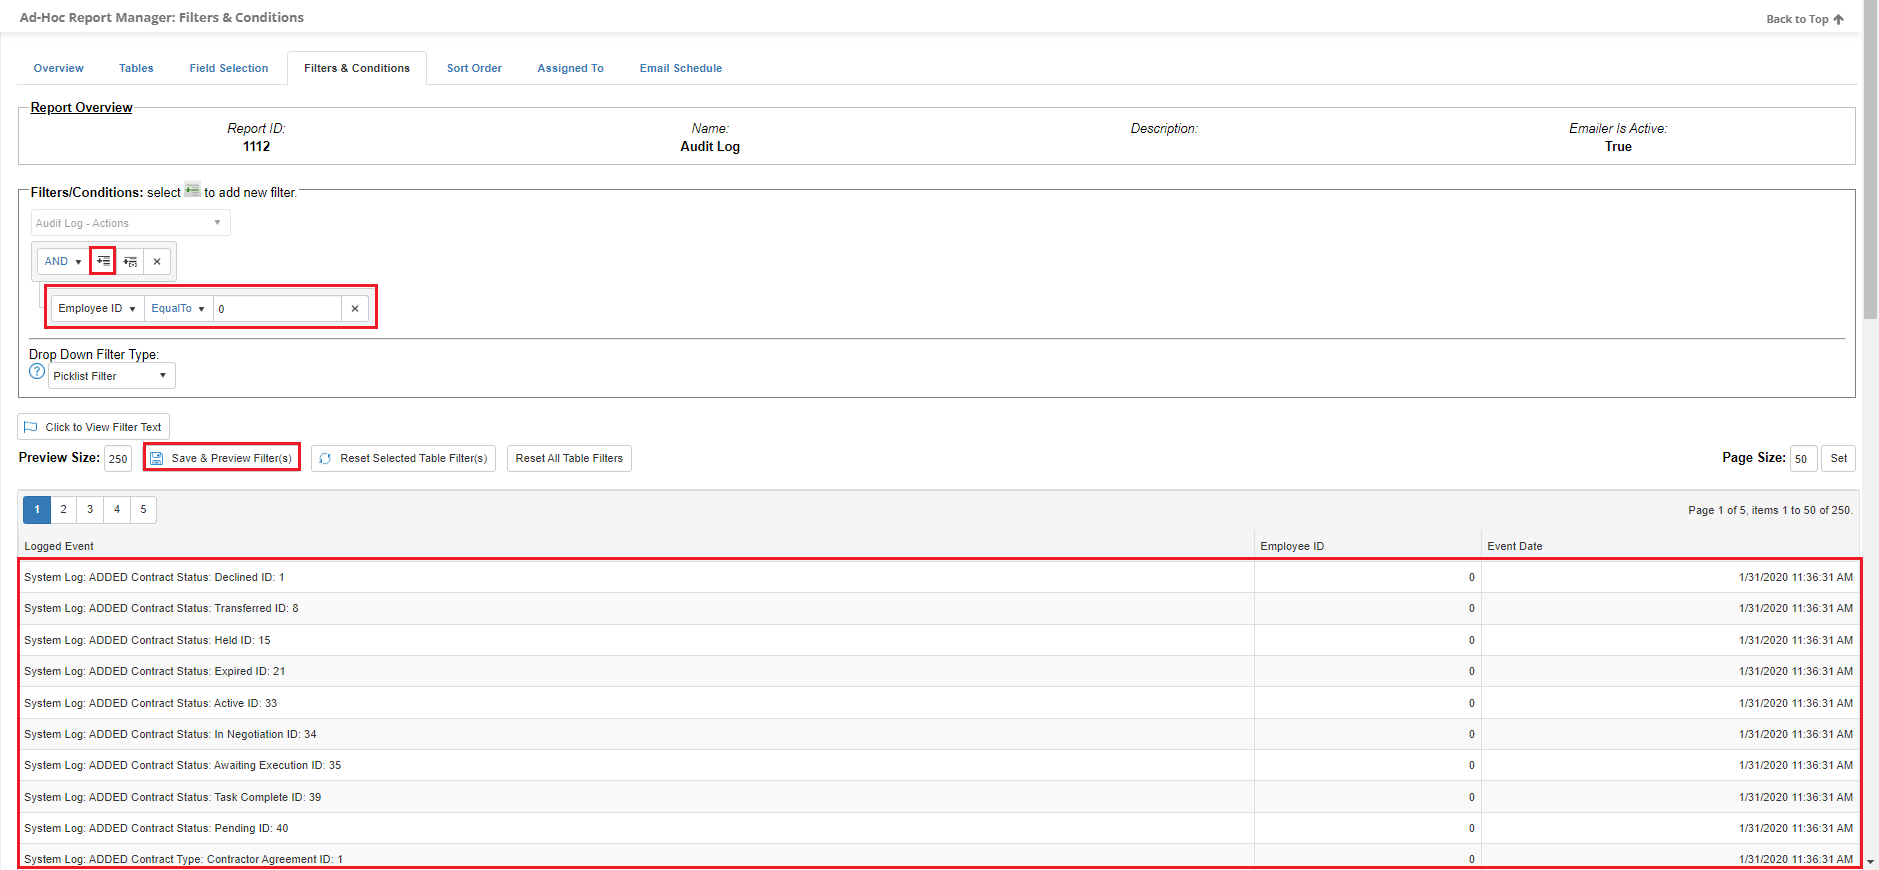
Once we save or Filter conditions, the rows are displayed.
We can re-run this report at any time and filter and/or export it by navigating to Reports/Searches > Ad-Hoc Reports/Searches > My Ad-Hoc Reports/Searches to open a list of all of the Ad-Hoc Reports/Searches created.