Approving & Reviewing Documents - E-Approvals
Document Collaboration Gateway E-Approvals & E-Signatures: Approving Documents
When the invitation email is received (Invitation in the subject line), click the link within to navigate to the E-Approval process (seen in Notifications & Email Alerts) in the Document Collaboration Gateway. Once the file is downloaded and the user makes changes necessary, save the document under a new name and upload a new file with a new version name. If no changes are made, check the document back in (if necessary) and click Approve in the dropdown menu.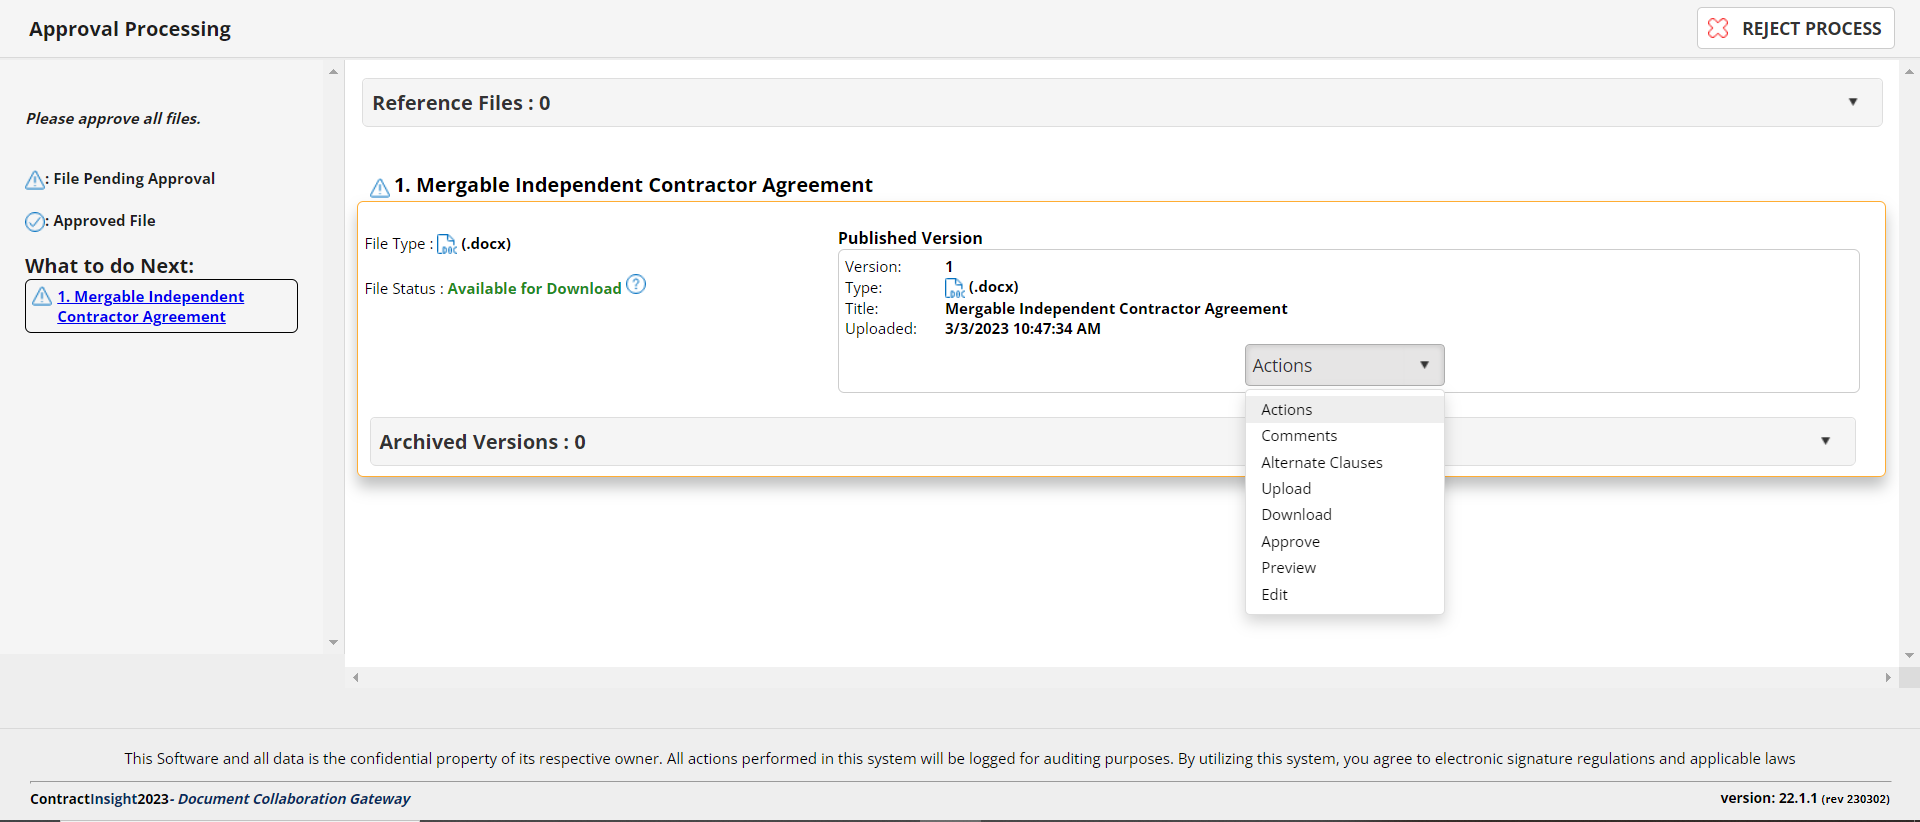
A pop-up window displays. Click Approve to verify that the document is approved.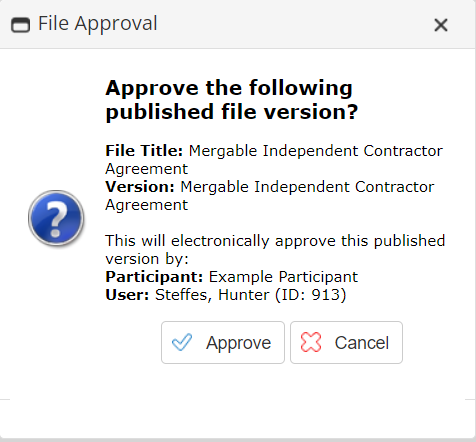
Once all individual documents are approved, the user will be able to click a Complete Approval button on the side menu.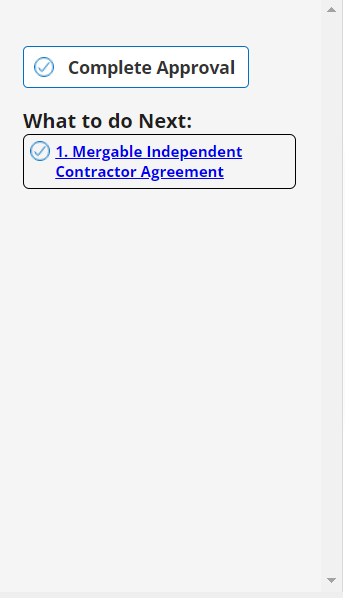
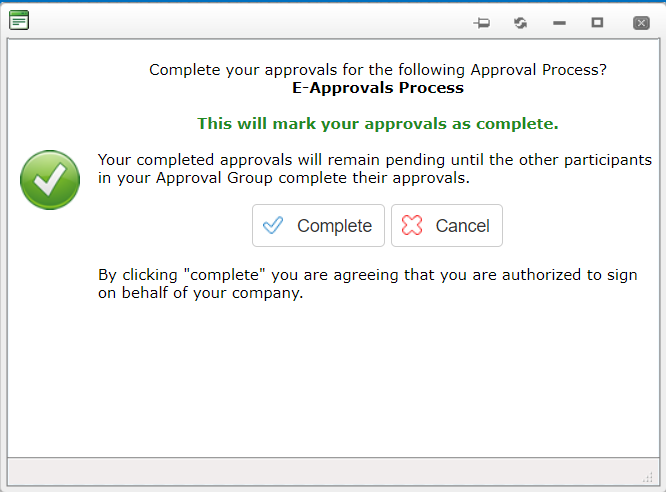
There will be one more pop-up to confirm that the user wants to complete the Approval Process.
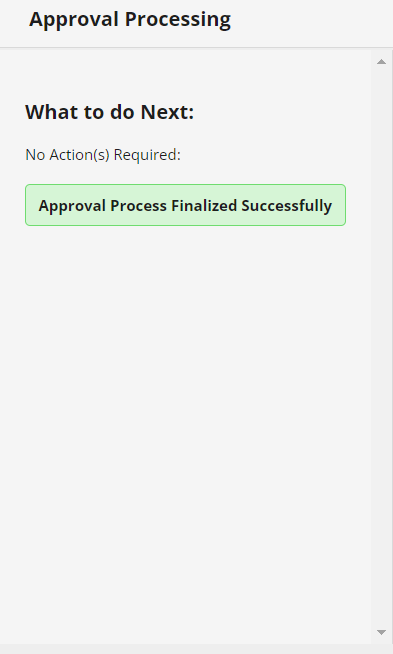
When the process is marked as complete, users will now see a Approval Process Finalized Successfully message on the Side Menu.
The user managing the process in Contract Insight can view the completion once all parties have finished. This is all done through the Dashboard for the process.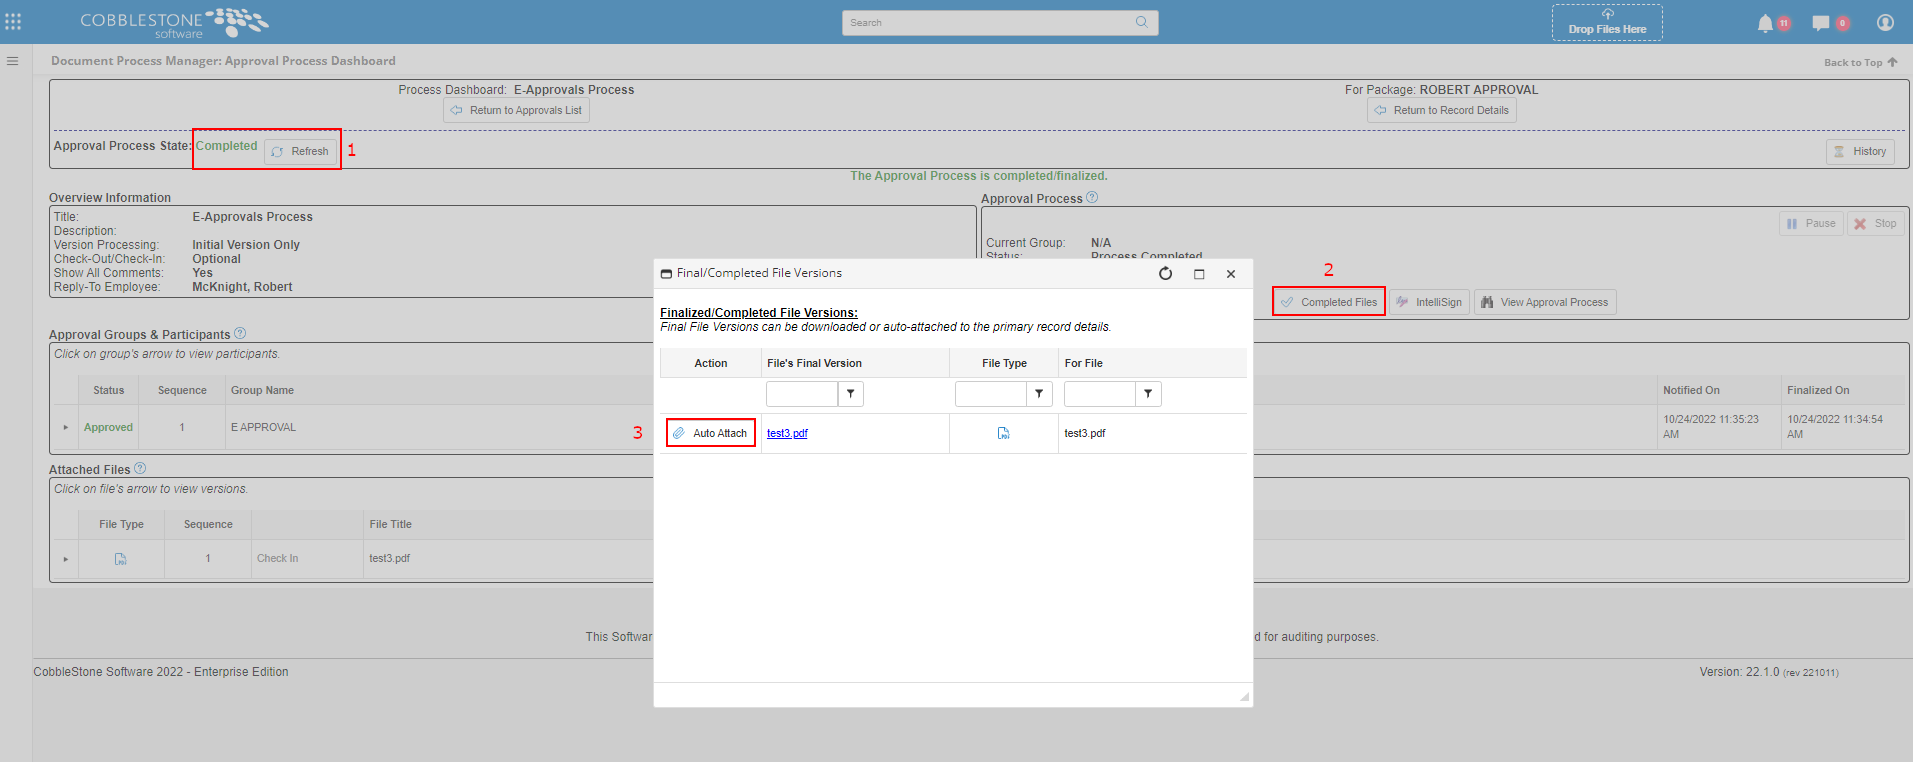
A number of options are available:
1. View the process' current state, In Process or Completed.
2. View and manage the completed file.
3. In the pop-up window, download the file to view as well as auto-attach it to the Record Details screen. The file displays in the Files/Attachments section of the record.
Prompt Before Signing / Approving
This is a new feature to CobbleStone® that enables companies to add their own Terms and Conditions, which the Signer must accept before they can sign the document. The Admin of the system can Enable or disable this feature, as well as edit the Terms and Conditions section. Only once the signer accepts the Terms and conditions, will they be allowed to sign the document. The system will log the date and time when the Signer accepted the Terms and conditions. If the Signer had previously opened the same document and agreed to the Terms and Conditions, they will not be asked to accept the Terms and Conditions again for that document as the signer already accepted it previously.
CONFIGURATION
Admins may choose to Disable / Enable this feature in their system. To do so, go to :
Manage Setup > Application Configuration > Config Settings
In the combo box to select Configuration Group, choose Document Authoring.
You’ll see 2 App Config settings associated with this feature :
1) Terms and Conditions : Enabling this will make the Signer first agree to the Terms and Conditions before he / she can sign the document.
2) Terms and Conditions Content : The Terms and Conditions content to show the Signer.
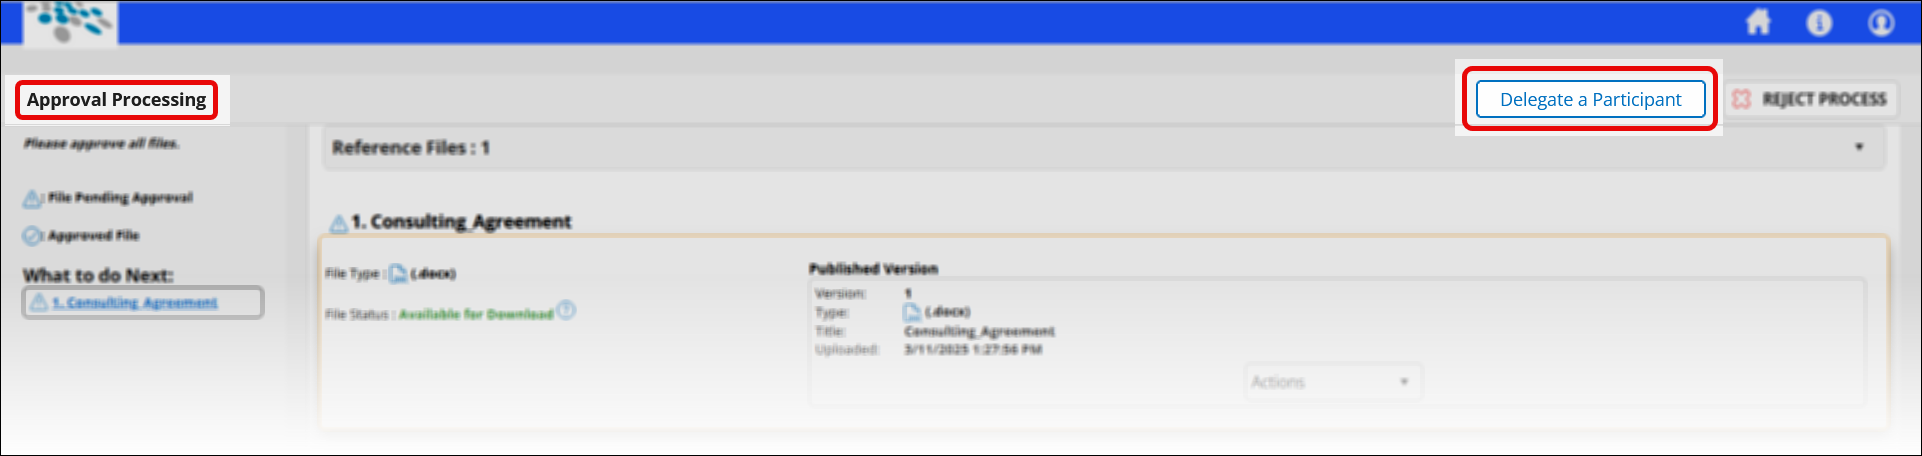
Delegating an Approval
After receiving an email to Approve, the participant will be able to click the Delegate a Participant button to delegate the process.
Once delegated, a notice will appear at the top of the Approval/Signing process page. Note that the person who delegated their Approval/Signature will only be able to view the document(s). They will also still receive email notifications of the process status.
Within the E-Approval/E-Signature process, delegation from an Employee can only be made to another Employee and delegation from a Company Contact can only be made to another Company Contact.
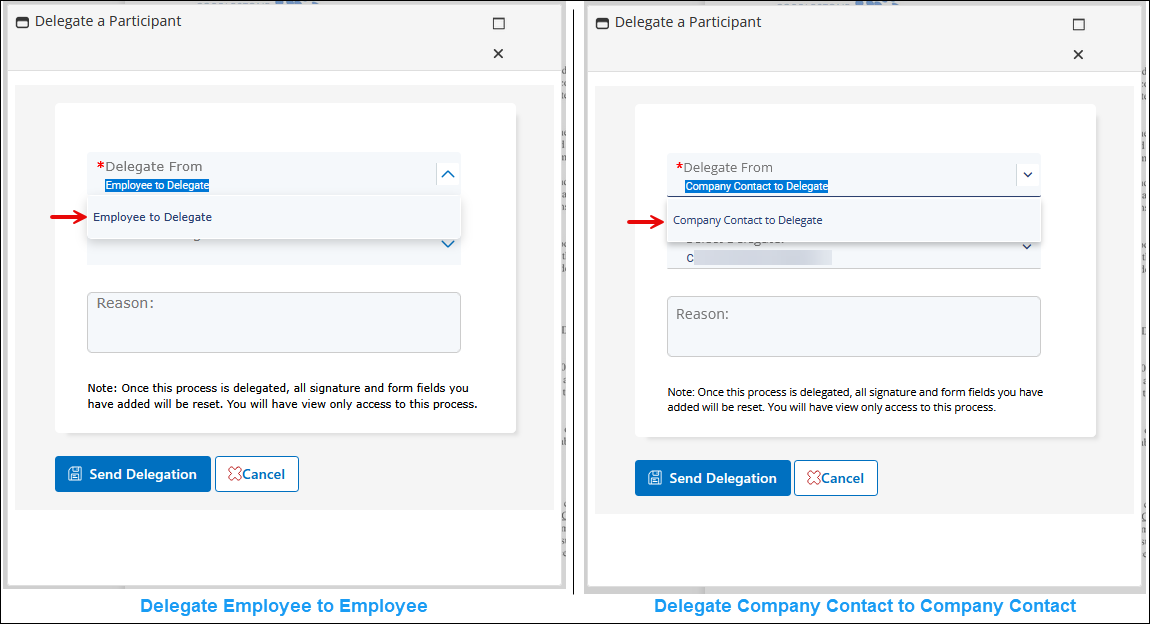
The Employee delegated to can delegate to another Employee. And the Company Contact delegated to can delegate to another Company Contact. This applies to both E-Approval and E-Signature processes.