Add/Search/Delete Attachments for PO
Purchase Orders: Attachments
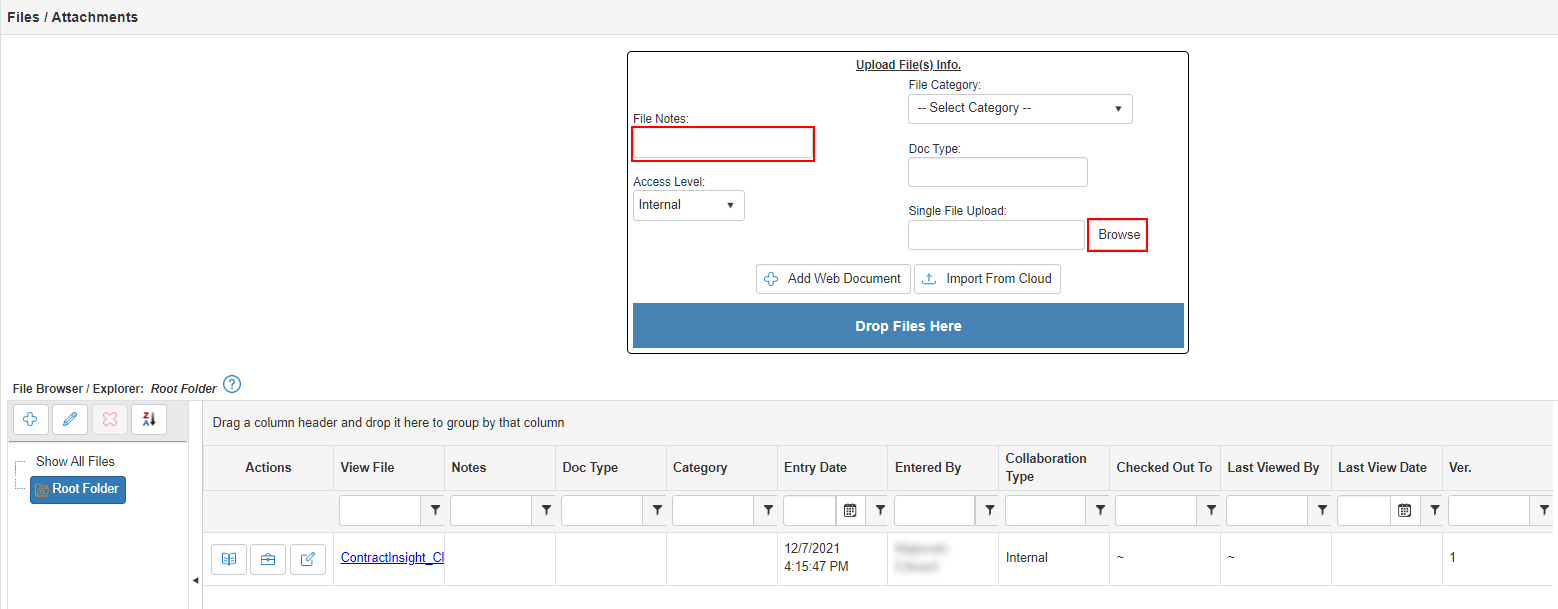
CobbleStone® allows users with the proper permissions to add an unlimited number of attachments/files to be uploaded to each Purchase Order.
To Add a PO File/Attachment
1. Navigate to the Details screen of the Purchase Order which to add an attachment. Click Files/Attachments on the side menu or scroll down the details screen to the Files/Attachments section of the page.
.png)
2. Click Choose File to navigate to and select the file to upload/attach to the Purchase Order. The file name appears to the right of Choose File.

3. Optionally, add a note in the Notes text box, and then select whether the attachment should be Internal, Public, or Gateway.
.png)
.png)
a. The Internal option means that, if your organization has purchased the Optional Add-On Module for the Vendor/Client Gateway, that the attachment is viewable internally by users of your organization of the CobbleStone® application. If your organization has not purchased the Optional Add-On for the Vendor/Client Gateway, it does not affect the attachment’s viewing capabilities.
b. The Public option means that, if your organization has purchased the Optional Add-On Module for the Vendor/Client Gateway, the attachment is viewable on to the public on the Public portion of the Vendor/Client Gateway (meaning the Vendors will not need to log in to the Gateway to view the attachment).
c. The Gateway option means that, if your organization has purchased the Optional Add-On Module for the Vendor/Client Gateway, the attachment is viewable to authorized Vendors who have been allowed access to log in to the Gateway portion of the Vendor/Client Gateway (meaning the Vendors will need to log in to the Gateway to view the attachment).
Note: If your organization has not purchased the Optional Add-On for the Vendor/Client Gateway, if an attachment is marked as Public or Gateway, it will not affect the attachment's viewing capabilities as the Public option only allows the attachment to be displayed on a public site/URL that does not exist if your organization has not selected this add-on module while the Gateway option only allows the attachment to be displayed on a Gateway site/URL that does not exist if your organization has not selected this add-on module.
4. Once any necessary notes and the area for which attachment should be displayed are entered, click Save File to save the attachment to the Purchase Order Details screen.
To Search/View/Delete a PO File/Attachment
Once the file has been successfully attached, it is displayed in a grid below Choose File. Note several items about the grid:
.png)
a. The grid can be sorted by clicking the column name (click once for ascending order, a second time for descending order, and a third time to remove the sort order).
b. The grid can be filtered by entering a keyword(s) into the filter text box and then clicking the filter icon ( ) to select how the grid should be filtered based on the keyword(s) entered.
c. To delete a file/attachment, click Delete to the left of the file name and then either confirm or cancel deleting the attachment.
d. To View an attachment, click the file name to open the attachment.
Note: Live editing is not available for attachments. If a file/attachment needs to be edited, open/download the attachment, make any changes/updates to the file, save the attachment again, and re-upload/re-attach the updated file/attachment.