COBBLESTONE SOFTWARE
Contract Insight — User Guide
Adding MRD Records In-Line
Master Reference Data Management: Add MRD In-Line
Note: Each procedure in this guide begins at the Contract Insight homepage, so any section can be followed on its own. Custom fields are configurable, so the exact field list on an in-line add panel may vary between environments.
1. Overview
Master reference data — contract categories, locations, departments, record statuses and the other built-in lookup lists — is normally maintained from the Administration area. Users who hold the appropriate permission can also add a value to one of those lists without leaving the record they are working on, directly from the add screen of a contract or other record.
This is useful when the value needed for a record does not exist yet: rather than abandoning the entry, opening the Administration area to create the value, and starting the record again, the user creates the value in place and continues. The value is created in the underlying master reference list exactly as it would have been through Administration, and is immediately available to every other record.
2. Where the In-Line Add Control Appears
The control is a small blue + icon shown immediately to the right of a lookup field. It appears only beside fields that draw on a master reference list, and only for users permitted to add to that list — a lookup without the icon has to be maintained from the Administration area.
On the add screen for a new contract, for example, the + icon appears beside lookup fields such as:
- Vendor / Client Name
- Location
- Department/Business Unit
- Status
The same control appears on the add screens for other record areas, and on the in-line add panels themselves, wherever a field draws on a list the user may add to.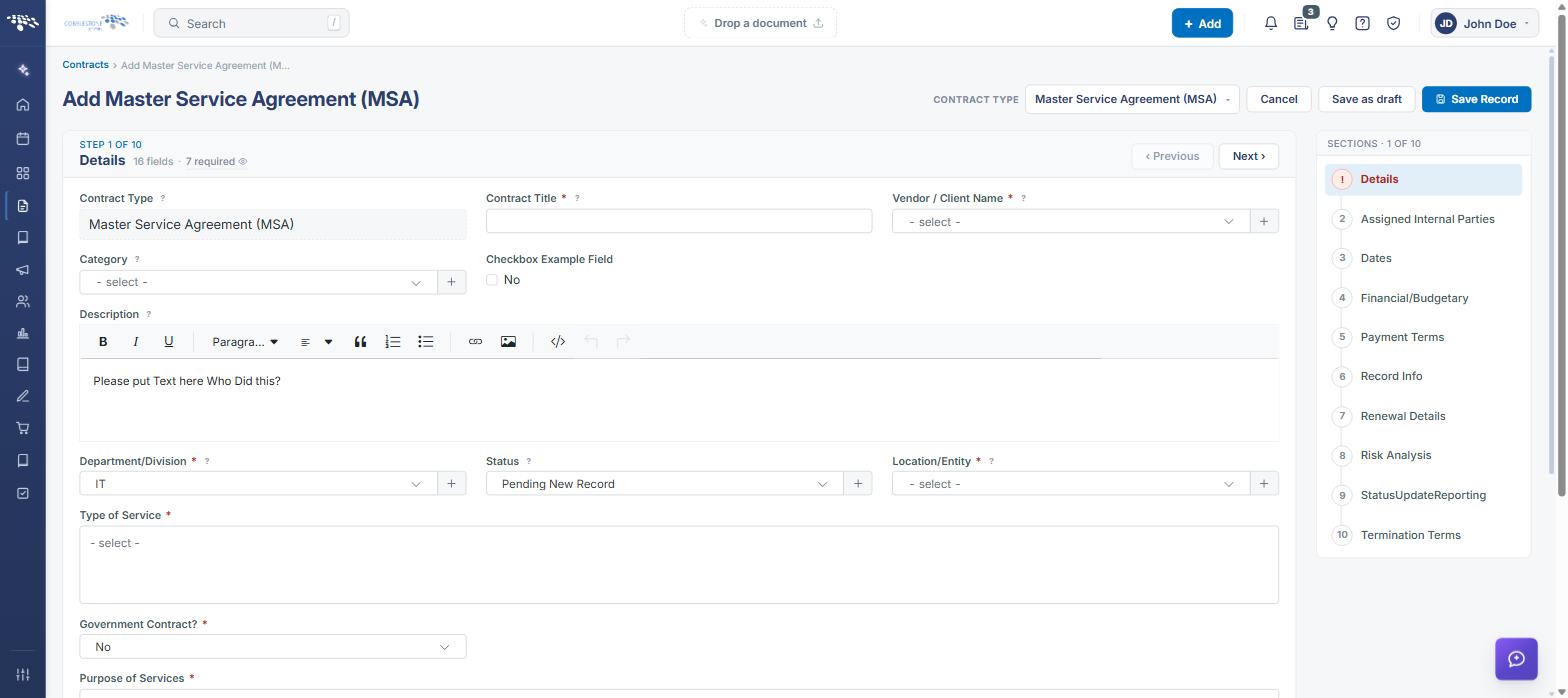
3. Adding a Master Reference Data Value In-Line
Steps:
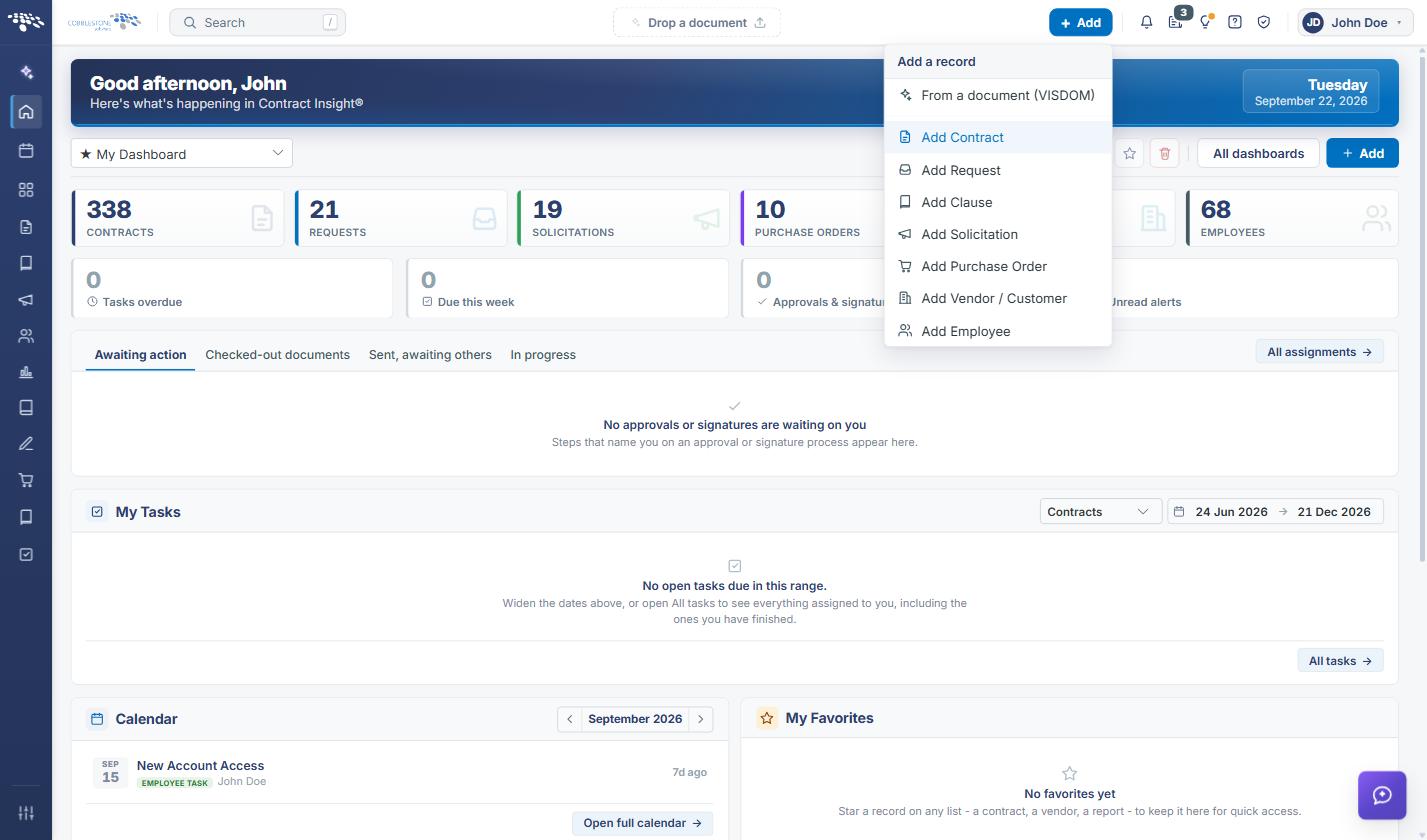
- From the Contract Insight homepage, start the record you are working on — for example, click + New in the upper right and select New Contract, then choose a contract type to open its add screen.
- Find the lookup field that needs a value that does not yet exist, and click the blue + icon to the right of it.
.png)
- A slide-out panel opens on the right, headed FILLS IN <FIELD NAME> over Add a new <item> detail — for example, FILLS
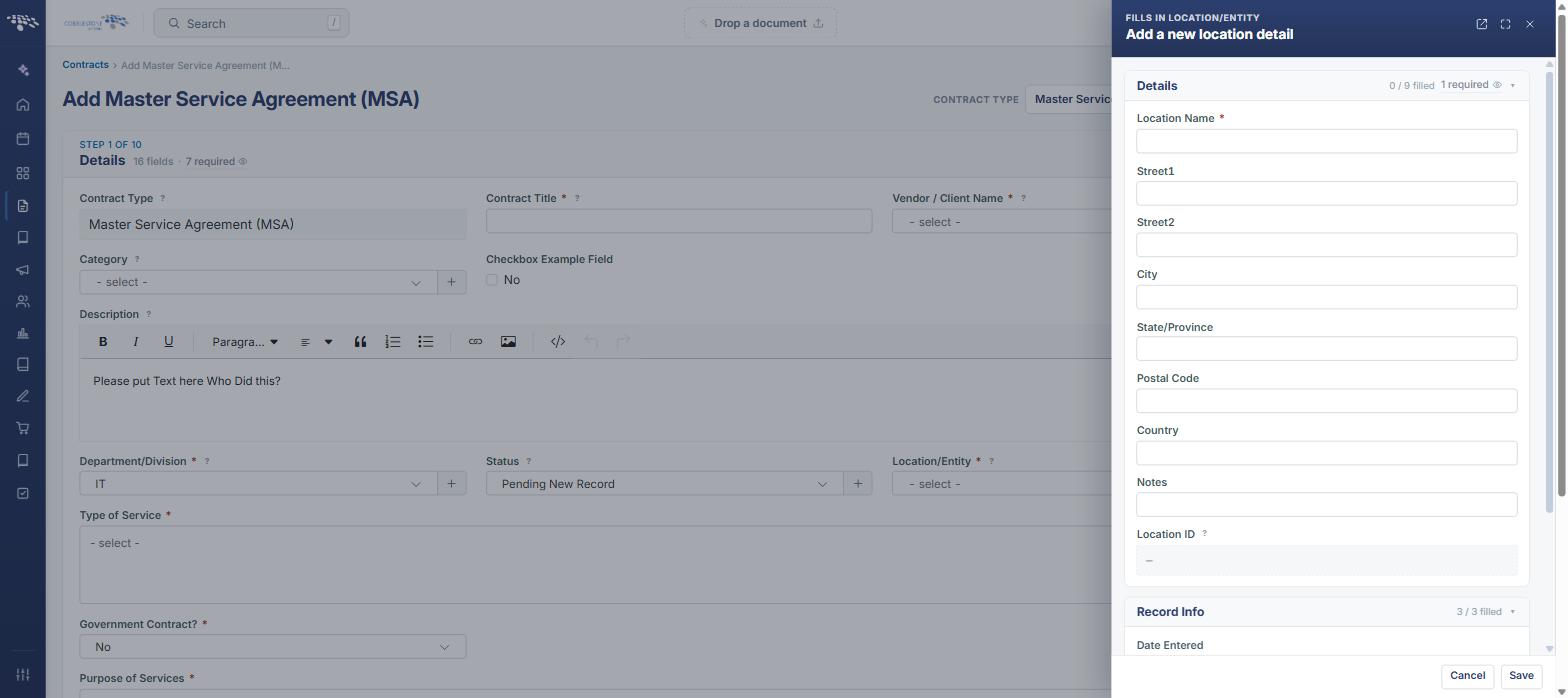 IN LOCATION over Add a new location detail.
 - Complete the required fields in the Details section (each is marked with a red asterisk), along with any other fields you want to set. The Details header tracks your progress with a field-completion indicator, for example “0 / 10 filled — 1 required”.
- Click Save in the lower right of the panel.
- The panel closes and the newly created value is entered into the field on the record you were completing. Continue filling in the record as normal.
Note: Click Cancel in the lower right of the panel, or the × in its header, to close the panel without creating the value. Nothing is added to the master reference list and the field on the record is left unchanged.
4. What the In-Line Add Panel Contains
The in-line panel is the same add form used by the list’s own management screen, so the value created from it is complete and consistent with values created through Administration. The panel includes:
- A header naming the field being filled — FILLS IN <FIELD NAME> — above the panel title, so it is clear which field on the record will receive the value
- A Details section listing the fields for that master reference list, with required fields marked by a red asterisk and a field-completion indicator in the section header
- A Record Info section, where the list has one, showing the read-only Entered By, Date Entered, and Updated By values the system populates on save
- Icons in the upper right that expand the panel to full width or open it as a full page, and an × that closes it
- Cancel and Save buttons in the lower right
5. Nested In-Line Adds
An in-line add panel can itself contain lookup fields, and those fields carry their own + icon. A value can therefore be created in place at more than one level without leaving the record.
For example, opening the in-line panel for Department/Business Unit shows an Entity lookup with its own + icon beside it. Clicking it opens a further add panel for the Entities list; saving there returns the new entity to the Entity field on the department panel, and saving the department in turn returns the new department to the record being created.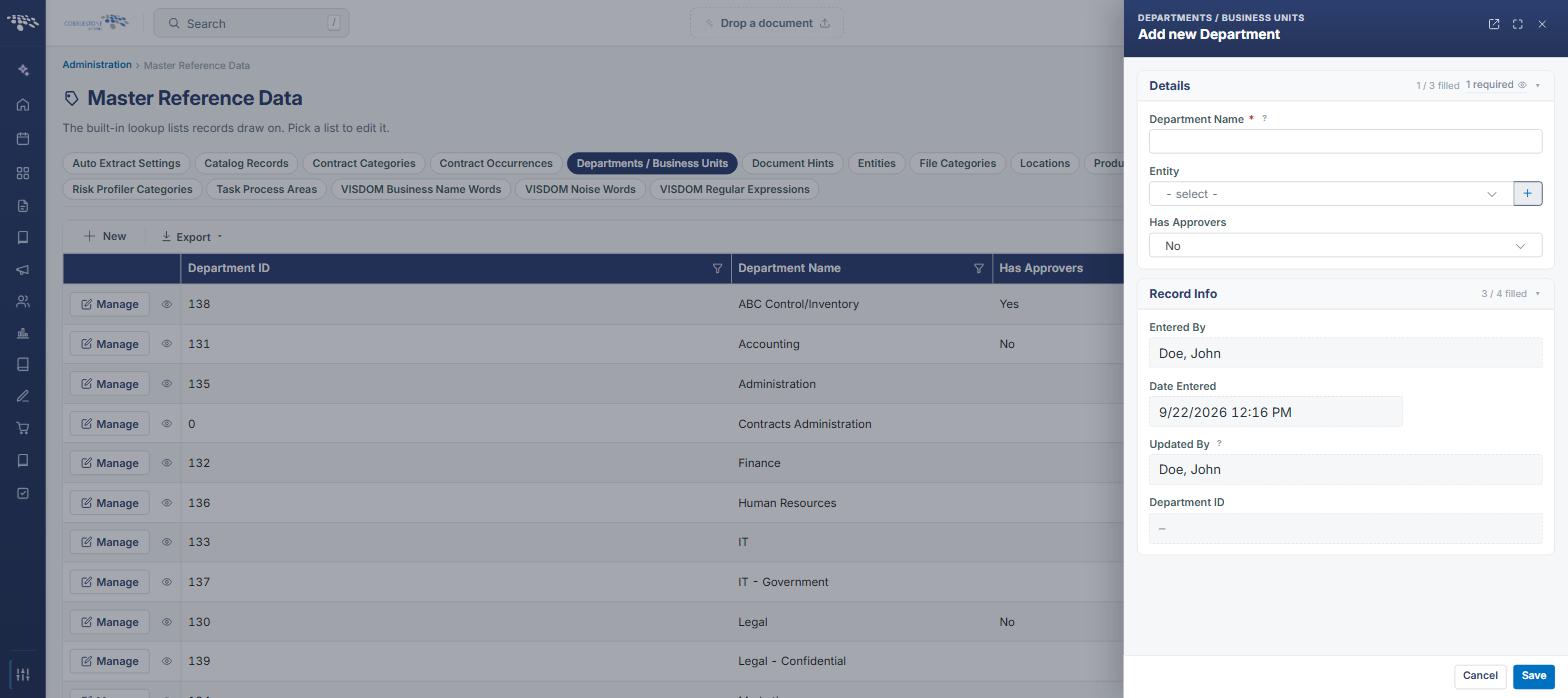
Note: Work outward from the innermost panel: save the nested value first, then the panel that requested it, then continue with the record. Cancelling a panel discards only that panel’s entry — the panel beneath it stays open with whatever has already been filled in.
6. Permissions and Availability
Adding master reference data in-line creates a record in a shared list that every user of the application draws on, so the + icon is shown only to users who hold the permission to add to that list. Users without it still select from the existing values, and a new value has to be requested from an Application Administrator.
Which lookup fields appear on an add screen — and therefore which lists can be reached in-line from it — depends on the record type and on the field layout configured for the environment through the Field Management and Tab Details Setup administration tools.
7. Managing the Full List Instead
In-line adding creates a single value quickly while a record is being completed. To review, edit, or remove values, or to add several at once, use the list’s own management screen instead: from the Contract Insight homepage, click Administration at the bottom of the left navigation menu, then under Lookup Tables select Master Reference Data and choose the tab for the list.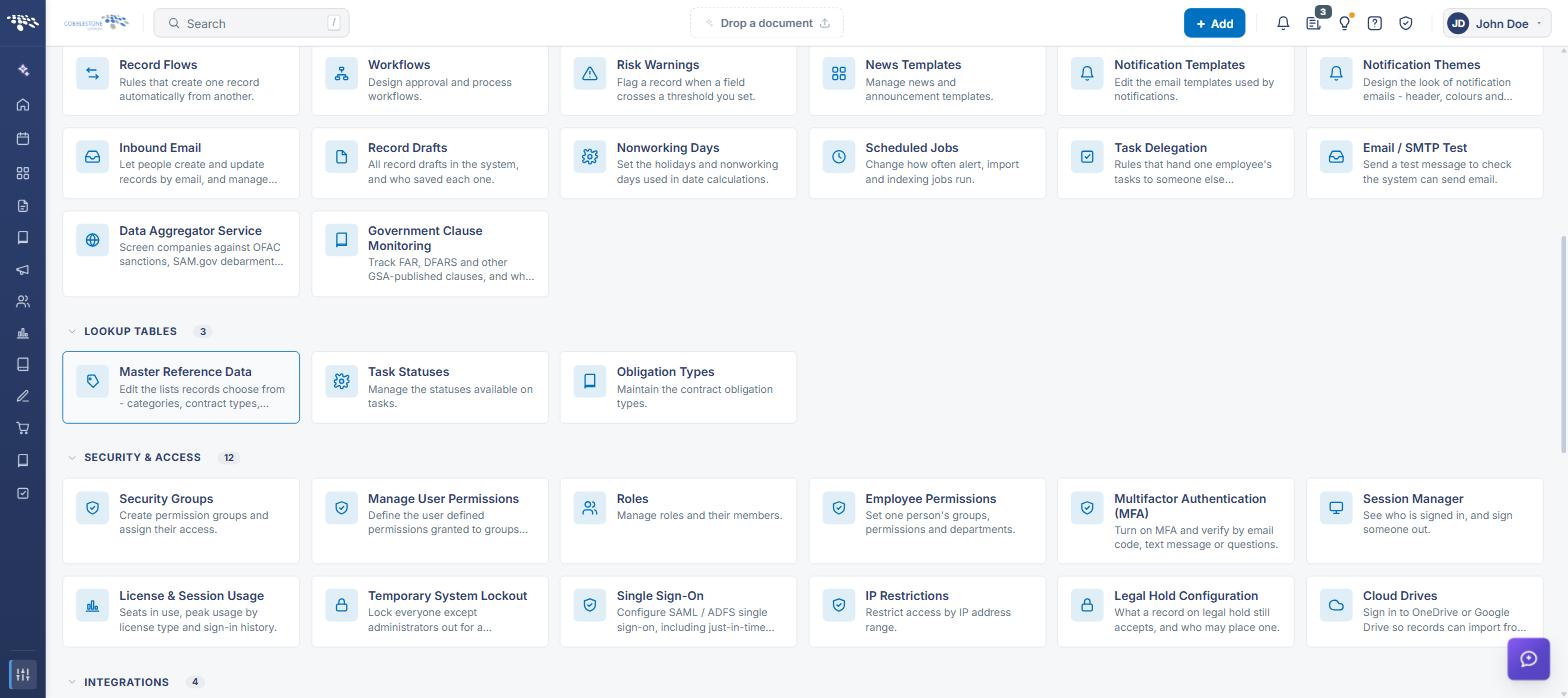
A value created in-line appears in that list immediately, with the same Record Info values the system records for any other new entry, and can be edited or deleted there in the usual way.
8. Quick Reference Summary
Task | How to Complete It |
Spot the control | A blue + icon immediately to the right of a lookup field on an add screen. |
Add a value in-line | Click the + icon, complete the required fields in the panel, then Save. The value drops into the field. |
Read the panel header | FILLS IN <FIELD NAME> names the field on the record that will receive the value. |
Back out safely | Cancel in the lower right, or the × in the panel header. Nothing is created. |
Nested lookups | A lookup inside the panel has its own + icon; save the innermost panel first, then work outward. |
Who can do it | Only users permitted to add to that master reference list see the + icon. |
Manage the whole list | Homepage → Administration → Lookup Tables → Master Reference Data → the tab for the list. |