Adding a Participant to a Signature Group
E-Signature Flow/Groups: Adding a Participant to a Signature Group
Note: The setup for E-Approval Flow/Group applies only to organizations who have the Document Authoring add-on module.
To add a participant to a signature group, click Actions drop down and select Add Participant
.png)
.png)
There are three (3) different types of participants that can be added to a Signature Group:
1. Internal Employees
2. External Company Contacts
3. Employee Roles & Groups
For Internal Employees as well as Employee Roles & Groups, you will be required to select the Employee or Group that is being used for this participant.
The Employee Roles & Groups provides a list of all roles and groups defined through the employee management area of Contract Insight.
The Internal Employees provides a list of all employees defined through the employee management area including two additional items:
1. Assigned Employee/User
a. This will dynamically assign the primary employee assigned to the contract or solicitation to this participant when the template document package is generated for a contract or solicitation.
2. Assigned Employee/User’s Manager
a. This will dynamically assign the manager of the primary employee assigned to the contract or solicitation to this participant when the template document package is generated for a contract or solicitation.
Note: External Company Contacts cannot be specifically selected at this point, because we are only setting up a template, and therefore do not know what vendors/customers are going to be assigned to the contract and/or solicitation. These participant entries get saved as saying [Assign on Merge] for the name of the participant.
All three types of participants must have a title provided as well as specifying if the participant is locked. Is Locked specifies if the participant can be removed on a generated document from this template.
Note: If adding a reason, that reason displays on the signing portal.


Once all the information is provided, click Save Participant.
Signature Group Rules & Conditions
Each signature group can have specific rules and conditions defined to determine when the group actually gets rolled onto a generated document package. To begin working with the rules & conditions for a signature group, click Actions and then select Group Rules.png)
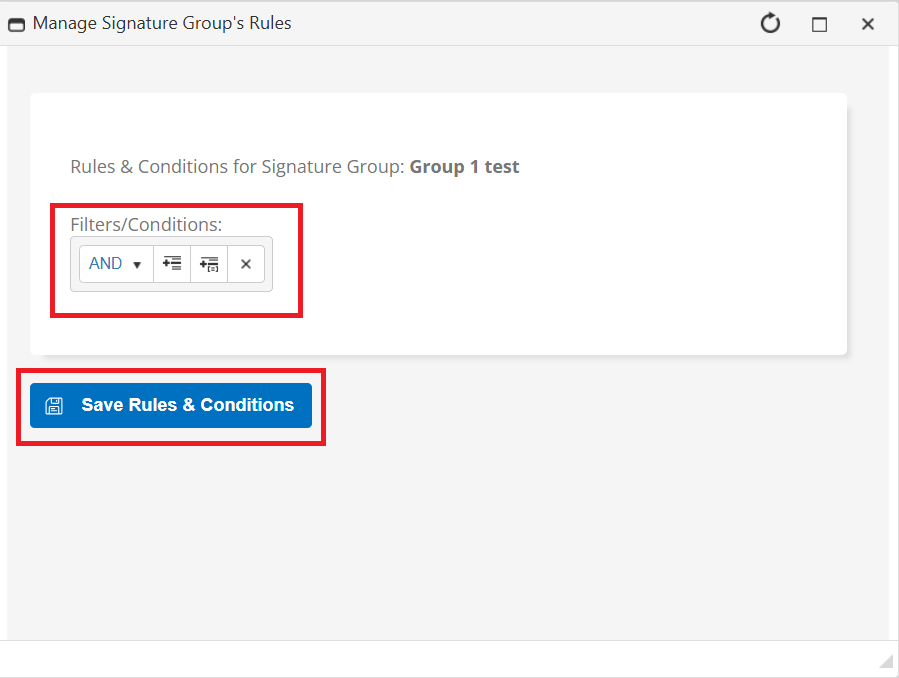
Clicking Rules pops-up a window for managing rules & conditions for a signature group.
To better understand how to use the filters/conditions functionality, lets breakdown the components. In the picture below each of the components of the filtering control are numbered:.png)
1. And/Or Selector: Used to determine if a new expression is being added as an AND or OR condition
2. Add New Filter Expression: Adds a new filter expression to the list of conditions (takes into consideration the And/Or Selector)
3. Add Expression Group: Adds a new sub-grouping of expressions to be used in complex conditions (takes into consideration the 'And/Or Selector' between groups)
4. Remove Filter Item: Removes the filter/condition from the list of applied filters and conditions
Once the necessary conditions have been defined, click Save Rules & Conditions.
Note: The rules and conditions at the signature group level are a second-tier condition. This means that these rules and conditions are only checked or verified if the first-tier conditions are validated. The first-tier conditions are specified in the Rules & Conditions button the menu (That page is for specifying the rules and conditions for when a template is available to be generated).
Quick Copy of a Signature Group
To quickly copy the setup of a signature group locate the Actions drop-down box and click Copy Group.png)