Add Contract From File
Adding a Contract: Add Contract from File
This feature allows users with the proper permissions to select a text-based document/file to upload and then go through the file and select text (within the file) to be highlighted and copied over to a field on the Add Contract screen. Using this option when adding a new contract record can save the user the time of re-typing Contract language into Contract Insight.
Method 1: Grey Drag and Drop Box
1. Drag and Drop File(s) on the grey box that reads, "Drag and drop a file to create a new record".

If the user wishes to create multiple records from files at one time, they may drag and drop multiple files on the grey drag and drop box.
2. After dropping the file it will prompt for what kind of record you wish to create. For a contract record, you would click on Contract.
.png)
3. The Add New Contract Record screen displays. Select the File for the new Contract Record being added..png)
4. Then, select the Record Type that is being created.
.png)
5. Select an OCR Type
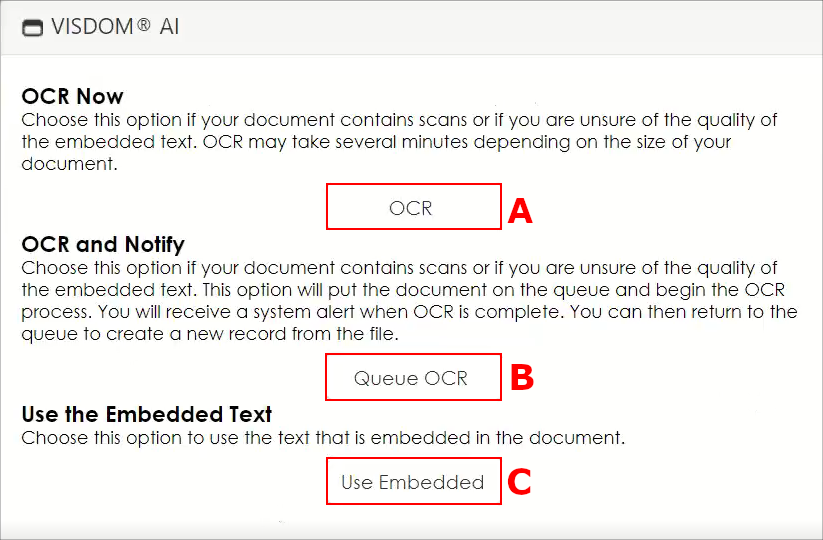
Select one of the three options that appear on the VISDOM AI popup.
A. OCR Now: This is if the document contains scans or if the user is unsure of the quality of the embedded text. In addition, this may be a better option for older text that has already been OCR’d many years ago, as the outcome may be less than desirable given recent advancements. Lastly, it is never a bad idea to OCR things into the CobbleStone® system over Embedded Text, for the sake of consistency and premium VISDOM results. This may take several minutes.
B. OCR and Notify: This is a good option for longer documents that will certainly take a longer duration to process through the OCR engine. This puts the document into a queue and begins OCR’ing it in the background immediately. Upon completion, a notification appears in the Alerts & Notifications area. The user can bypass the typical extraction process once complete.
C. Use Embedded Text: This option uses the text that is embedded in the document. This also works if the document has already been OCR’ed, as this process defers OCR until a later point, but VISDOM pulls text as available. It is possible that the user has a document where some text is embedded, and some is not, so OCR Now is a better choice given these circumstances.
6. Review the Add Screen. Always be sure to double check the record, assuring information has pulled completely and correctly. It is up to the user to make sure the information has pulled over correctly..png)
If it is an imaged based pdf, by clicking the Text tab, no text found displays. If there is text found in the document, it can be Auto-Extracted from the document and placed in the fields on the right hand side. For auto-extract settings please visit the Auto Extract Wiki Settings Page..png)
Contract Insight has a built in OCR (Optical Character Recognition) Tool for image based pdf's that will extract the text.
Note: It is recommended that files larger than 25 MB be broken up and separated to separate files when uploading. Note many computer systems depend on the internet connection, time-out settings, e-mail settings and uploading large files might affect performance. The system does has not imposed a limit on the number of files that can be added to contract record. Results of the OCR Tool depend on the document quality.
By clicking OCR PDF, Contract Insight will OCR the document and turn it into a text based pdf.
Once the OCR tool is used, the file name will change and, by clicking the Text tab, the extracted text displays (Again, the tool works better with better images)..png)
If the pdf is already text based, the screen will provide you with the text that was in the selected file/document as well as all of the Add Contract Record screen fields that should be displayed for the selected Contract Type..png)
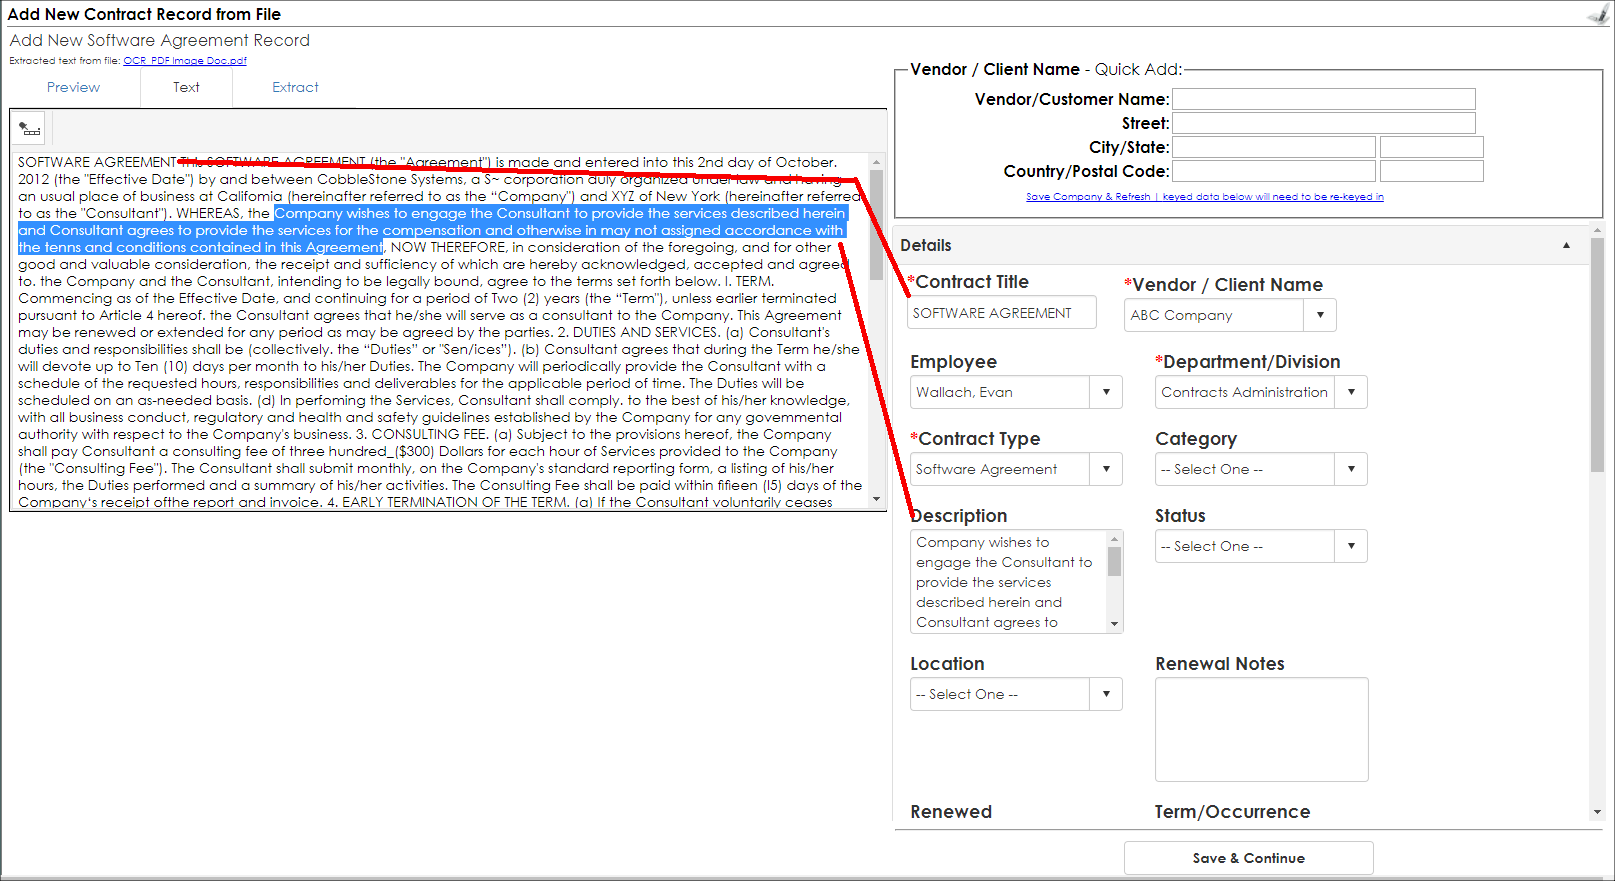
7. Using your mouse, you can then select/highlight a portion of the text in the left box that a user can then drag and drop into the desired text box in the right hand side of the screen..png)
.png)
8. Note that for drop down lists (such as for the Vendor/Customer, Employee Assigned, and Department/Division fields) still need to be clicked to then manually select the value needed to populate the field.
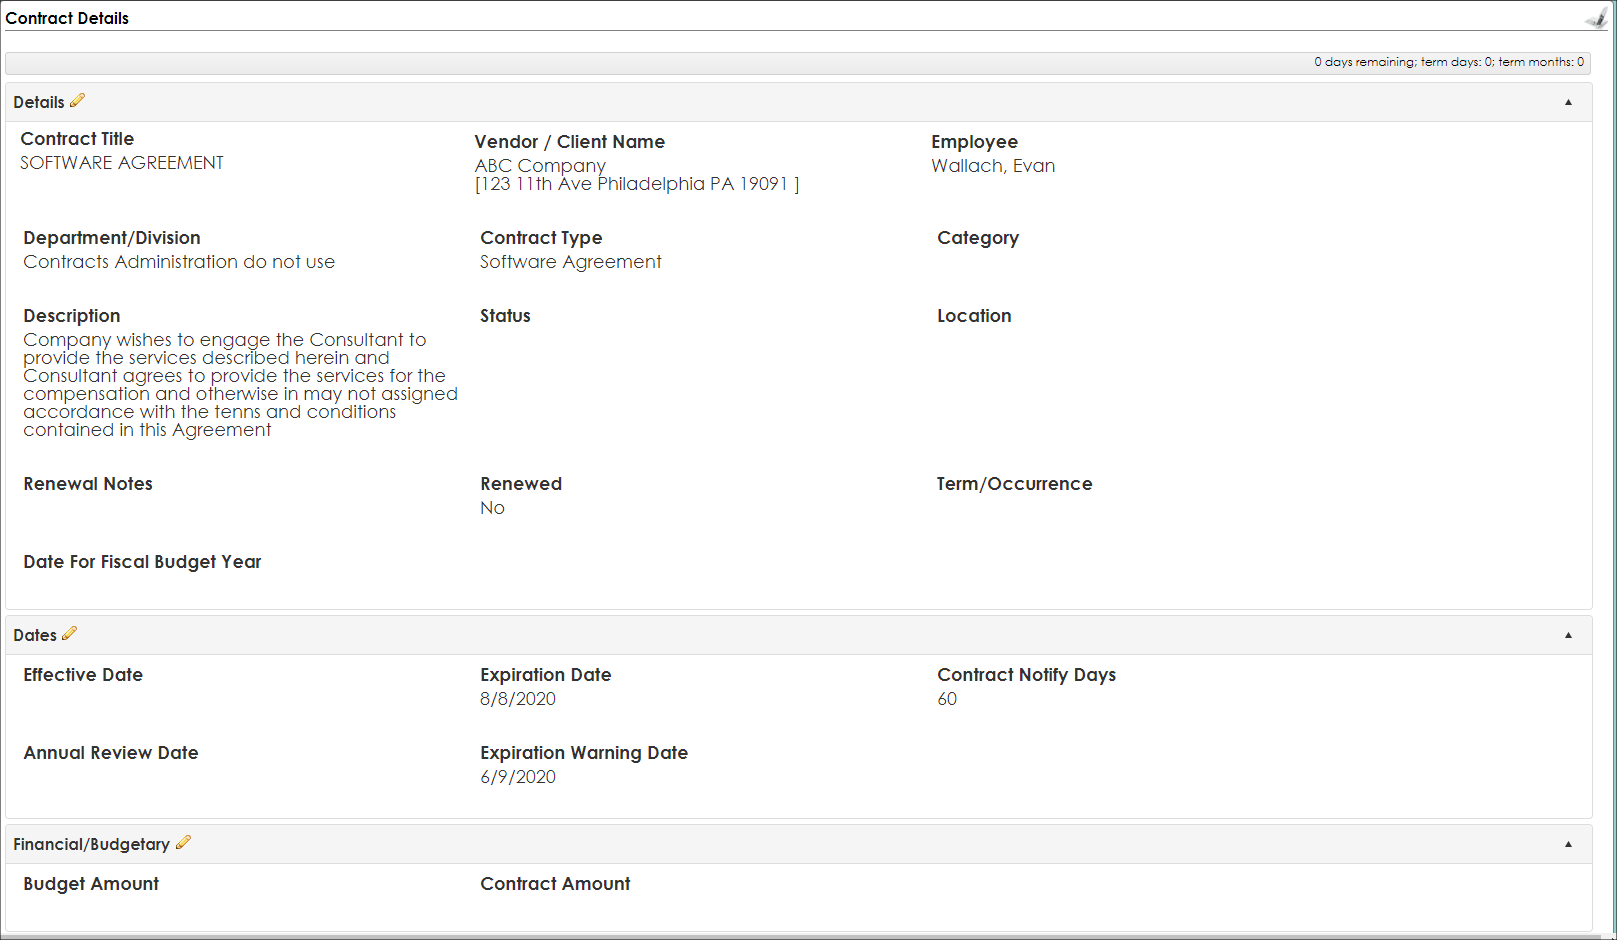
9. Once field population is complete, click Save & Continue at the bottom of the screen to save the new Contract Record and navigate to the new record's Contract Details screen..png)
10. If working with multiple files, please follow the same steps as 1-6. Then with every file thereafter, follow the prompt. This asks the user if they are creating a new record altogether (the creation of multiple records at one time), if they are adding this file to the previously created contract from the subsequent entry (the addition of supporting documentation the the previously entered record), or if they would like to cancel the operation and keep the unentered files in the file queue.
.png)
.png)
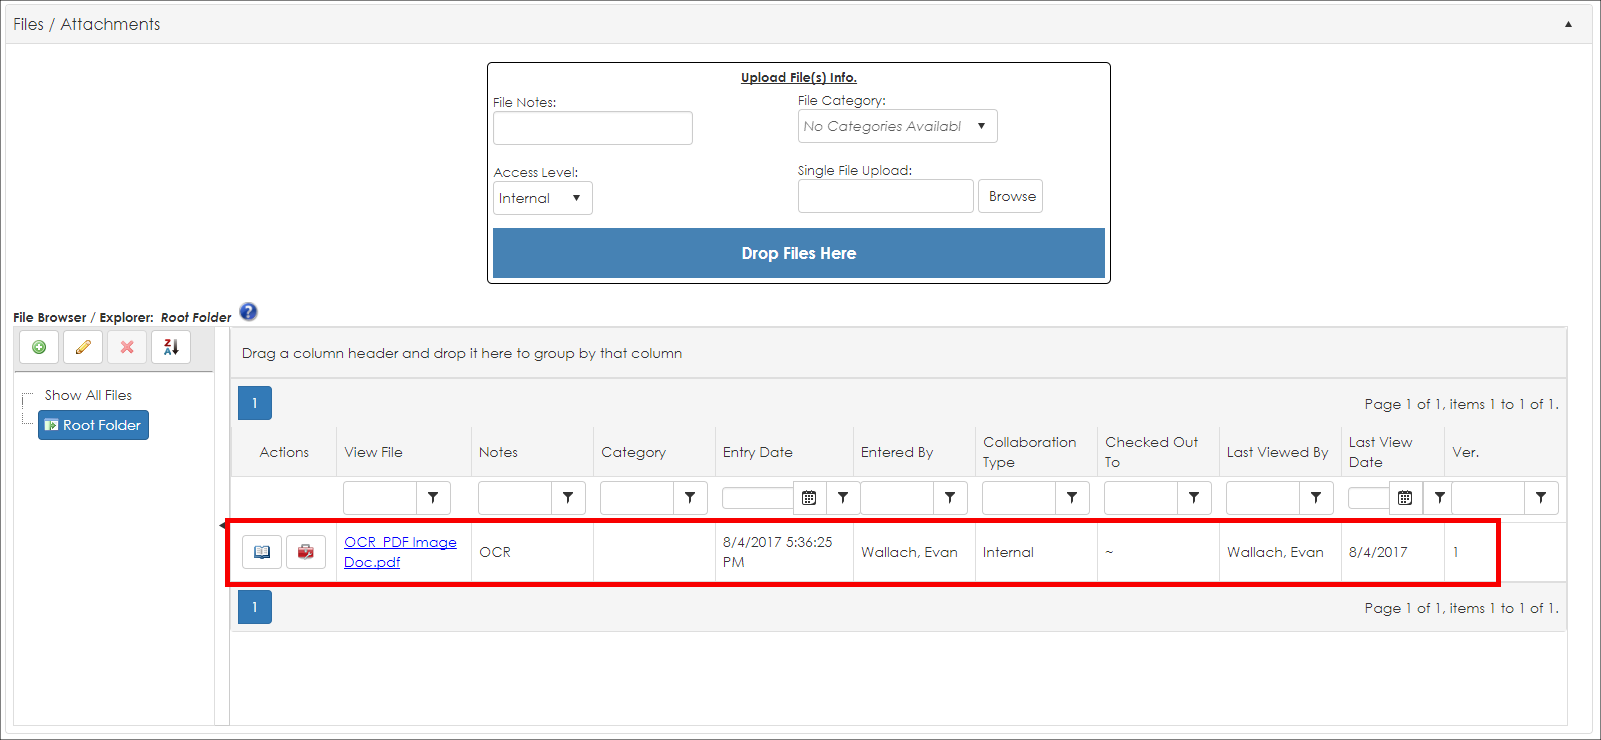
11. Note that the file/document that the Contract Record was created from is automatically attached to the Contract in the Files/Attachments section of the Contract Details screen, where it can be opened/downloaded..png)
Method 2. Contracts Dropdown
1. Navigate to Contracts > Add Contract From File.
.png)
2. Click Browse or Choose File (depending on the Internet Browser used) to navigate to and select the text-based file/document from which to create the new Contract Record..png)

3. Optionally, any necessary File Notes can be added in the text box to the right of the file name.
4. Click Continue to open the Add New Contract Record screen..png)
OCR Type
Select one of the three options that appear on the VISDOM AI popup.
A. OCR Now: This is if the document contains scans or if the user is unsure of the quality of the embedded text. In addition, this may be a better option for older text that has already been OCR’d many years ago, as the outcome may be less than desirable given recent advancements. Lastly, it is never a bad idea to OCR things into the CobbleStone® system over Embedded Text, for the sake of consistency and premium VISDOM results. This may take several minutes.
B. OCR and Notify: This is a good option for longer documents that will certainly take a longer duration to process through the OCR engine. This puts the document into a queue and begins OCR’ing it in the background immediately. Upon completion, a notification appears in the Alerts & Notifications area. The user can bypass the typical extraction process once complete.
C. Use Embedded Text: This option uses the text that is embedded in the document. This also works if the document has already been OCR’ed, as this process defers OCR until a later point, but VISDOM pulls text as available. It is possible that the user has a document where some text is embedded, and some is not, so OCR Now is a better choice given these circumstances.

The Add Screen
If the document is an imaged based pdf, on the next screen, a preview of the pdf displays.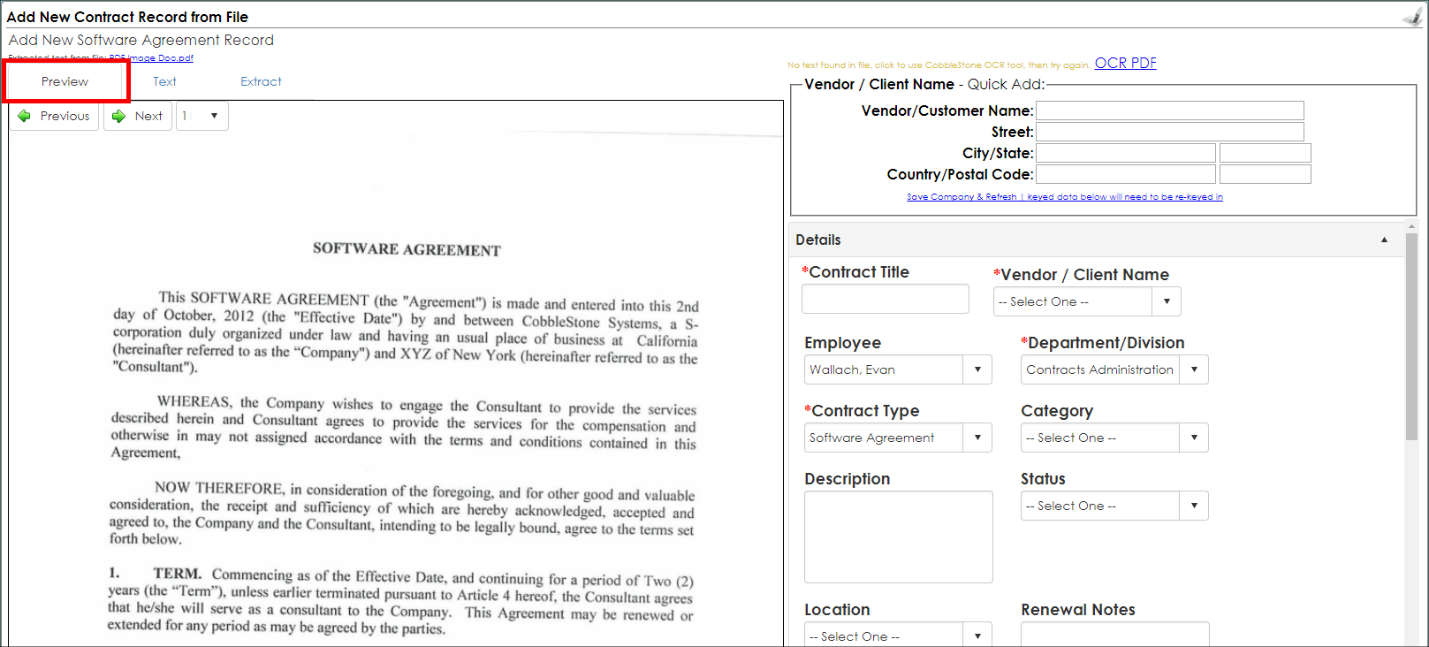
If it is an imaged based pdf, by clicking the Text tab, no text found displays. If there is text found in the document, it can be Auto-Extracted from the document and placed in the fields on the right hand side. For auto-extract settings please visit the Auto Extract Wiki Settings Page.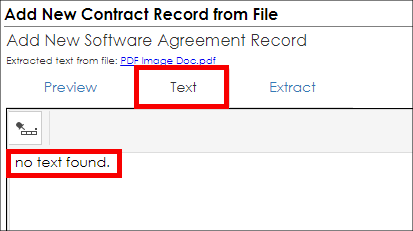
Contract Insight has a built in OCR (Optical Character Recognition) Tool for image based pdf's that will extract the text.
Note: It is recommended that files larger than 25 MB be broken up and separated to separate files when uploading. Note many computer systems depend on the internet connection, time-out settings, e-mail settings and uploading large files might affect performance. The system does has not imposed a limit on the number of files that can be added to contract record. Results of the OCR Tool depend on the document quality.
By clicking OCR PDF, Contract Insight will OCR the document and turn it into a text based pdf.
Once the OCR tool is used, the file name will change and, by clicking the Text tab, the extracted text displays (Again, the tool works better with better images).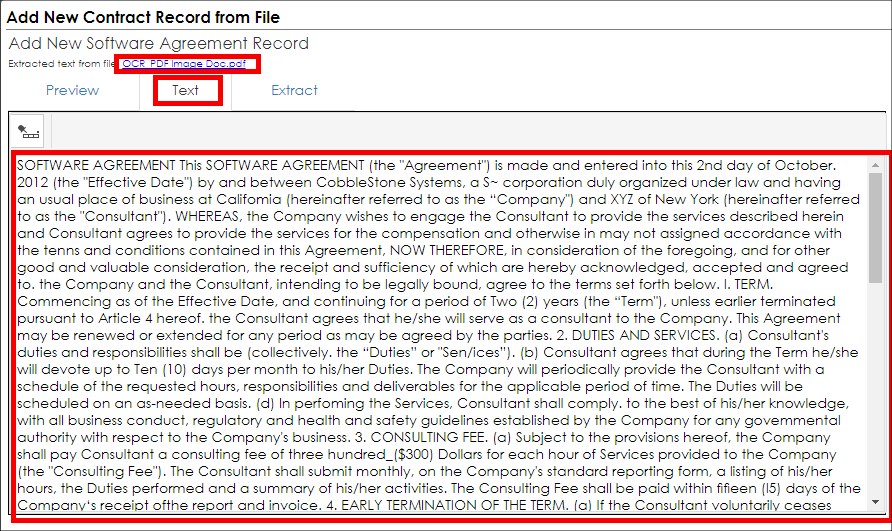
If the pdf is already text based, the screen will provide you with the text that was in the selected file/document as well as all of the Add Contract Record screen fields that should be displayed for the selected Contract Type.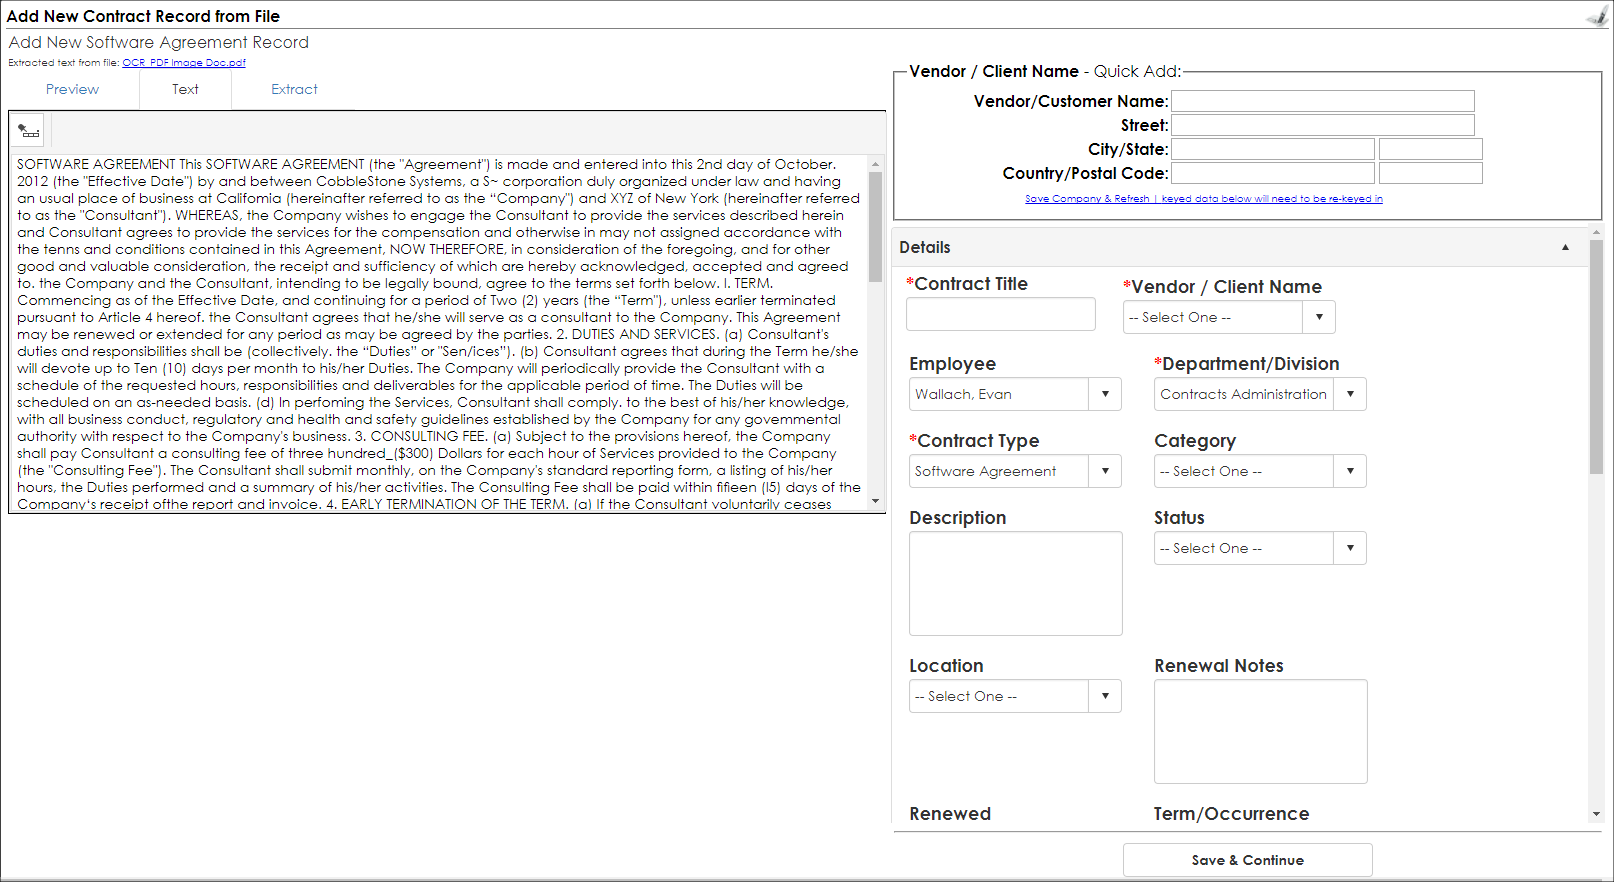
5. Using your mouse, you can then select/highlight a portion of the text in the left box that a user can then drag and drop into the desired text box in the right hand side of the screen.
6. Note that for drop down lists (such as for the Vendor/Customer, Employee Assigned, and Department/Division fields) still need to be clicked to then manually select the value needed to populate the field.
7. Once field population is complete, click Save & Continue at the bottom of the screen to save the new Contract Record and navigate to the new record's Contract Details screen.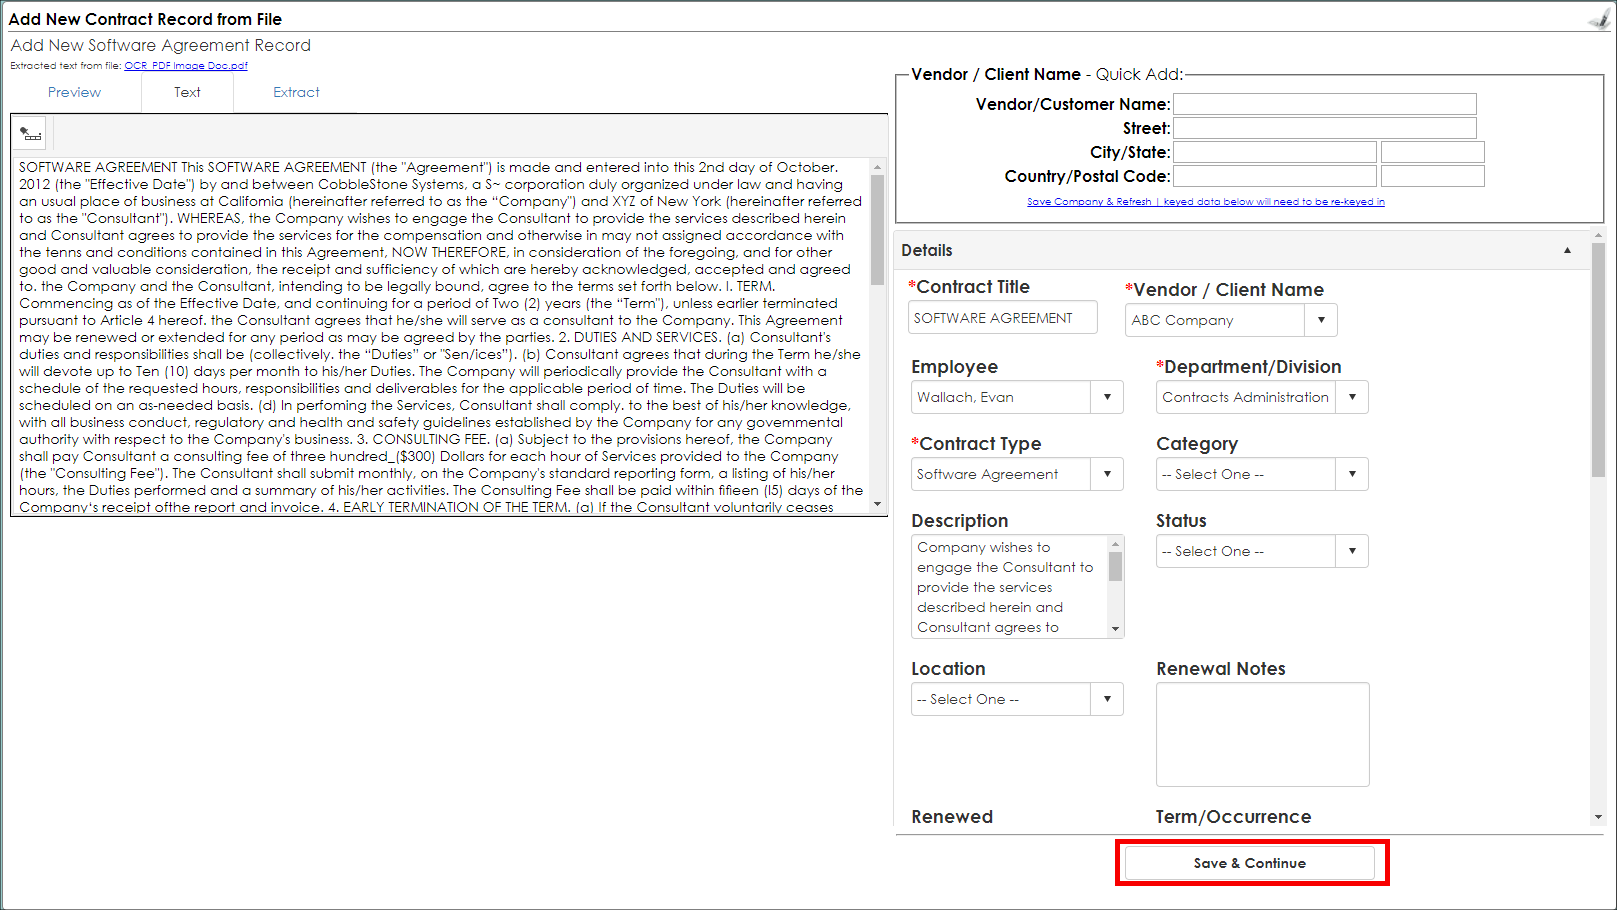
8. Note that the file/document that the Contract Record was created from is automatically attached to the Contract in the Files/Attachments section of the Contract Details screen, where it can be opened/downloaded.