Creating an Account on the Gateway
Vendor/Client Gateway: Signing Up/Creating an Account on the Gateway
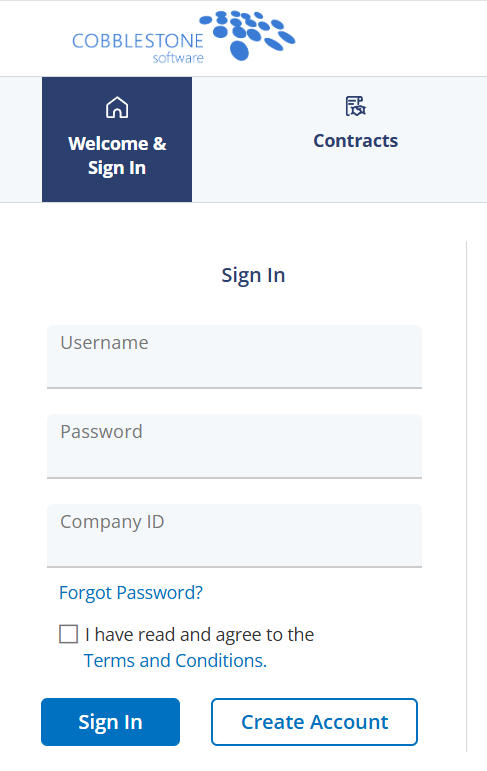
1. To create a new account to signup and log into the Vendor/Client Gateway, click Create Account on the top right corner of the screen or at the bottom of the sign in area.
2. The New Account Signup screen displays.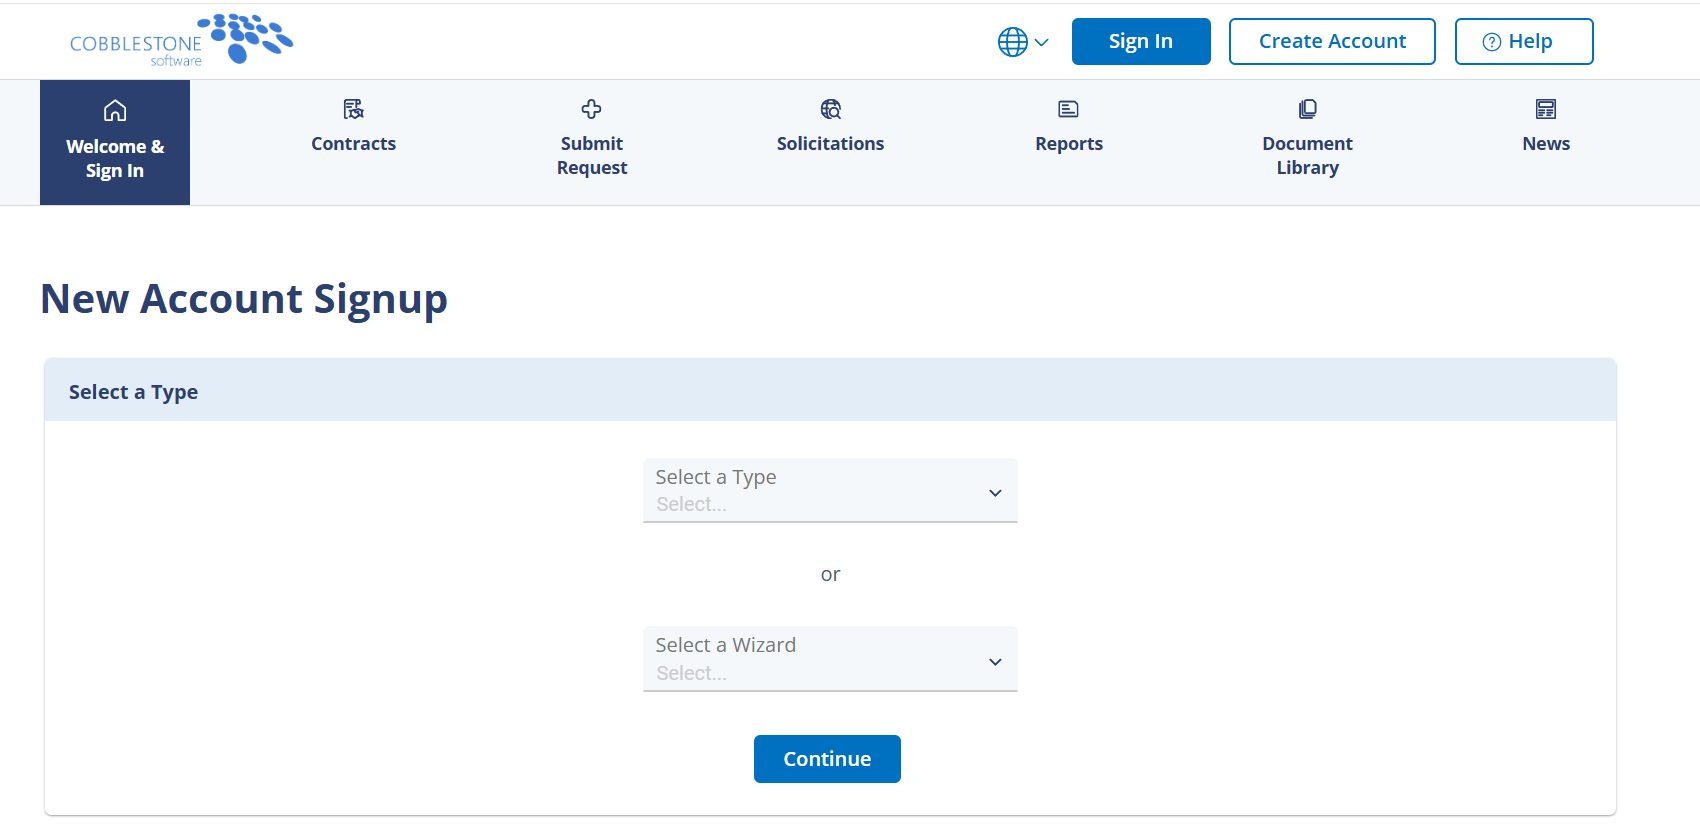
Note: Click Help and select the link to the organization's site to learn how to signup and register for a new account.
3. After selecting a type, the New Account Signup Add screen displays.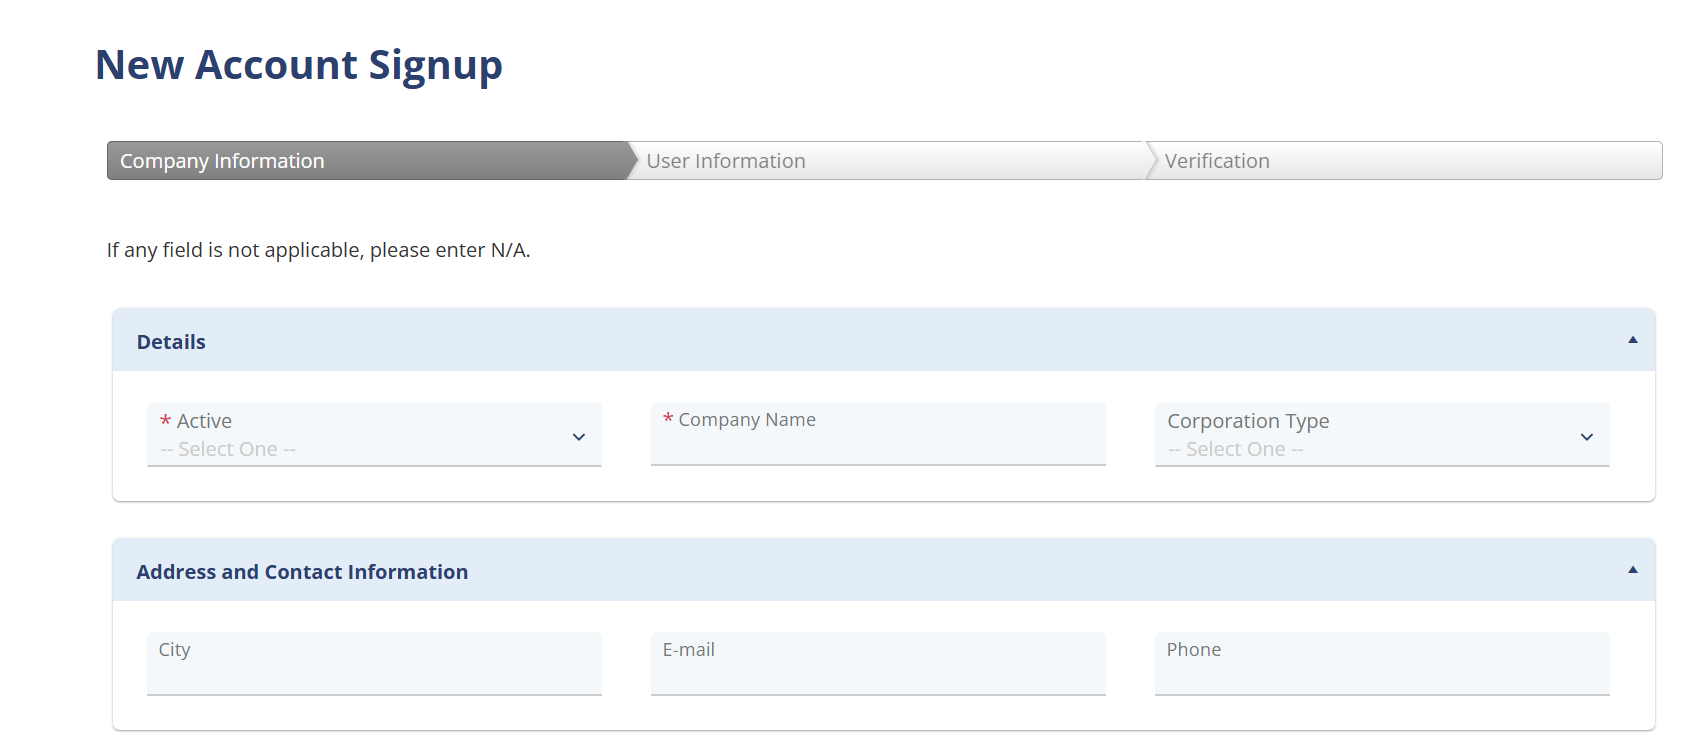
Note: The New Account Signup screen may have different fields displayed/required than shown above, based on the fields the organization has selected/required to be displayed on the New Account Signup screen.
4. Once all necessary and required information on the Company Information and User Information sections has been entered, click Continue.
5. The New Account Signup - Confirmation screen with the Company/User log-in information displays.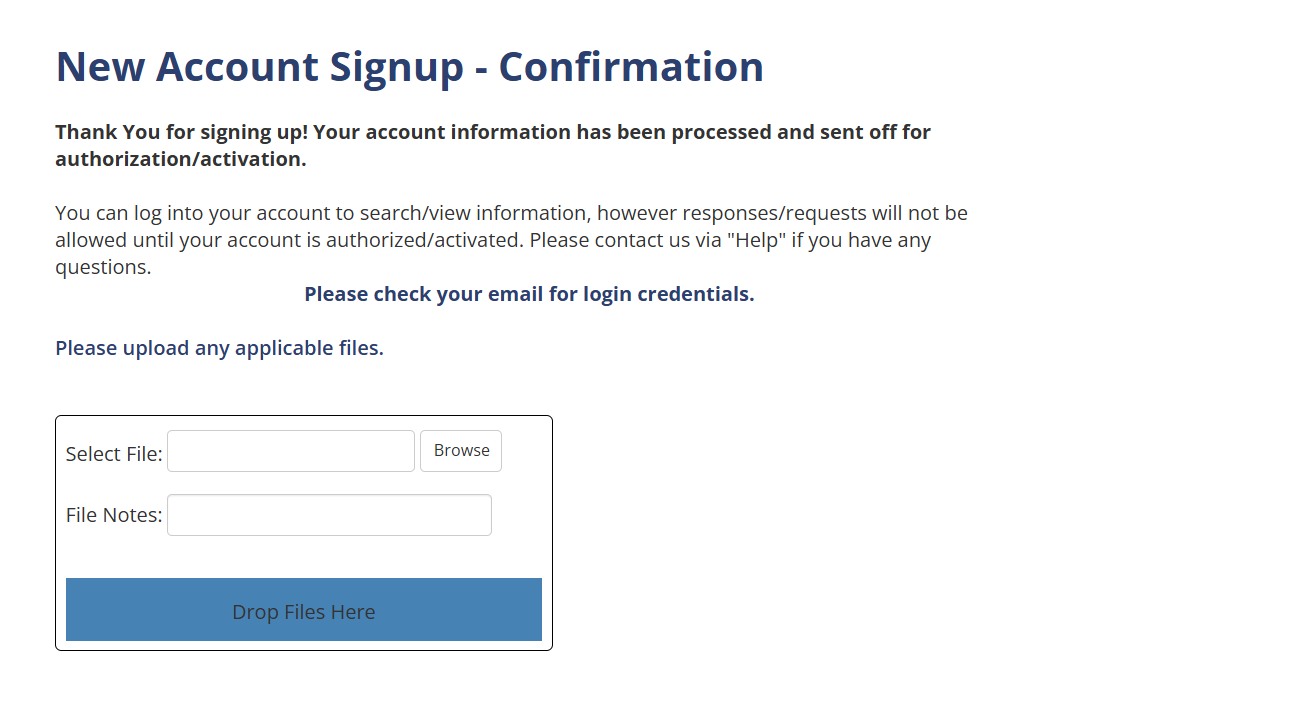
VCG MFA on Account Creation
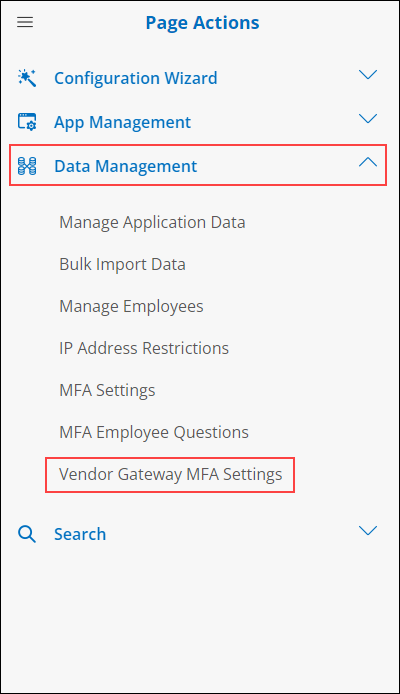
In the Core system, navigate to Application Configuration > Manage / Setup > Application Configuration > Config Settings and, in the side menu, select the Vendor Gateway MFA Settings option under the Data Management section.
Enable the MFA code on the registration page.

OPTIONAL – Update the remaining settings as desired. These include code style, length and message. NOTE – The message text is HTML, email clients may render this differently than it appears in the web page. This is particularly true of MS Outlook which uses the IE engine to display HTML.
Navigate to the gateway site and click the Create Account button
.png)
Note the new tab in the wizard navigation

Fill in Company Information form
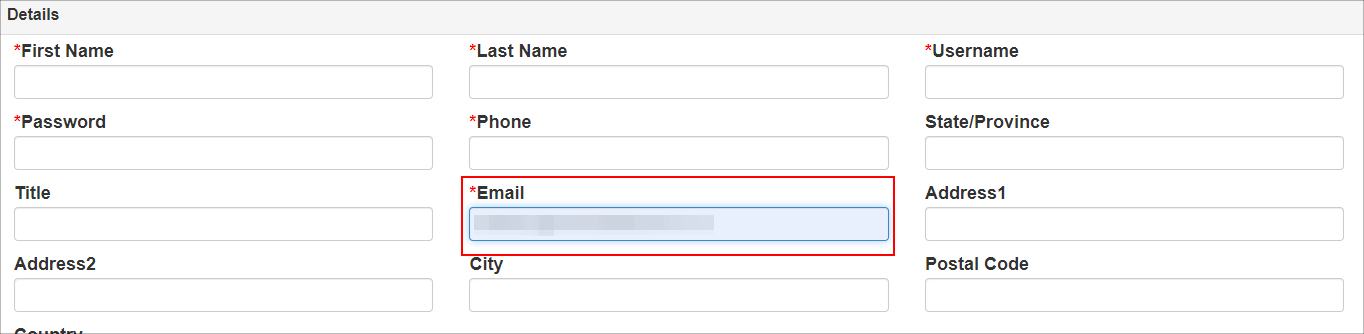
Fill in the User Information form. Make sure to use an email address you have access to on this form
At the bottom of the form agree to the terms and conditions and enter the Captcha code.
NOTE: If the form validation fails you will be required to re-enter the password and the captcha. This is by design.
The final tab will display the email address where the code was sent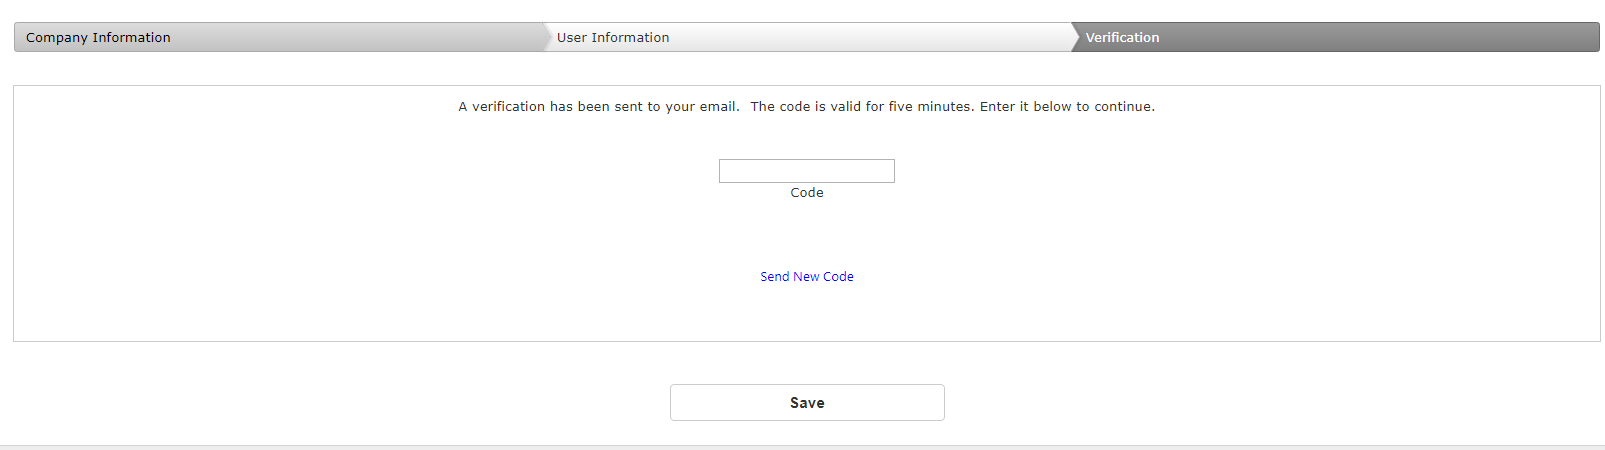
Check your email to retrieve the code
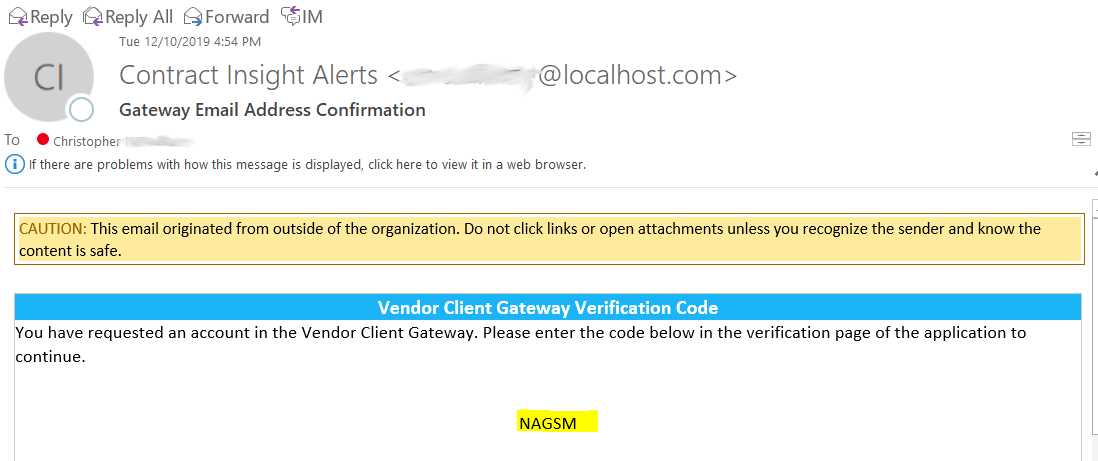
Enter the code in the text box and click the Save button at the bottom.
The gateway generates the account and provides follow up instructions. This functionality has not been changed.
Note: The registrant can then log-in to the Gateway to view/search information but is not authorized to submit responses/requests until the account has be authenticated and activated by the Gateway's organization.
6. Click Continue to My Company Account or Login Now to log into the Gateway.
Wizard-Based Registration
An Admin to choose to use wizard-based registration for Vendor Client Gateway.
To access this:
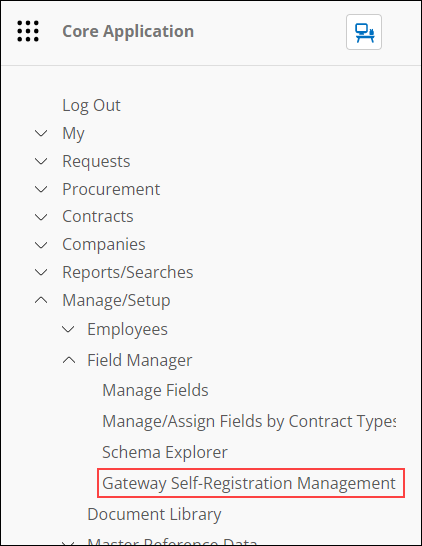
1. Click Manage/Setup
2. Click Field Manager
3. Click Gateway Self-Registration Management
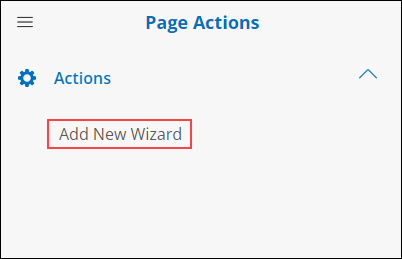
From here, an Admin may add, edit, or delete a wizard.
To add a wizard, click Add New Wizard under the Actions side menu.
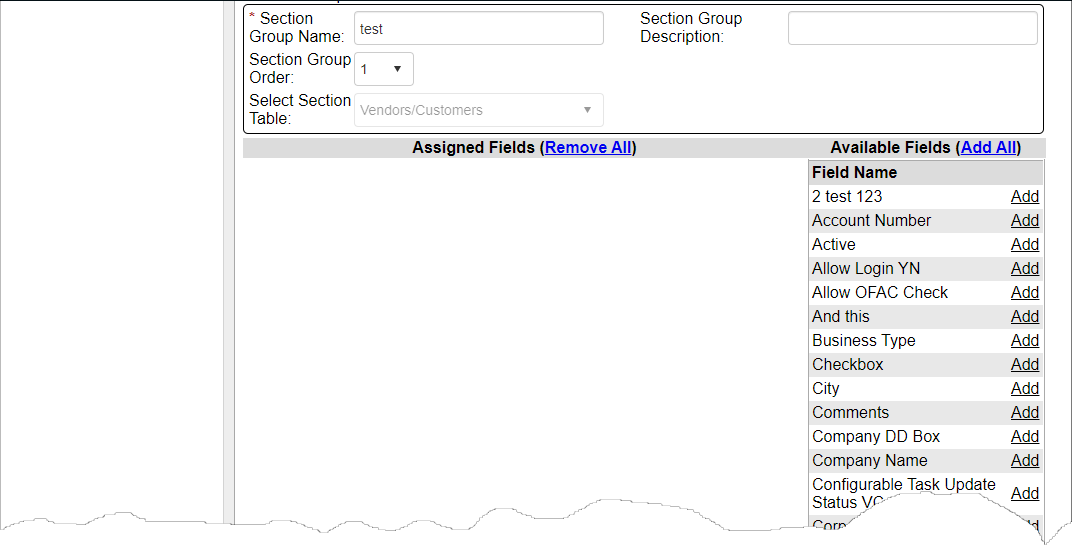
Once the wizard is saved, the user may assign the fields to the group.
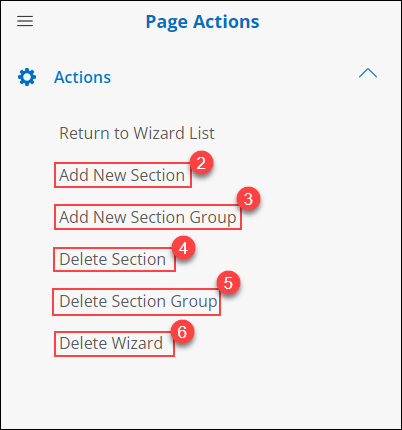
To edit a wizard, click View Details on the Wizard Name. From here, the user may do things like change the wizard type (1), add a new section to the wizard (2), and add a new section group (3).
To delete a wizard, click View Details on the Wizard Name. Click Delete Wizard (4) under the Actions side menu. If the user wishes to not delete the wizard altogether, but instead delete a section (5)/group (6), they may also do that.
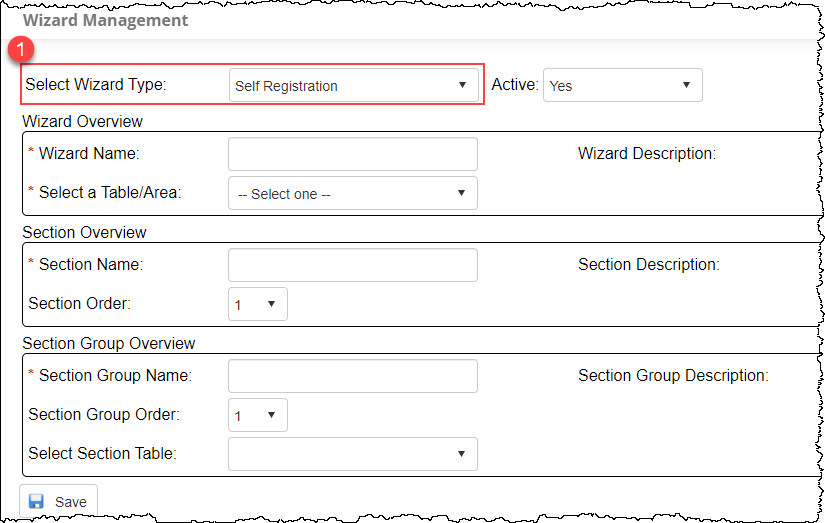
When the user adds a wizard, the following screen is shown:
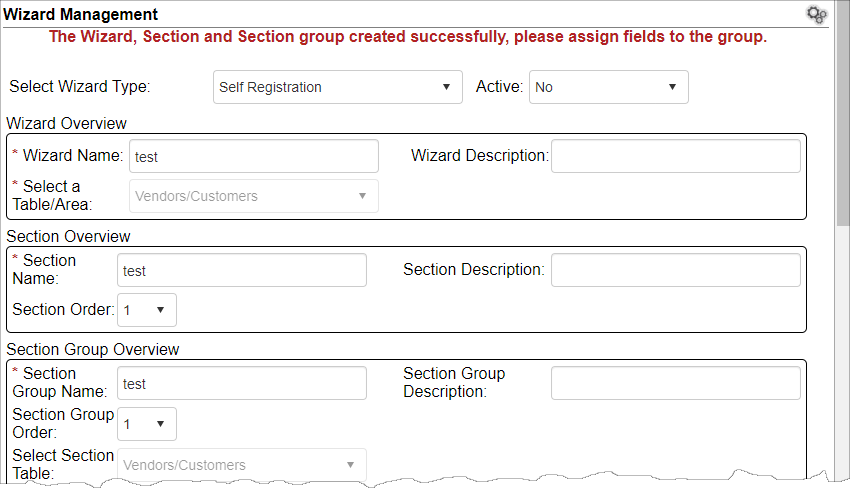
Here, the user names the wizard, selects the type, group name, etc. Once the wizard is saved, the user may assign fields to the group: