Manage Gateway File Categories
File Categories
With CobbleStone® Contract Insight Enterprise Edition and the optional Vendor/Client Gateway, system administrators can limit the file categories available for selection by users via the Gateway.
Note: Images below may not reflect the configuration in your system and are for illustrative purposes only.
Viewing Defined File Categories
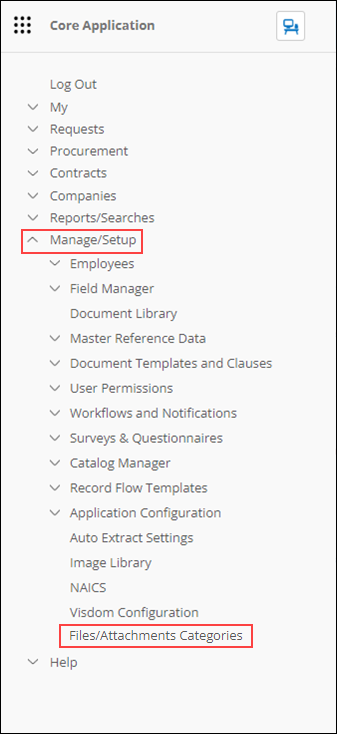
1. Via the main menu, navigate to Manage/Setup - File Attachments/Categories.

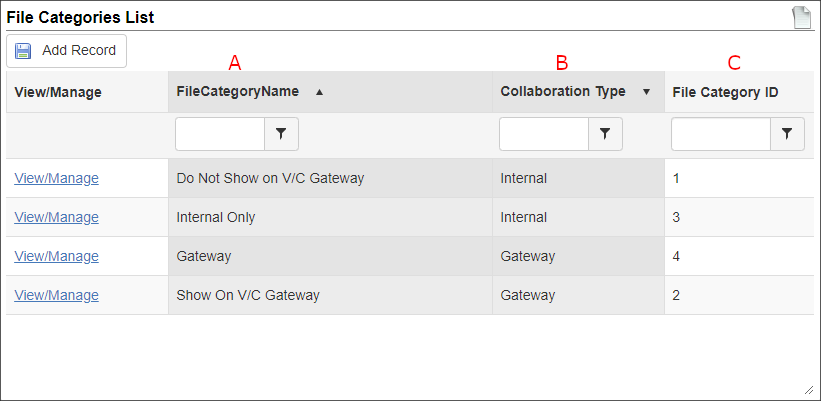
2. The File Categories List displays and offers numerous pieces of information regarding each category. To modify the information displayed, on the side menu, click Manage Columns (not pictured).

A. File Category Name: The name given to the category
B. Collaboration Type: Defined as Internal for use in CobbleStone® only or as Gateway for use in CobbleStone® and in the gateway
C. File Category ID: The ID applied by CobbleStone® to the line item
Adding File Categories
System administrators may add new file categories for internal or gateway use at any time.
1. Click Add Record.
.png)
2. Enter the new Category Name.
3. Select the Collaboration Type, either Internal or Gateway.
.png)
4. Click Save & Continue to commit the new category to the system.
5. The File Category List page displays.
Editing File Categories
System administrators may also manage or delete defined categories.
1. For the desired line item, click View/Edit.
.png)
2. The Record Details: File Categories page displays. Edit the Category Name and/or the Collaboration Type by clicking the pencil icon ( that appears when the field is hovered over. Alternatively, click the pencil icon next to Details to edit multiple fields at once.
.png)
3. A pop-up window appears. Make any changes necessary.
4. Save any changes made.
Deleting a Category Type
1. As above, click View/Manage for the desired line item.
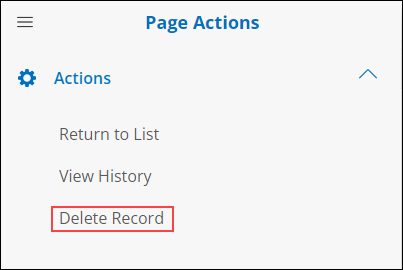
2. The Record Details: File Categories page displays. On the side menu, click Delete.

3. The record is removed and the category list displays.
Note: Before deleting a file category, ensure files are not using the category in question. If any files are using a deleted category, those files have their categories removed (but the file remains).
File Categories List Side Menu Options
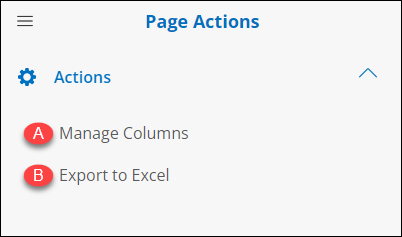
The side menu of the File Categories List offers two options:

A. Manage Columns: Add or remove columns displayed on the File Categories List page
B. Export to Excel: Export the displayed columns to an Excel file